 Batoi Support
Setting up Mozilla Thunderbird as Your Email Client
Thunderbird is a free local email client provided by Mozilla Foundation. The following steps shall help you configure an Email Account in Mozilla Thunderbird in Windows PC.
Go to http://www.mozilla.org/en-US/thunderbird/ and download the application to your local system.
To install Thunderbird in your Windows PC, follow the steps in the help guide provided by Thunderbird available at https://support.mozilla.org/en-US/kb/installing-thunderbird-windows.
After successful installation, go to Start Menu >> All Programs >> Thunderbird and double click the icon to run the program.
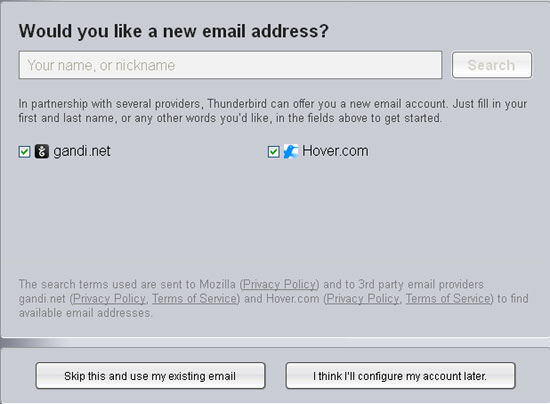
If you are running the application for first time, then the screen will appear as shown in Figure 1. Click the button Skip this and use my existing email and system will take you to Mail account setup page as shown in Figure 1.
Upon doing so you shall land on the Mail Account Setup page where you need to fill in necessary details like Your Name, Email Address and Password as shown in Figure 2.
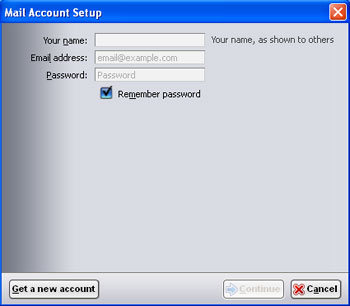
Click on the check box Remember Password if you want Thunderbird to remember your account password.
After entering all the details the Continue button will get activated. Click on the button to proceed further.
When you click the Continue button, Thunderbird will start configuring your email account automatically.
Note: By default: Thunderbird will configure your email account in IMAP. If you want to configure the email account in POP3 mode, you need to click the Manual Config button after clicking the Continue button.
By clicking the 'Manual Config' button, Thunderbird will stop the auto configuration and a manual screen will appear as shown in Figure 3.
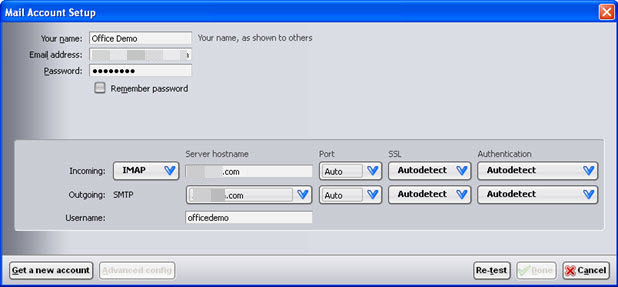
Set the Incoming protocol to either POP or IMAP according to your preferences. The ports are default - 143 for IMAP and 110 for POP3.
Enter the server host name for IMAP or POP3 with the details received from BATOI Support Team.
Do not select anything for next two fields as SSL and Authentication. Let it be as Autodetect.
For Outgoing server enter the details received from Batoi Priority Support Team. The default SMTP port is 25, but you can also use 26.
After entering all the details click the button Re-test and Thunderbird will start configuring your email account.
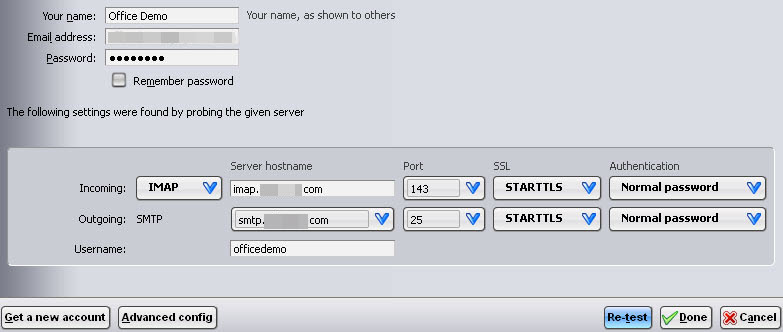
After the successful configuration Thunderbird will create your account and the screen will appear in Figure 4.
Click the button Done and Thunderbird will start checking your password as shown in Figure 4.
After verifying the password, Thunderbird will ask you for security encryption as shown in Figure 5.
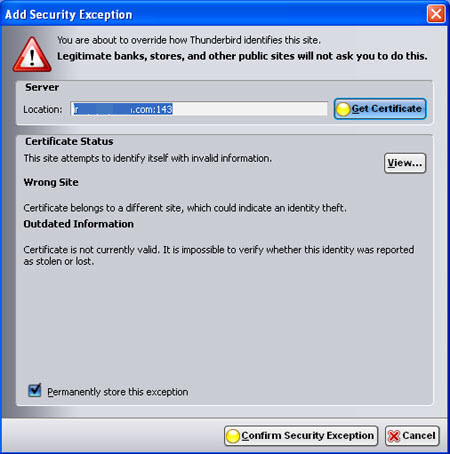
Click the check box Permanently store this exception and click the button Confirm Security Exception and Thunderbird will setup your email account.
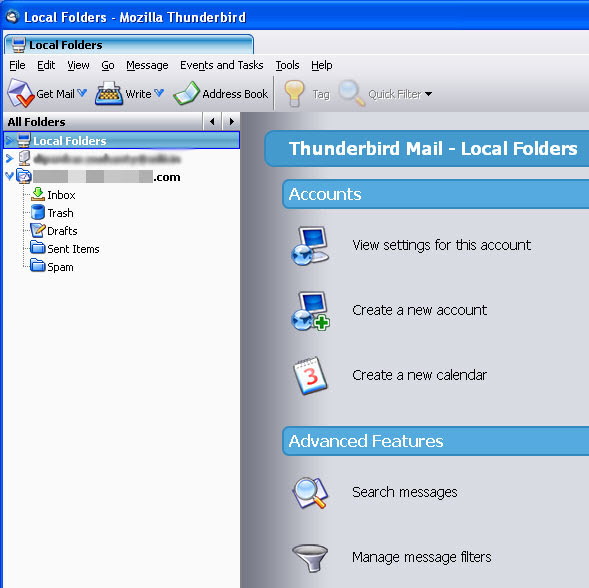
After the setup is done, Thunderbird will take you to the mail server dashboard where you can see your account as shown in Figure 6.

If you want to add more accounts to Thunderbird then click the 'Local Folder' link on the left side of the screen and Thunderbird will take you to the Settings page as shown in Figure 7.
Click the link Create a new account and follow the steps mentioned above for creating new account.
If you want to change the settings of a particular email account in Thunderbird then click the account name from the All Folders panel which is located on the left side of the dashboard and Thunderbird will take you to the Account Settings page.
Click the link View setting for this account and Thunderbird will open the setting page for that particular account as shown in Figure 8.
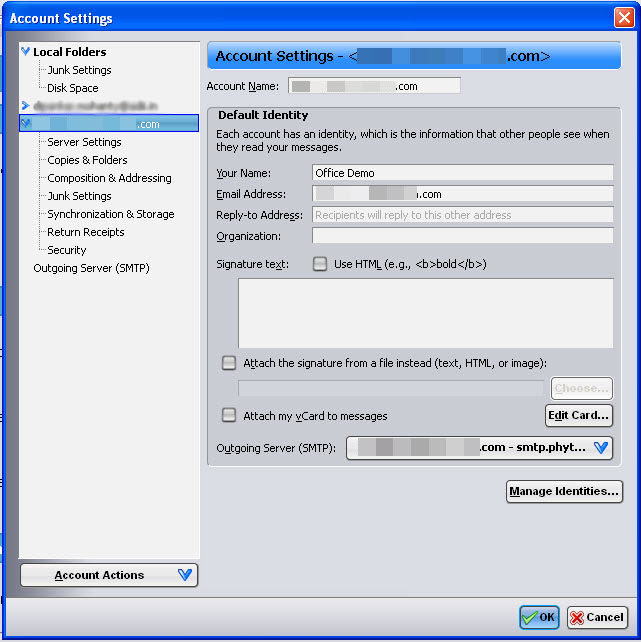
Here you can change the settings like Server Settings, Copies & Folders, Composition & Addressing, Junk Settings, Synchronization & Storage, Return Receipts, Security and Outgoing Server (SMTP) settings which are located in the left side of the screen as link items.
After changing the setting, click on the OK button to make the changes effective.
Just below the Account Settings panel, you will find a button called 'Account Actions'. By clicking a drop-down menu will appear having options Add Mail Account, Add other Account, Set as Default and Remove Account.
- Add Mail Account: Here you can add new email account to Thunderbird mail client.
- Add other Account: Here you can add different mail account like 'Blog & News Feeds' and 'Newsgroup Account'.
- Set as Default: Here you can make a email account as default.
- Remove Account: Here you can delete a email account from your Thunderbird mail client.