 Batoi Support
Professionalize your communication by setting up Google Workspace via your Batoi Hosting cPanel. Our comprehensive guide walks you through every step — from purchasing Google Workspace to domain verification and email configuration. Ideal for entrepreneurs, programmers, and tech-savvy professionals looking for seamless integration.
Introduction
Discover how to seamlessly integrate Google Workspace services with your domain through your hosting cPanel. This guide provides a detailed roadmap for configuring Google Workspace with your website and establishing a professional email system.
Steps at a Glance:
- Purchase and Manage Google Workspace Service via Batoi
- Add Additional Users to Your Account (Optional)
- Verify Domain Ownership with Google by Adding a TXT Record to Your DNS Settings
- Configure Professional Email by Adding MX Records
- Customize URL for Your Google Workspace Services (optional)
- Adding SPF Record to Prevent Messages from being Marked as Spam
Section 1: Purchase and Manage Google Workspace Service via Batoi
For a step-by-step breakdown of acquiring and managing Google Workspace through Batoi, please refer to our comprehensive help article here.
Section 2: Section 2: Add Additional Users to Your Account (Optional)
To explore the process of adding other users to your Google Workspace account, refer to our in-depth help article here.
Section 3: Verify Domain Ownership with Google by Adding a TXT Record to Your DNS Settings
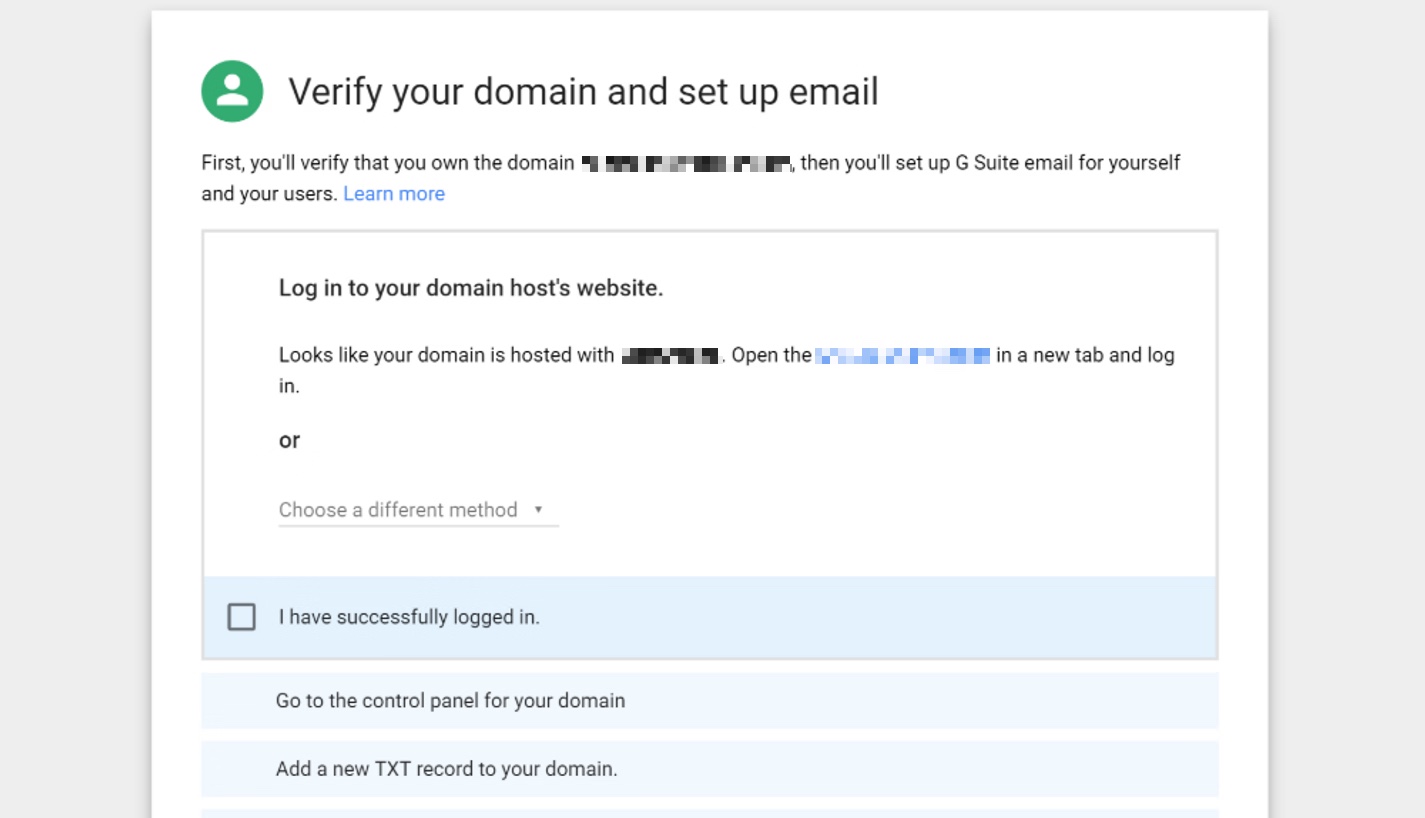
To confirm your domain ownership with Google, you need to insert a specific TXT record into your DNS settings.
To help you do this, Google will try to detect where your domain is hosted and provide instructions, as illustrated in Figure 1 below.
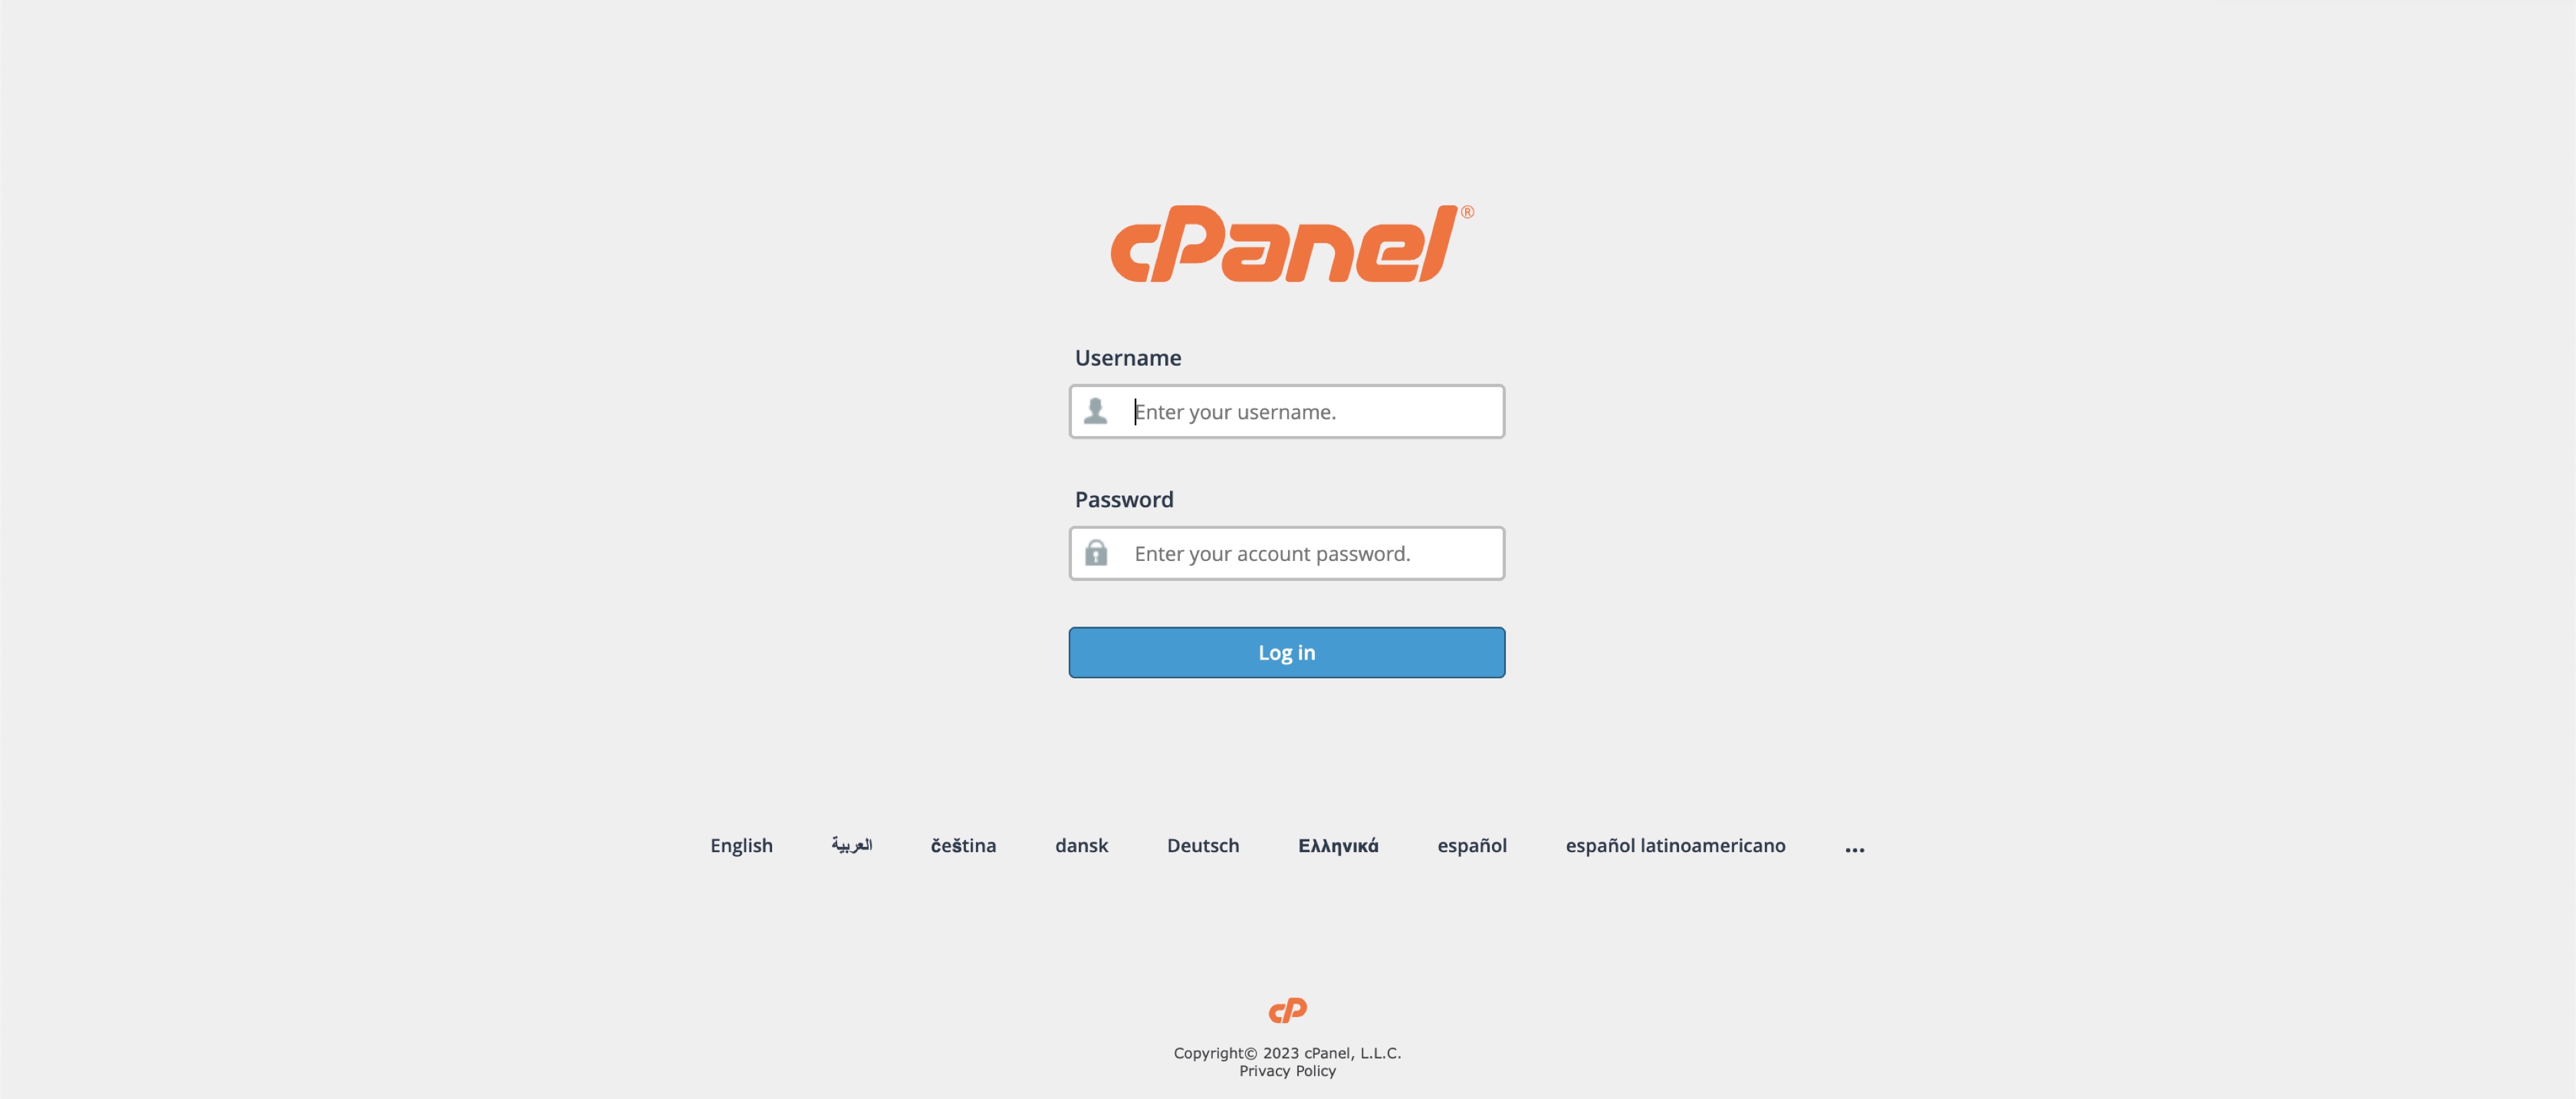
Login to cPanel: To start, you need to access your cPanel account. You can do this by appending '/cpanel' to your domain name (e.g., https://<your-domain-name>/cpanel) or via the link provided by our Support Team. Use your username and password to log in, as illustrated in Figure 2 below.
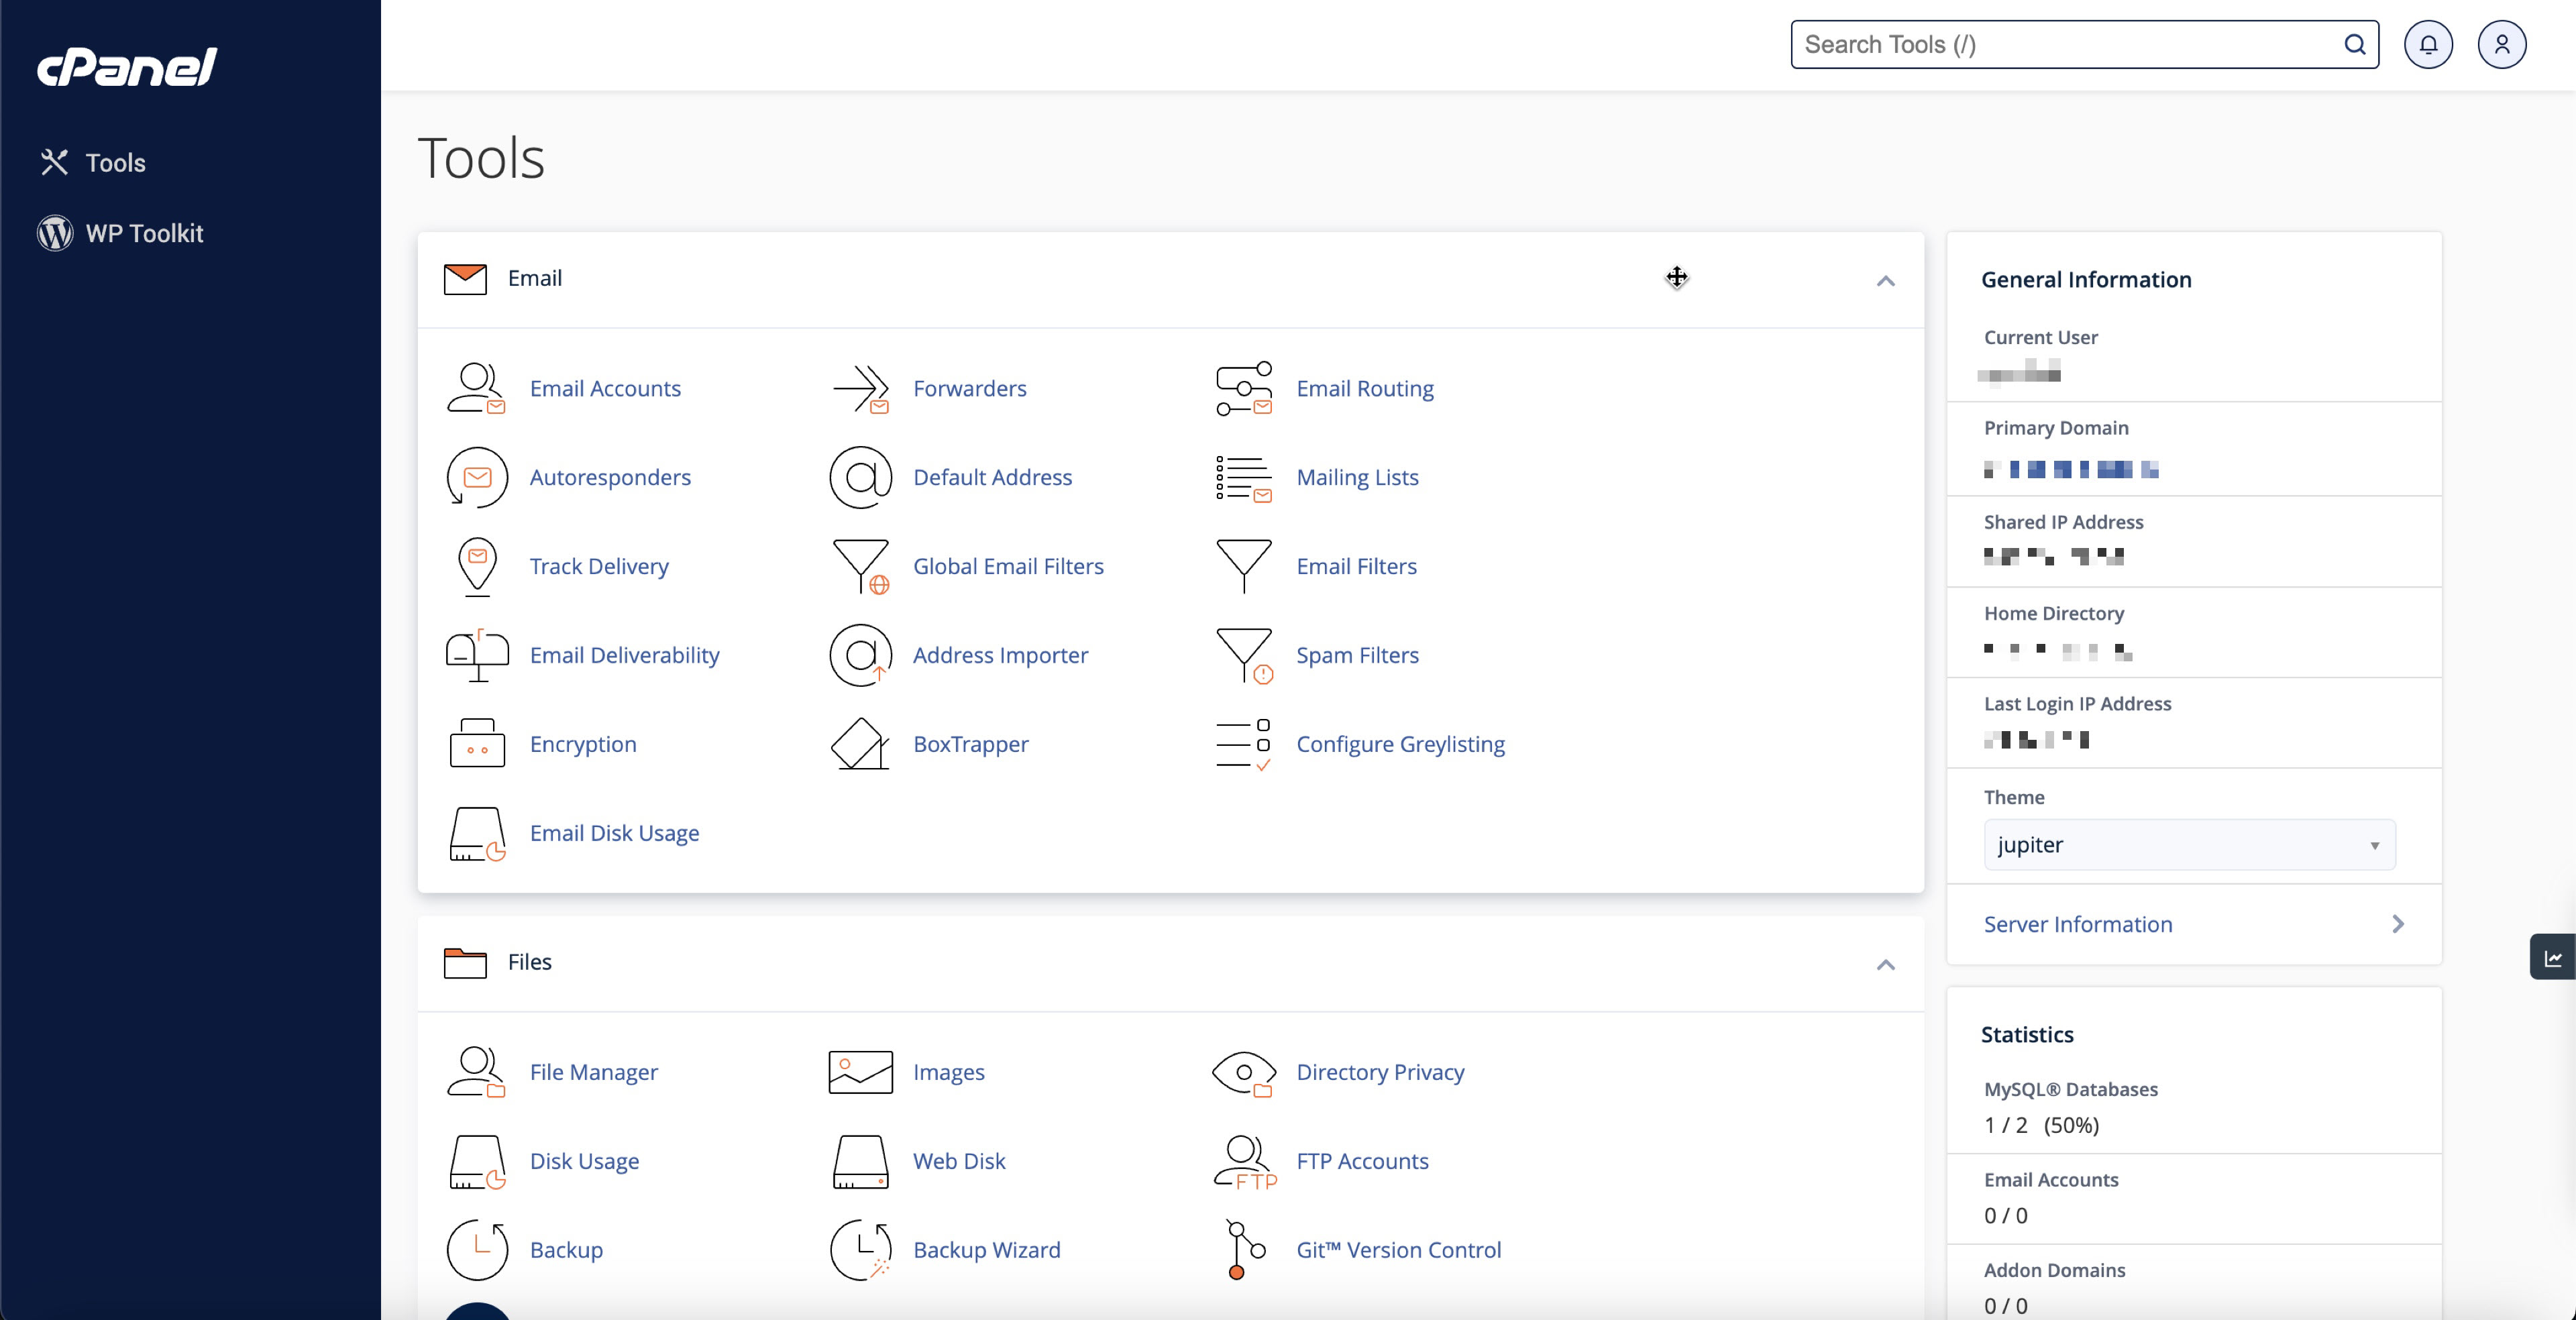
You will land on the dashboard page upon successful login, as illustrated in Figure 3 below.
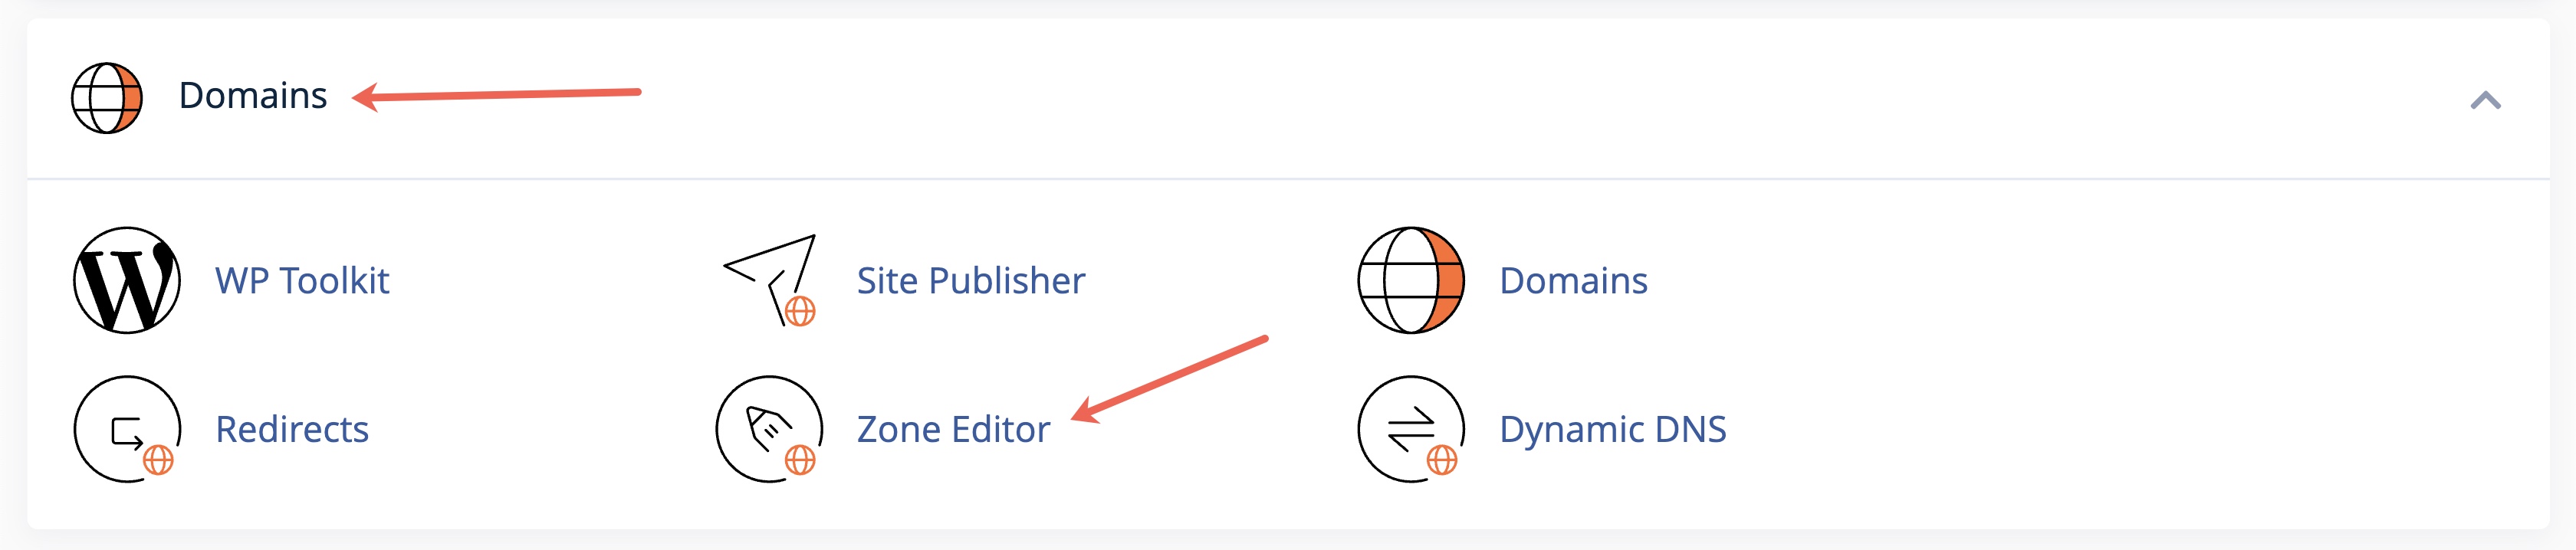
Look for the DNS Zone Editor tool under the Domain section, as illustrated in Figure 4 below.
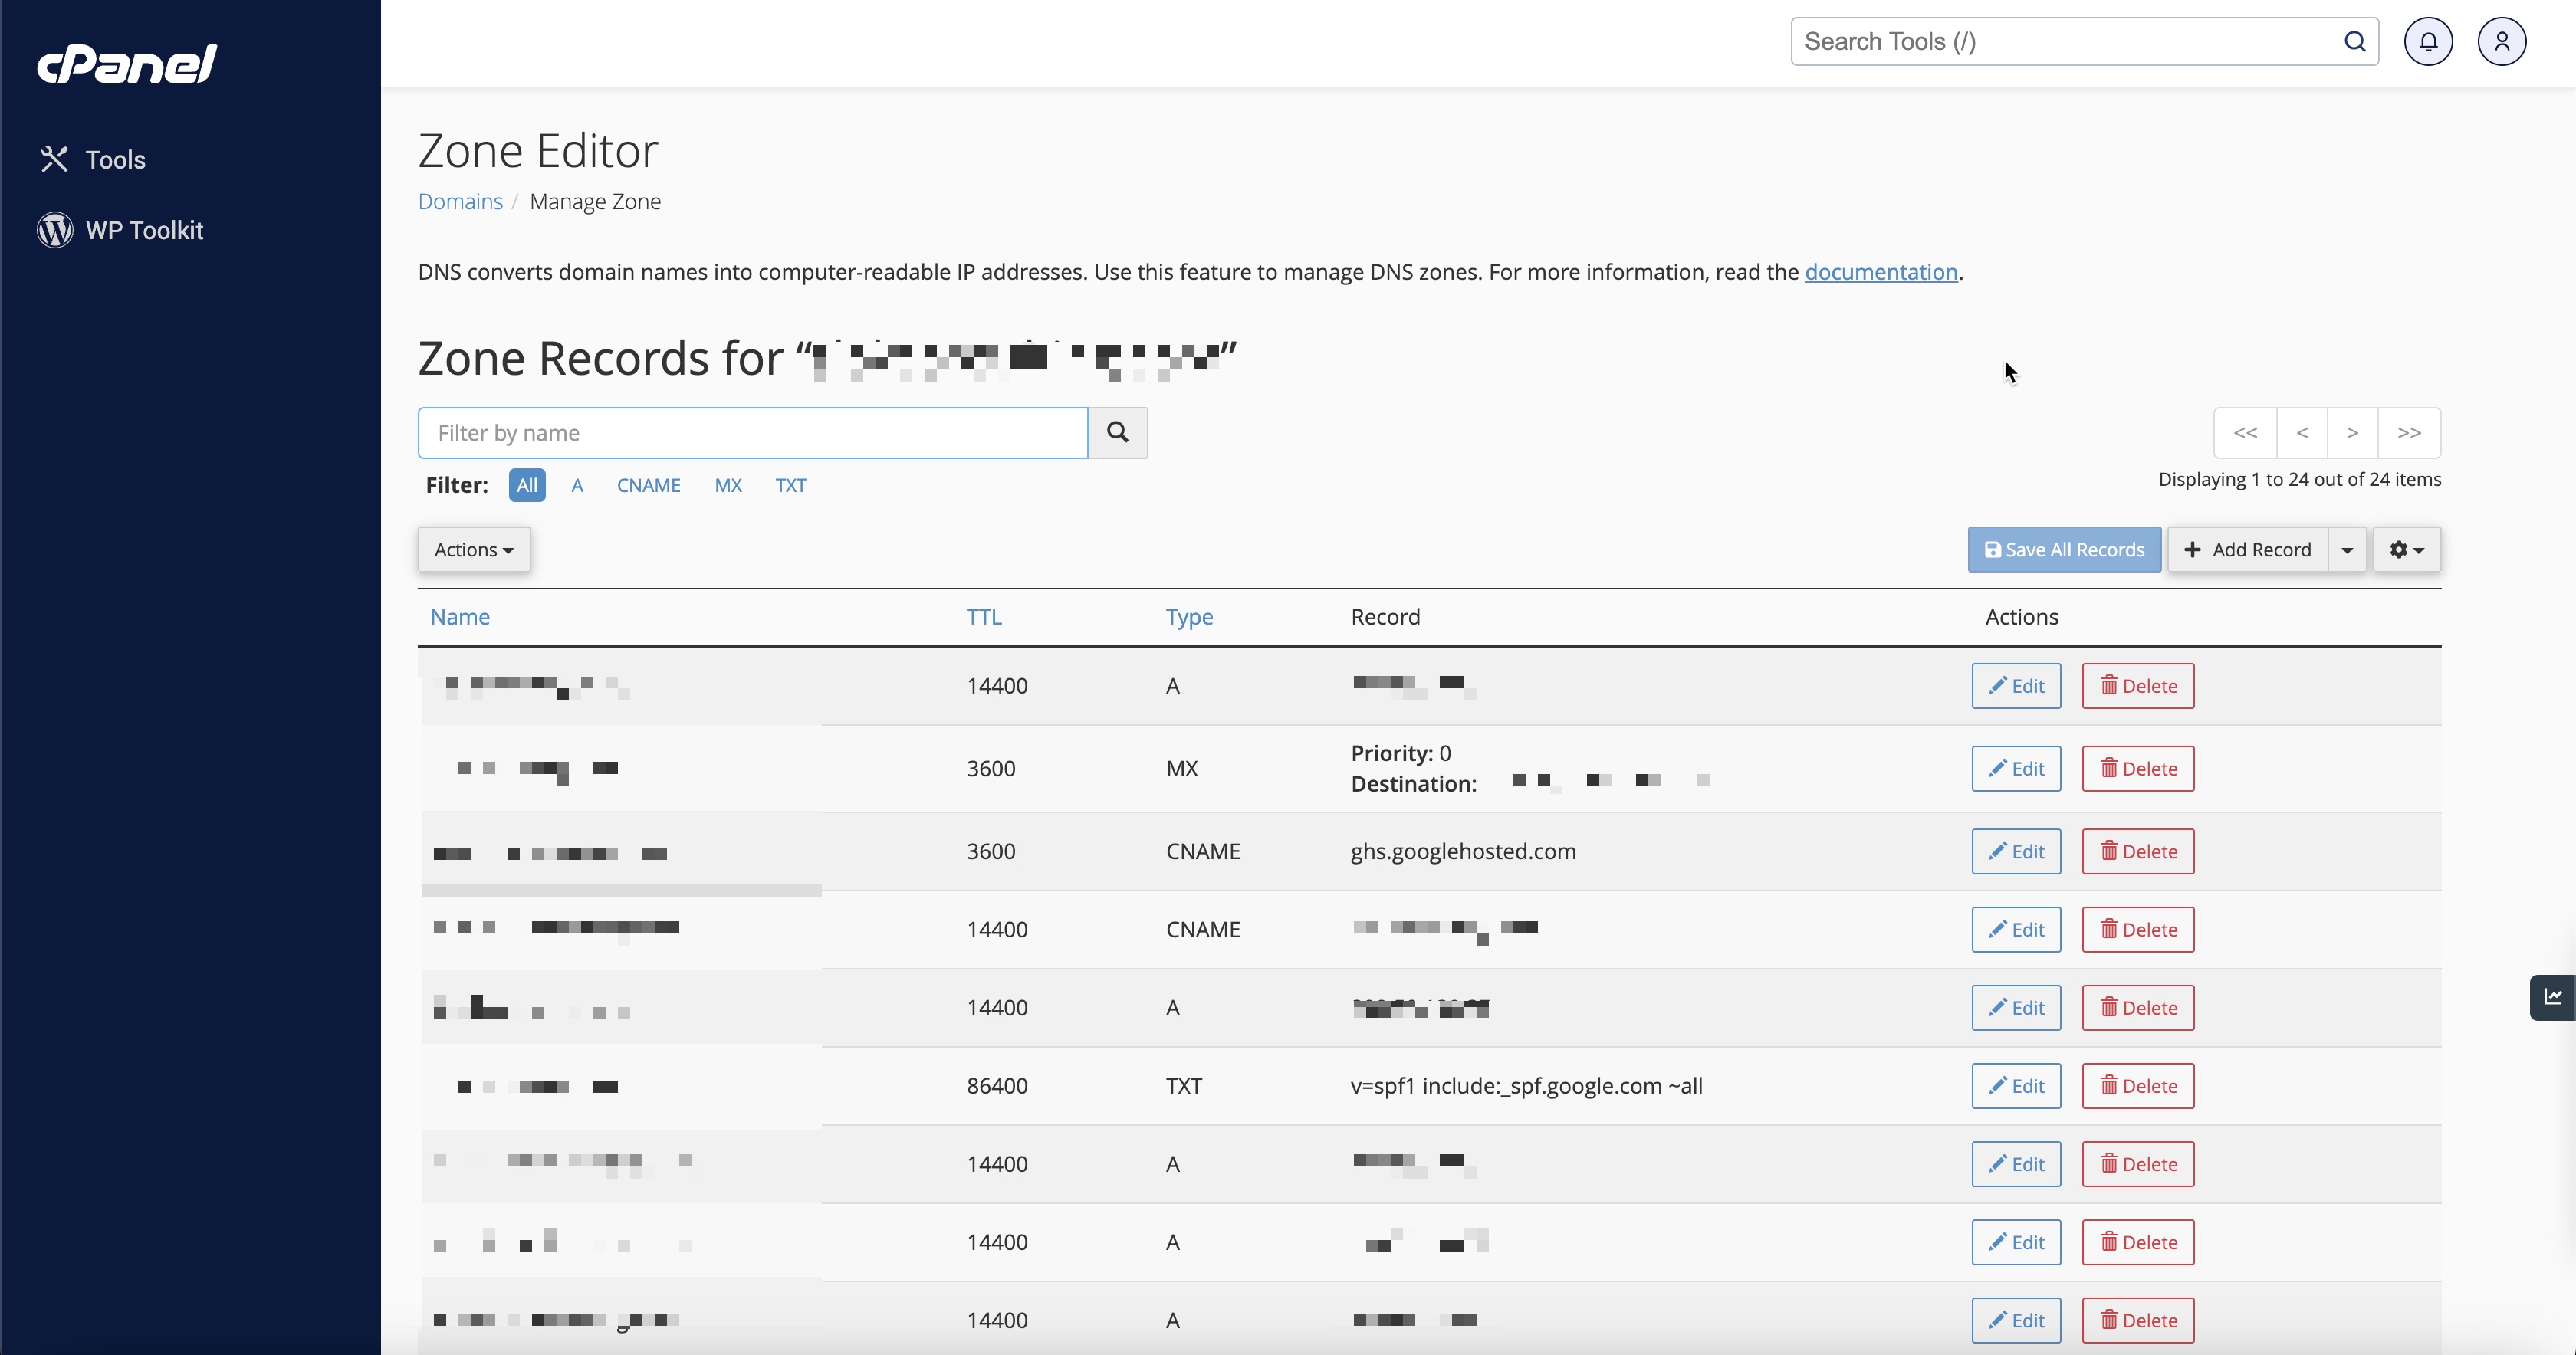
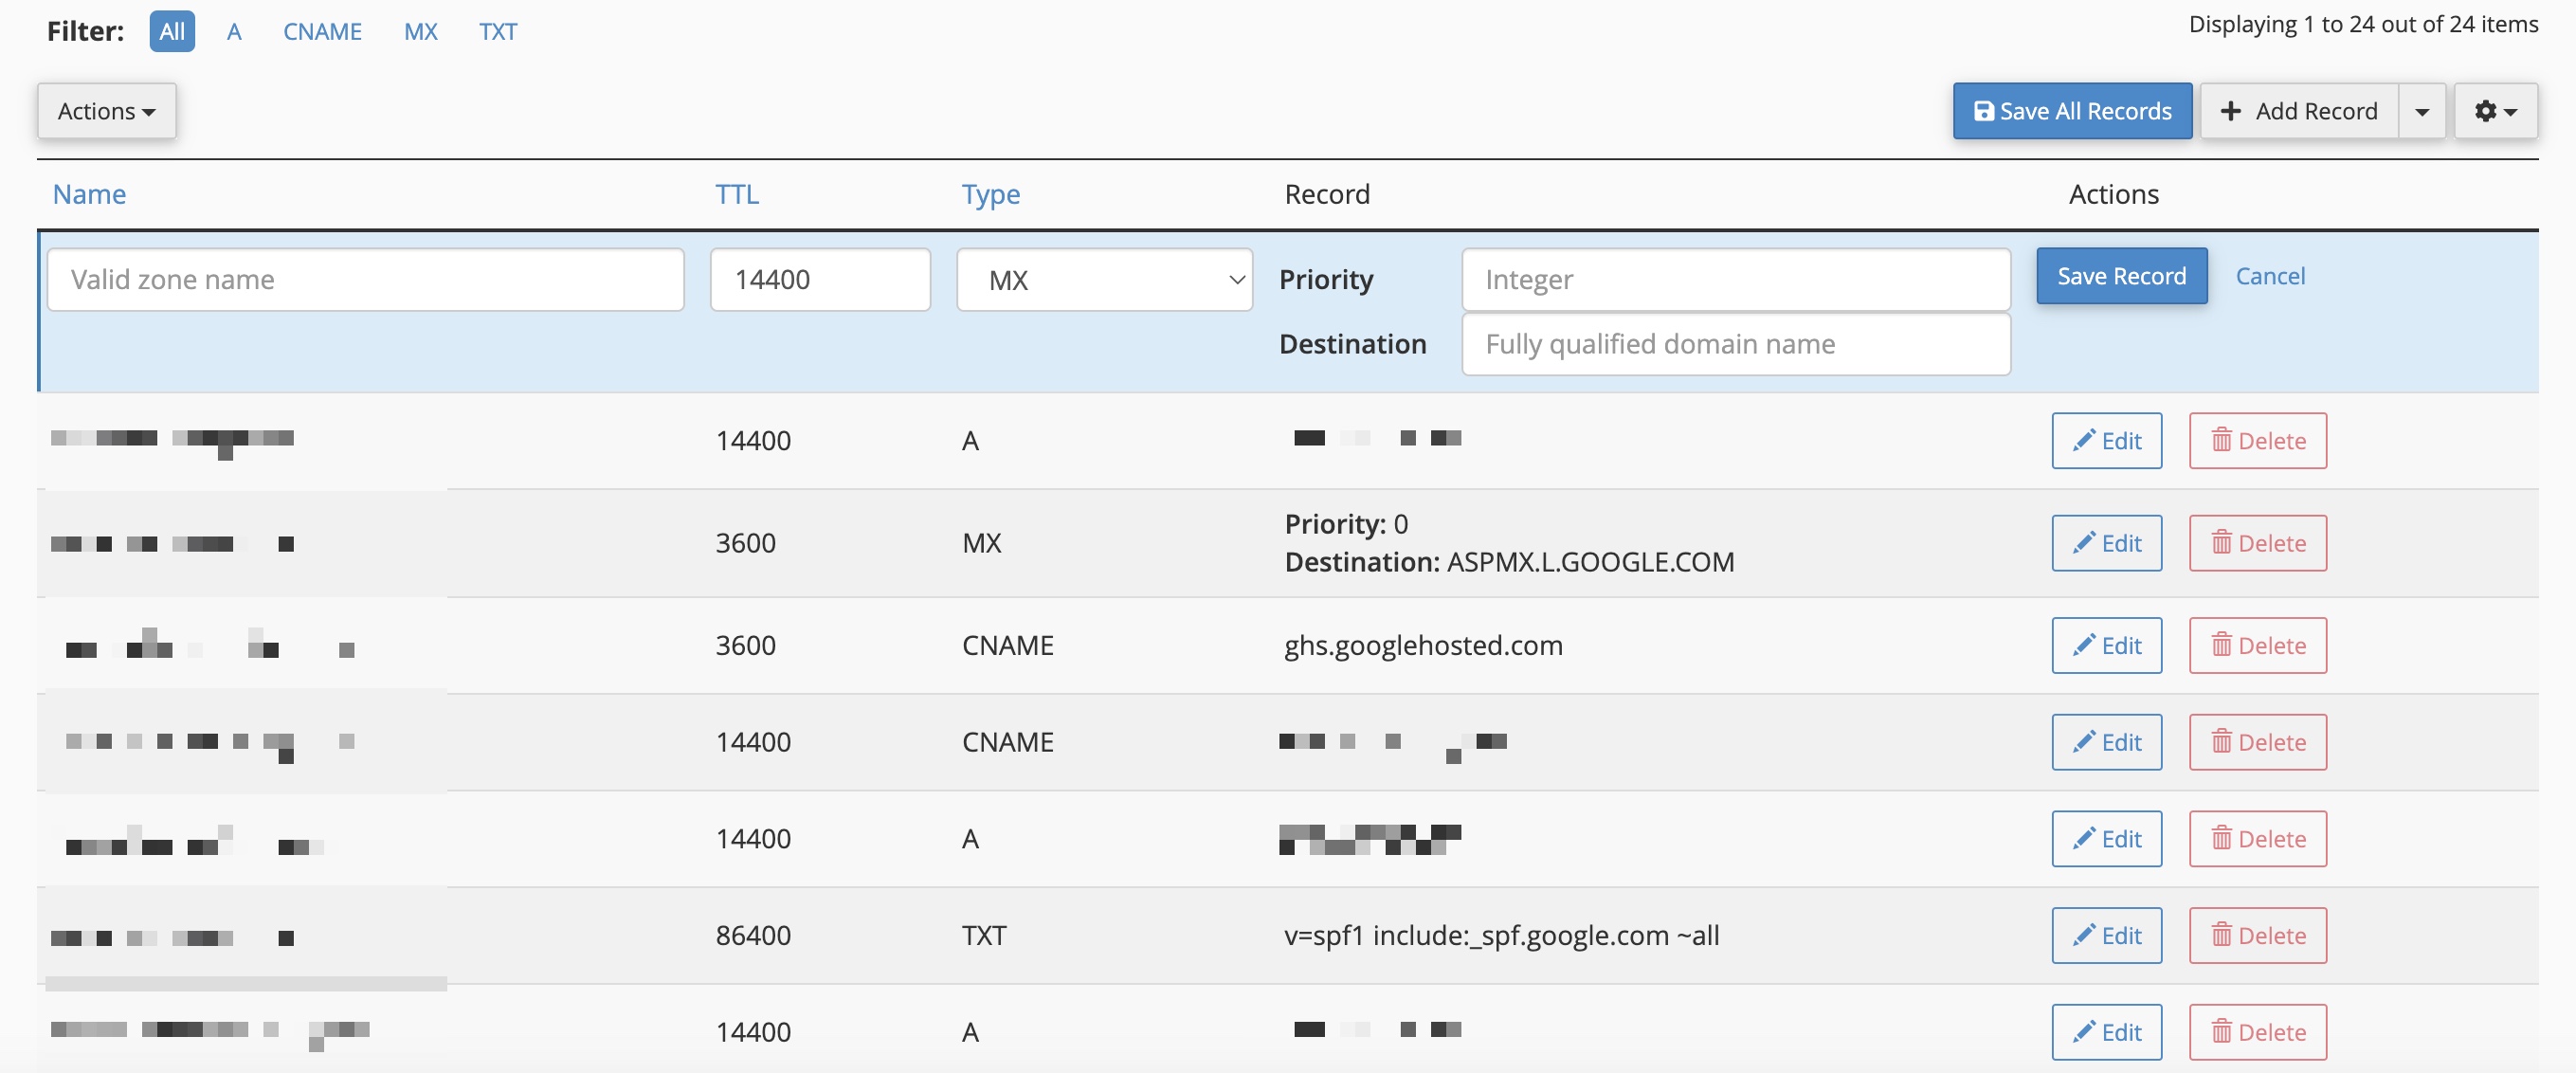
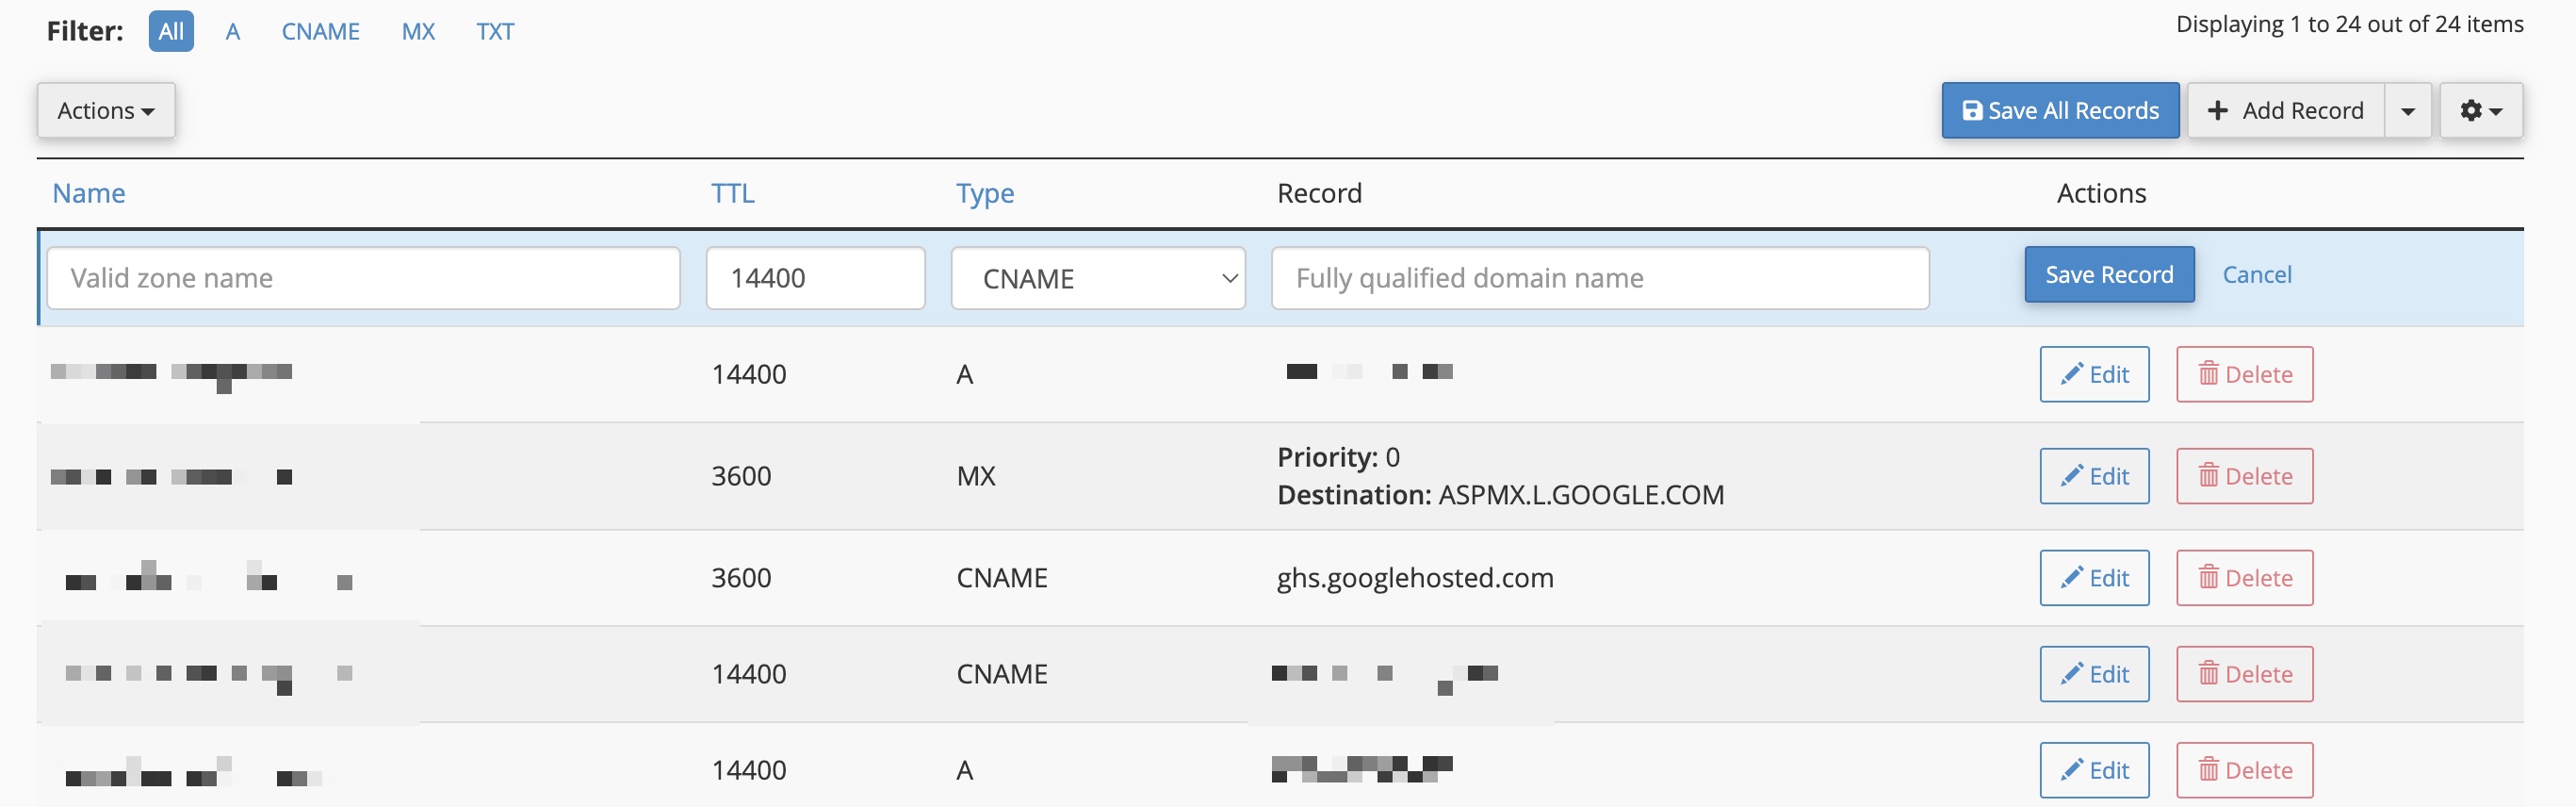
You will land on the zone editor list page, as illustrated in Figure 5 below.
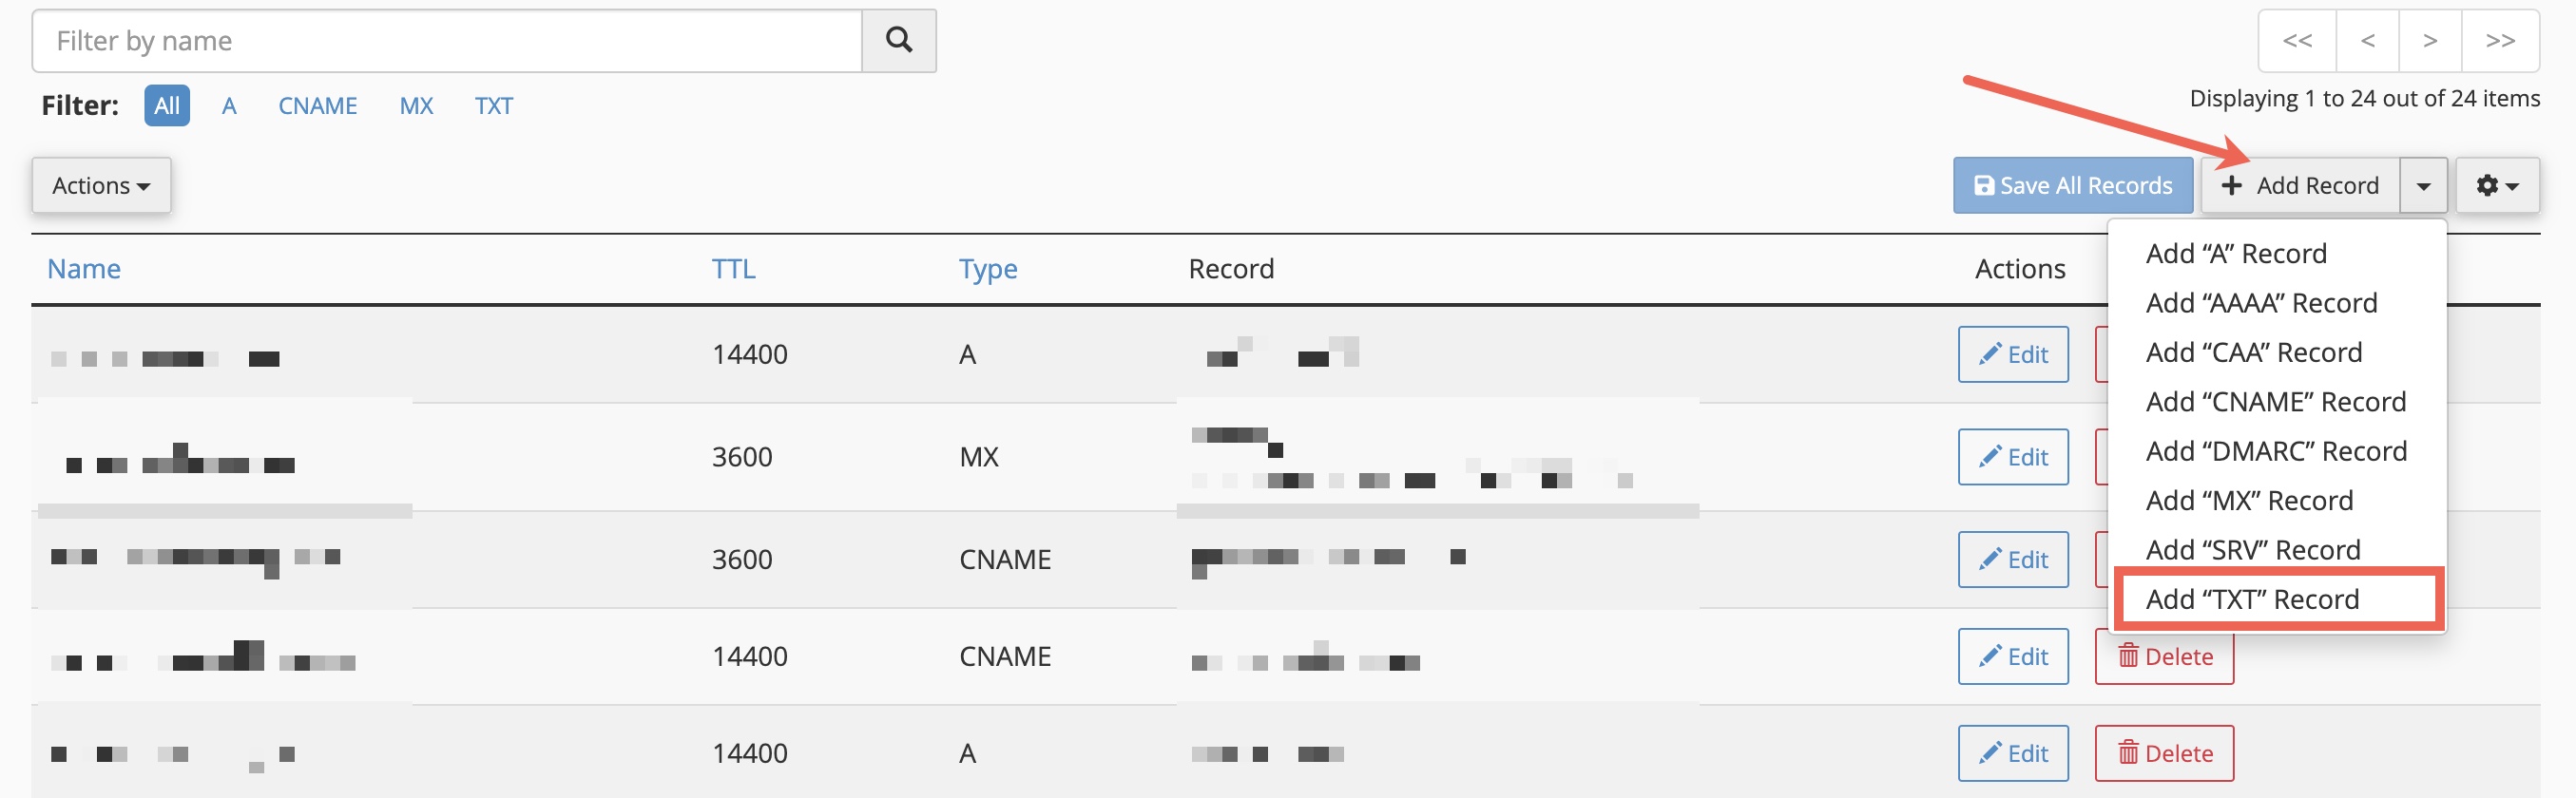
Click on the Add Record button drop-down arrow and click Add ”TXT” Record, as illustrated in Figure 6 below.
A new form will open and you need to use the form to add a TXT record that contains the information from the Google Workspace website, as illustrated in Figure 7 below.
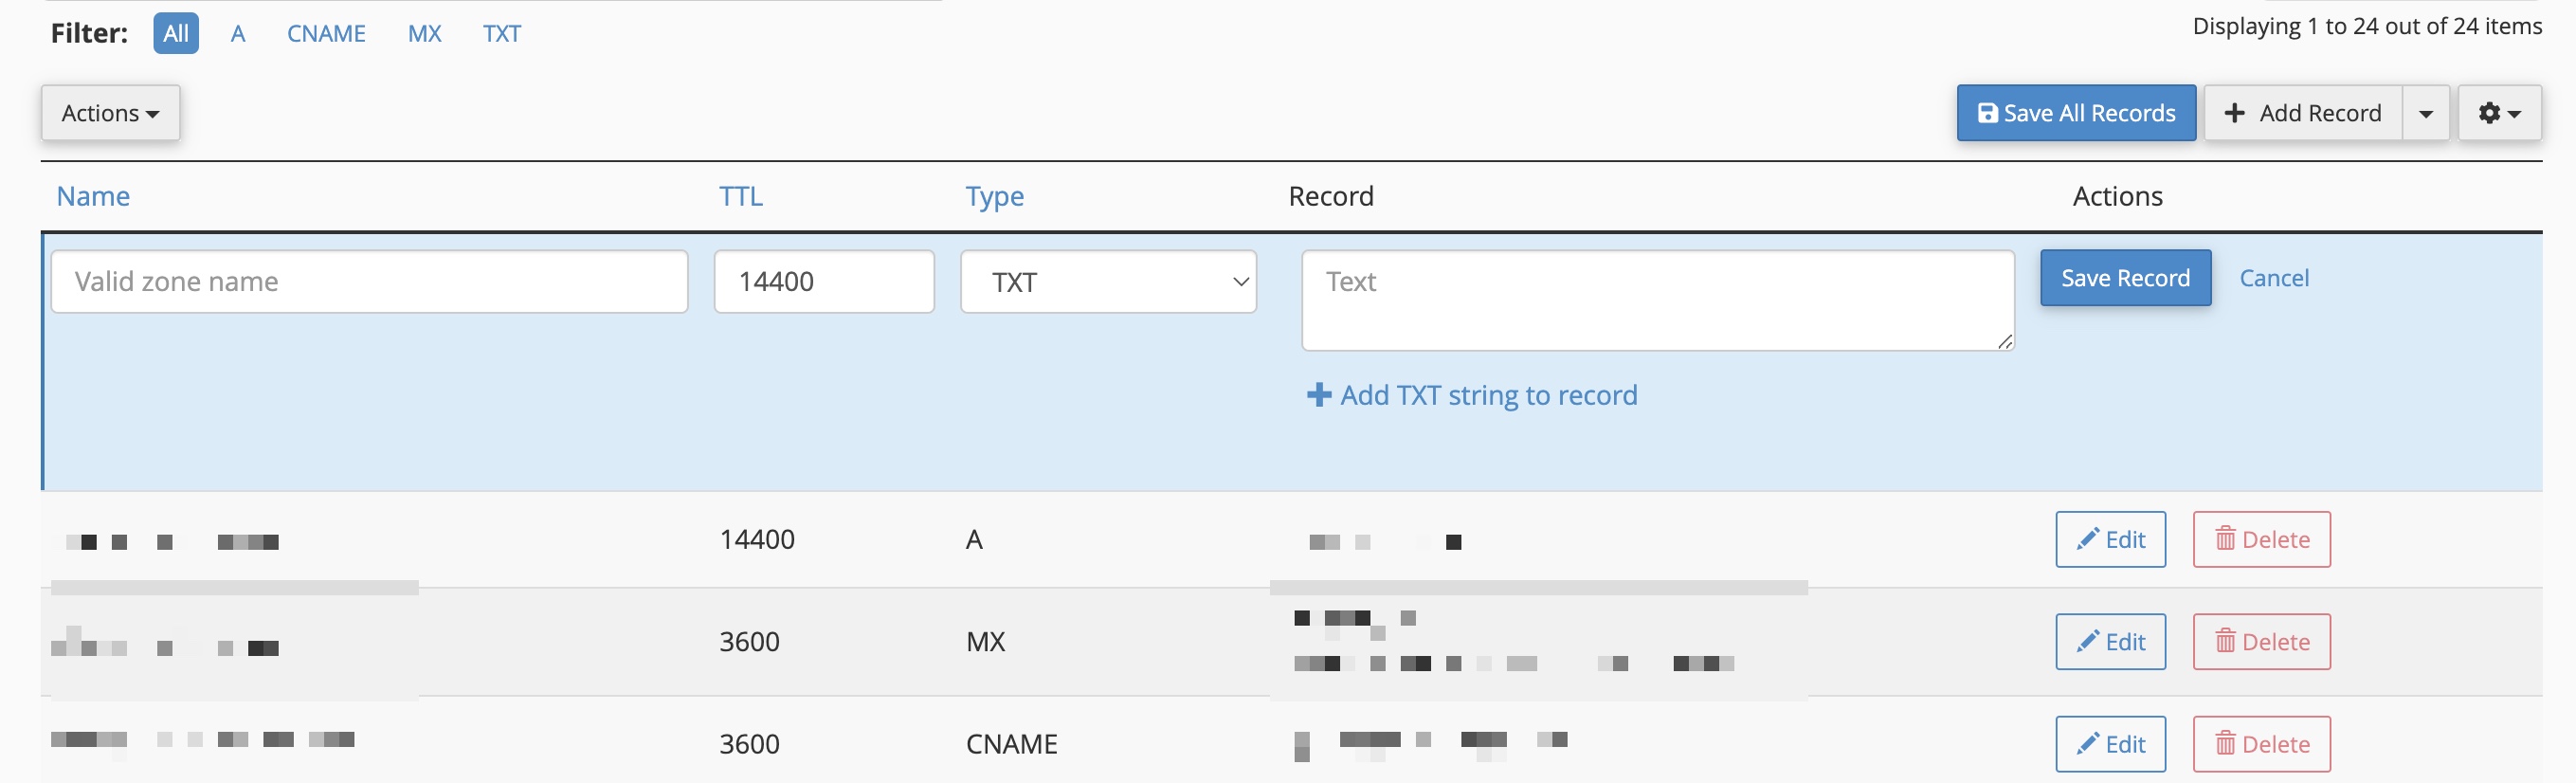
Enter the below details and click on the Save Record button, as illustrated in Figure 7 above.
- Name – your domain name
- TTL – 86400
- Type – TXT
- TXT Data – copy and paste from the Google Workspace interface
Section 4: Set up Email by Adding MX Records
Next, you need to complete the steps to add the MX Records. These are the things that allow Google Workspace to handle email for your new domain name.
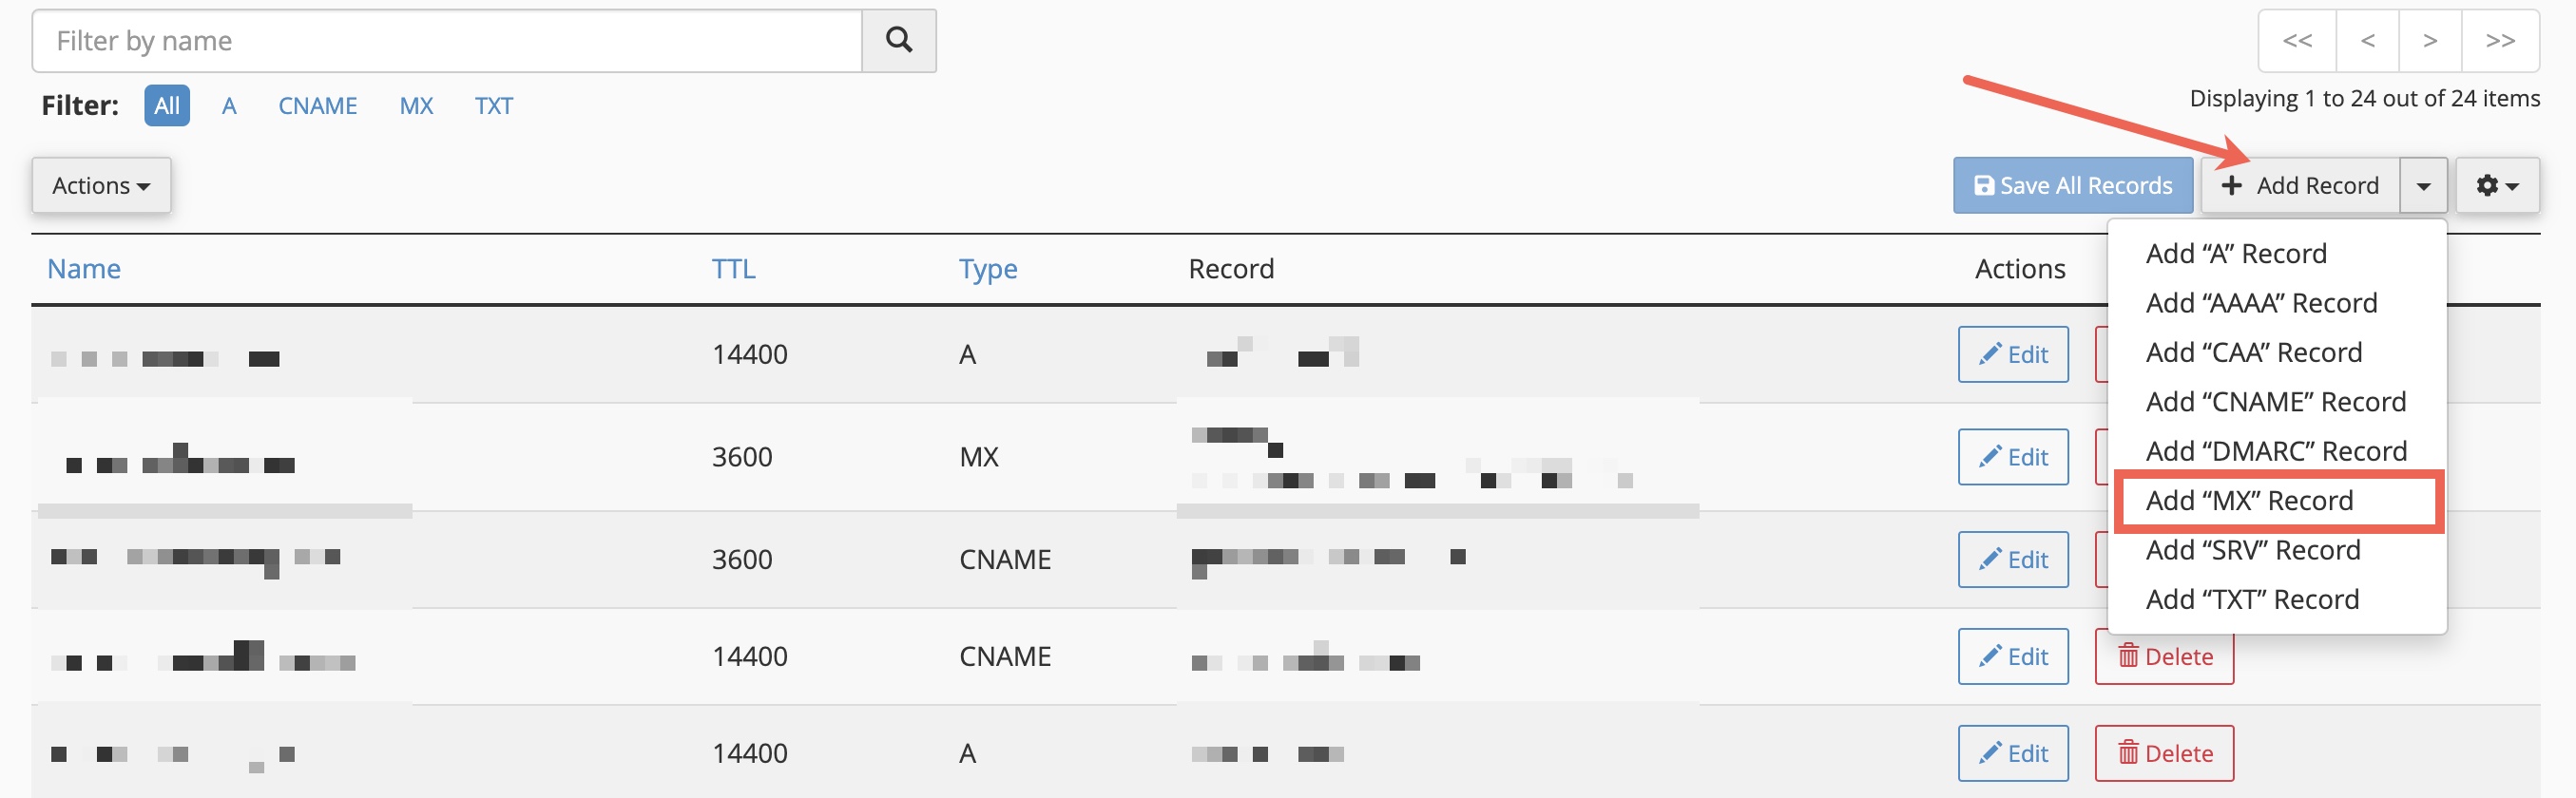
Go to the DNS Zone Editor and from the list page click on the Add Record button drop-down arrow and click Add “MX” Record, as illustrated in Figure 8 below.
A new form will open and you need to use the form to add a MX record that contains the information from the Google Workspace website, as illustrated in Figure 9 below.
You can manually delete the existing entries and then use the form to add the following entries:
| Name | TTL | Priority | Destination |
|---|---|---|---|
| (Your Domain Name) | 3600 | 1 | ASPMX.L.GOOGLE.COM |
| (Your Domain Name) | 3600 | 5 | ALT1.ASPMX.L.GOOGLE.COM |
| (Your Domain Name) | 3600 | 5 | ALT2.ASPMX.L.GOOGLE.COM |
| (Your Domain Name) | 3600 | 10 | ALT3.ASPMX.L.GOOGLE.COM |
| (Your Domain Name) | 3600 | 10 | ALT4.ASPMX.L.GOOGLE.COM |
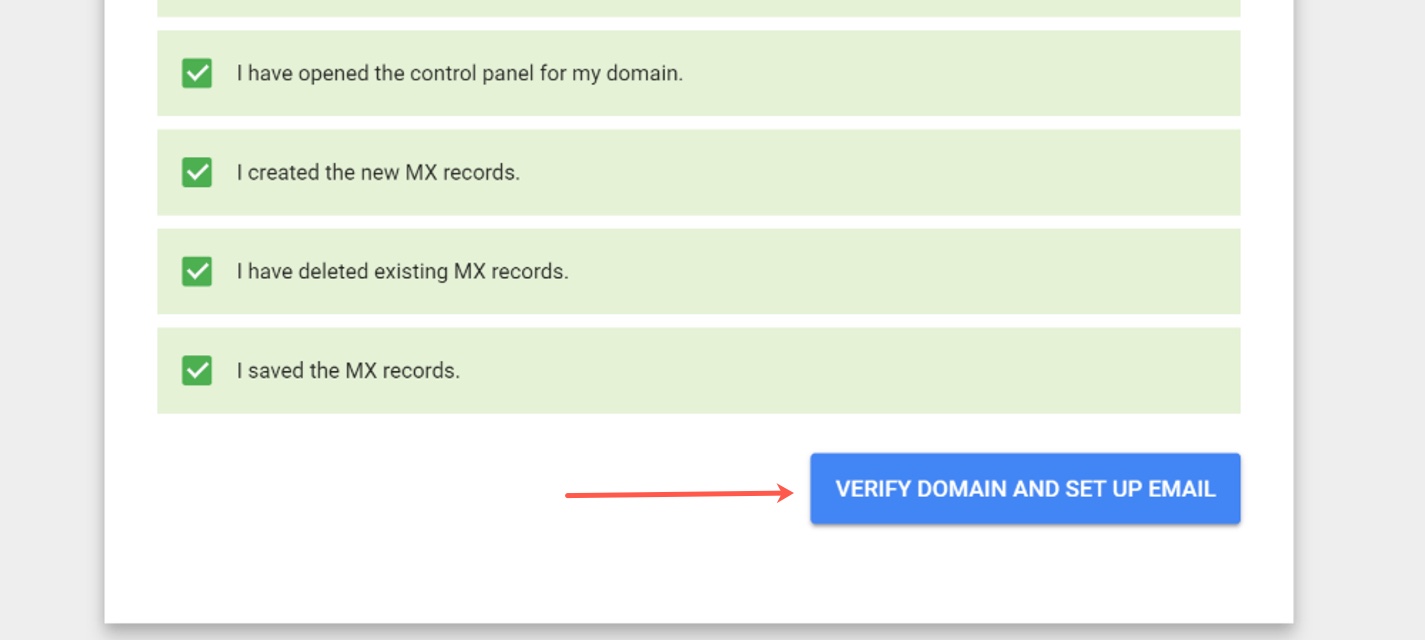
Once added, go to the Google Admin console and click the Verify Domain And Set Up Email button and Google will start verifying your domain name, as illustrated in Figure 10 below.
A success message will appear once the domain is verified, as illustrated in Figure 11 below.
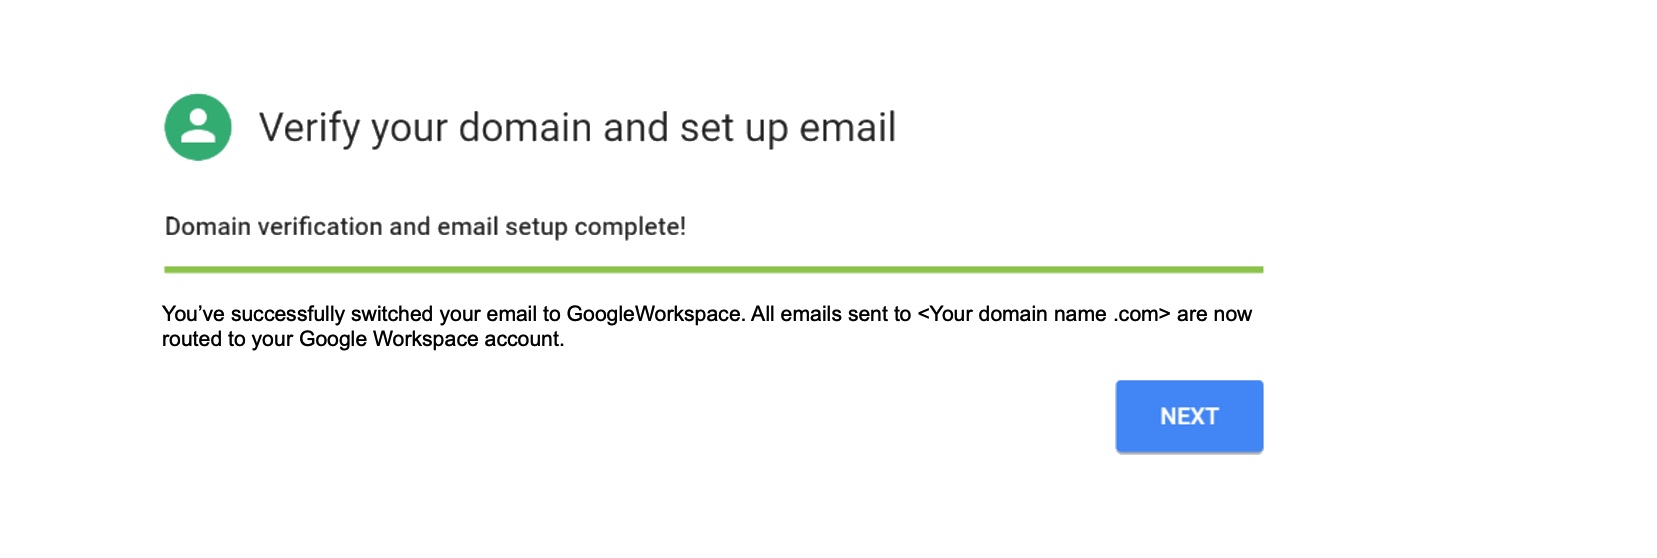
With this set up Google Workspace is complete and your email should start working soon.
Section 5: Customize URL for Your Google Workspace Services (optional)
You can customize your Google Workspace services by creating a custom web address (URL) to make it easy for users to find each service. Create custom addresses for your primary domain services including Gmail, Calendar, Google Groups, Sites, and others.
Follow the below steps to create the custom URL:
- Login to the Google Workspace admin console at https://admin.google.com
- From the admin console dashboard, go to Menu > Account > Account settings > Custom URLs
- Select the domain you want to update from the list
- Under the service URL, enter a prefix. Note: for example prefixes for Google services include calendar, drive, mail, groups, and sites. If the prefix is already assigned to another service, remove or rename the prefix and click Save. Then add the prefix to the service URL.
- You need to add the CNAME record for each service address you're customizing in Your DNS settings
- Once the CNAME is added in your hosting control panel, go to the Google admin console and click I've completed these steps.
Add CNAME Record to Your DNS Settings
Next, you need to complete the steps to add the CNAME Records.
Go to the DNS Zone Editor and from the list page click on the Add Record button drop-down arrow and click Add “CNAME” Record, as illustrated in Figure 12 below.
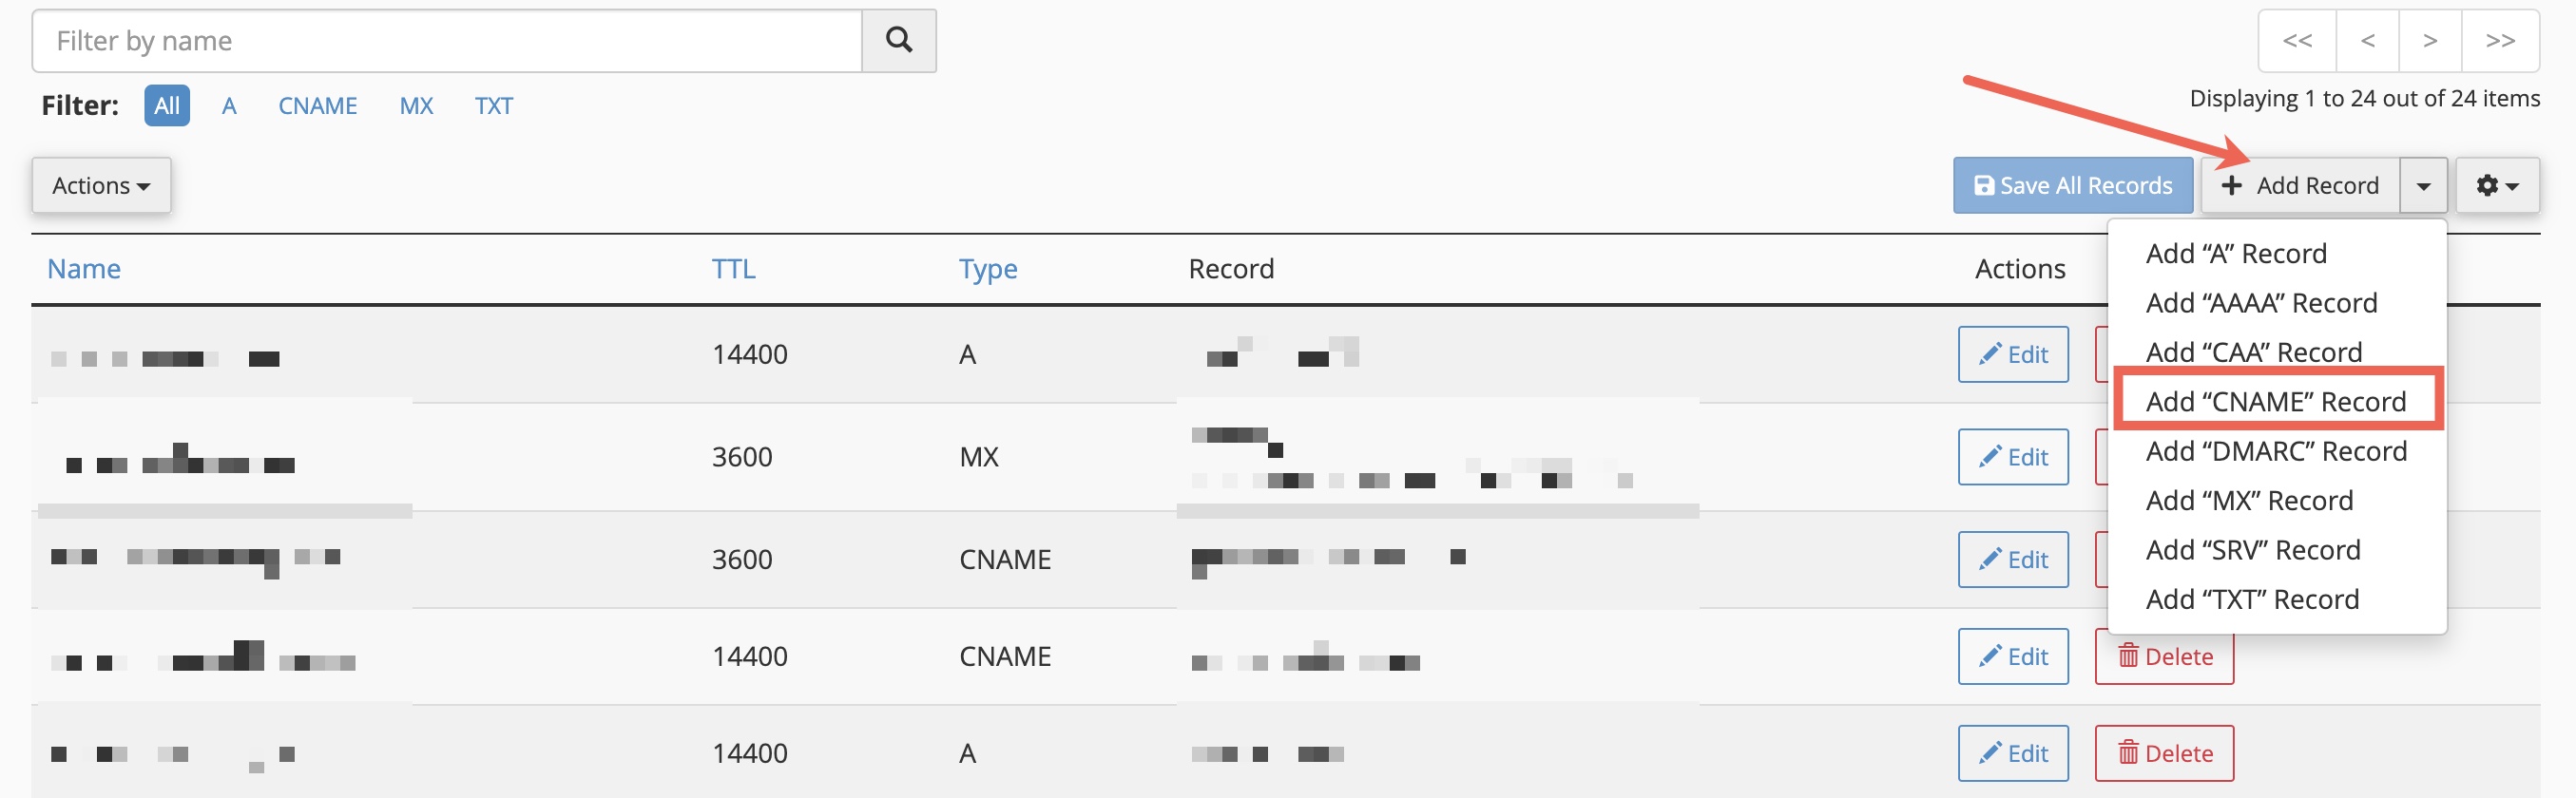
A new form will open and you need to use the form to add a CNAME record that contains the information from the Google Workspace website, as illustrated in Figure 13 below.
You can manually delete the existing entries and then use the form to add the following entries:
| Name | TTL | Record |
|---|---|---|
| 3600 | ghs.googlehosted.com | |
| calendar | 3600 | ghs.googlehosted.com |
| drive | 3600 | ghs.googlehosted.com |
| groups | 3600 | ghs.googlehosted.com |
| sites | 3600 | ghs.googlehosted.com |
Once added, go to the Google Admin console and click the I’ve completed these steps button.
Section 6: Adding SPF Record to Prevent Messages from being Marked as Spam
To explore the process of adding SPF records to your DNS Settings, refer to our in-depth help article here.
Conclusion
This guide has equipped you with the tools to successfully set up Google Workspace services via your Batoi Hosting cPanel. For further information or assistance, feel free to reach out to the Batoi Support Team.