This article provides the detailed information on uploading files through an FTP client (FileZilla) by using the default port or the secured port.
You can use a free FTP client like FileZilla to upload your files to your hosting account or to download from your hosting account to your desktop. You can use FTP through the default port (21) or the secured port (22) based on the server used by you. You should have this information from Batoi Support when you signup for your hosting service with Batoi.
Uploading Files through Port 21
Download the FTP application FileZilla from https://filezilla-project.org//download.php
Install the application in your local desktop or laptop.
Run the application by double-clicking the icon. After clicking the icon the FileZilla dashboard will open, as shown in Figure 1.
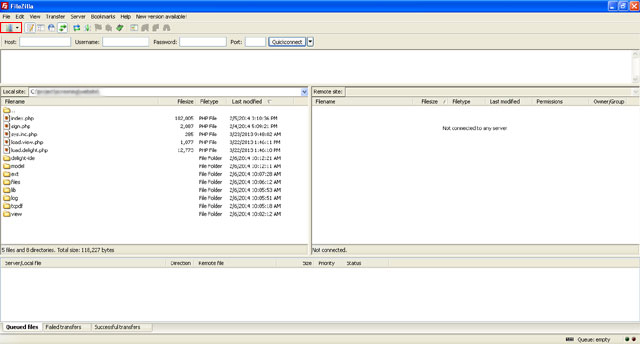
Click the File menu followed by the Site Manager item on that menu, as shown in Figure 1.
Click the New Site button on that dialog box. This creates a new item under My Sites called New site. Rename New site to the name of your site. By default, the cursor would have been placed in the name section of New site allowing you to change the name immediately. If you have lost the cursor because you accidentally clicked somewhere else in the dialog box, you can get it back by simply clicking once on the name.
Note: This name can be anything you wish - it is not required for accessing your site. However, you can probably make your life easier if you change the name to that of your site rather than the New site.
The new site details will appear in the right side of the popup screen, as shown in Figure 2. Enter the name of your FTP server in the Host, enter the Port as 21, select the protocol as FTP - File Transfer Protocol from the Protocol drop-menu, as shown in Figure 2.
Now choose Use plain FTP from the Encryption drop-menu, as shown in Figure 2.
Then choose the Logon Type as Normal from the drop-menu, as shown in Figure 2.
Then enter the Username and Password details in their respective textboxes and click the button Connect and FileZilla will connect to the webserver, as shown in Figure 2.
Note: The Username and Password to log into FTP account shall be provided to you by Batoi Support after you sign up for hosting services at Batoi. If you do not have the correct login credentials, please contact Batoi Support via phone or create a support ticket for help.

Once connected, you shall see two panes: the left one shows the files on your computer (local site), and the right one shows the files currently on the web server.
Here in the web server side you can find a folder called public_html, as shown in Figure 3. This is your web server's root folder. You can double click the folder and can start creating your file structure there.

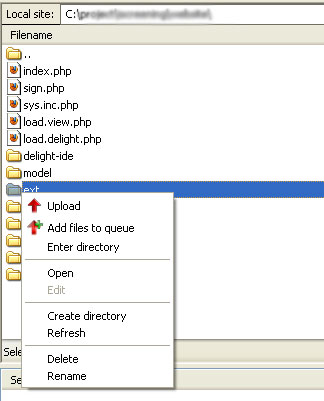
Using the pane on the right, browse to the folder to which you want to upload your files. Then choose any file from your local folder and right click on the particular folder or file that you want to upload to web server, as shown in Figure 4. By right clicking the particular folder or file you can see the Upload link and by clicking that link the file or folder will get uploaded to the selected folder on the web server location instantly.
As FileZilla proceeds to upload your file to your site, you should be able to see the upload progress in the bottommost window pane in FileZilla. When the upload is completed, you can disconnect. Do this by clicking the Server menu followed by the Disconnect item.
Uploading Files through Port 22 (secured FTP)
'Follow the steps below to set-up secureFTP (sFTP) on FileZilla.'
Download the FTP application FileZilla from 'https://filezilla-project.org//download.php'
Install the application in your local desktop or laptop.
Run the application by double-clicking the icon. After clicking the icon the FileZilla dashboard will open, as shown in Figure 5.
Click the File menu followed by the Site Manager item on that menu, as shown in Figure 5.
Click the New Site button on that dialog box. This creates a new item under My Sites called New site. Rename New site to the name of your site if you wish. By default, the cursor would have been placed in the name section of New site allowing you to change the name immediately. If you have lost the cursor because you accidentally clicked somewhere else in the dialog box, you can get it back by simply clicking once on the name. Note that this name can be anything you wish - it is not required for accessing your site. However, you will probably make your life easier if you change the name to that of your site rather than the New site.
The new site details will appear in the right side of the popup screen, as shown in Figure 6. Enter the name of your FTP server in the Host, enter the Port as '22', select SFTP - SSH File Transfer Protocol from the Protocol drop-menu, as shown in Figure 6.
Note: When you select the protocol type as SFTP - SSH File Transfer Protocol, the Encryption drop-menu will get deactivated.
Then choose the Logon Type as Normal from the drop-menu, as shown in Figure 6.
Then enter the Username and Password details in their respective textboxes and click the button Connect and FileZilla will connect to the webserver, as shown in Figure 6.
Note: The Username and Password to log into FTP account shall be provided to you by Batoi Support after you sign up for hosting services at Batoi. If you do not have the correct login credentials, please contact Batoi Support via phone or create a support ticket for help.
Once connected, you shall see two panes: the left one shows the files on your computer (Local site), and the right one shows the files currently on the web server.
Here in the web server side you can find a folder called public_html, as shown in Figure 7. This is your web server's root folder. You can double click the folder and can start creating your file structure there.
Using the pane on the right, browse to the folder to which you want to upload your files. Then choose any file from your local folder and right click on the particular folder or file that you want to upload to web server, as shown in Figure 8. By right clicking the particular folder or file you can see the Upload link and by clicking that link the file or folder will get upoloaded to the selected folder on the web server location instantly.
As FileZilla proceeds to upload your file to your site, you should be able to see the upload progress in the bottommost window pane in FileZilla. When the upload has completed, you can disconnect from your website. Do this by clicking the Server menu followed by the Disconnect item.