Master the management of your Business/Enterprise email services with this comprehensive guide. Dive into accessing, purchasing, and optimizing email services through the My Domain Control Panel.
Introduction
Learn how to buy and manage Business/Enterprise email services from your domain control panel.
Section 1: Accessing Domain Control Panel
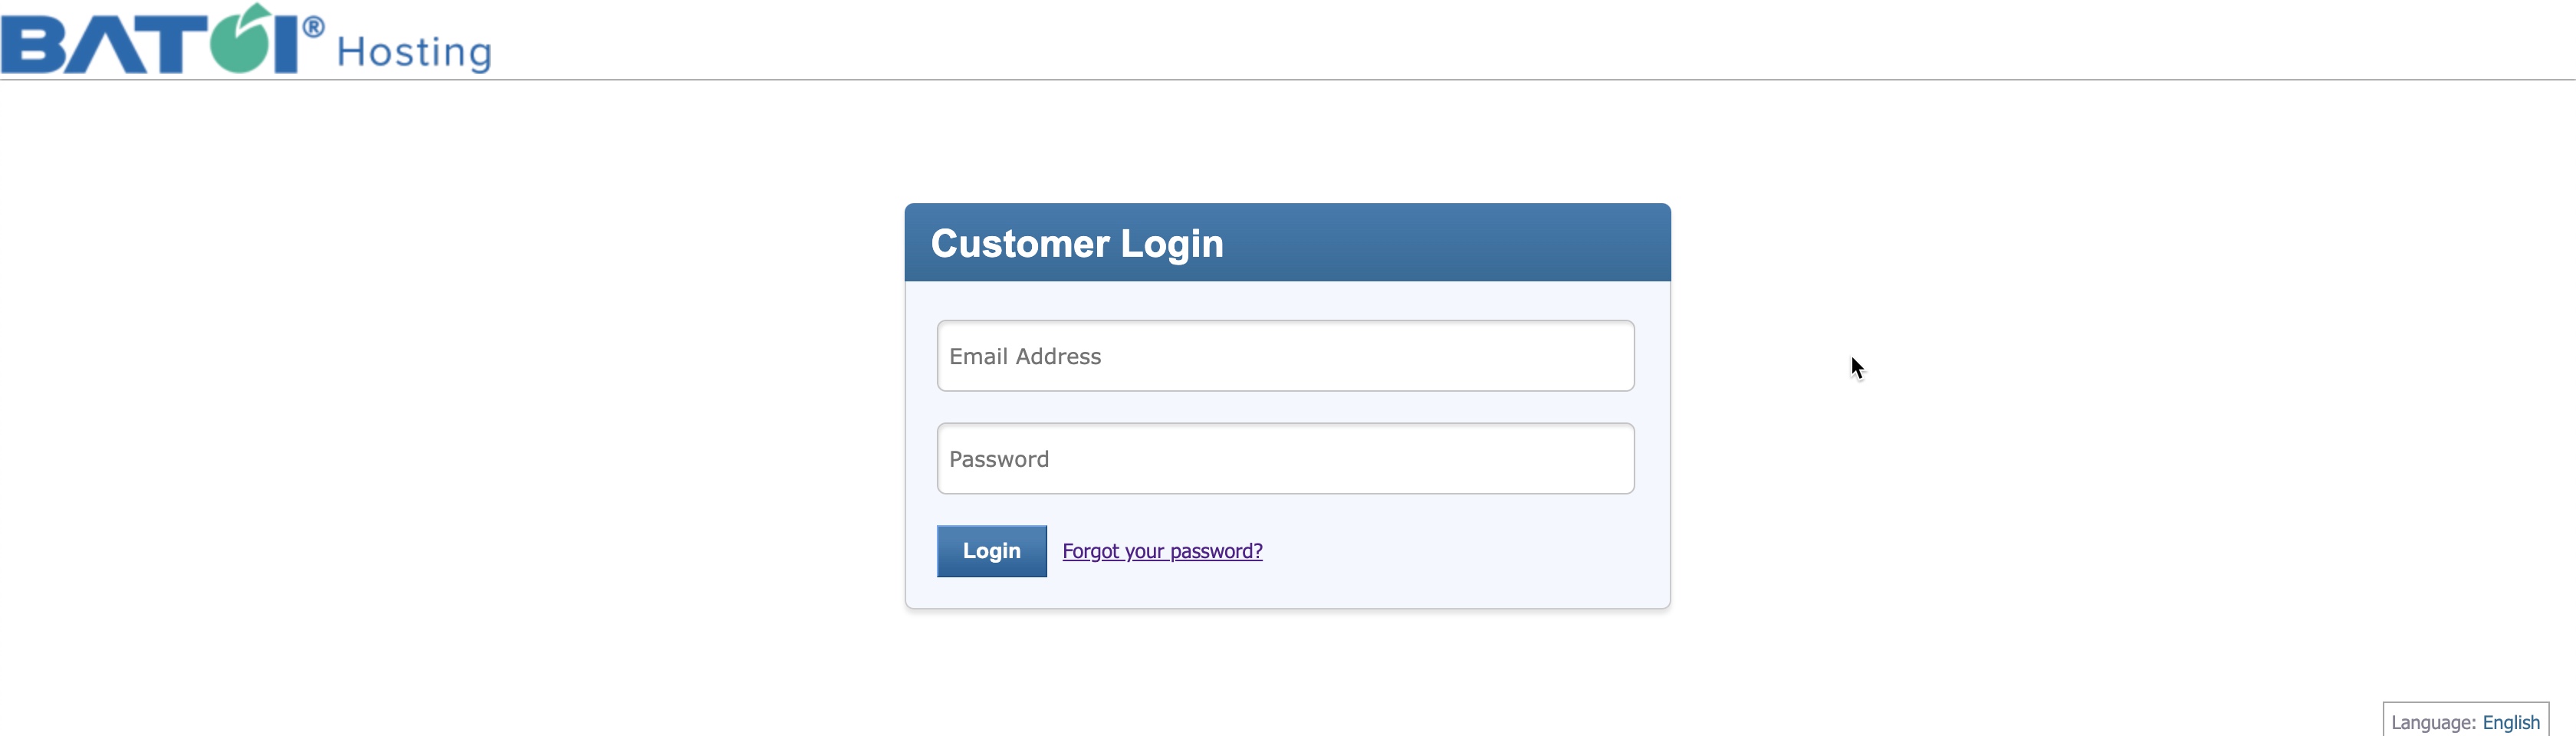
Login to HostMart: To start, you need to access your domain control panel at Batoi. You can do this by typing the URL https://myhostmart.batoi.com/customer or via the link provided by our Support Team. Use your username and password to log in, as illustrated in Figure 1 below.
Section 2: Accessing Services in Domain Control Panel
You will land on the dashboard page upon successful login, as illustrated in Figure 2 below.
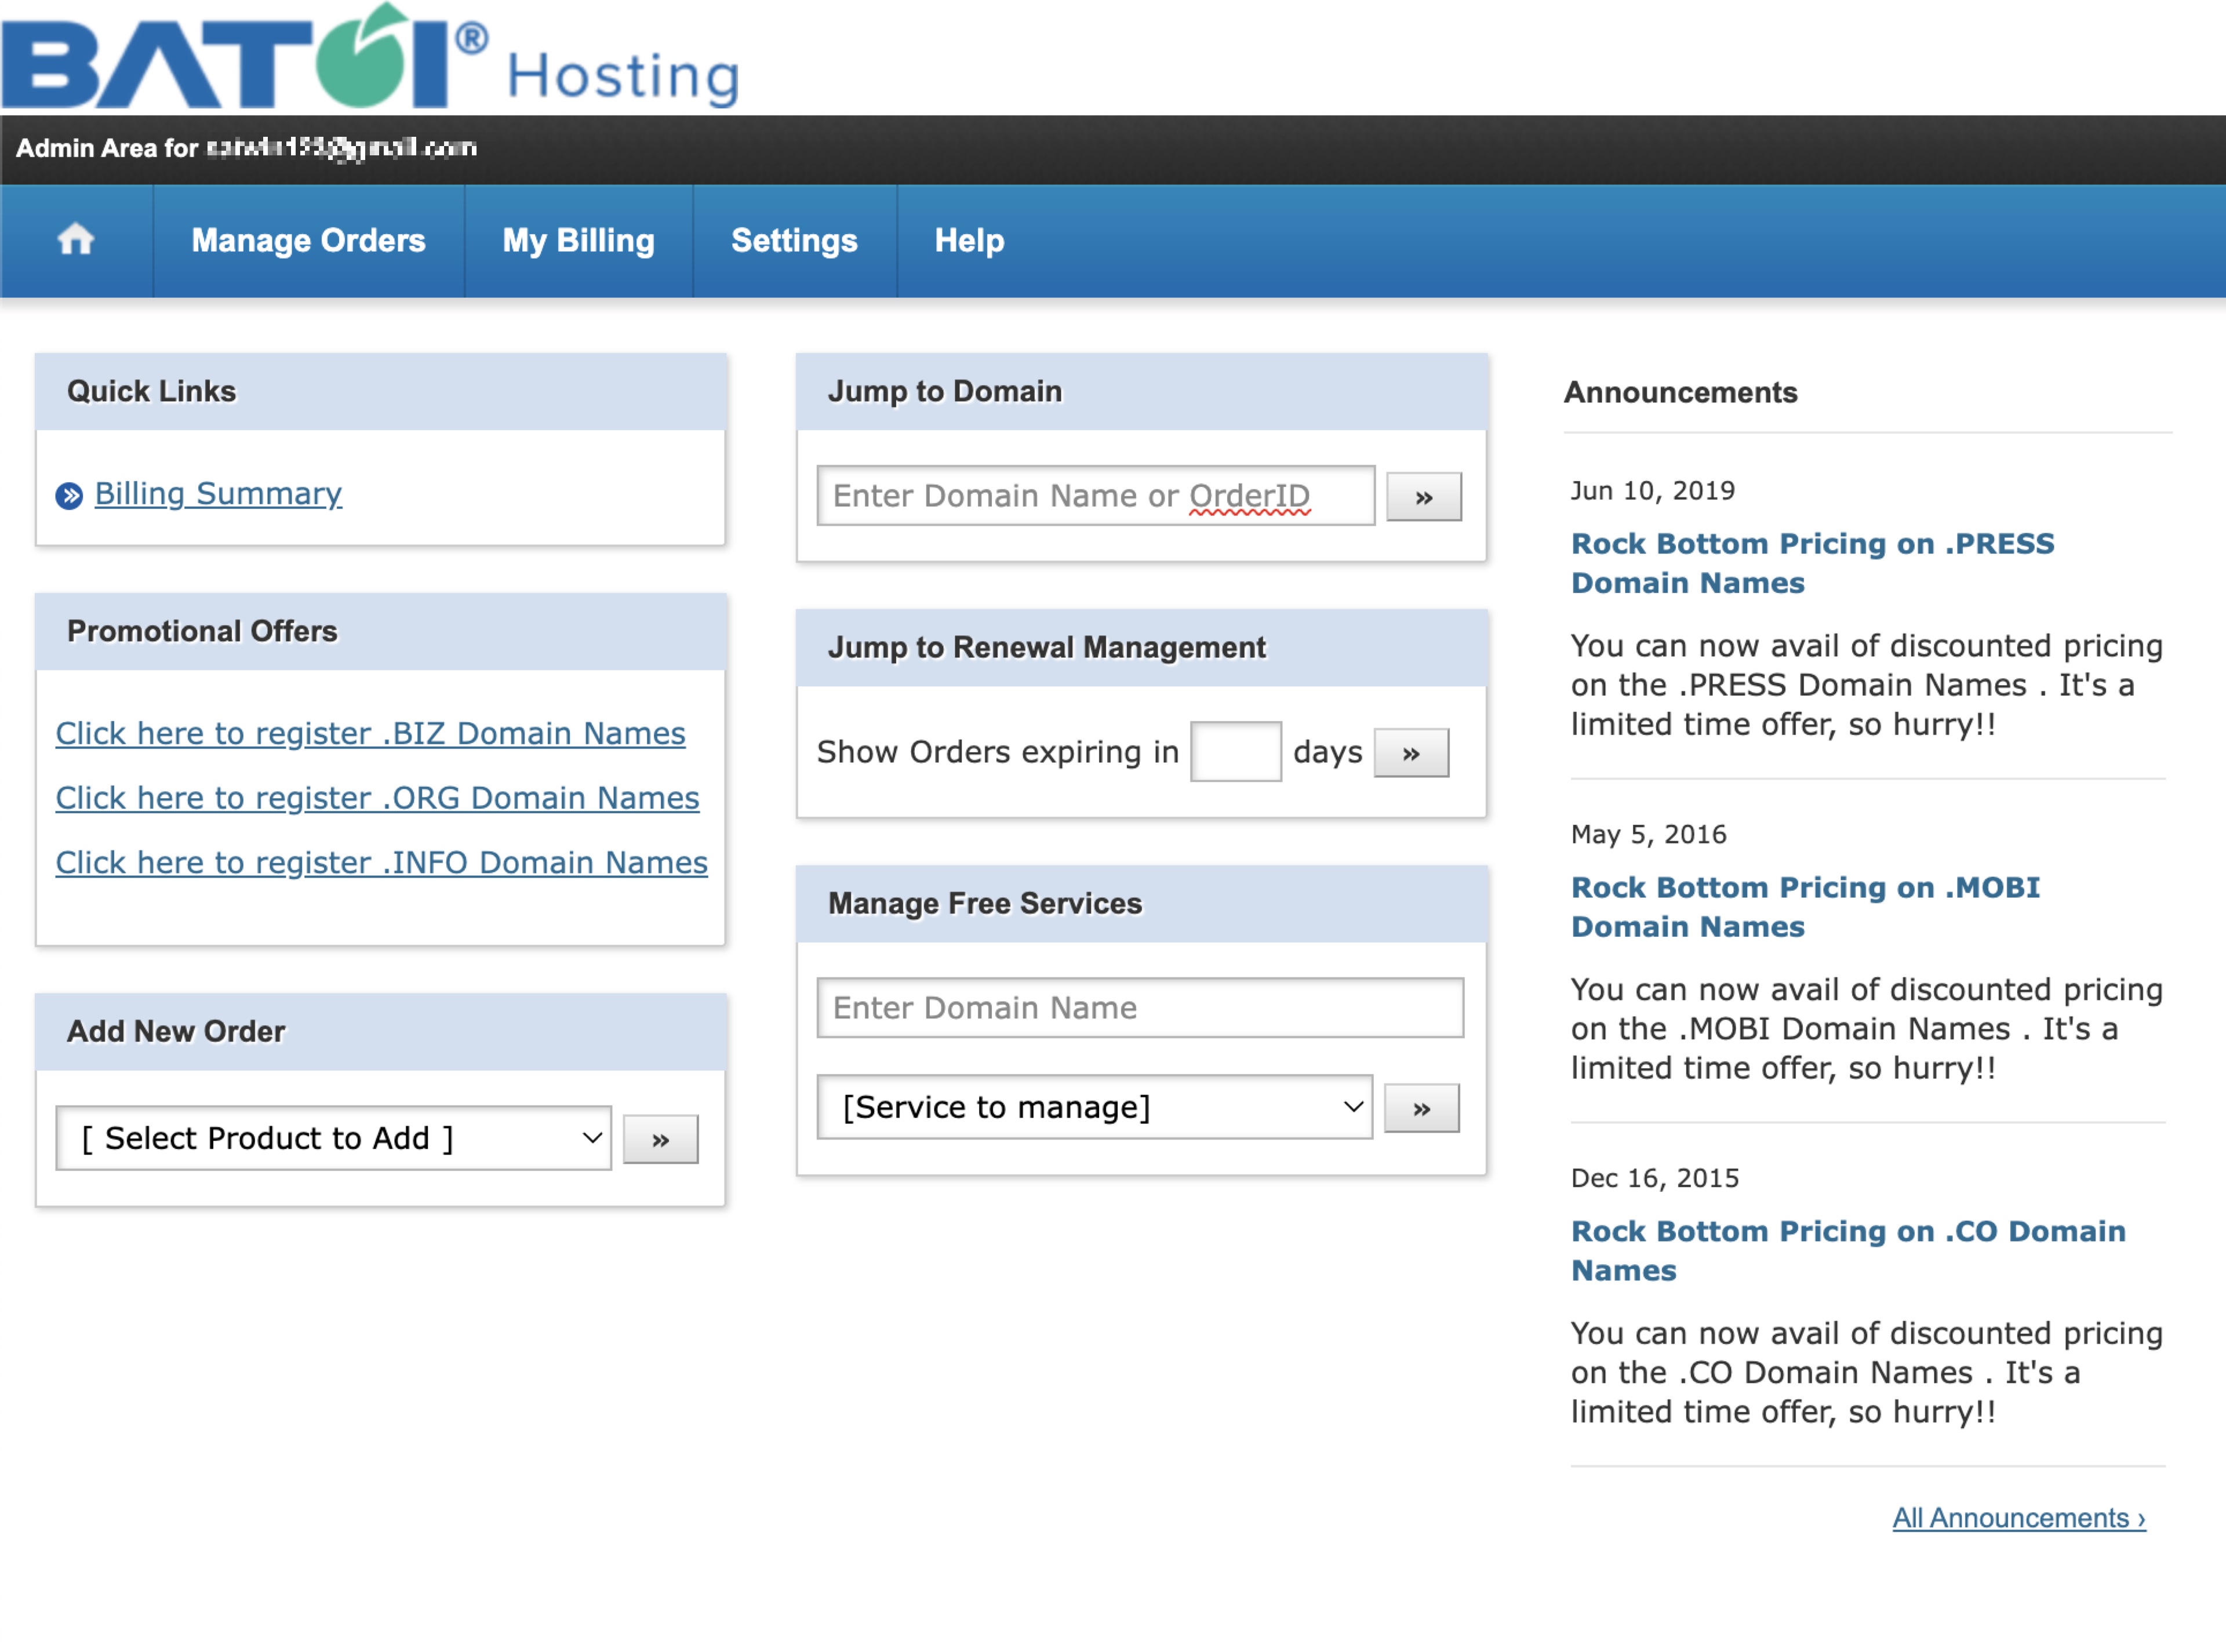
Click on the Manage Orders link, as illustrated in Figure 2 above, and the system will take you to the list of service pages.
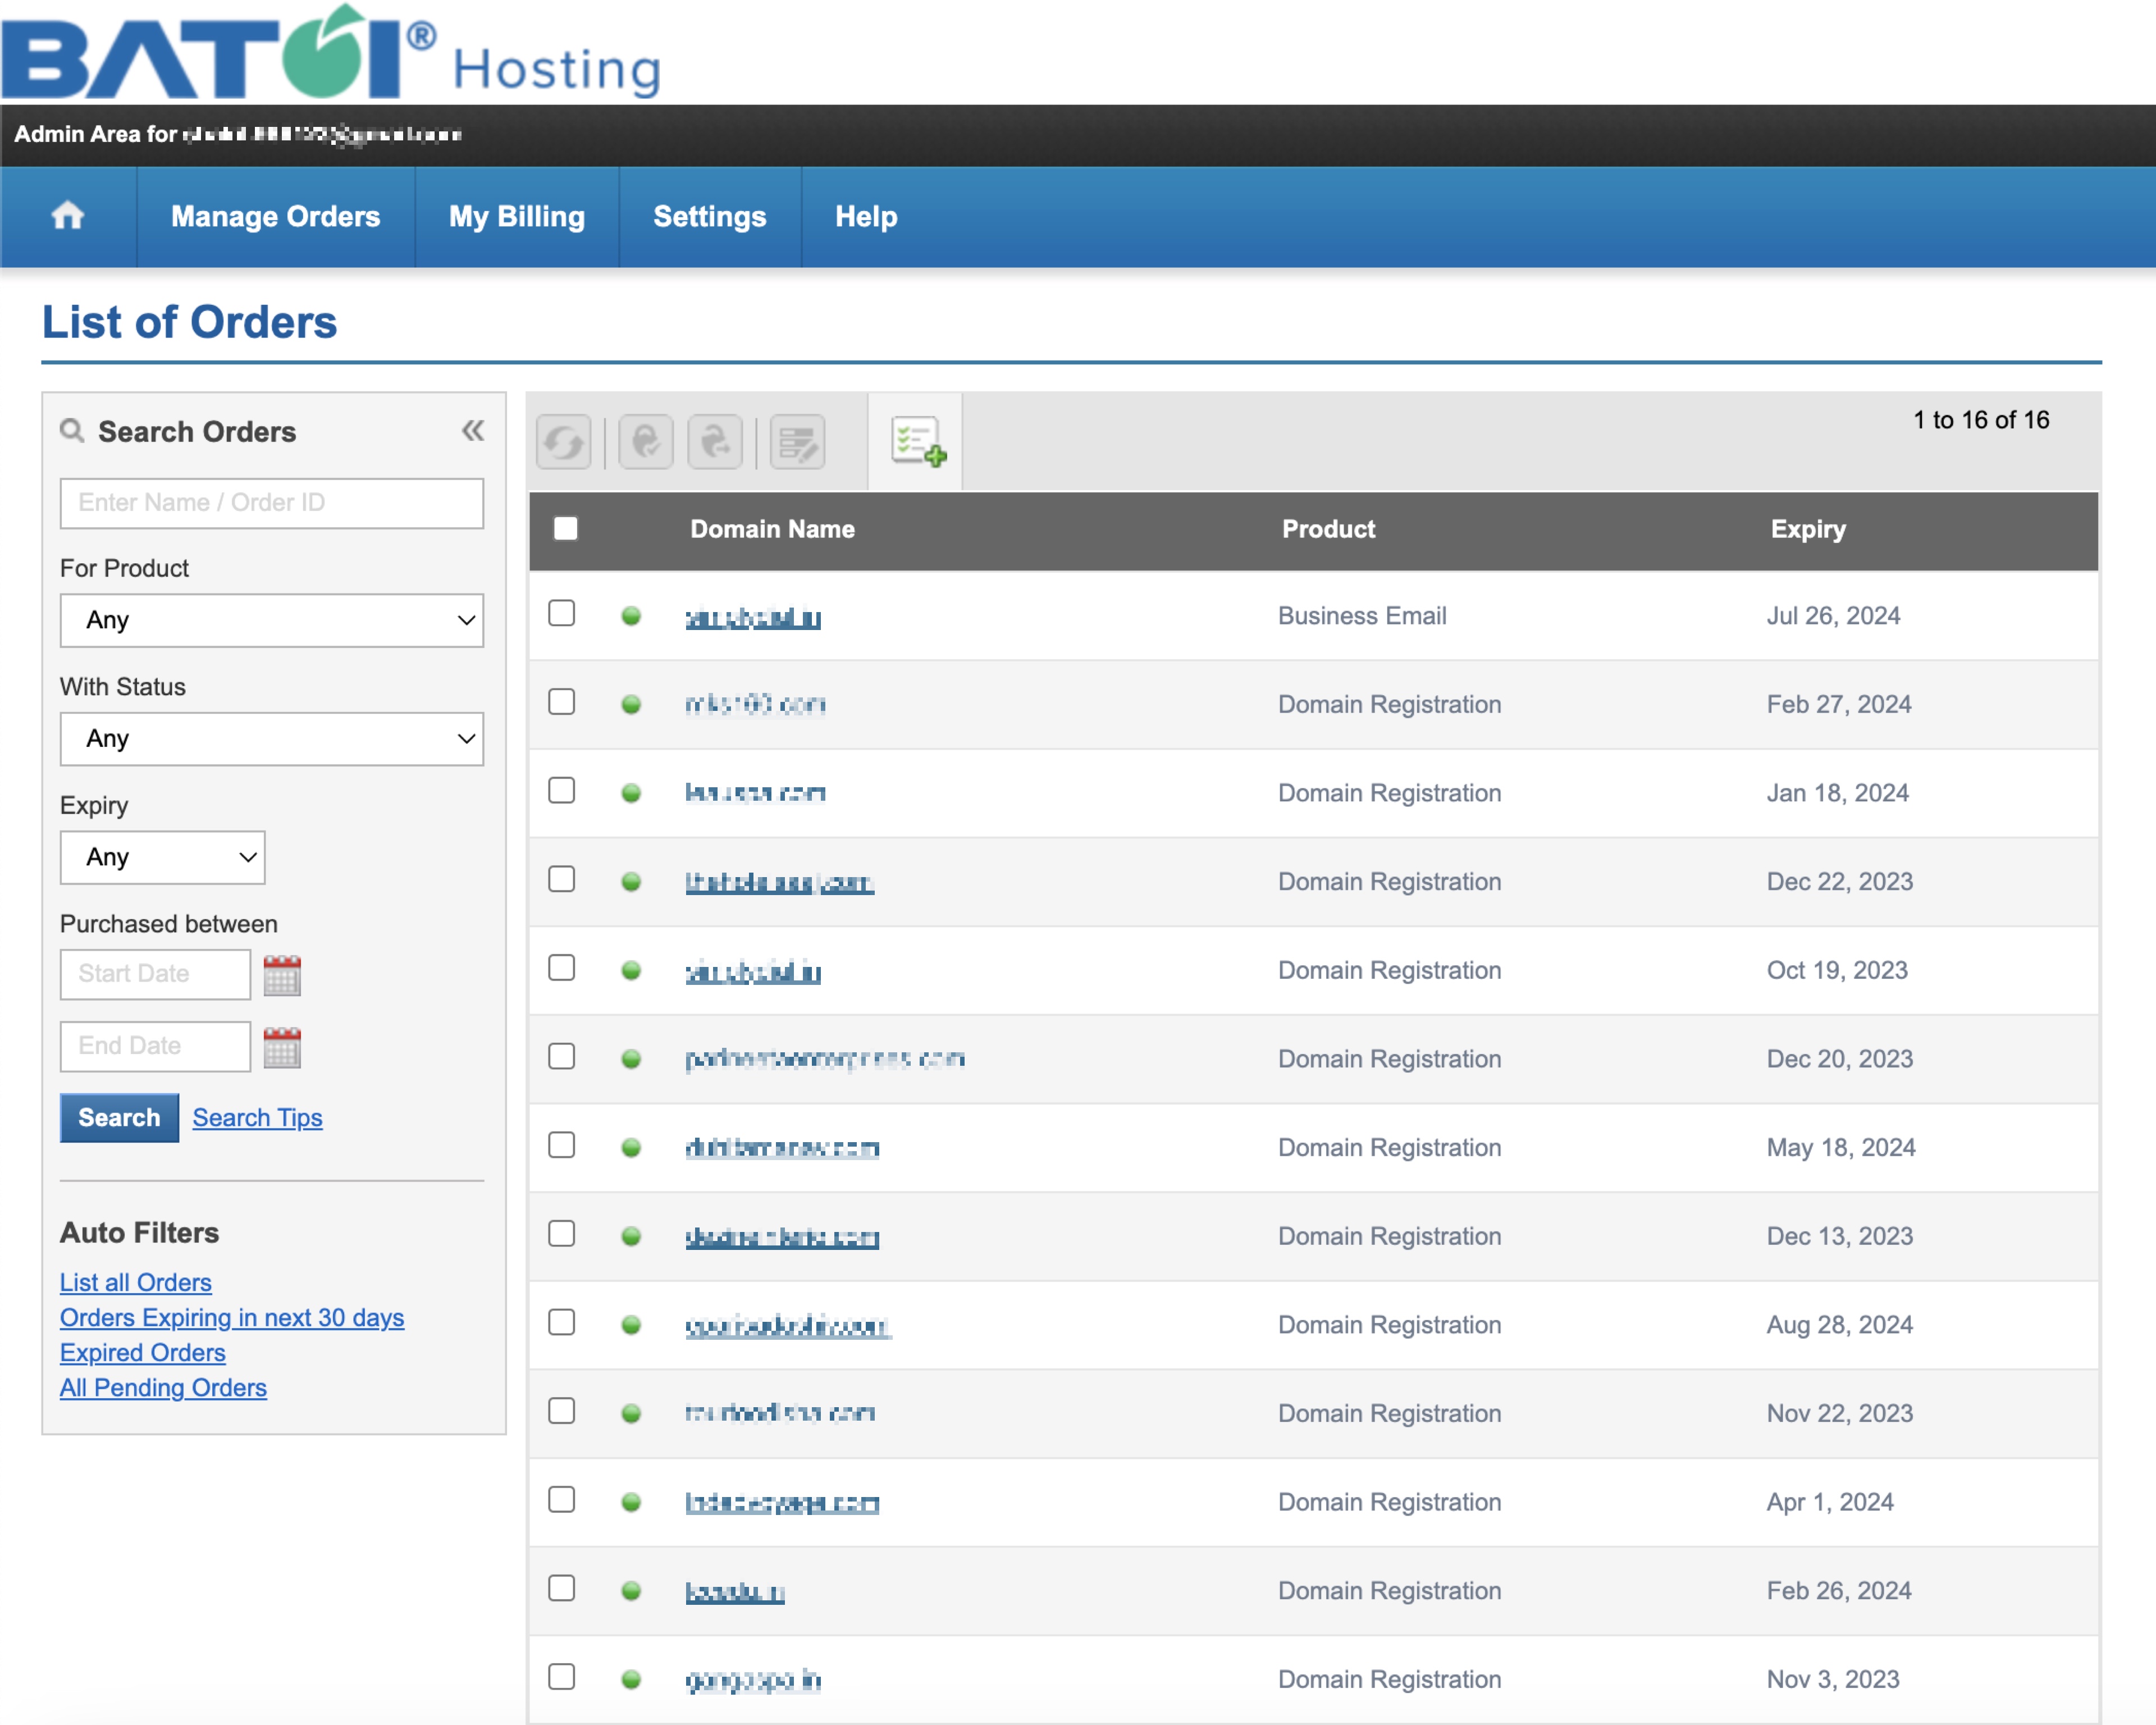
All the products allocated to you with the Product Type and Expiry Date will be listed in the tabular format on the List of Orders page. Click on the as illustrated in Figure 3 below.
Section 3: Accessing Individual Domain Details
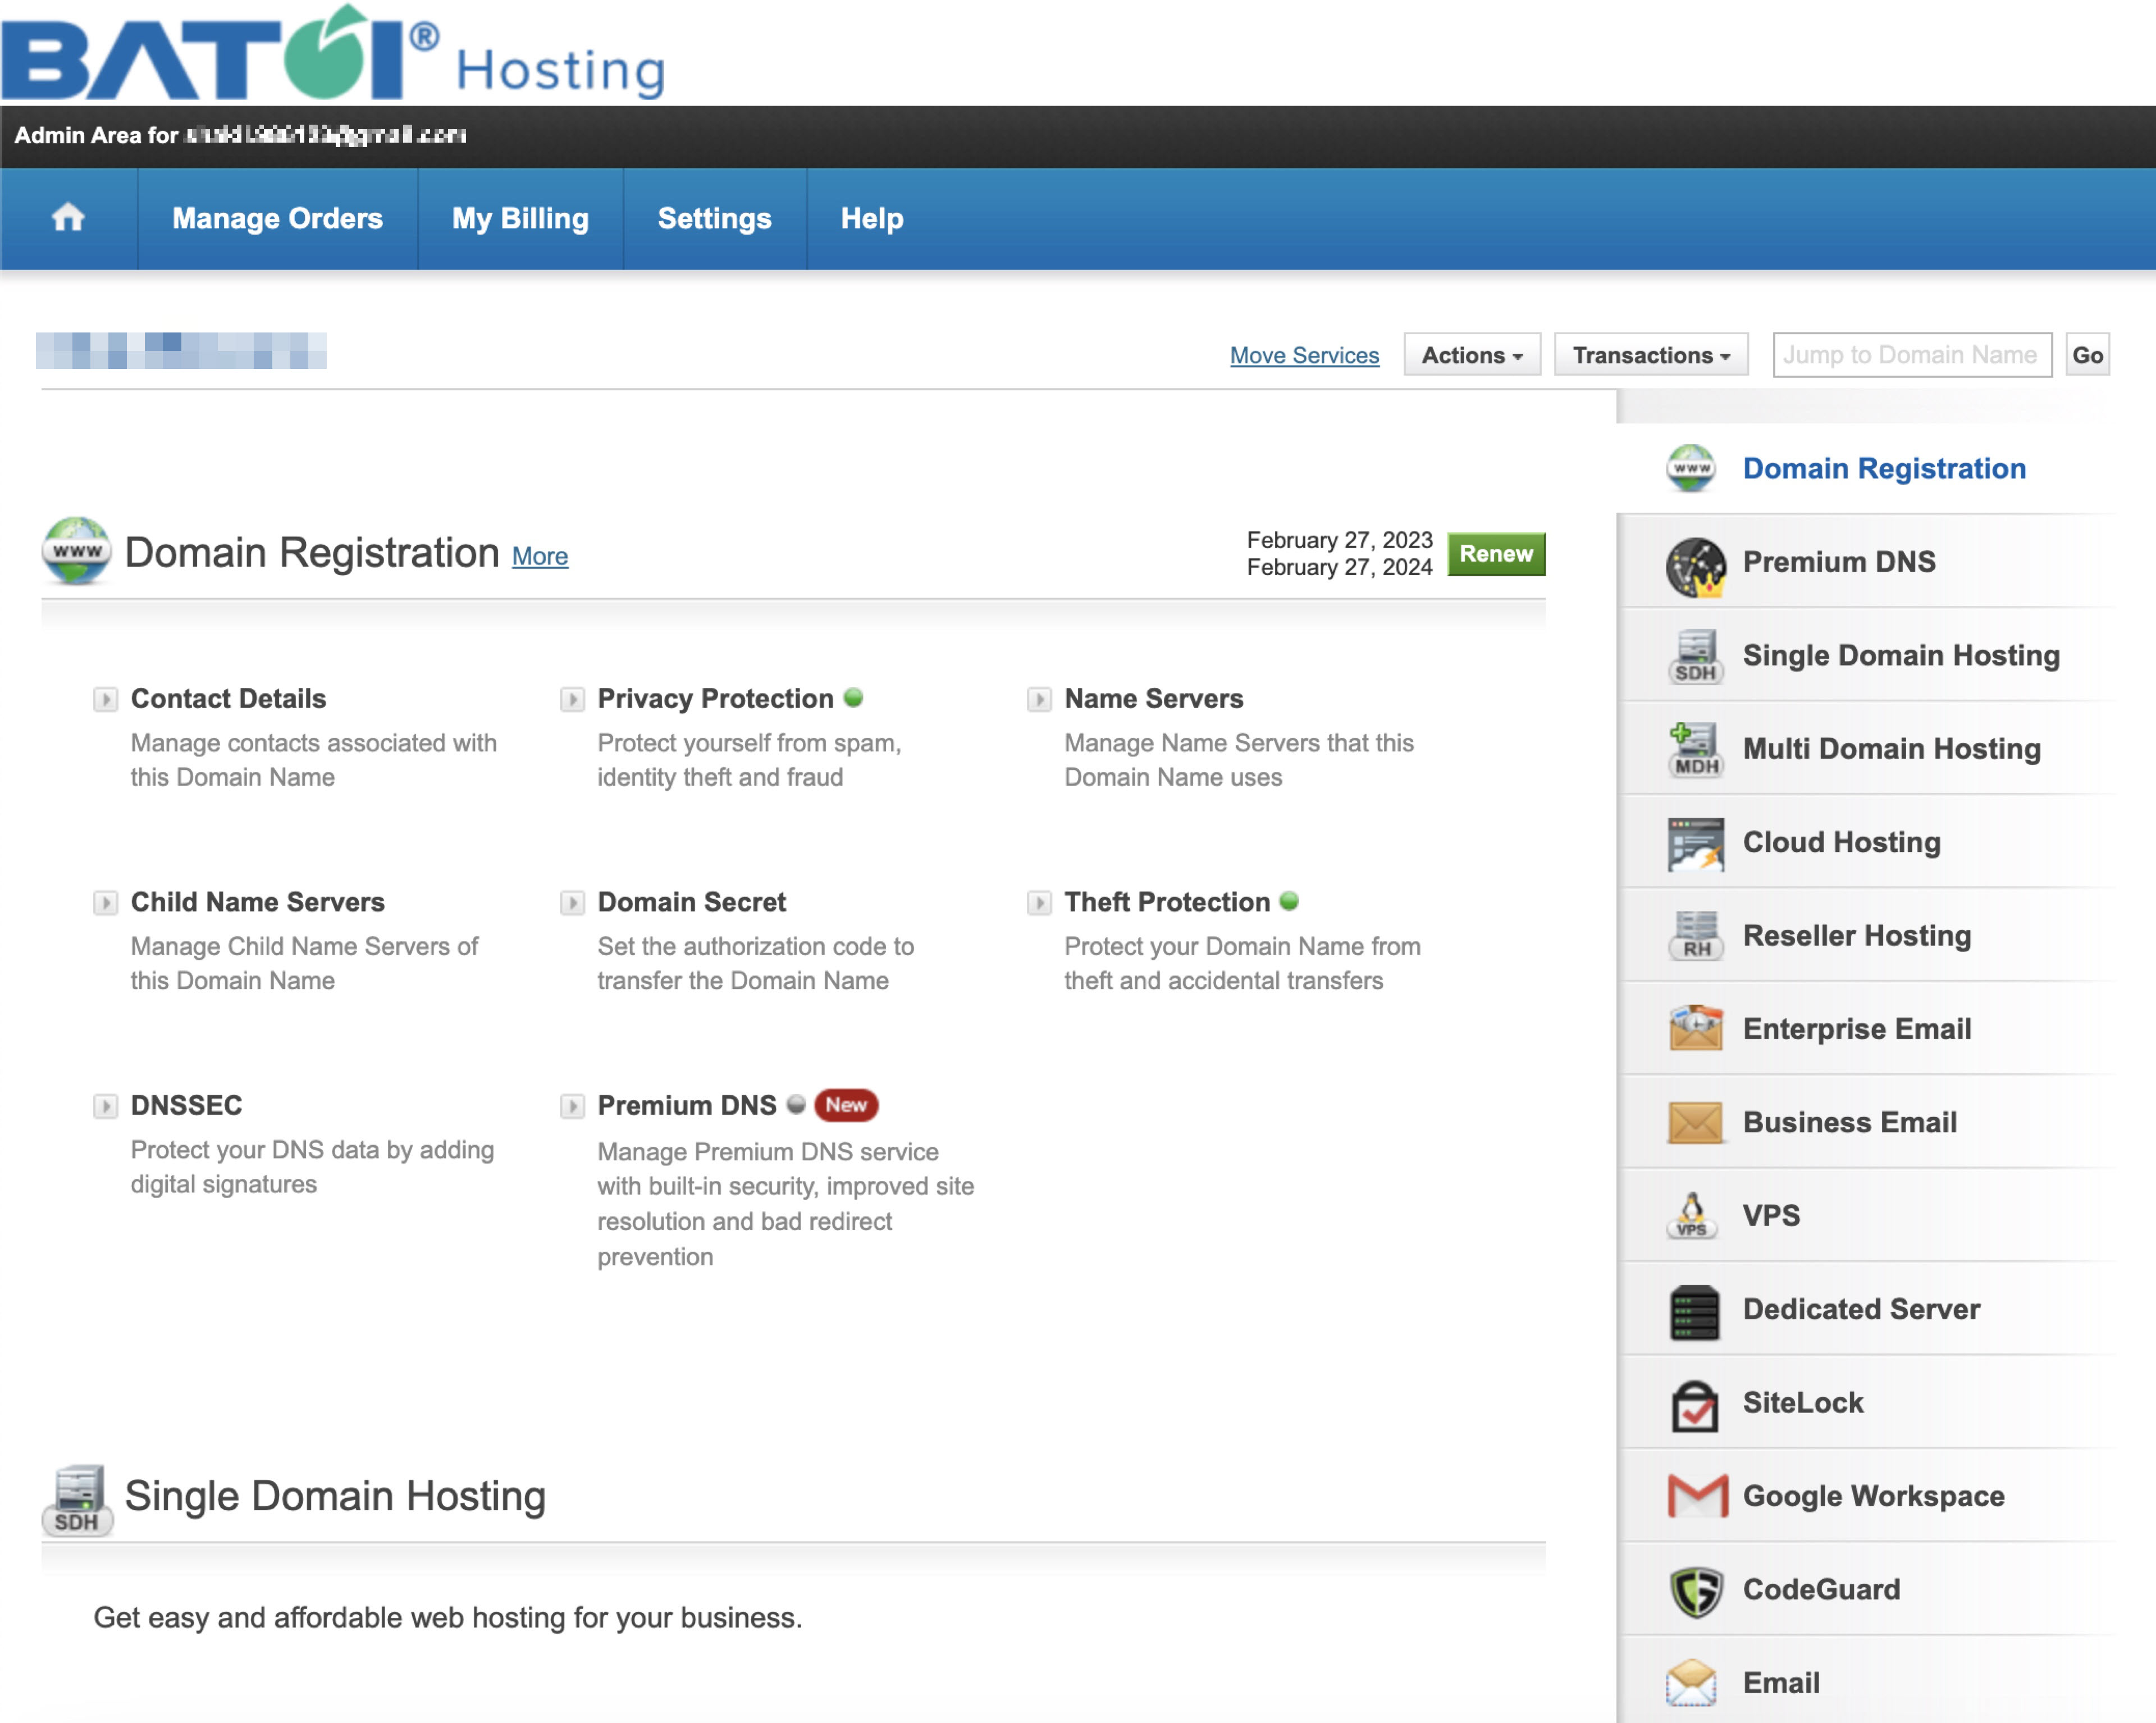
Click on the Domain Name for which you want to add or modify the DNS record from the list, and you will be redirected to the detail page for the particular domain, as illustrated in Figure 4 below.
Section 4: Accessing Enterprise/Business Email Details
Go to the Enterprise Email section under the individual domain details page, as illustrated in Figure 5 below.

To subscribe to the Enterprise Email, click the Buy Now button under the section, as illustrated in Figure 5 above.
Section 5: Purchasing Enterprise/Business Email Service
After clicking the Buy Now button, the system will redirect to the purchase page, as illustrated in Figure 6 below.
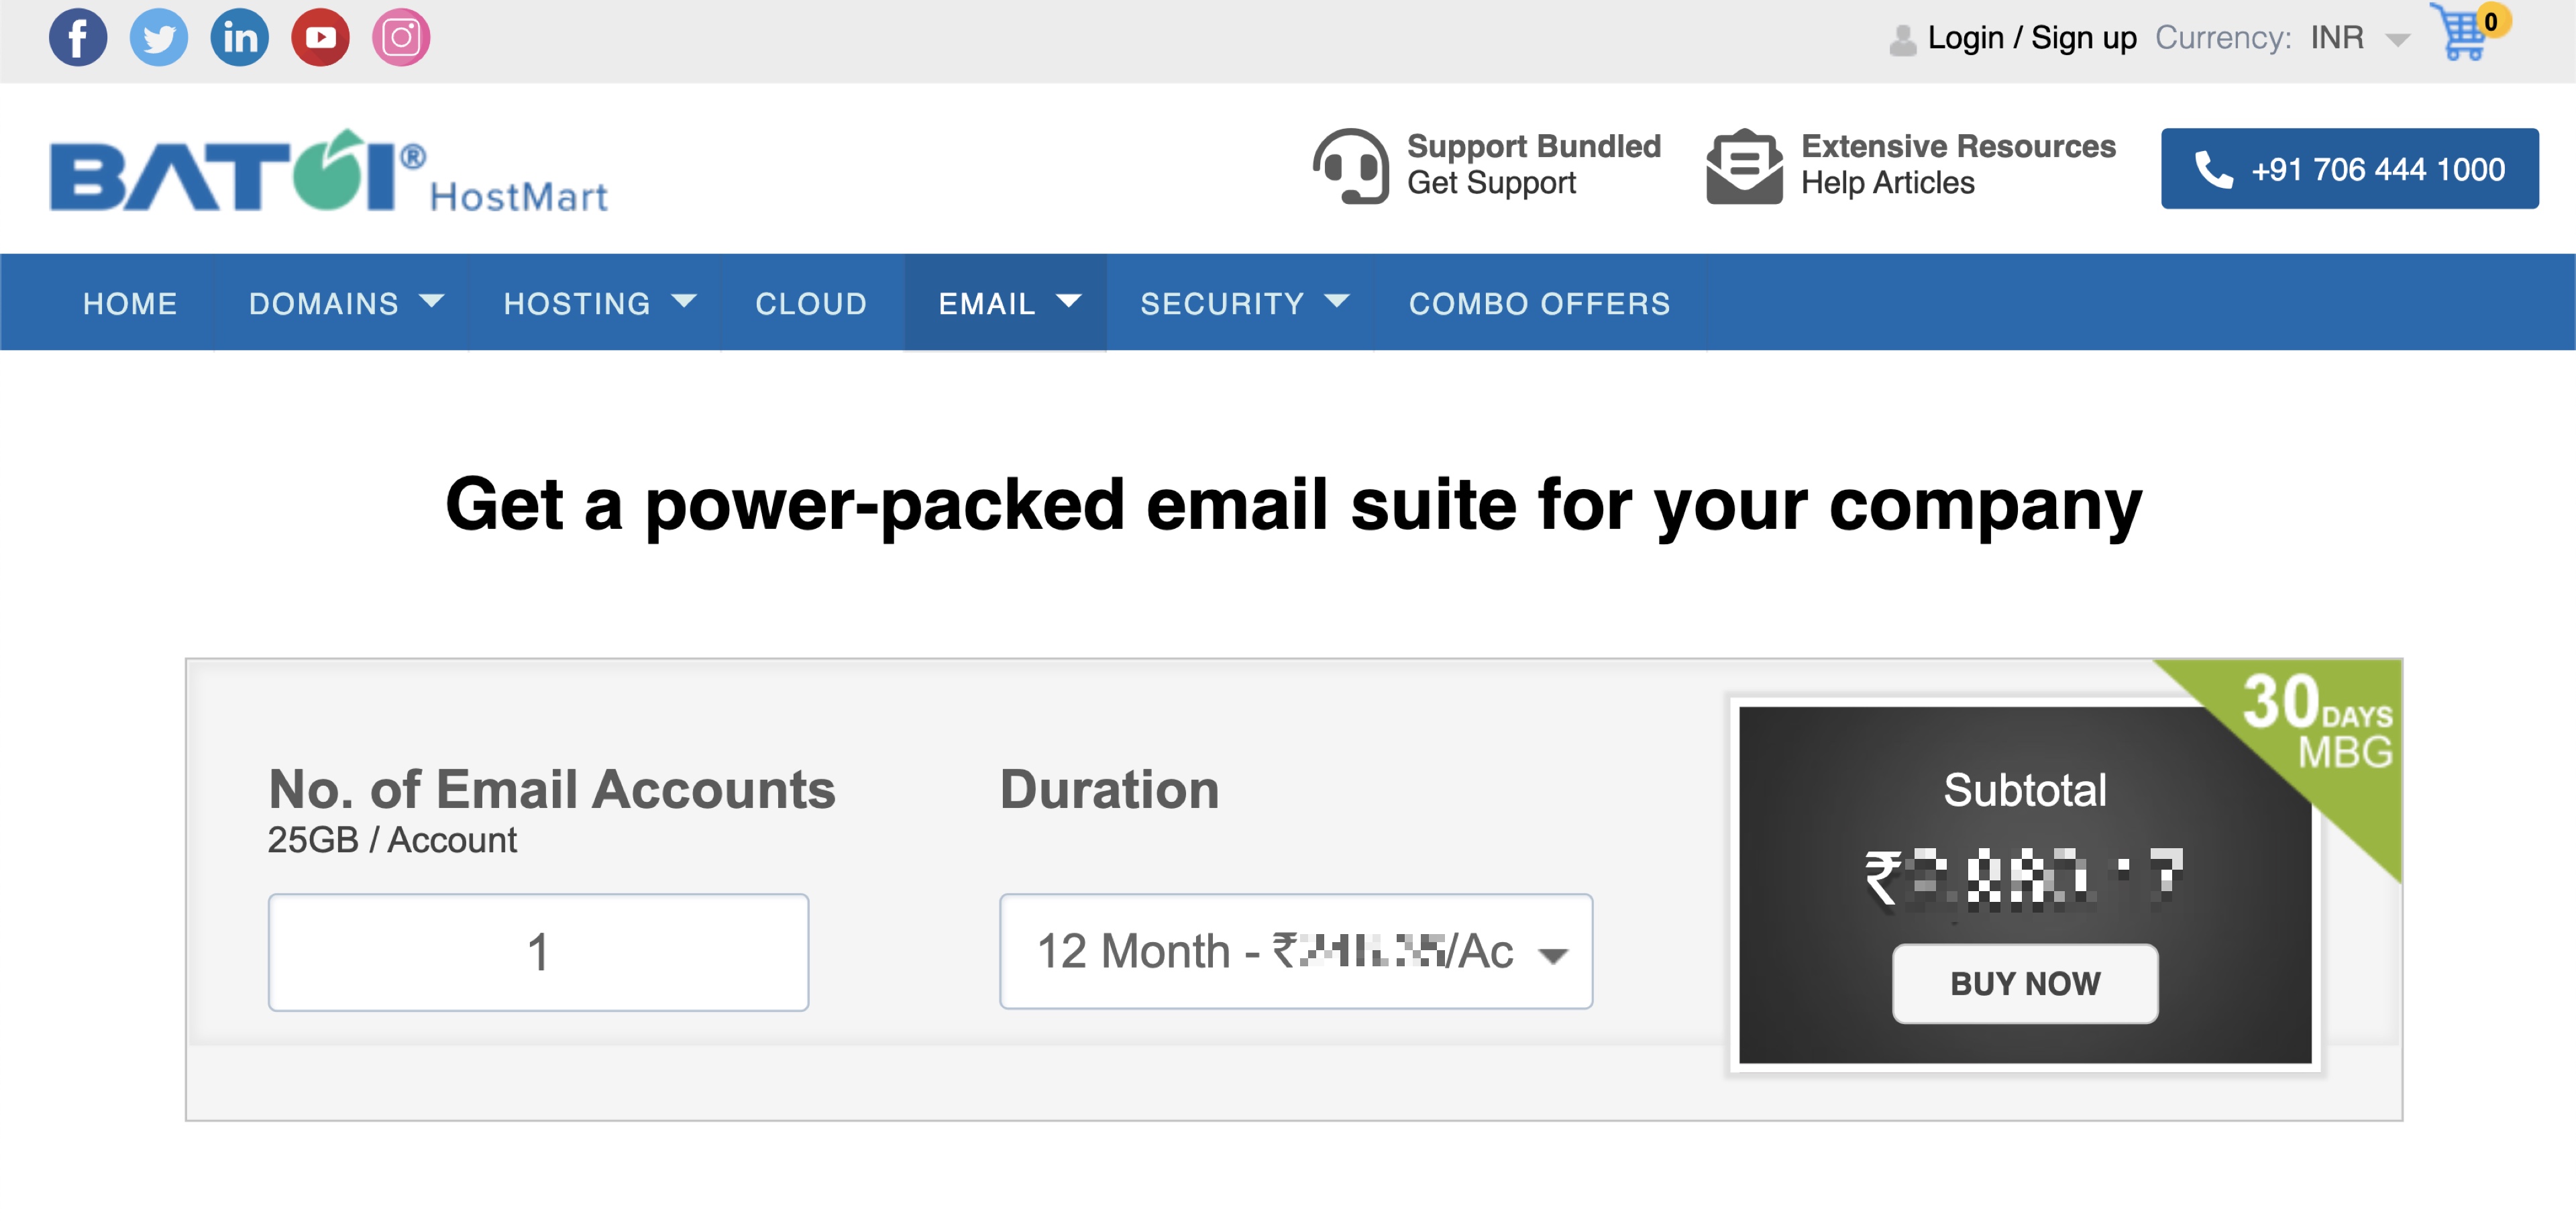
- Enter the number of emails required on the No. of Email Account
- Select the duration of purchase from the Duration dropdown
The total amount will be shown, and by clicking the BUY NOW button, the system will take you to the payment gateway page, and upon successful payment, the service will be added to your order list page, as illustrated in Figure 7 below.

You will land on the Enterprise/Business email details page, as illustrated in Figure 8 below, by clicking on the link.
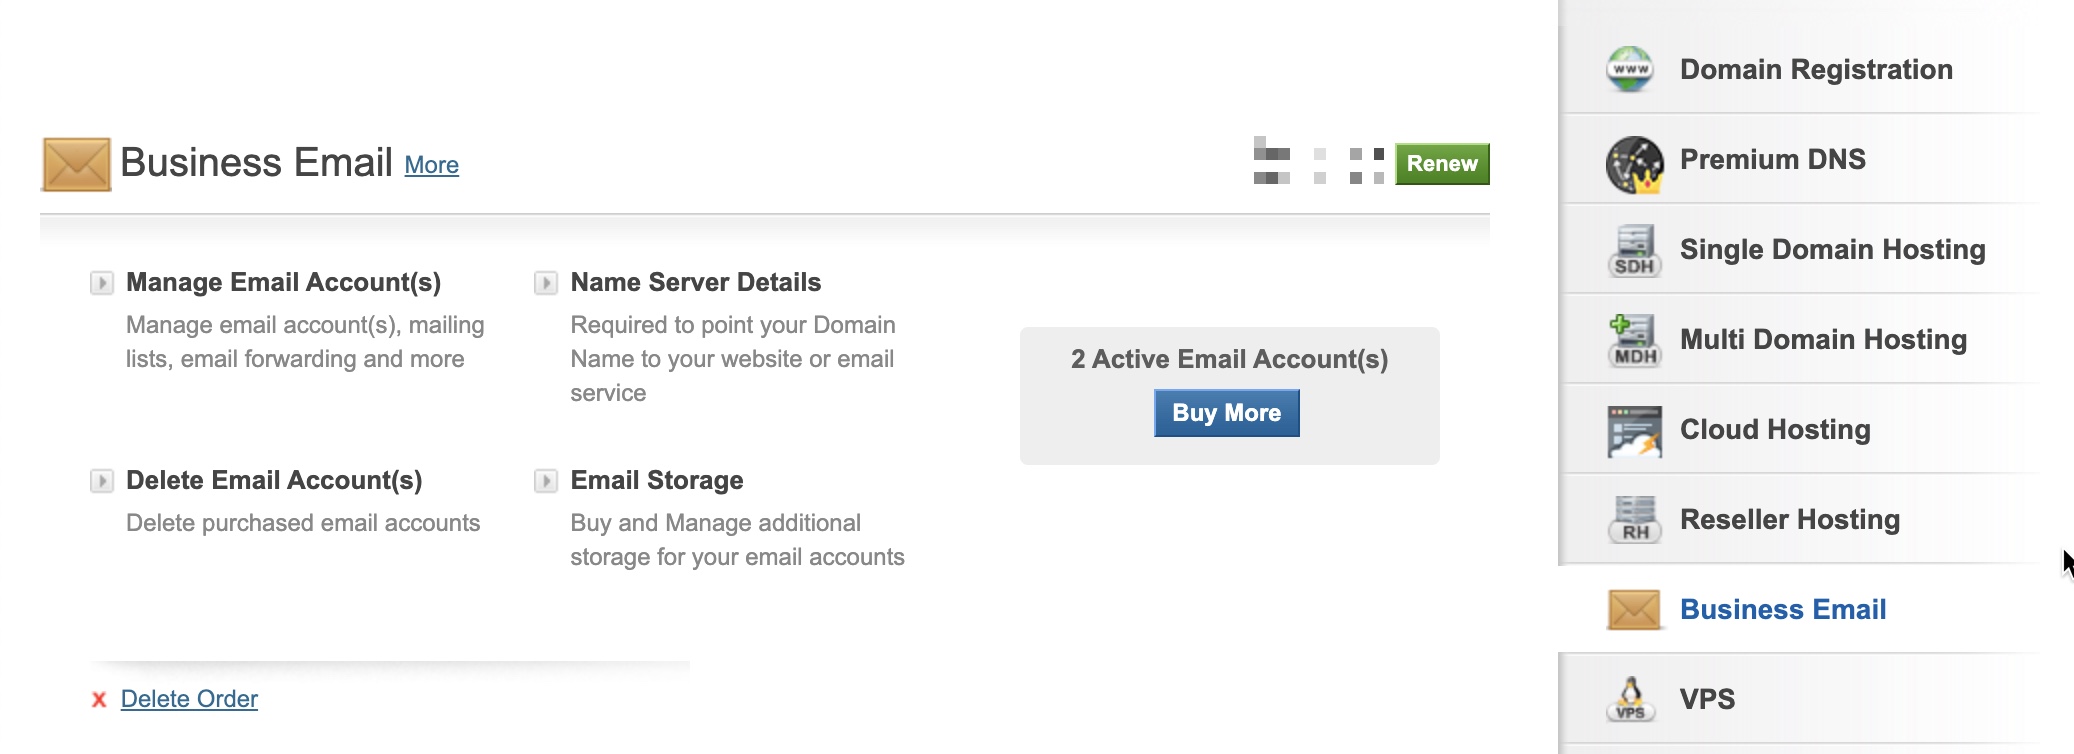
Section 6: Manage Enterprise/Business Email Service
You will find the features below once you subscribe to Enterprise/Business email, as illustrated in Figure 8 above.
- Manage Email Account: You can Add Users, Add Forward Only Accounts, Manage Users / Accounts, Add Mailing Lists, and Manage Mailing Lists.
- Name Server Details: Manage your domain name server details
- Delete Email Account: Able to delete user accounts
- Email Storage: Able to add more storage to your email account
Manage Email Account
Click on the Manage Email Account link in the Business Email section, as illustrated in Figure 8 above, and a popup screen will appear, as shown in Figure 9 below.
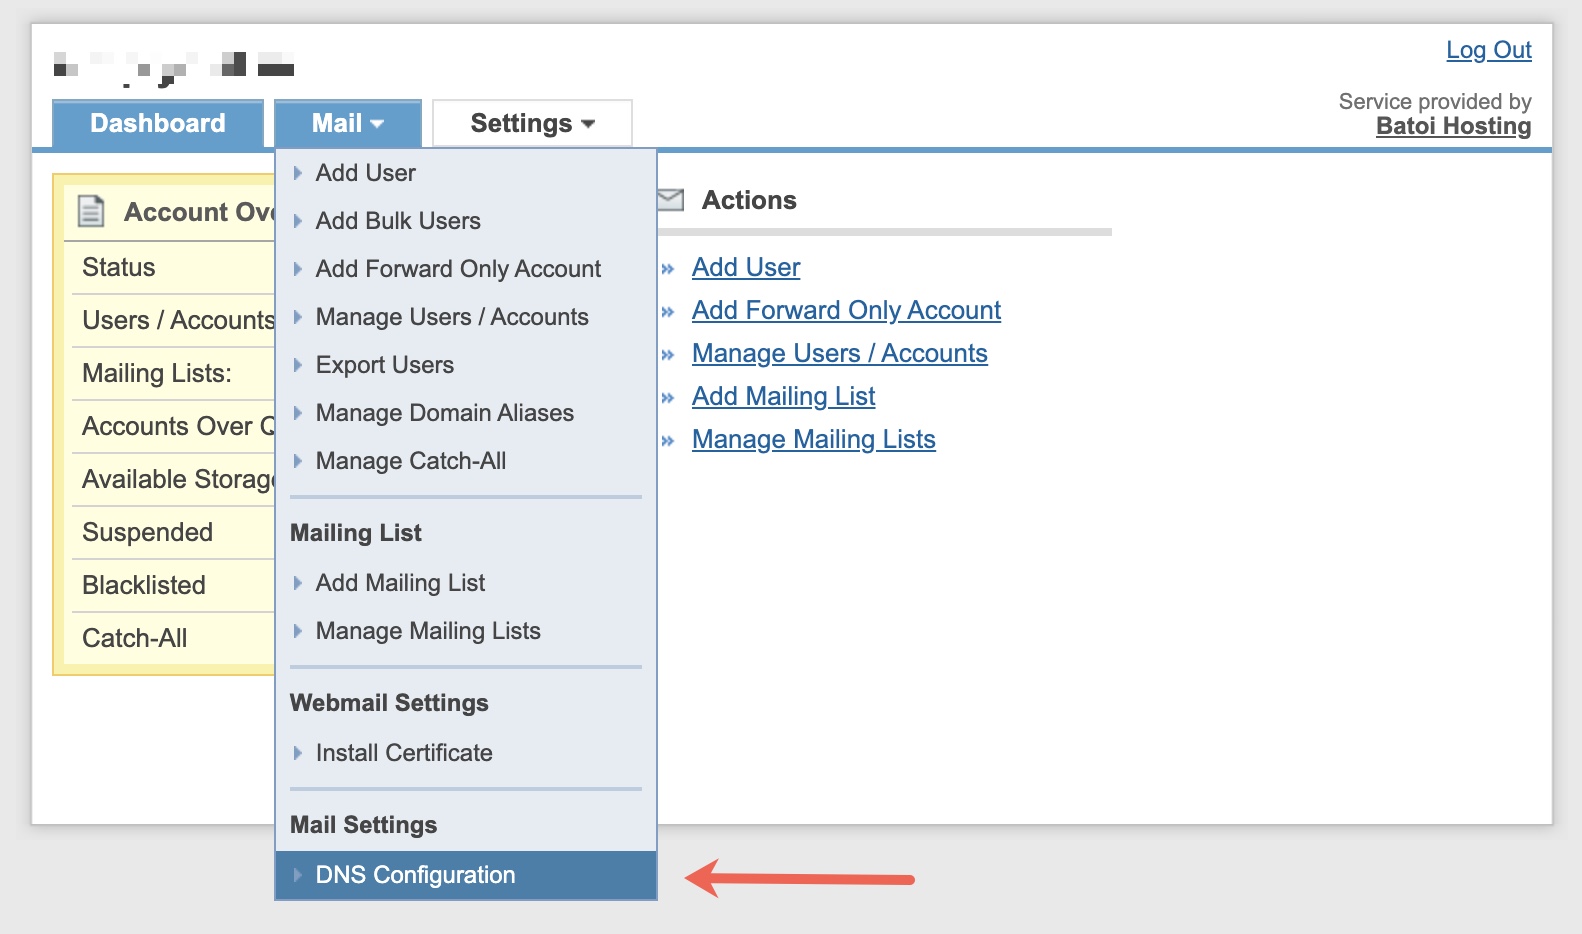
Click on the Mail drop menu and go to the DNS Configuration link, as illustrated in Figure 9 above. The first thing you need to do is to set up the DNS records for the emails. To know more about DNS records, please read our help article (Manage DNS Records through Premium DNS Service from My Domain Control Panel)
Once your DNS is set up, go to the Add User section from the Menu drop menu, as illustrated in Figure 9 above. A popup window will open once you click the Add User link, as shown in Figure 10 below.

On the popup window, you need to enter the data ‘Name’, ‘Desired Email Address’, ‘Alternative Email Address’, ’Country of User’, and ’Language of User’. Once you fill in the details, click on the Add User button, and your email ID will be created.
Once the user is created, you can go to the Manage User Account section to view and manage the details. A popup window will open by clicking the Manage User Account link, as illustrated in Figure 11 below, and you can see the list of users created.
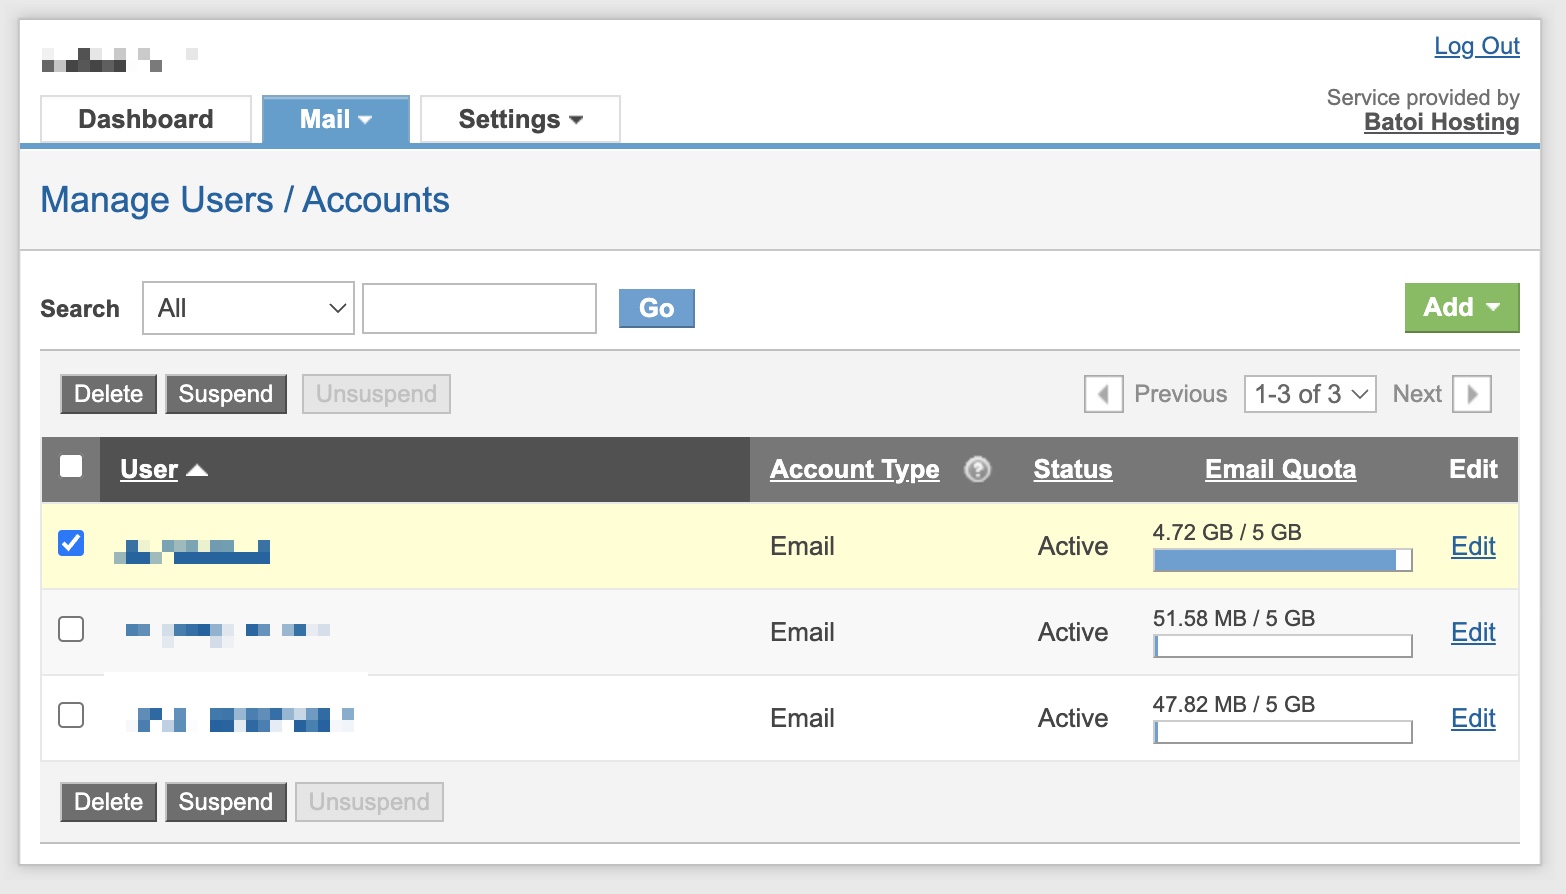
Click on the individual user account to see the details, as illustrated in Figure 12 below.
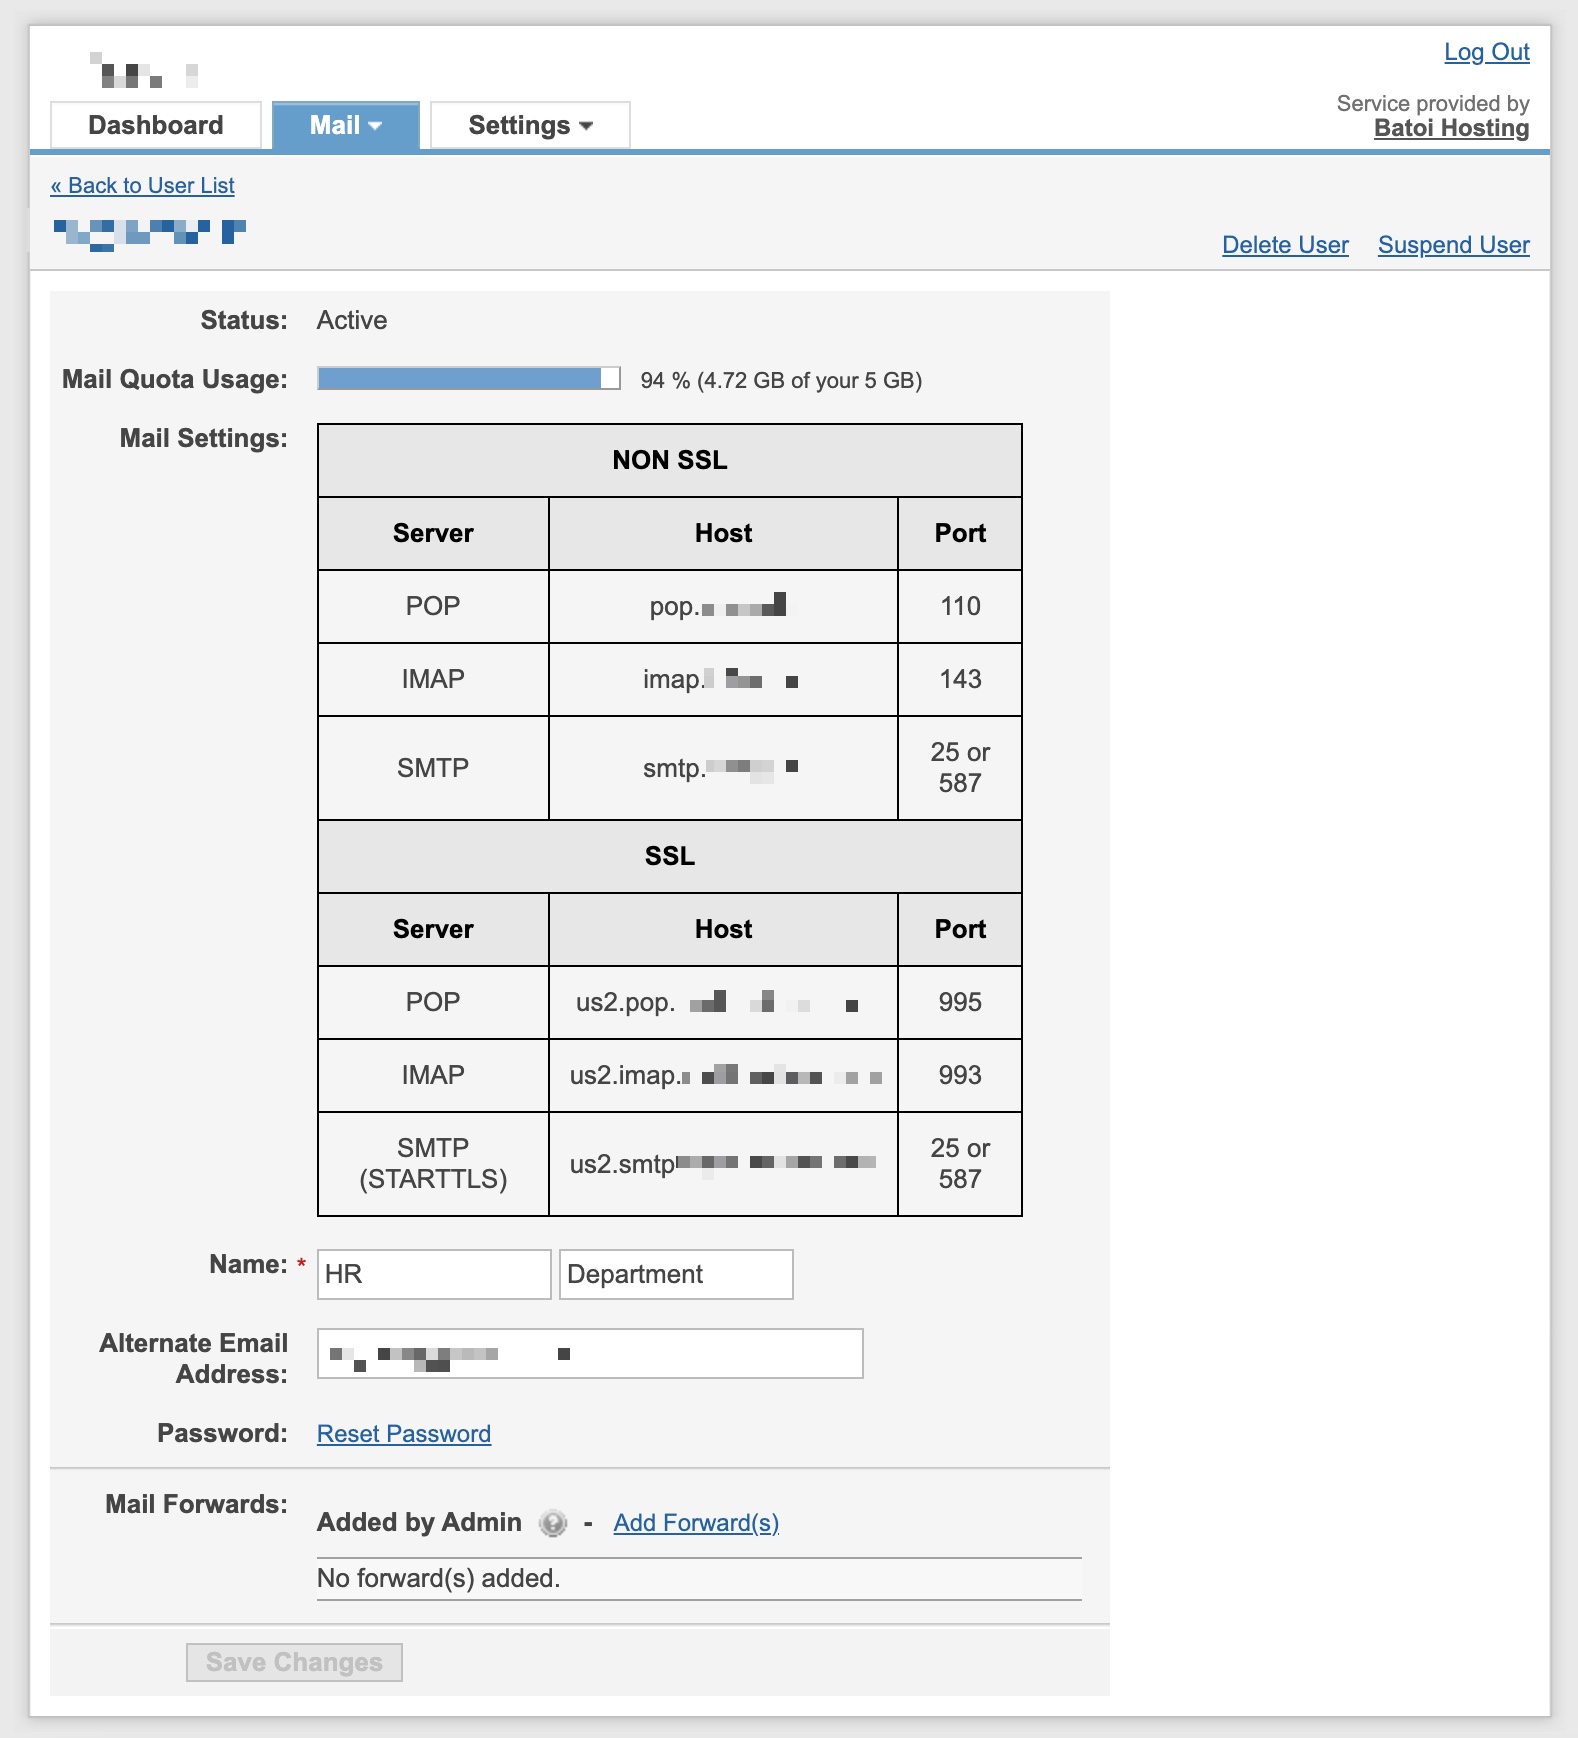
From the above screen, you can delete the user, suspend/unsuspend the user, and change the user password.
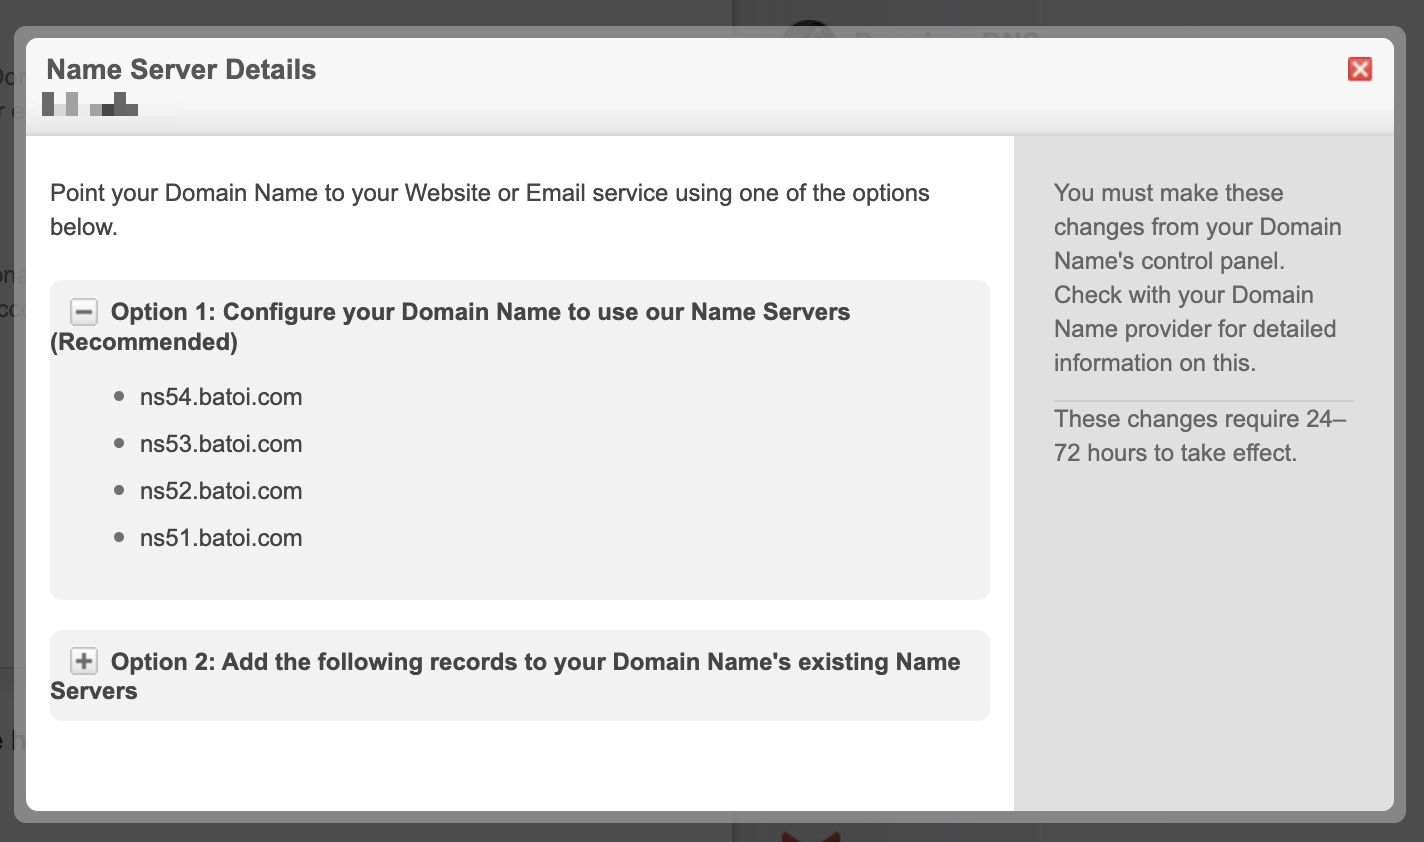
Name Server Details
Clicking on the Name Server Details link under the Business Email section and a popup window will open, as illustrated in Figure 13 below.
Delete Email Account
Clicking on the Delete Email Account Details link under the Business Email section, a popup window will open, as illustrated in Figure 14 below.
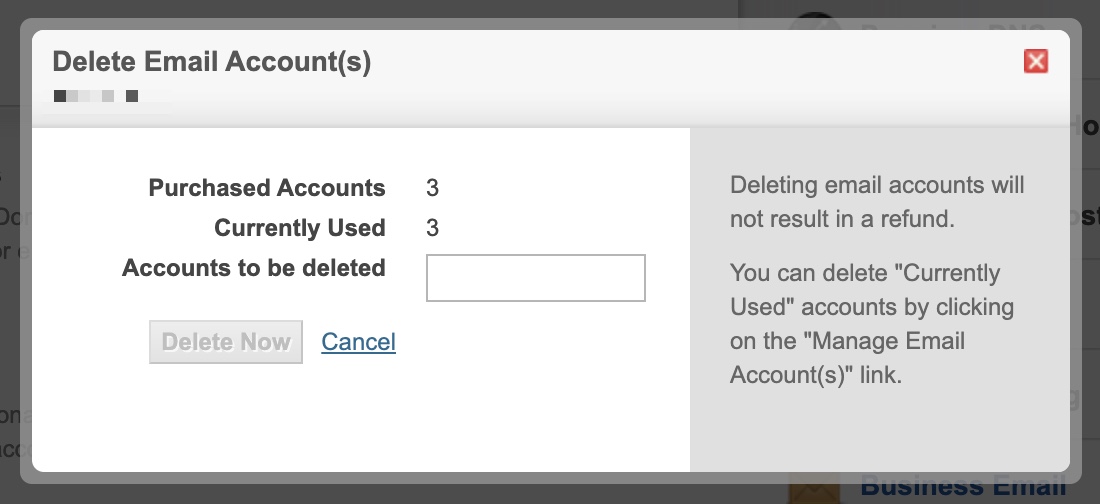
You can enter the number of user accounts to be deleted in the Accounts to be deleted textbox, as illustrated in Figure 14 above. After entering the details, click the Delete Now button, and the users will be deleted.
Email Storage
Clicking on the Email Storage link under the Business Email section and a popup window will open, as illustrated in Figure 15 below.
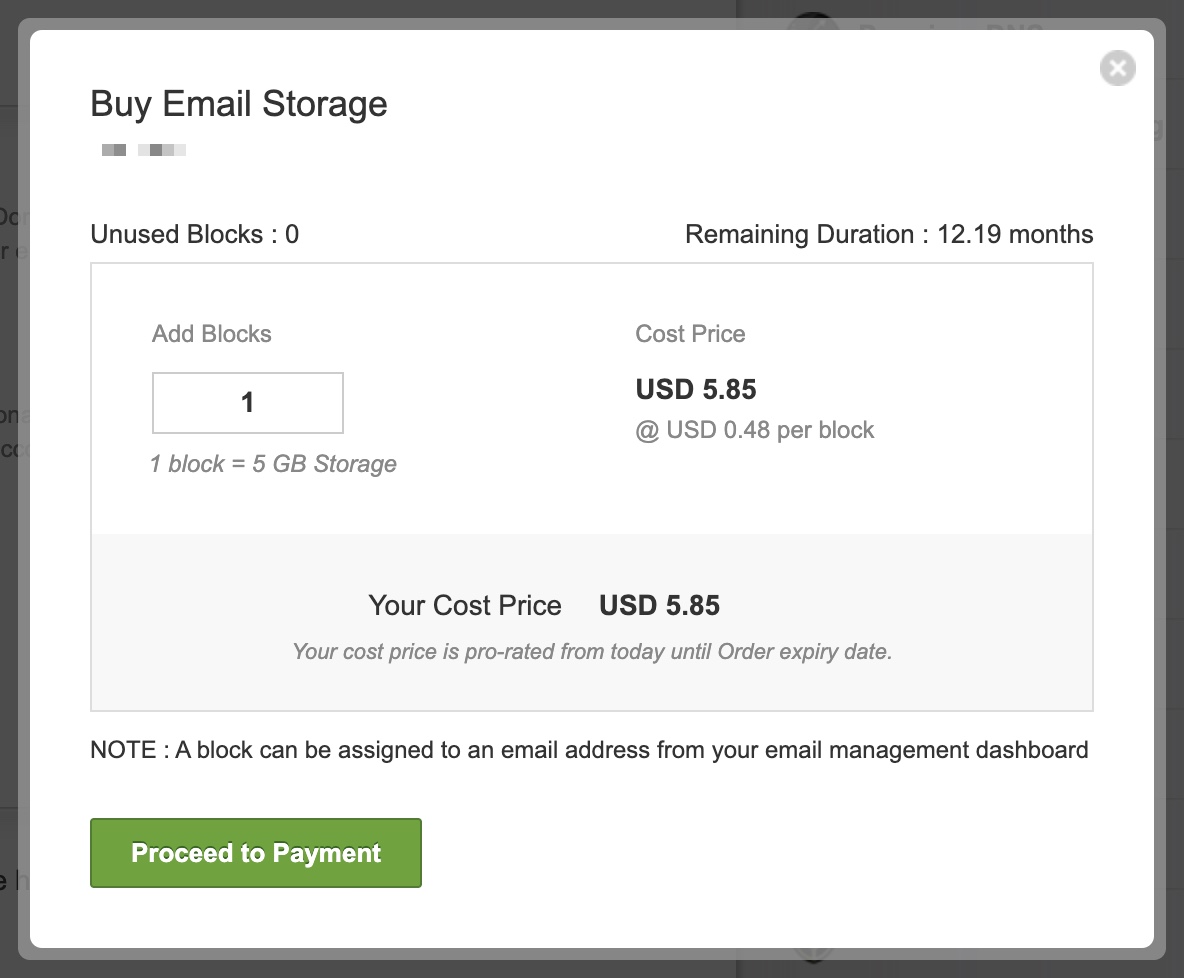
You can enter the number of blocks you want to add as storage to your email in the textbox, as illustrated in Figure 15 above. The system will show the amount that needs to be paid to purchase the additional storage, and by clicking the Proceed to payment button, you will be redirected to the payment gateway section; upon successful payment, the email storage will be added to your existing user.
Conclusion
Managing Business and Enterprise email services through the My Domain Control Panel is straightforward. Following these instructions gives you a seamless experience navigating and customizing your email services.