List of Help Articles
Overview of Batoi Hosting Renew Your Domain Name with Batoi Protect or Lock Your Domain Name with Batoi View Action History of Your Domain Name Manage Name Servers for a Domain Name Forward a Domain Name to a Different Website Handle Privacy Protection for a Domain Name Domain Name Whois Data Reminders from Batoi Modify the Contact Details of Your Domain Name Backup Your Website with cPanel on Linux Managing DNS Records in Linux Hosting via cPanel: A Comprehensive Guide Create FTP Accounts in Your Linux Hosting using cPanel Backup and Restore Your Linux Hosting Account via cPanel Effortless 301 and 302 Redirects in Linux Hosting: A Detailed cPanel Guide How to Seamlessly Manage DNS Records with Batoi's Premium DNS Service through Your Domain Control Panel Mastering Contact Management within Batoi's Domain Control Panel Step-by-Step Guide: Managing Business/Enterprise Email via My Domain Control Panel How to Efficiently Manage Users and Assign Administrative Roles in Google Workspace A Complete Guide to Purchasing and Managing Google Workspace through Batoi Hosting Control Panel Effortless Migration from cPanel Email to Google Workspace: Your Step-by-Step Guide Setting Up Google Workspace Using cPanel: A Comprehensive Guide How to Add an SPF Record to Your DNS Settings for Email Security Setup of Microsoft Office 365 Using cPanel: A Comprehensive Guide Reviewing Your Linux Hosting Resource Allocation and Usage in cPanel Creating and Managing Sub-domains with cPanel on Linux How Do I Emulate DNS Change on My PC? Effortless Migration from cPanel Email to Microsoft Office 365: Your Step-by-Step Guide How to Set up MFA for Your Microsoft Office 365 Outlook Account Setting up POP or IMAP Email on an Apple iPhone Creating and Managing MySQL Databases with cPanel on Linux How to Fix the Error '0x800CCC1A' in Microsoft Outlook? How to Fix the Error '0x800CCC78' in Microsoft Outlook? Setting up Email Account on Your Mac Mail Application Installing WordPress within Your Hosting Account with cPanel on Linux Setting up POP or IMAP Email on an Android Phone Setting up Mozilla Thunderbird as Your Email Client in Windows PC Setting up Microsoft Outlook as Your Email Client in Your Windows PC Setting up Mozilla Thunderbird as Your Email Client in Mac Creating Email Accounts with cPanel on Linux Creating More FTP Accounts with cPanel on Linux Accessing cPanel and Webmail on Linux Generate a Certificate Signing Request (CSR) Generate the Domain Secret or the Authorization Code for Your Domain Name How to Fix the Error '0x800CCCDD' in Microsoft Outlook with IMAP Server? Comprehensive Guide to Managing PHP Settings in cPanel on Your Linux Hosting Account Integration of Google Analytics on Your Website My Emails Are Bouncing Back. What Should I Do? What should I do when I cannot access my email or website on My Windows PC? Password Protect Files and Folders with cPanel on Linux Transfer Your Domain Name from your Current Registrar to Batoi Uploading Your Files with an FTP client (FileZilla)

Integration of Google Analytics on Your Website


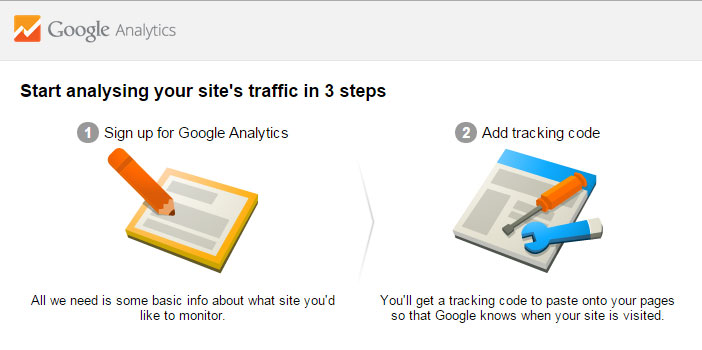
This article provides the detailed information on how you can create a Google Analytics account and can integrate it to your website by following some steps.

To integrate 'Google Analytics' to your website, you need to have a Google account.

If you don't have a Google account, then go to http://www.google.co.in/analytics/ and click on 'Sign In' and then on 'Google Analytics' on the top right side. There you can find a link to create an account.

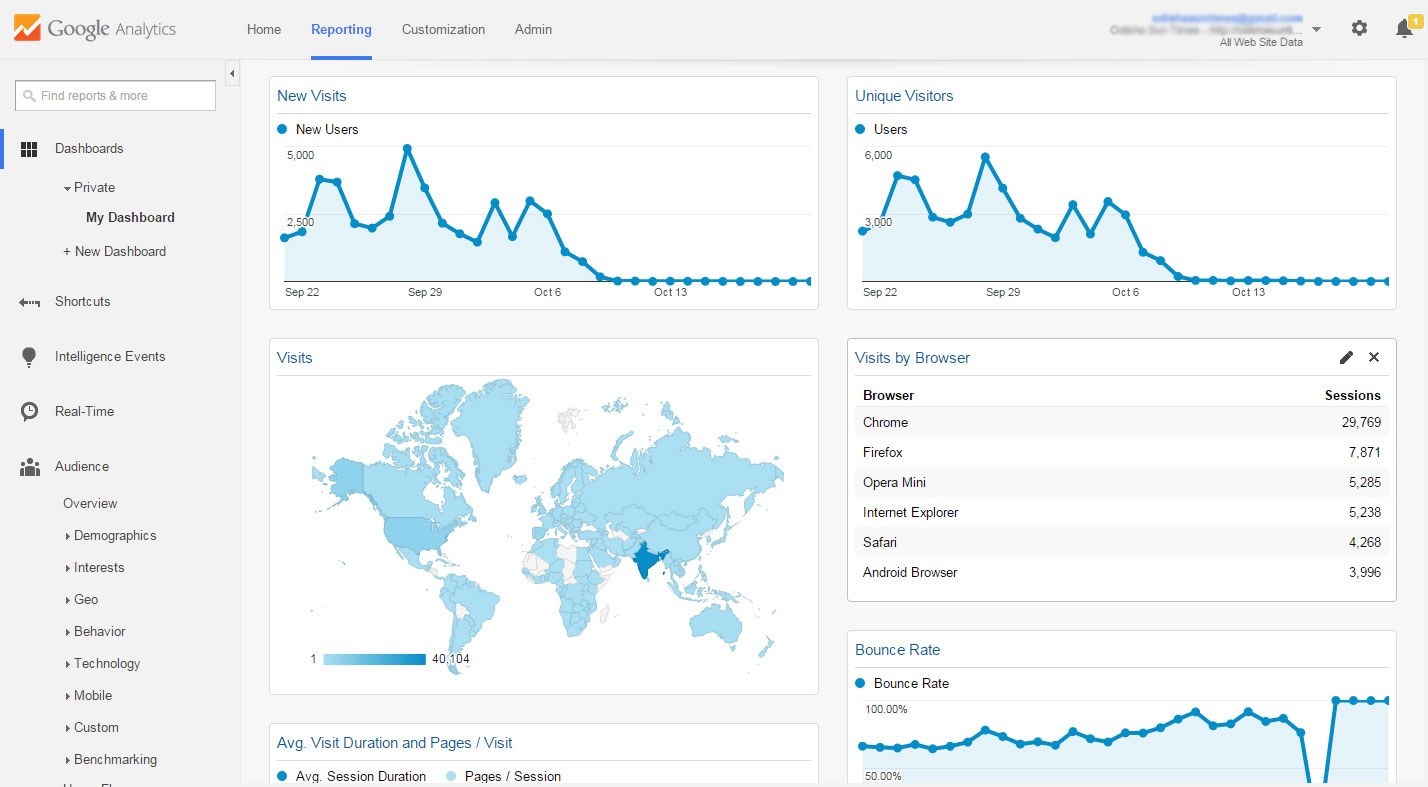
Once you have successfully created your account, login to the account by providing your details and you will find the dashboard as shown in Figure 1.

Figure 1
Figure 1

Now click the link 'Sign Up for Google Analytics' and Google will take you to the page where you need to fill in the details as shown in Figure 2. Here you need to choose 'Universal Analytics' under 'Website' as shown Figure 2.

Figure 2
Figure 2

Next you need to fill in the details for your website like 'Account Name', 'Website Name', 'Website URL', 'Industry Category' and 'Reporting Time Zone' as shown Figure 3.

Figure 3
Figure 3

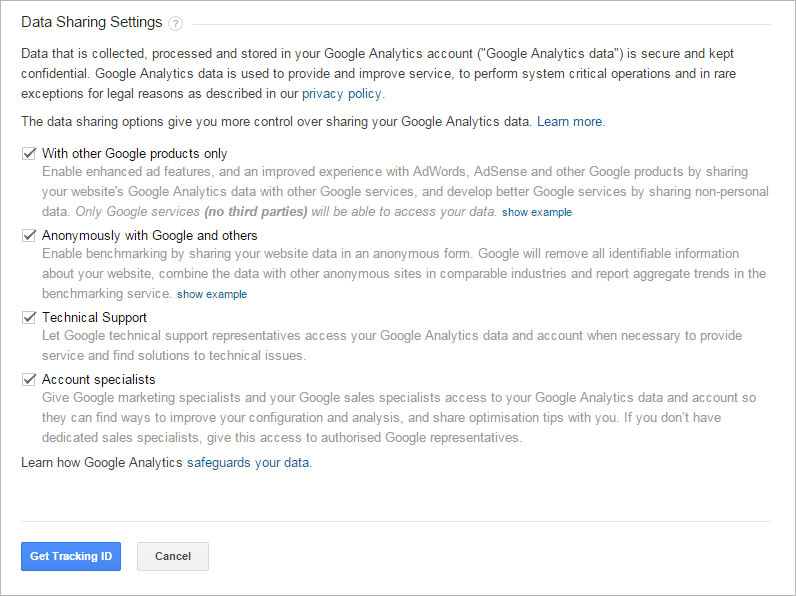
Next you need to choose the 'Data Sharing Settings' from the given check boxes as shown Figure 4 and then click the button 'Get Tracking ID' as shown Figure 4.

Figure 4
Figure 4

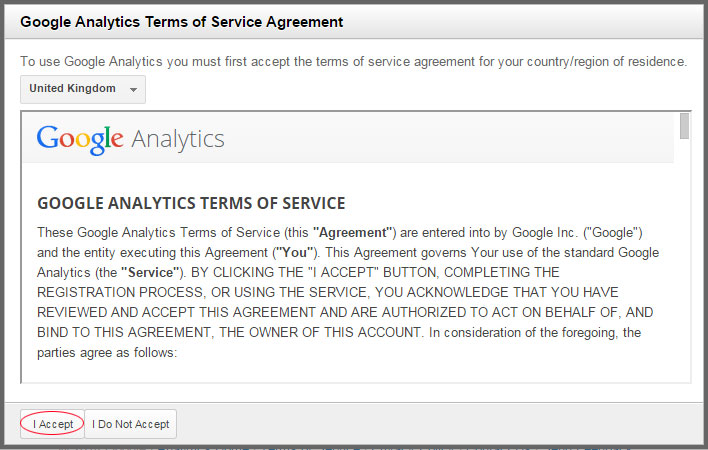
As soon as you click the button 'Get Tracking ID', Google will give you a popup screen to accept the Terms of Service for analytics as shown Figure 5. Accept the Terms of Service and Google will create the Tracking ID for your website.

Figure 5
Figure 5

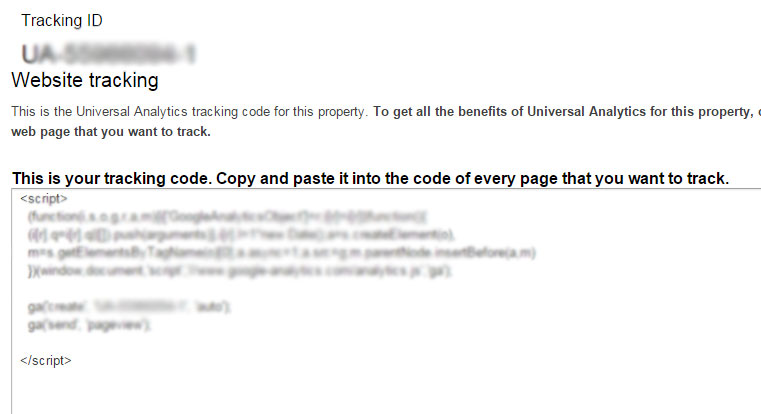
Now you can find the Google Analytics dashboard with the 'Tracking ID' and the 'Tracking Script Code' as shown Figure 6.

Figure 6
Figure 6

Now, open the FTP client installed on your computer and connect to your website through FTP.

Download the 'index.php' file to your computer. In the 'index.php' file of your website, copy the entire 'Script Code' under the 'HTML Head Section'. Save the changes to the 'index.php' file and upload it to your hosting location through FTP.

After uploading the 'index.php', refresh the 'Google Analytics' dashboard and you will find the analytics report as shown Figure 7.

Figure 7
Figure 7

Whenever you want to check your website analytics, go to http://www.google.co.in/analytics/, enter your user details and see the analytics reports of your website.