 Batoi Support
Elevate your email experience by effortlessly migrating your cPanel email accounts to Microsoft Office 365. Follow our step-by-step guide to ensure a seamless transition, packed with actionable insights and tips. Perfect for those looking to enhance their email services without losing critical data.
Introduction
Ready to upgrade your email services? This detailed guide simplifies the process of migrating your cPanel email accounts to Microsoft Office 365. Follow these steps and switch over effortlessly, preserving all your crucial data and communications.
Section 1: Setting the Stage in Microsoft Admin Console
Log in to your Google Admin console at http://portal.office365.com, and upon successful login, you will be landed on the dashboard, as illustrated in Figure 1 below.
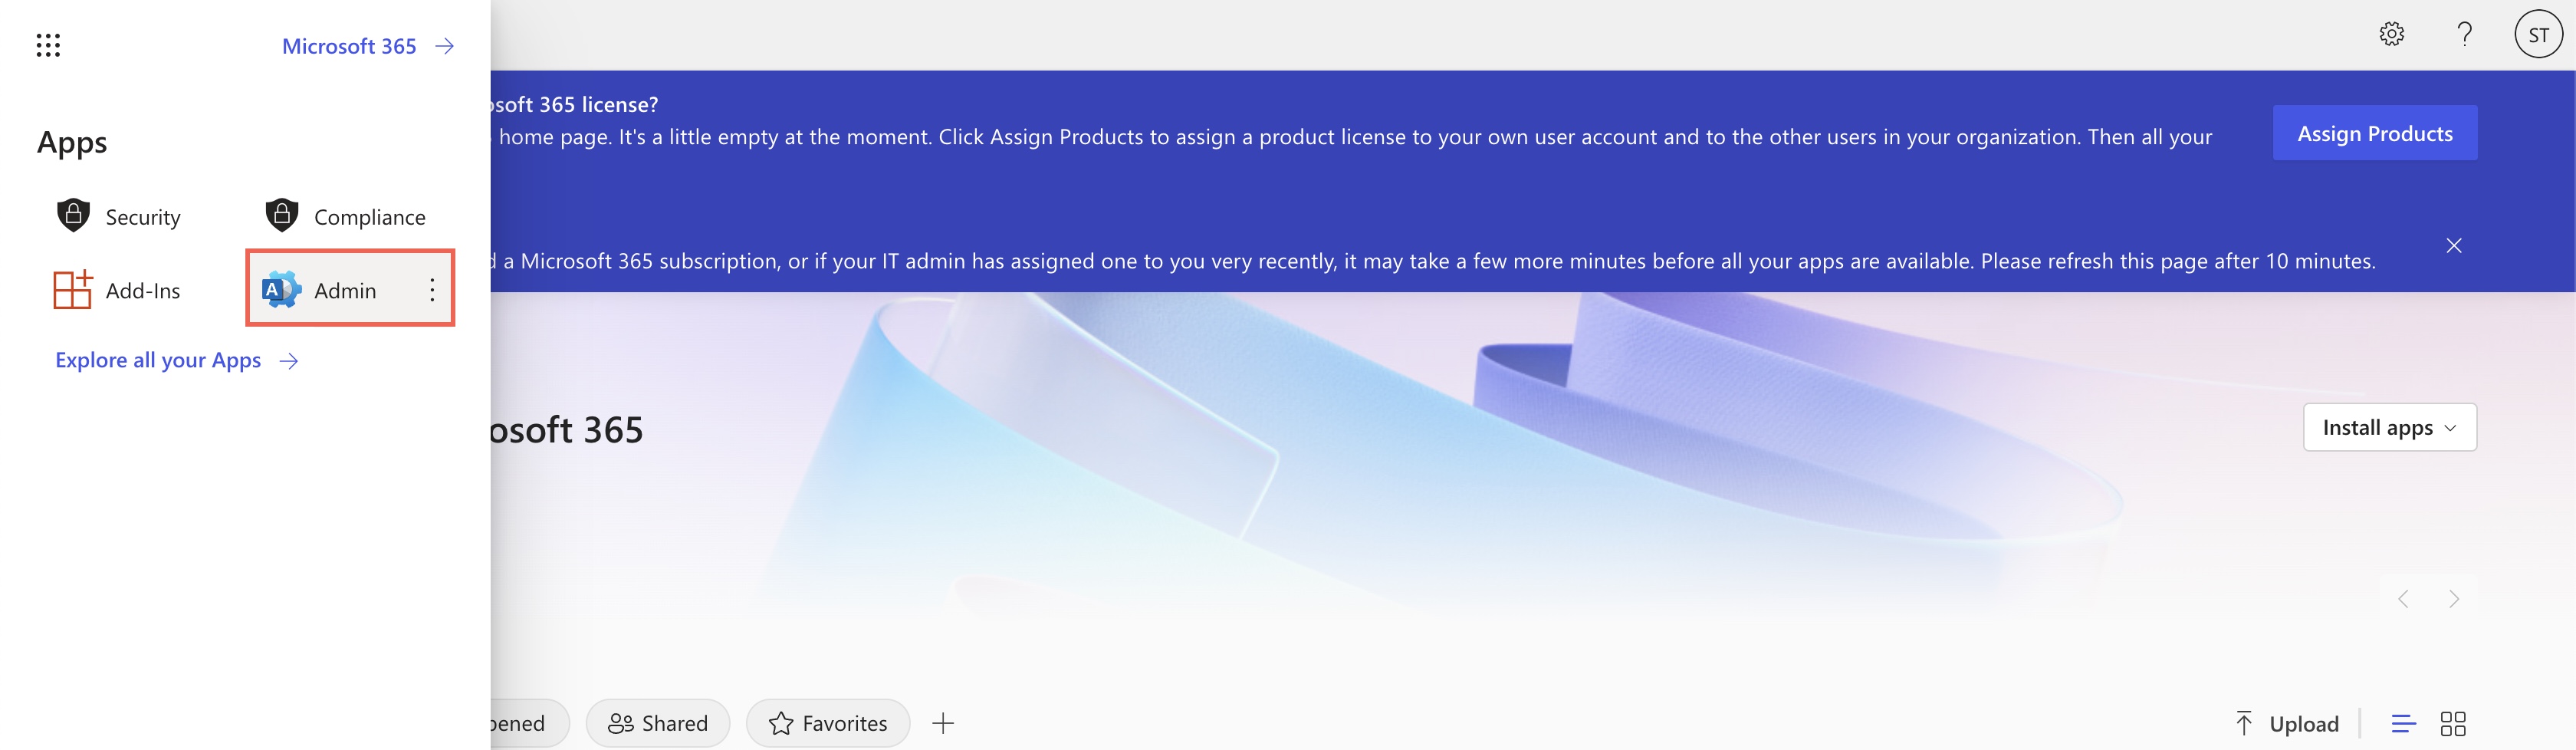
From the dashboard left side menu, click on the Admin link, as illustrated in Figure 1 above.
You will be landed on the admin panel of the dashboard, as illustrated in Figure 2 below.
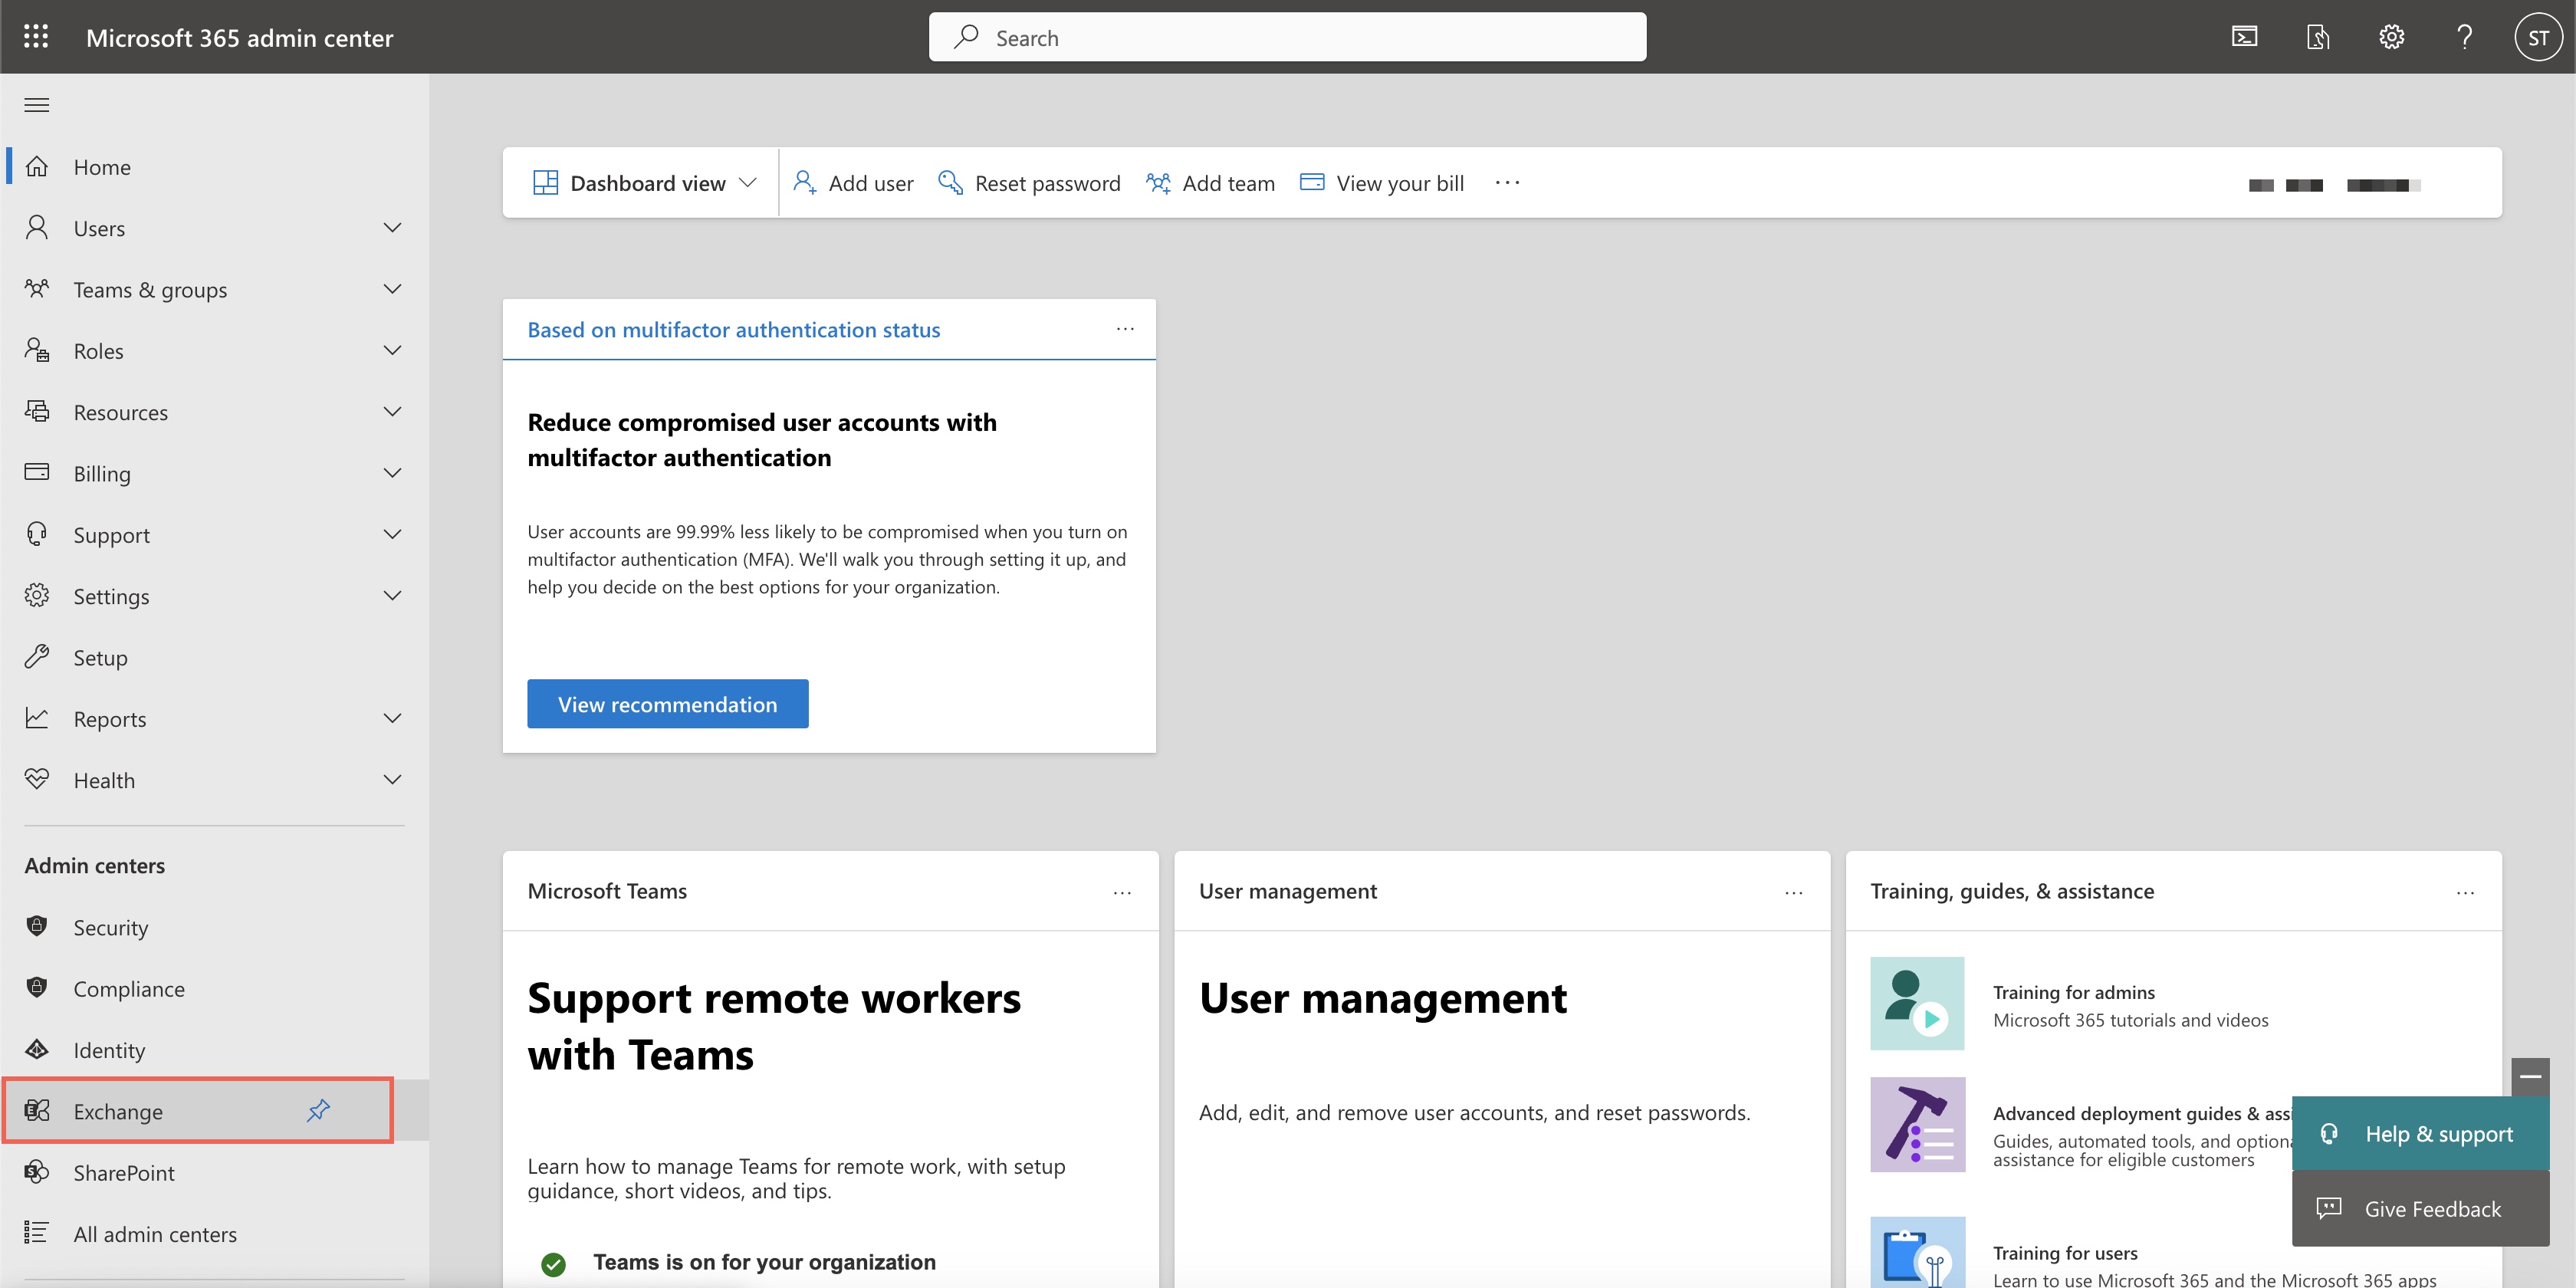
Click on the Exchange link, from the left side menu, as illustrated in Figure 2 above.
You will be landed on the exchange dashboard, as illustrated in Figure 3 below.
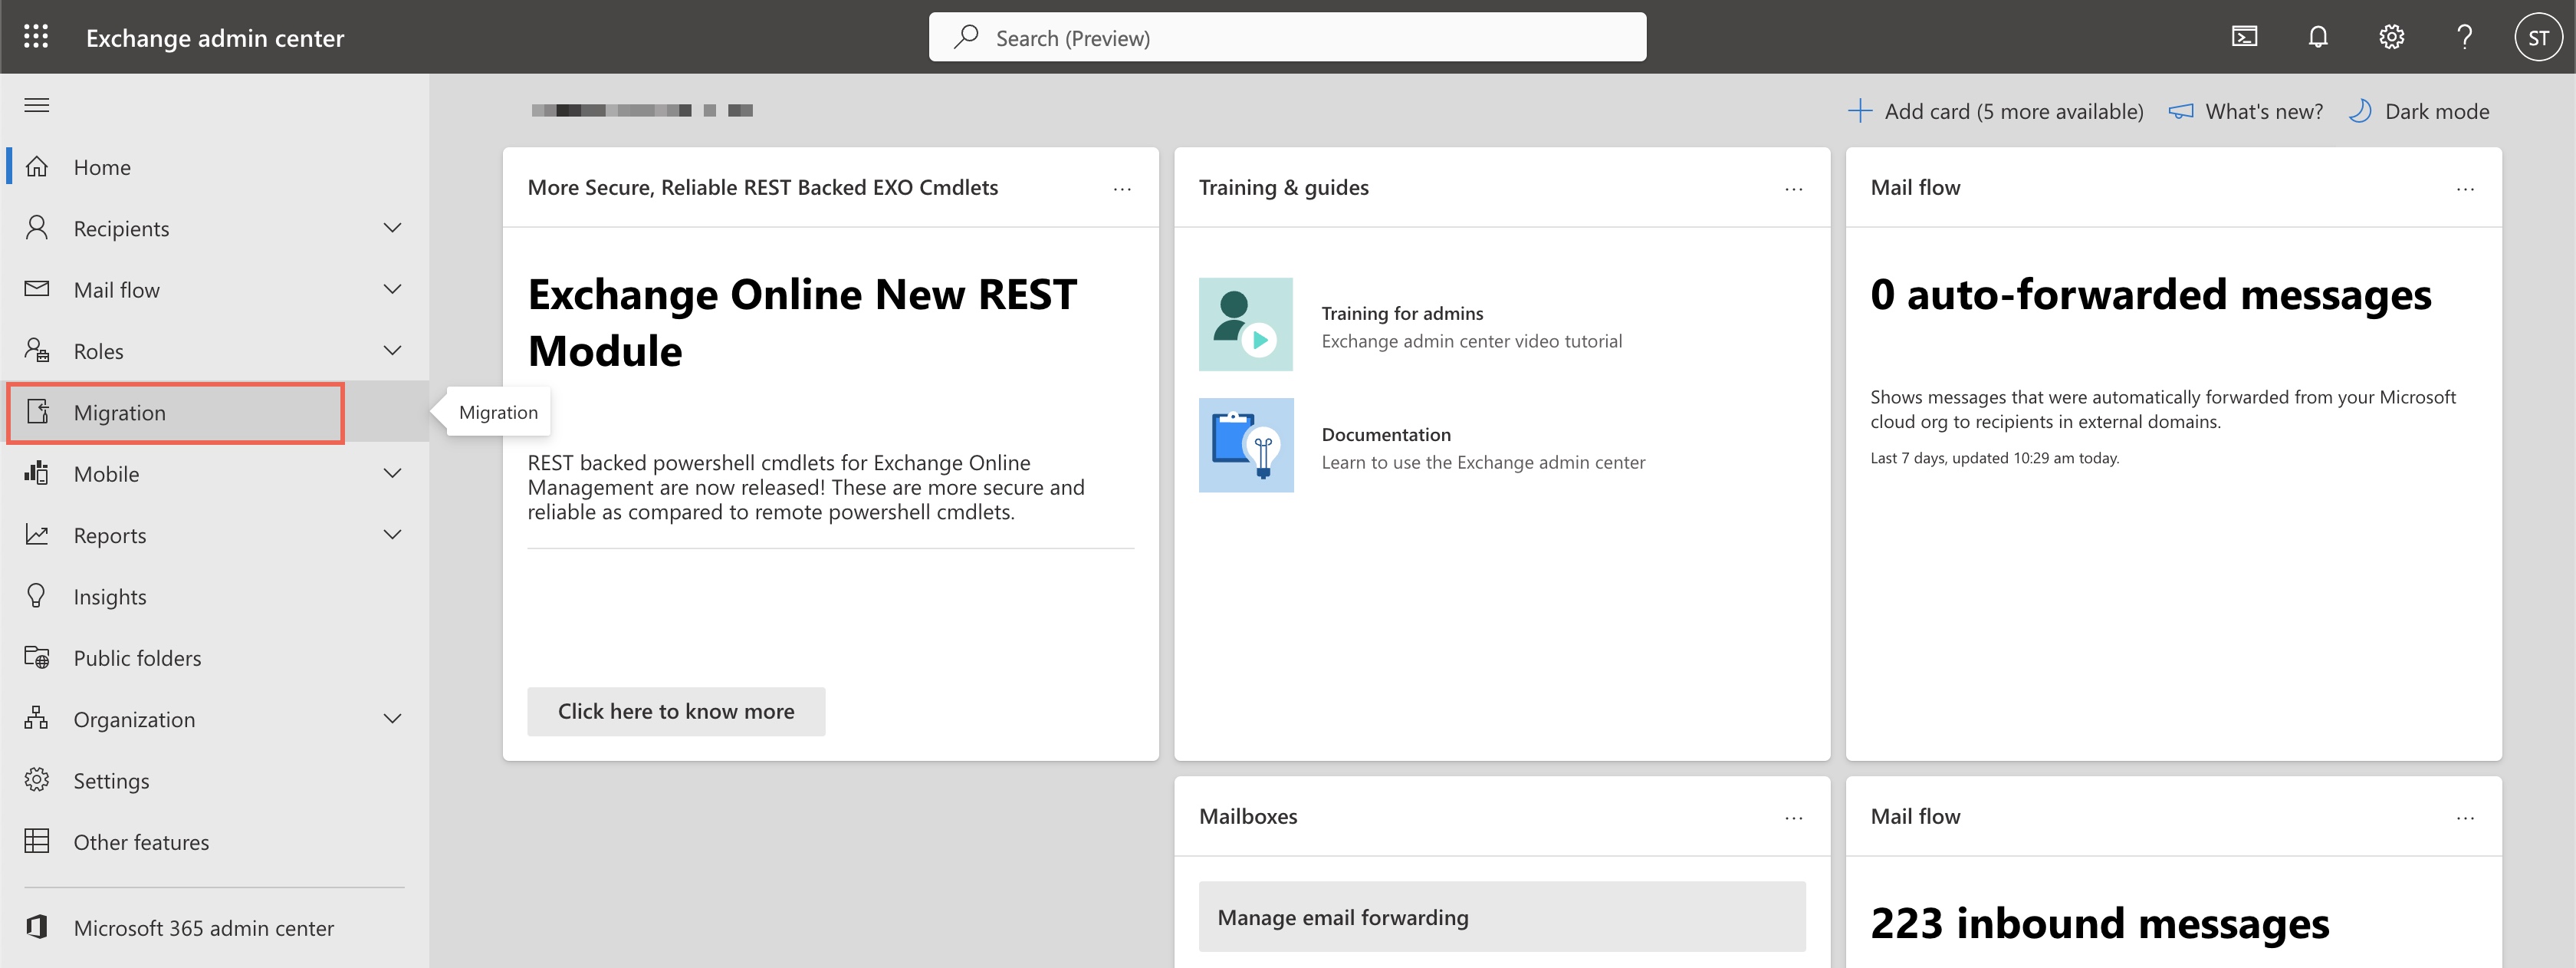
Click on the Migration link, from the left side menu, as illustrated in Figure 3 above.
Section 2: Defining Your Migration Parameters
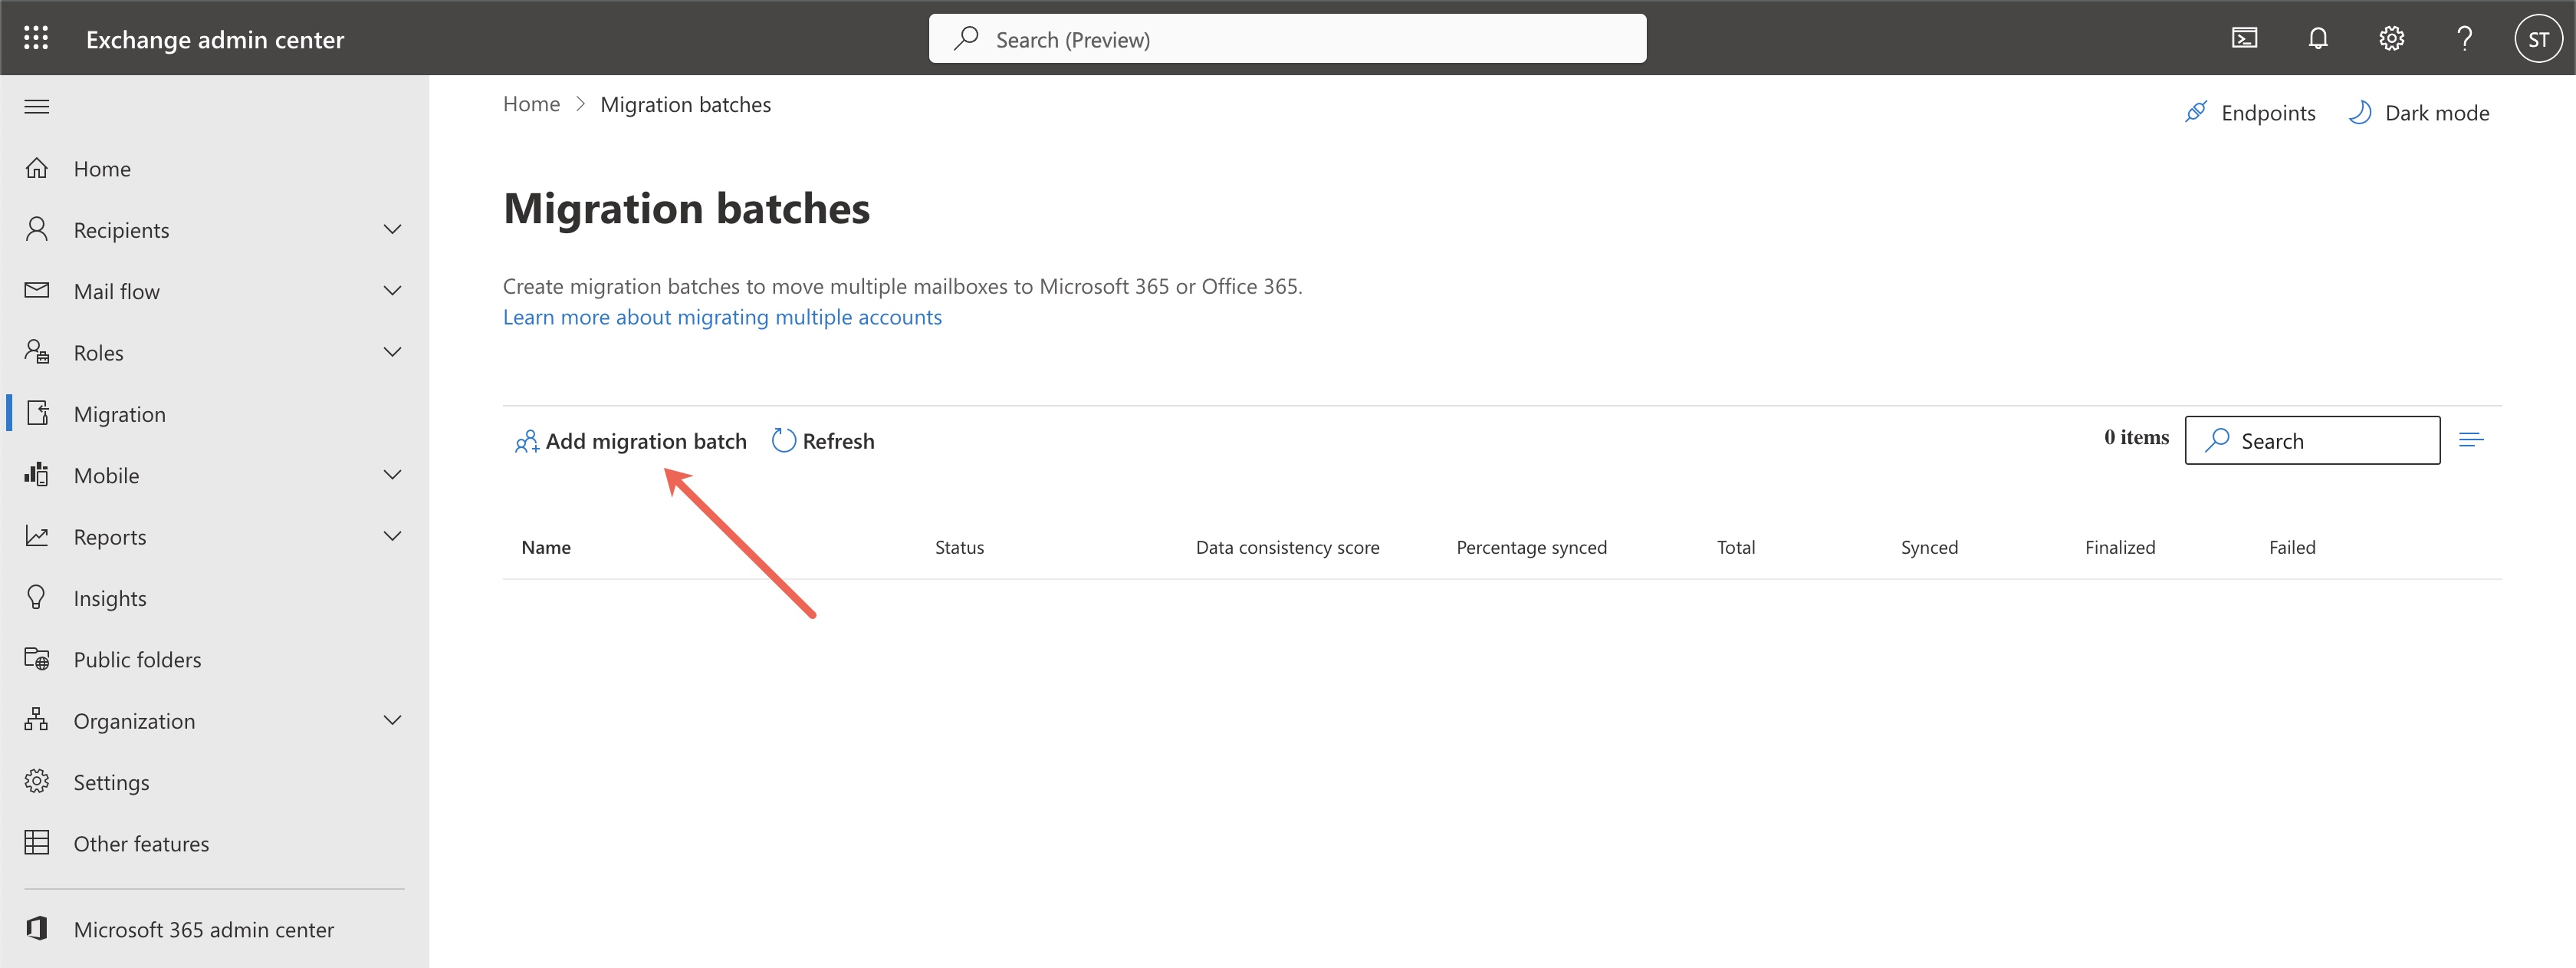
You will land on the migration list page after clicking the link, as illustrated in Figure 4 below.
Click on the Add migration batch link available at the top of the list page, as illustrated in Figure 4 below.
Section 3: Commencing Migration
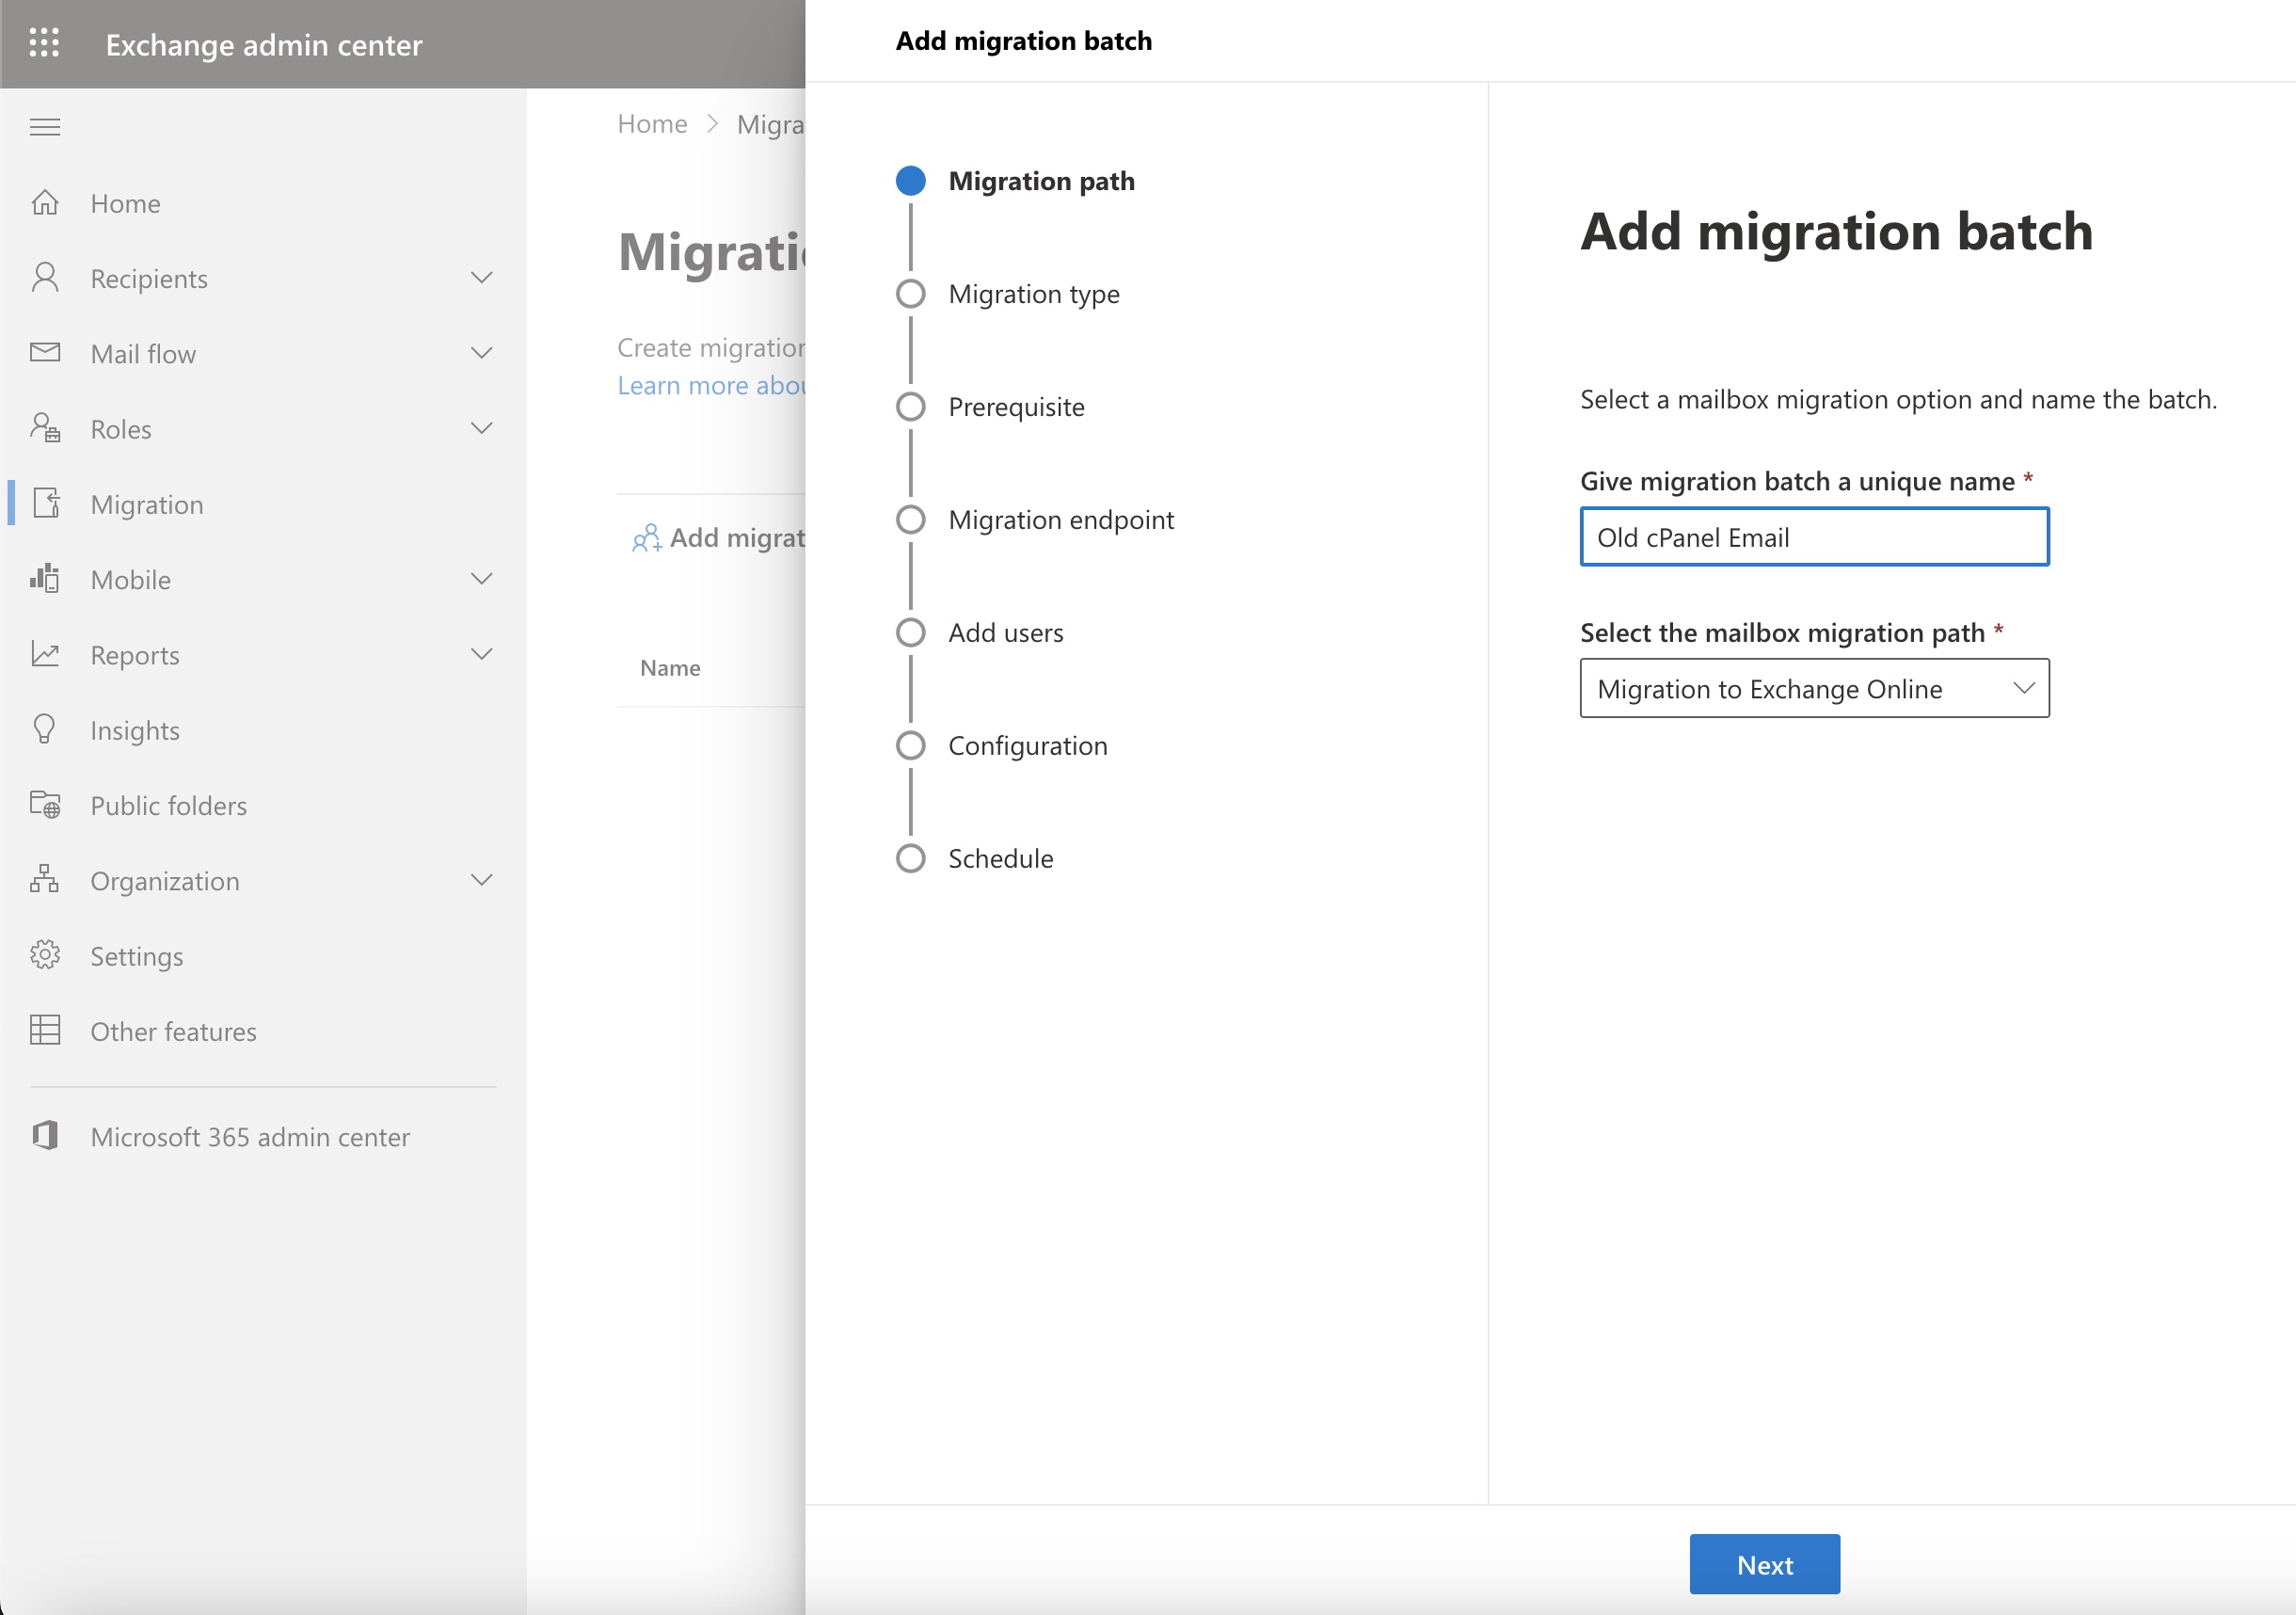
A popup window will open from the right side of your screen where you need to create the new batch, as illustrated in Figure 5 below.
Give a name to the migration batch and select the option Migration to Exchange Online from the select the mailbox migration path drop menu, as illustrated in Figure 5 below.
Click the Next button to move to the next screen.
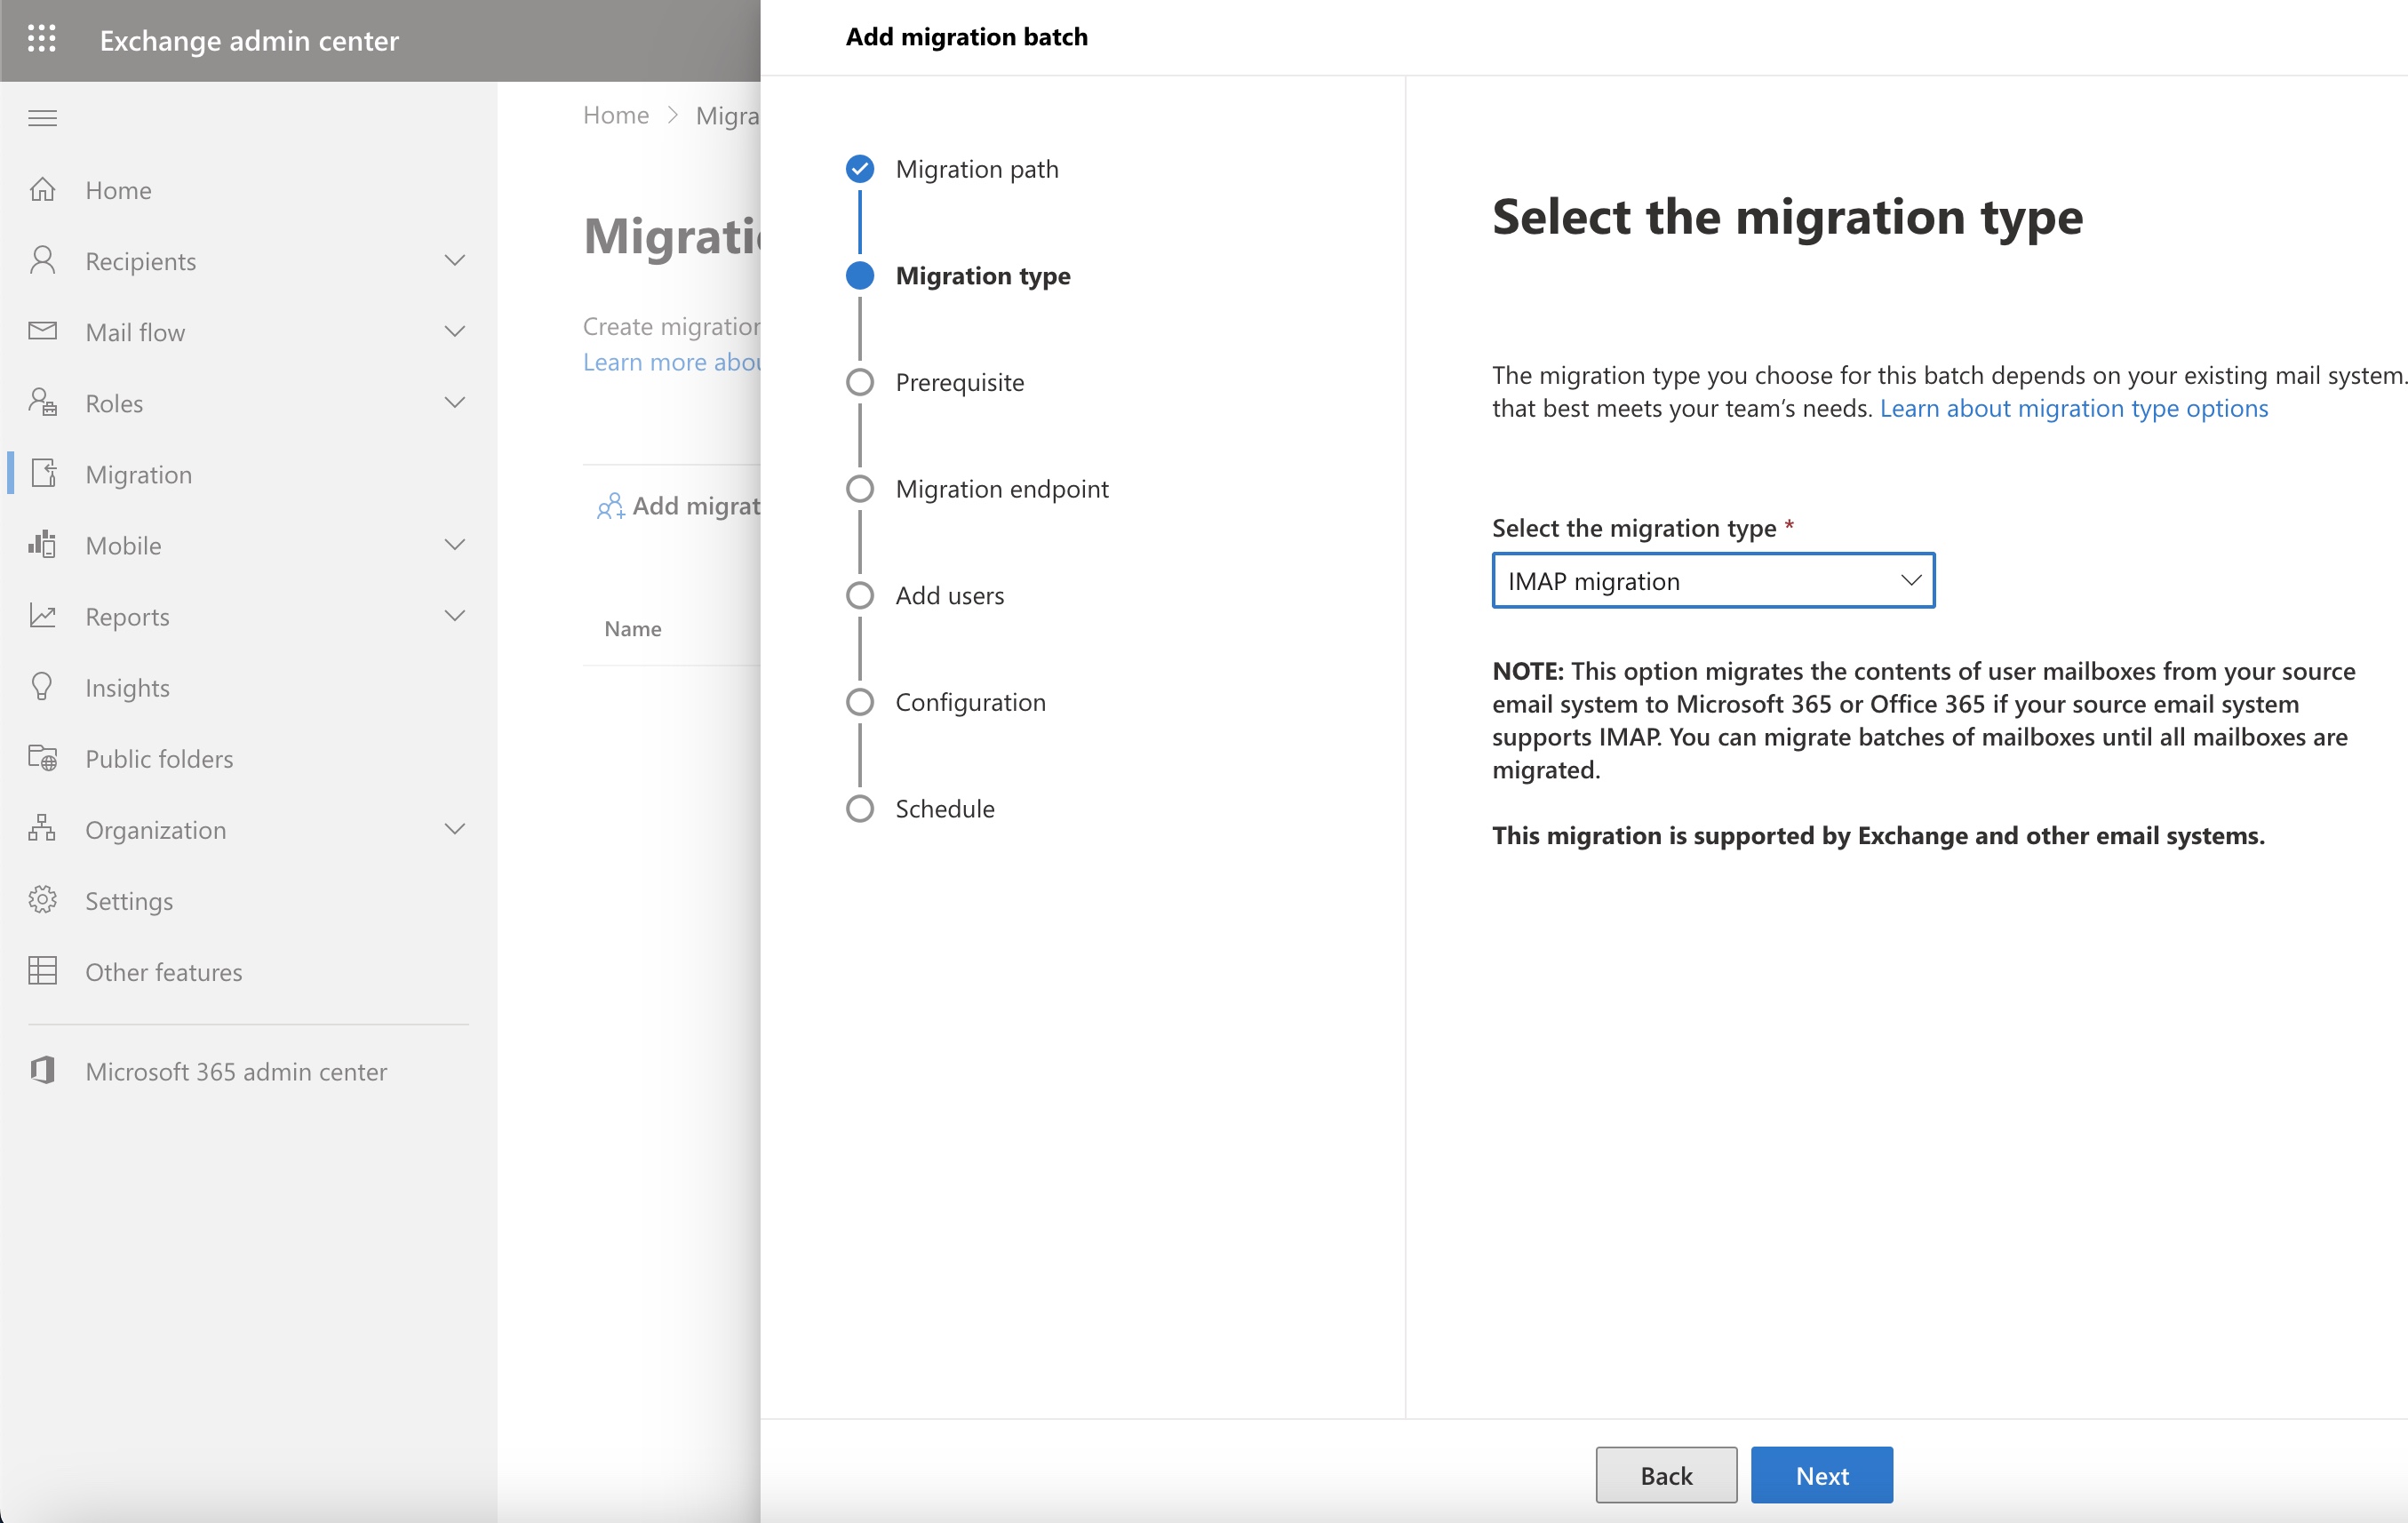
Select the migration type from the drop menu on the next screen, as illustrated in Figure 6 below. The options available are:
- Remote move migration: This option migrates the contents of mailboxes from an on-premises Exchange to Exchange Online. You can migrate batches of mailboxes until all mailboxes are migrated to the cloud.
- Staged migration: This option migrates the contents of mailboxes from an on-premises Exchange to Exchange Online. You can migrate batches of mailboxes until all mailboxes are migrated to the cloud.
- Cutover migration: This option migrates the contents of mailboxes from an on-premises Exchange to Exchange Online. You can migrate batches of mailboxes until all mailboxes are migrated to the cloud.
- Cross-tenant migration: This option migrates the contents of mailboxes from one Exchange Online Organization (tenant) to another Exchange Online Organization (tenant). You can migrate batches of mailboxes until all desired mailboxes are migrated to the other tenant.
- Google Workspace migration: This option migrates the contents of mailboxes from a Google Workspace (Gmail) organization to Exchange Online. You can migrate batches of mailboxes until all mailboxes are migrated to the cloud.
- IMAP migration: This option migrates the contents of user mailboxes from your source email system to Microsoft 365 or Office 365 if your source email system supports IMAP. You can migrate batches of mailboxes until all mailboxes are migrated.
Select the IMAP migration from the drop menu, as illustrated in Figure 6 below.
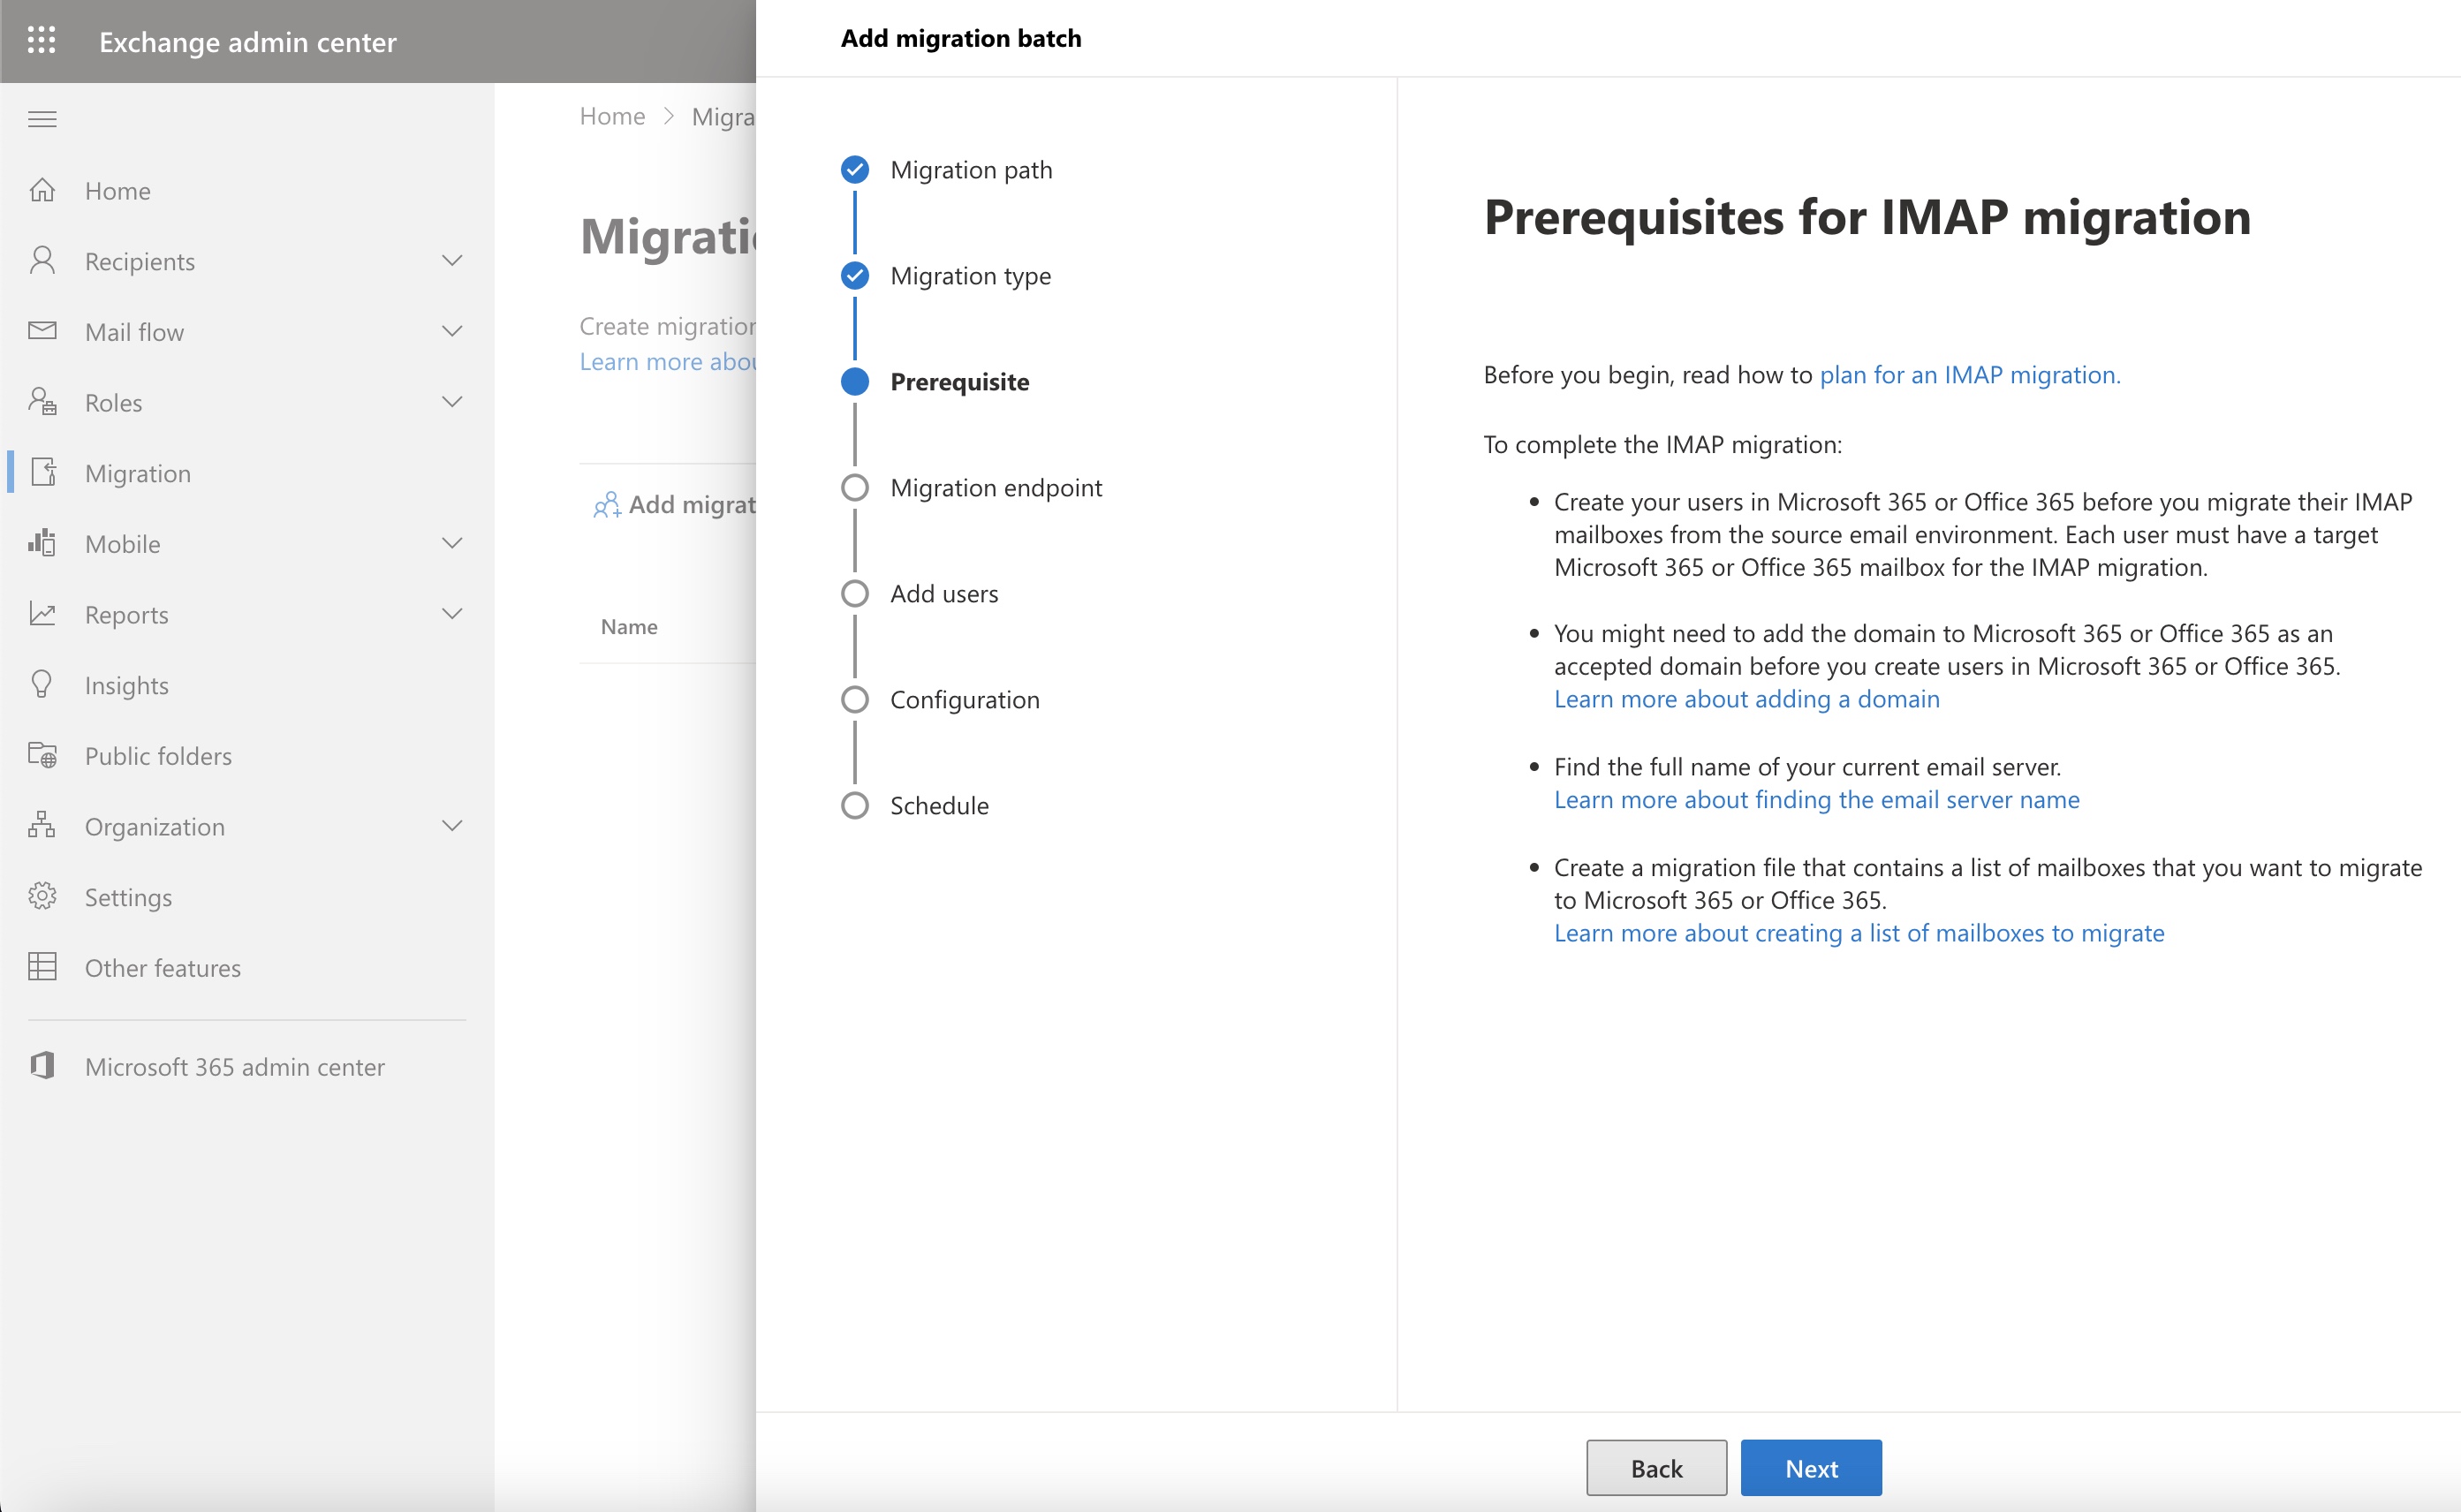
The next screen shows the prerequisites for the migration, as illustrated in Figure 7 below. Go through the details and finish all the prerequisites before moving to the next step.
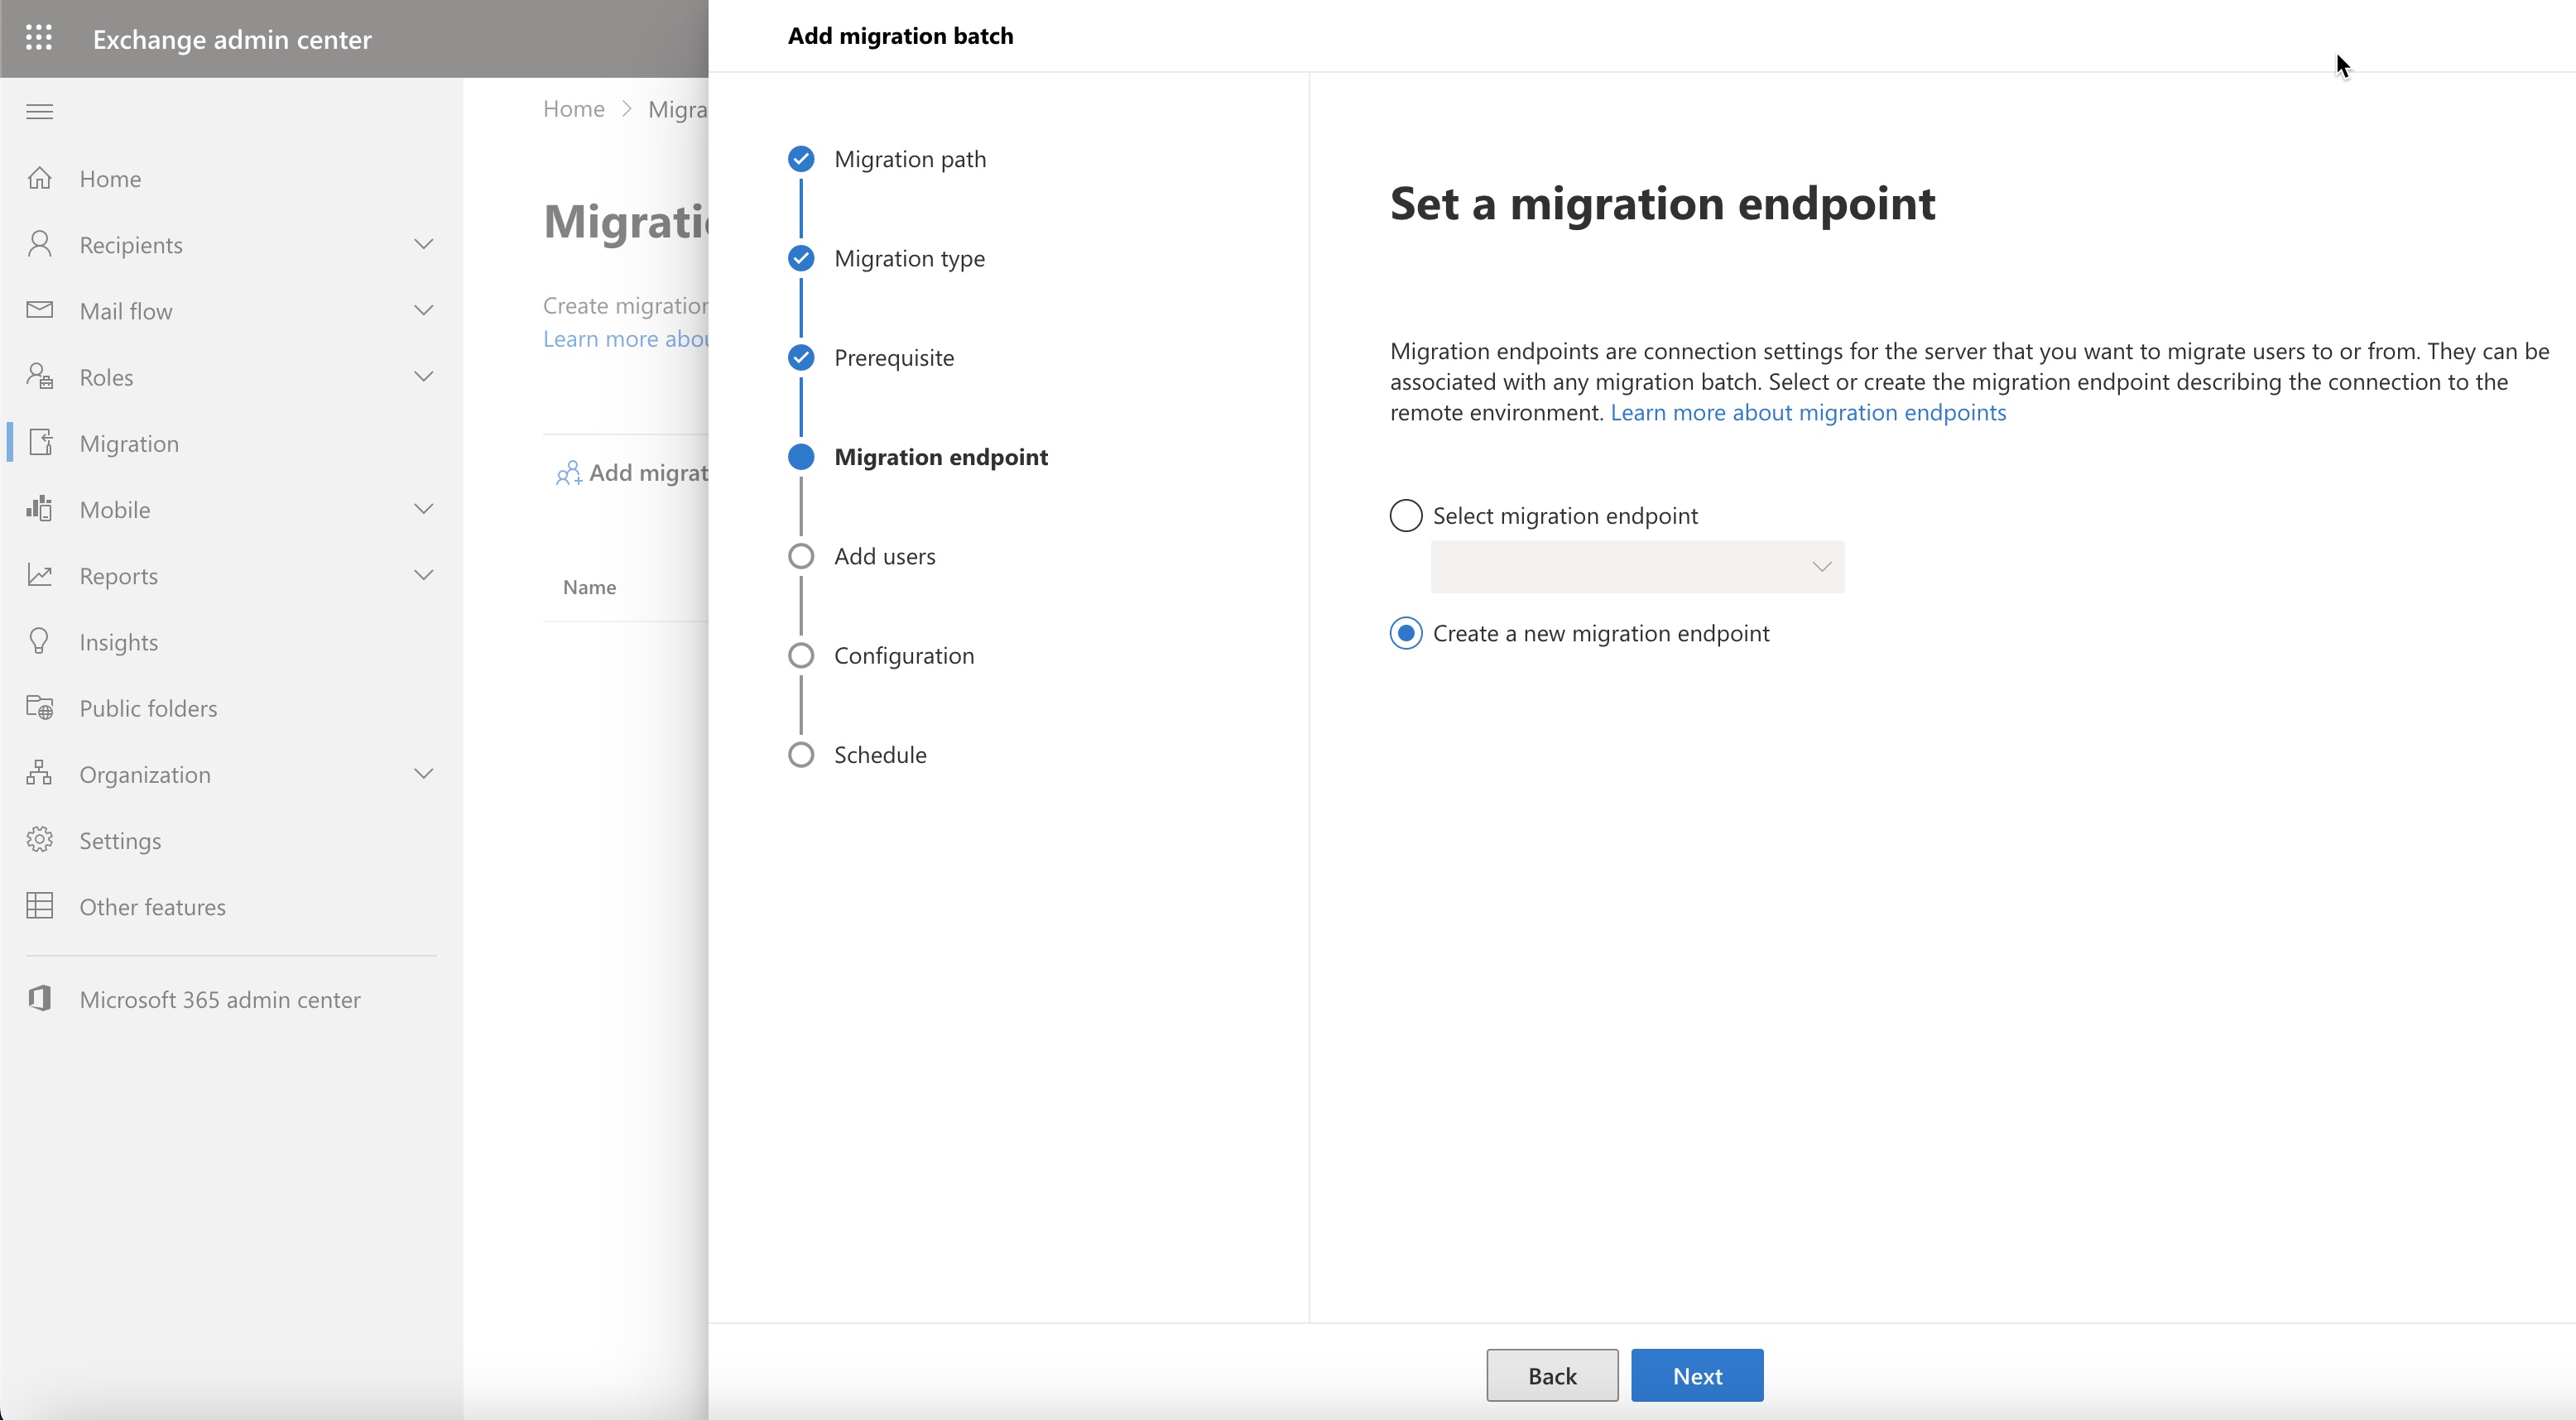
The next screen will allow you to set the endpoints. This is basically the source location setup widget. Select the Create a new migration endpoint radio button and click next, as illustrated in Figure 8 below.
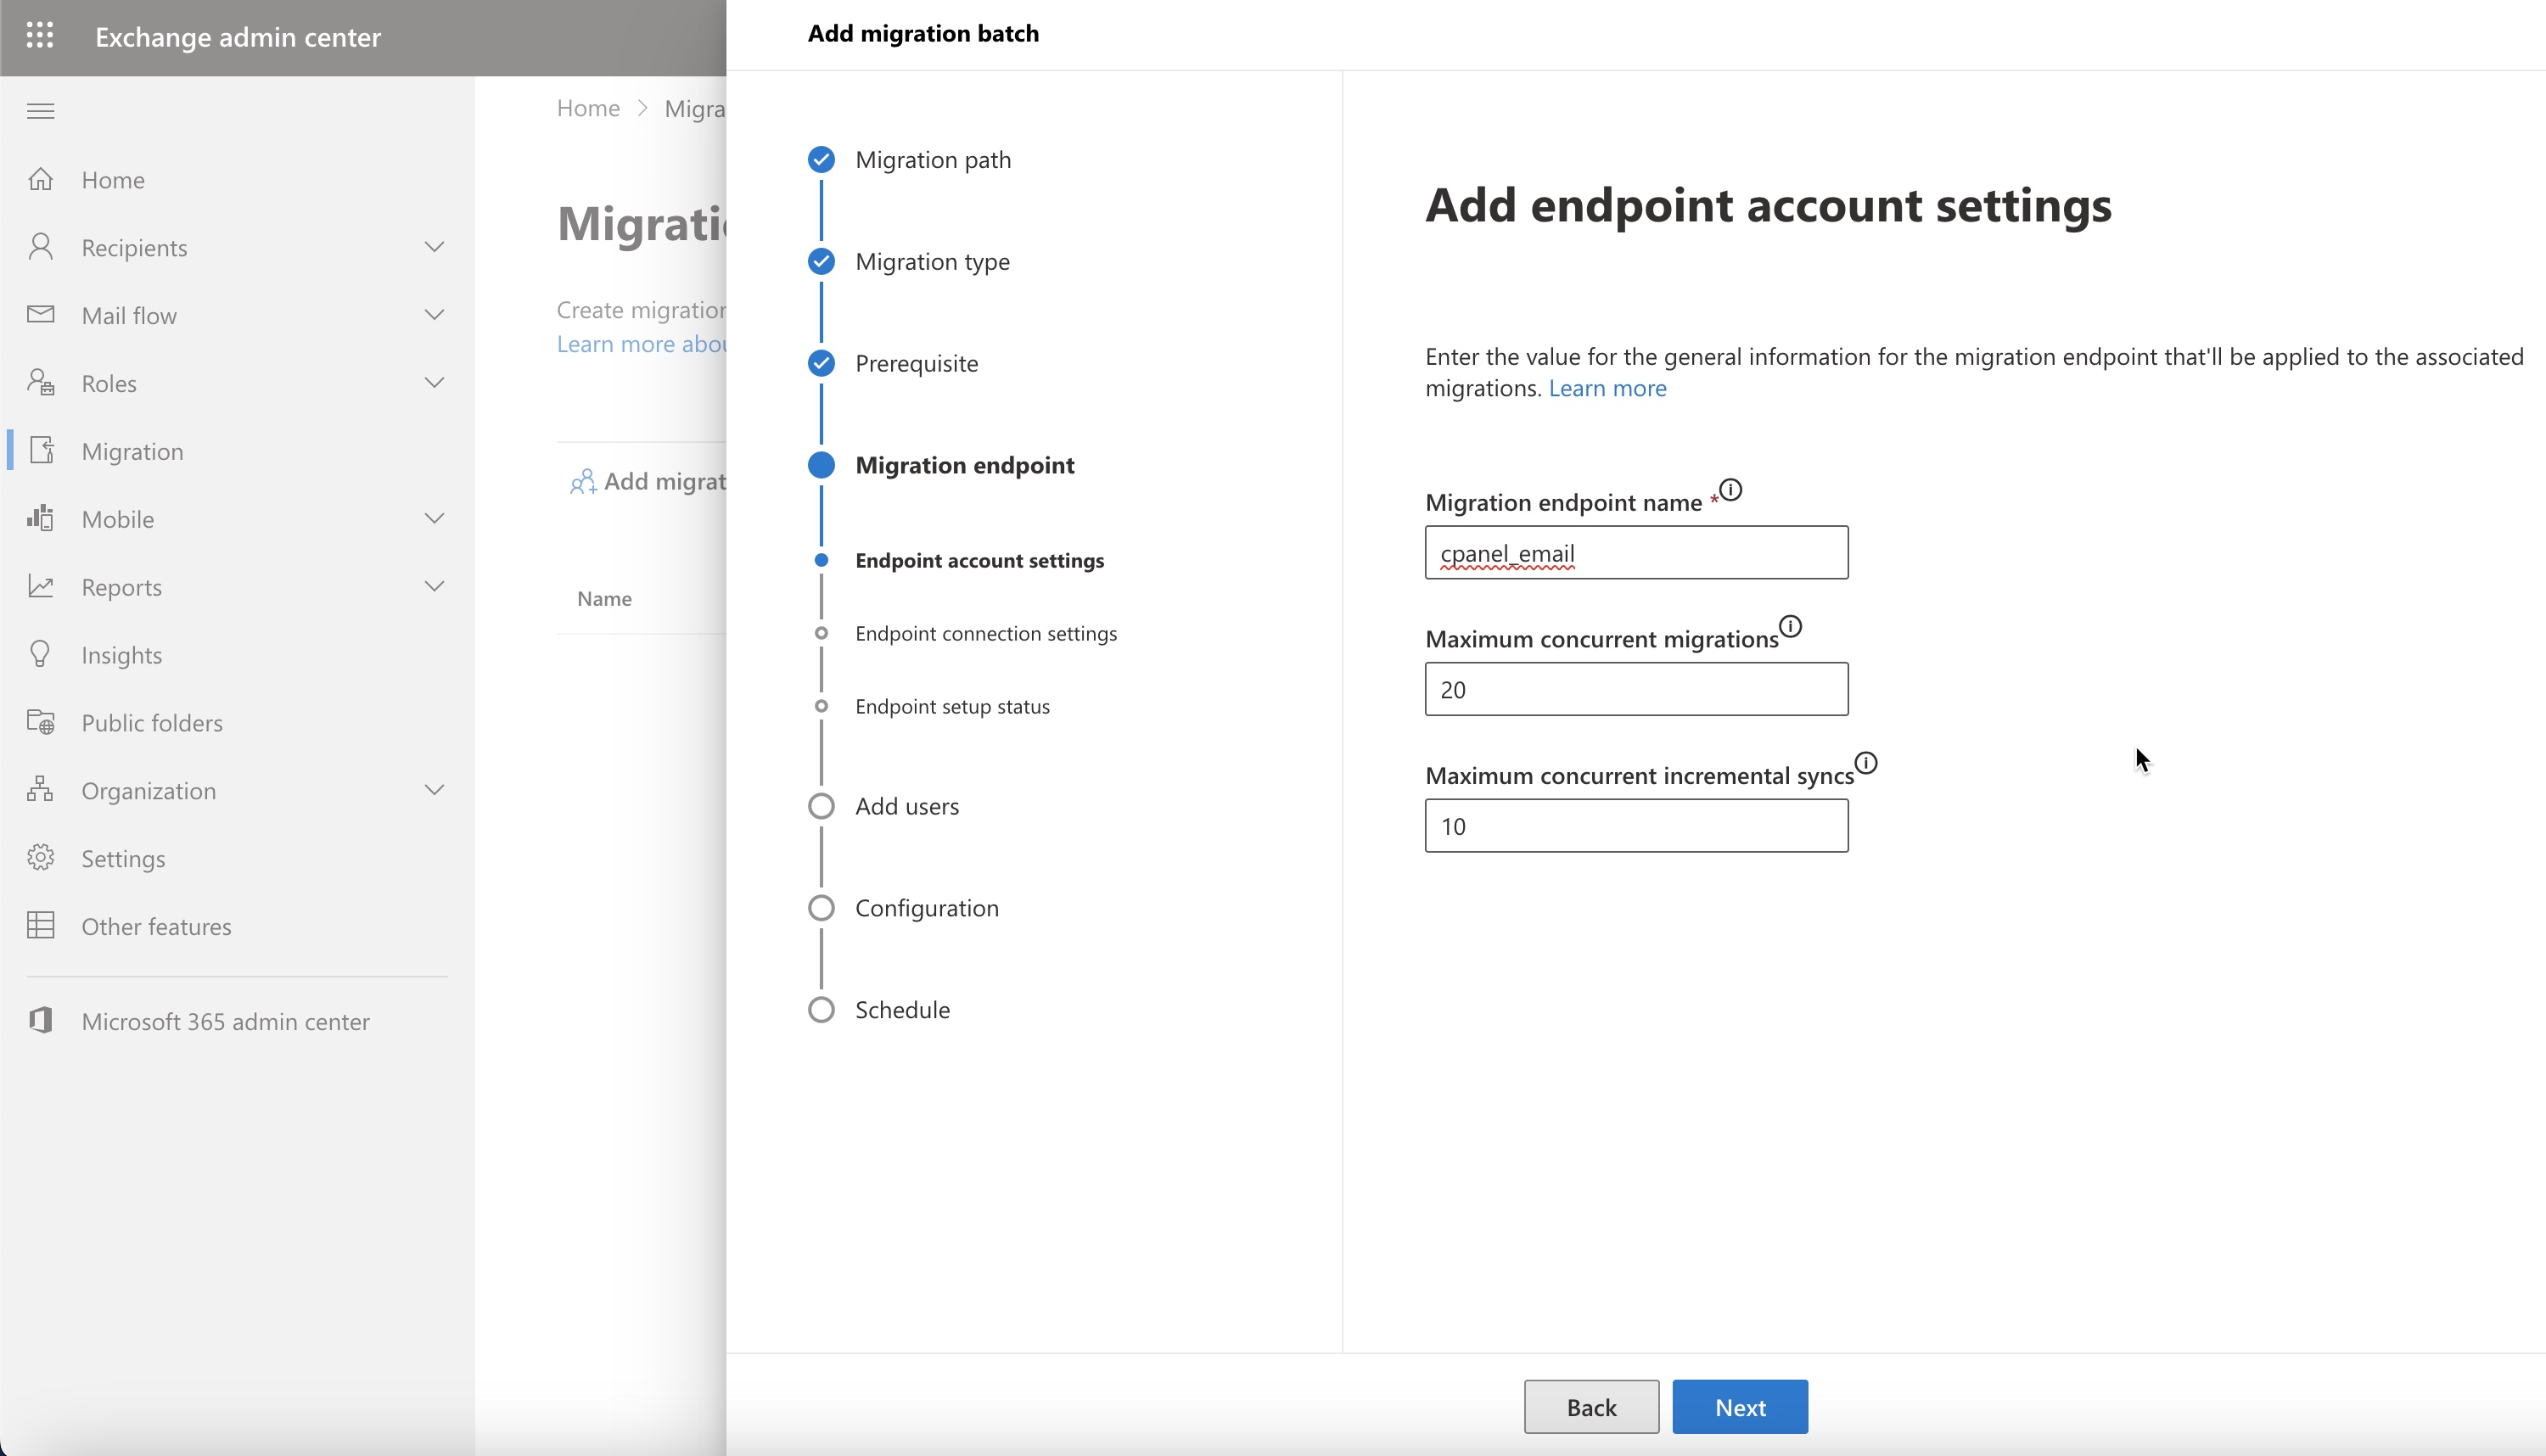
You can set the endpoints in three steps. In the first step, you need to add the source account details, as illustrated in Figure 9 below. Here you need to give a name to your endpoint setting and click the Next button.
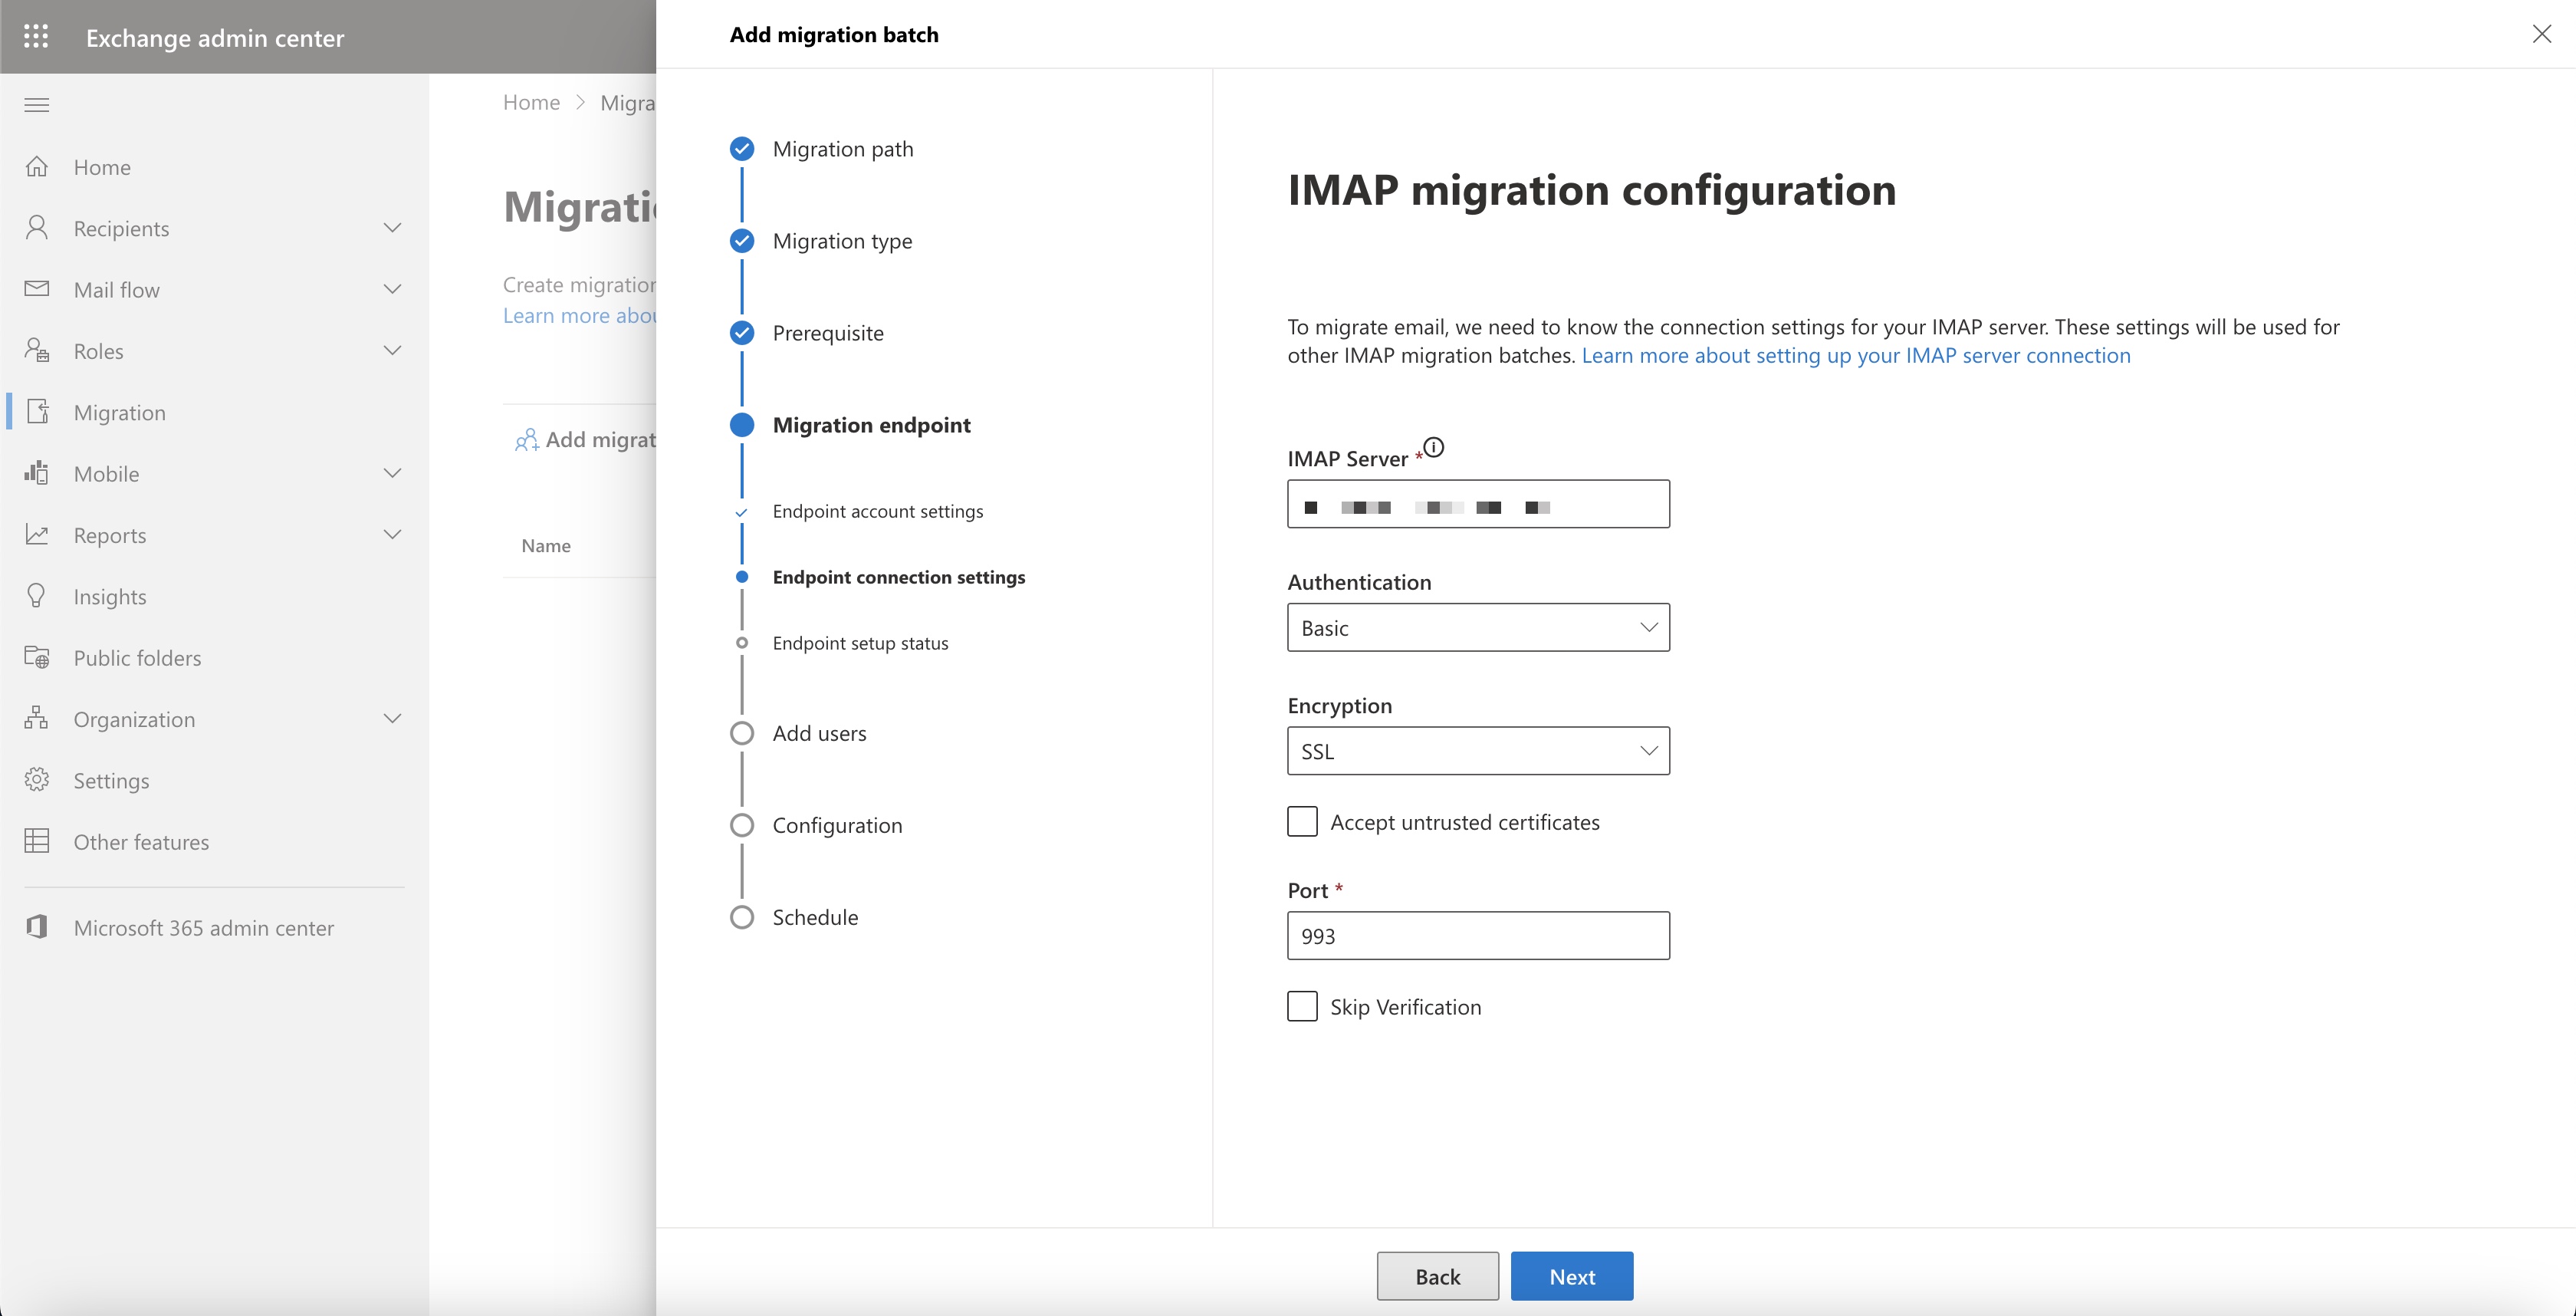
In the next screen, you need to enter the IMAP Server details along with the Encryption type and Port details and click the Next button, as illustrated in Figure 10 below.
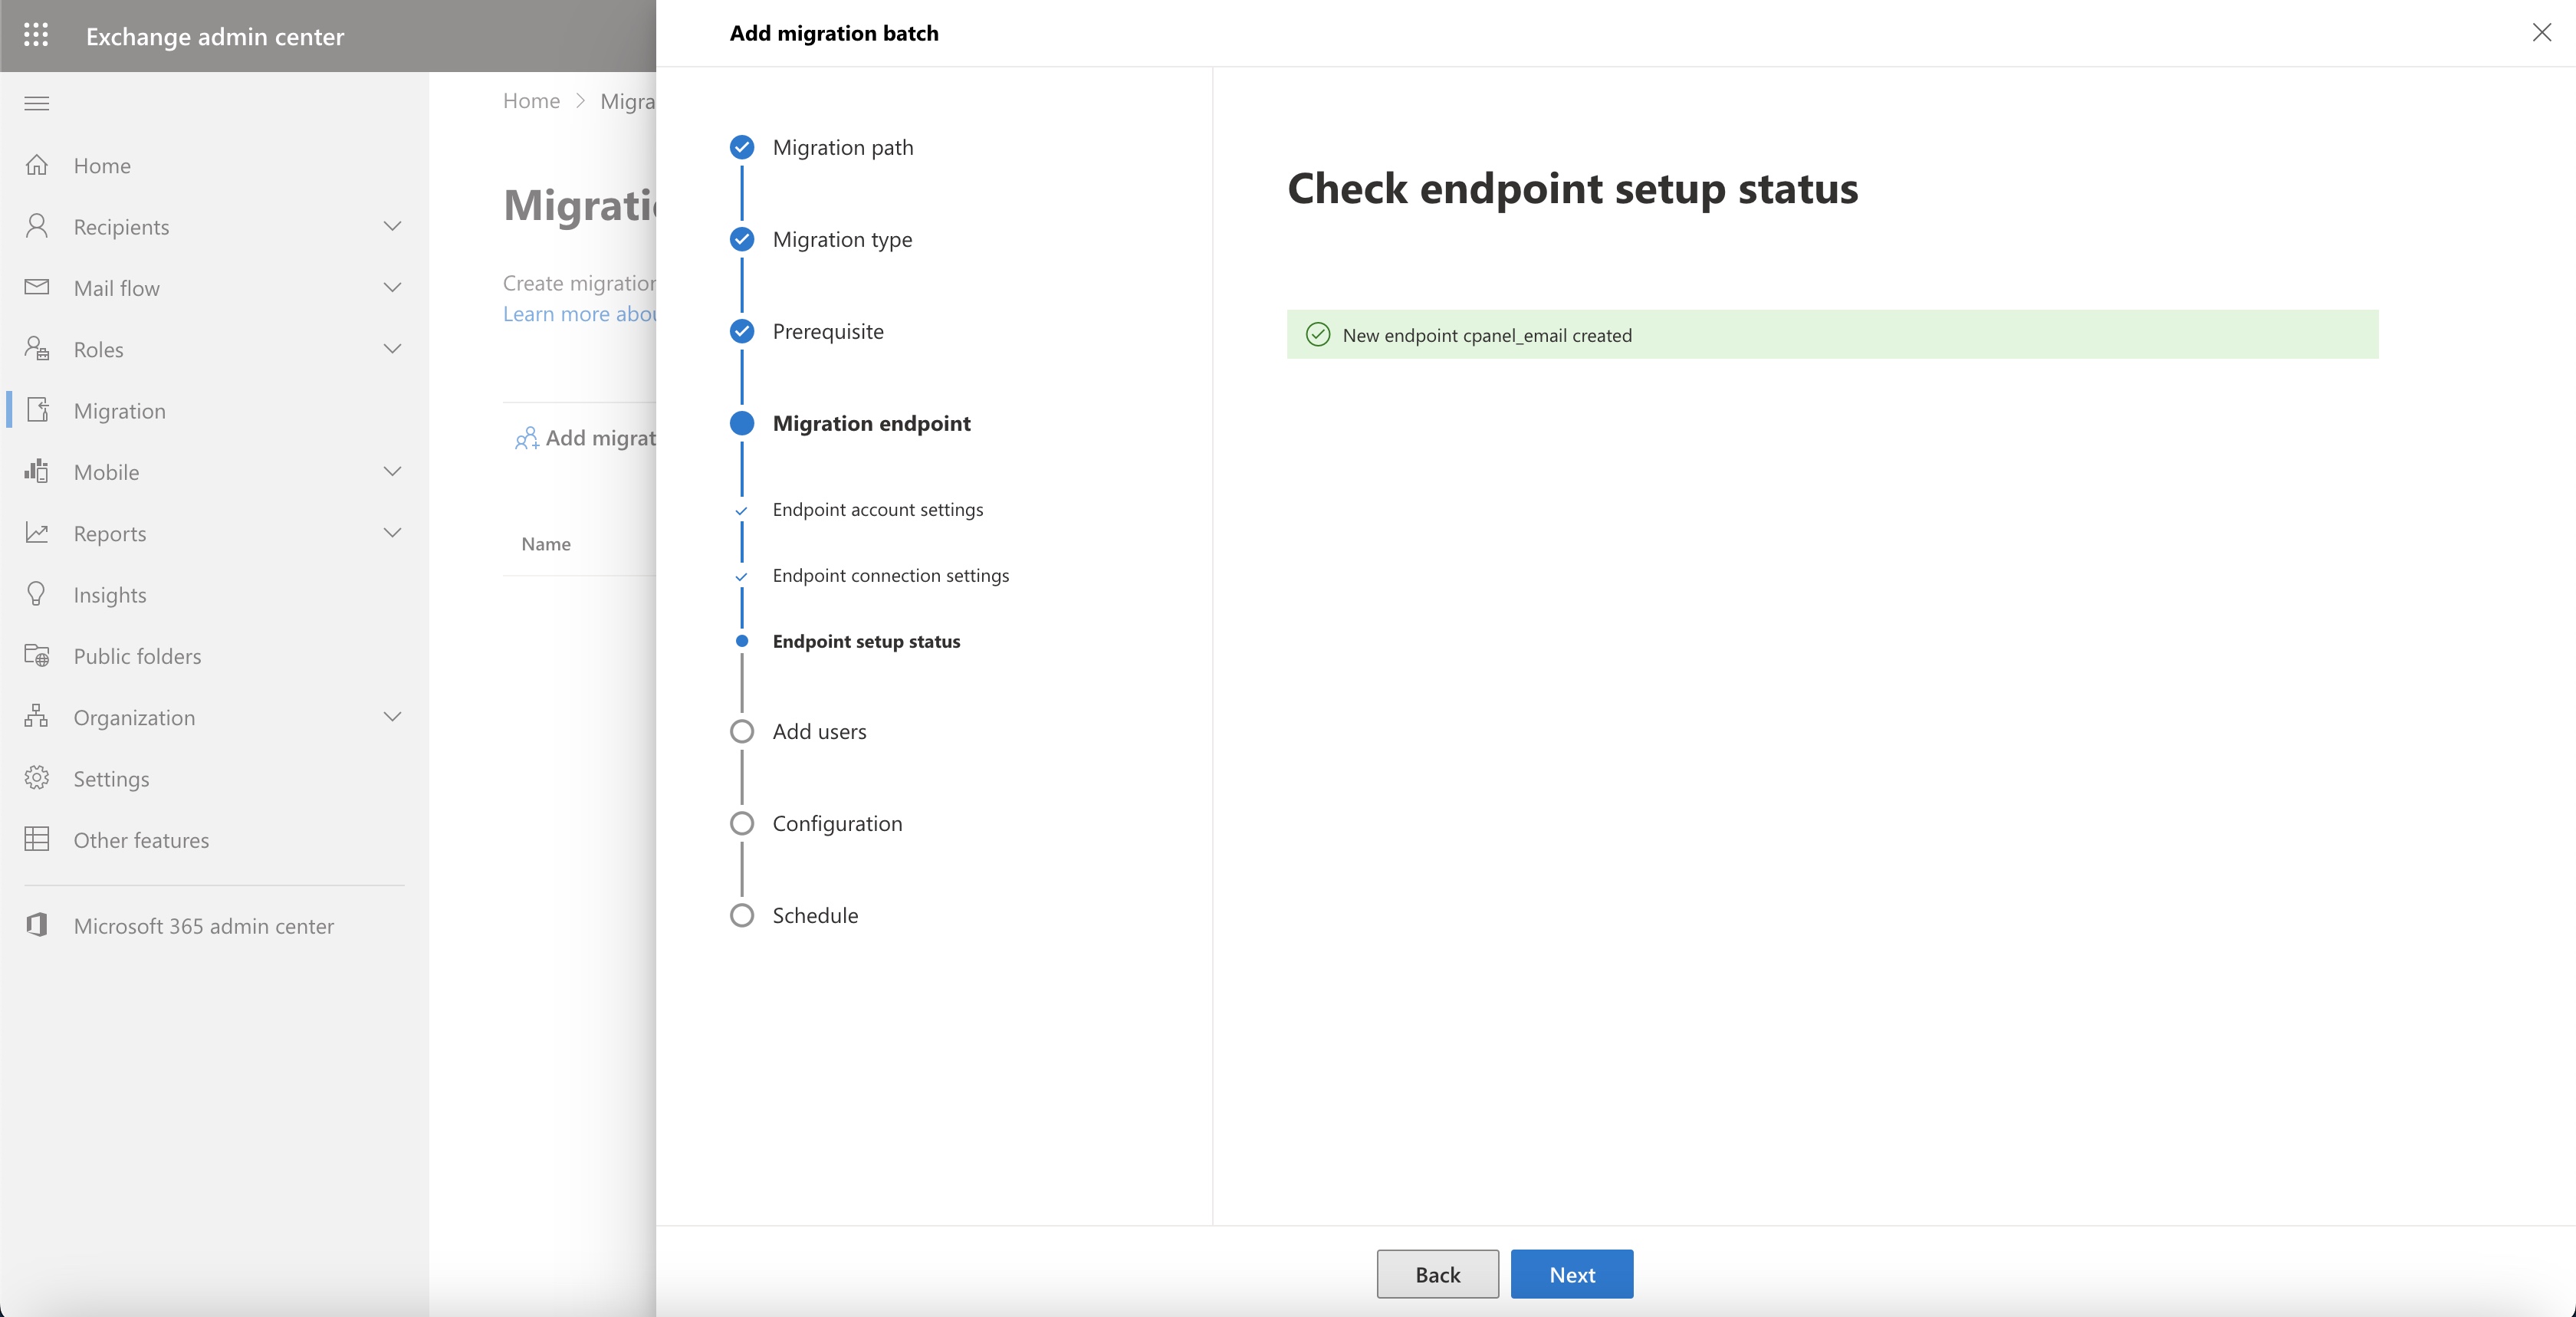
In the next step, Microsoft will verify the IMAP details, and upon successful authentication, the success message will appear, as illustrated in Figure 11 below.
In the next step, you must upload the user list CSV file for the migration, as illustrated in Figure 12 below.
Create a sample CSV file with Email IDs, User Names, and Password to upload. You can also download a sample file by clicking the download link available on the page, as illustrated in Figure 12 below.
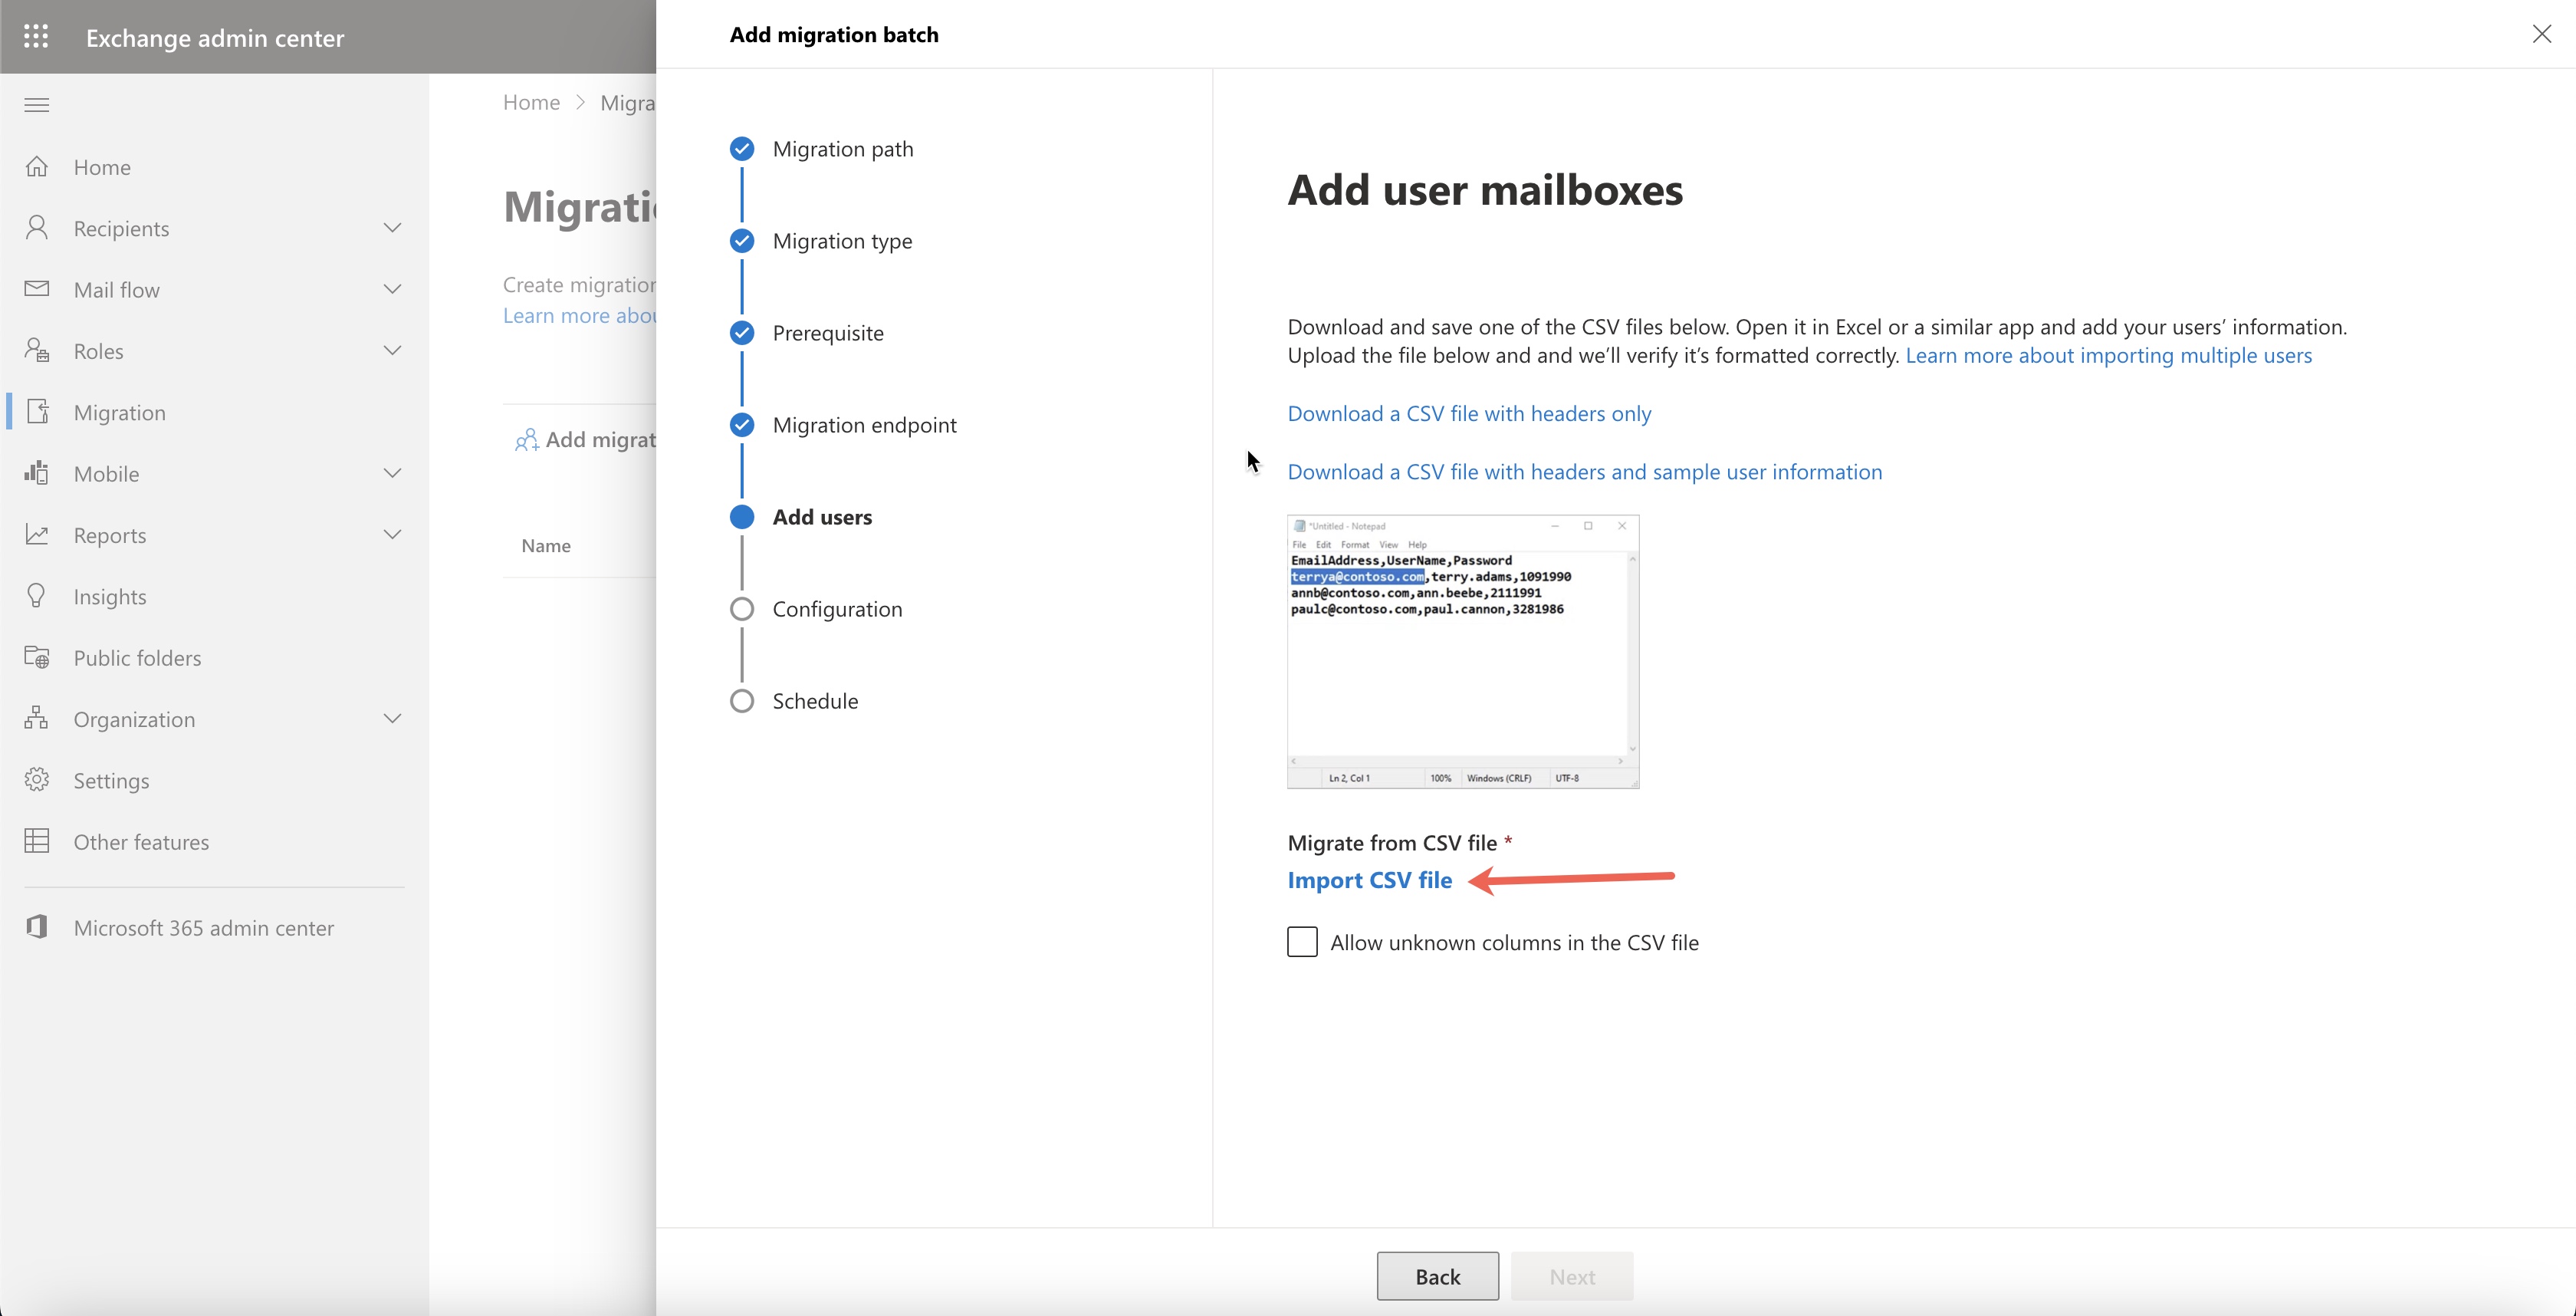
Once the CSV file is ready, click on the Import CSV file link, as illustrated in Figure 12 above, and once you upload the file, click the Next button.
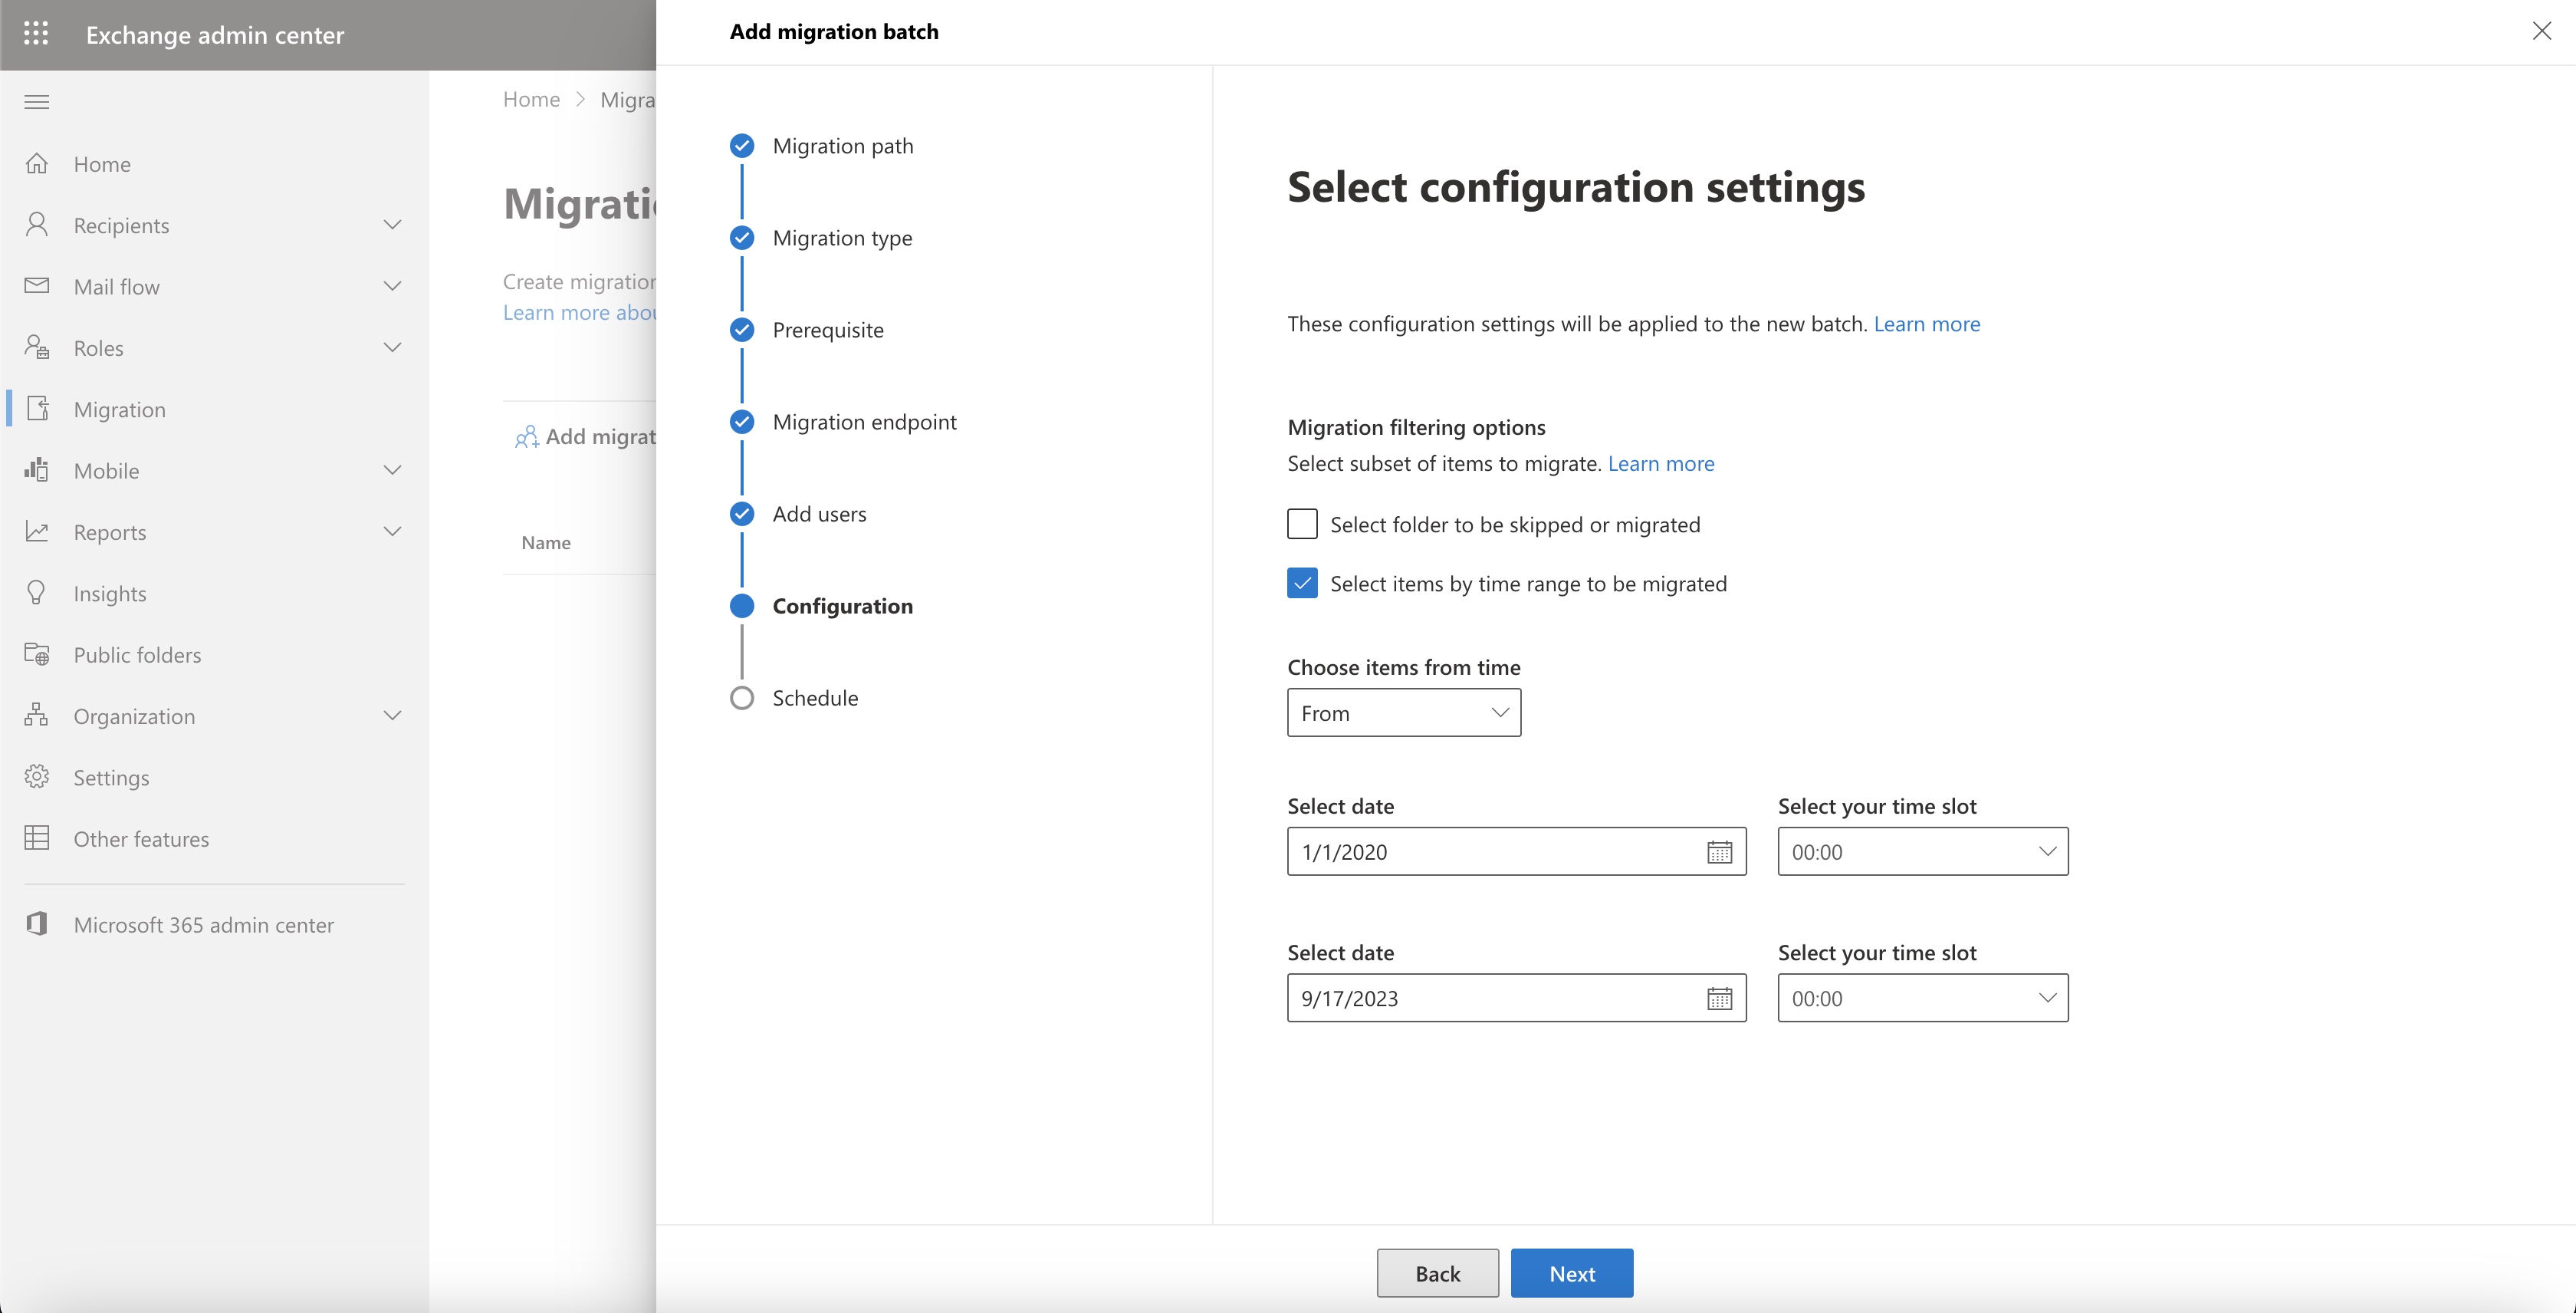
On the next screen, select the checkbox Select items by time range to be migrated, as illustrated in Figure 13 below.
Now you can select the item from the drop menu Choose items from time and select the date and time range from which the mails need to be migrated.
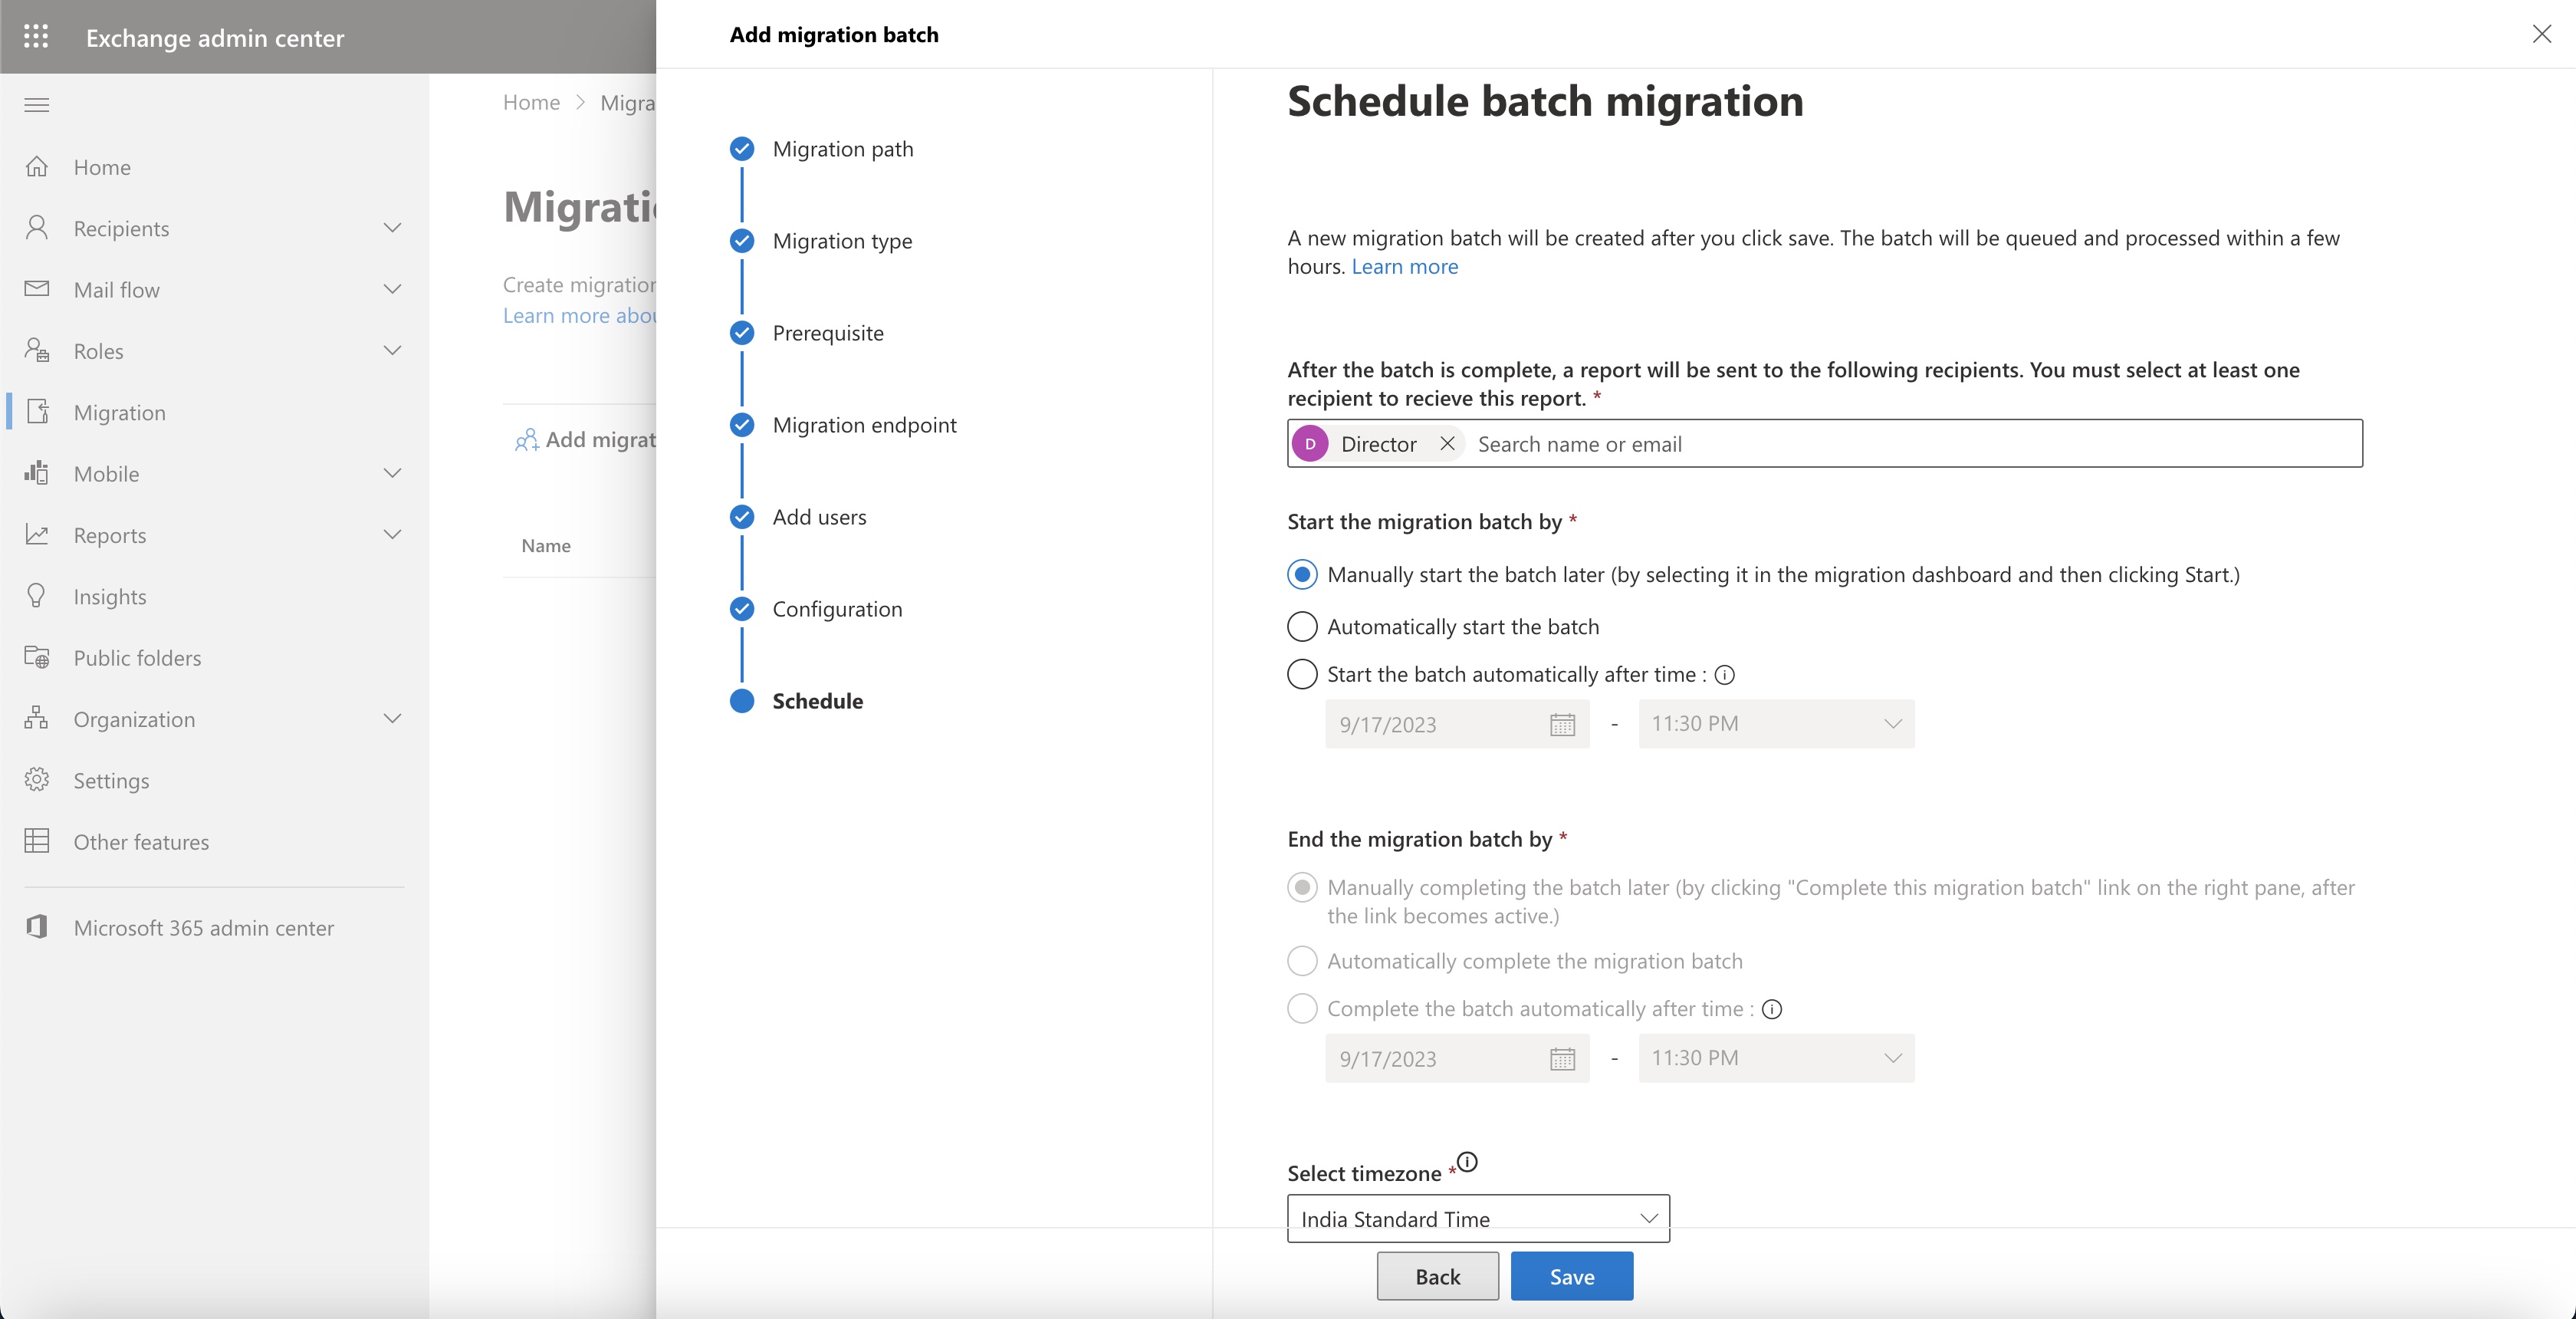
In the next screen, select one user by typing the name from the textbox to whom the email should be triggered once the migration is over and select the migration option from the radio button available, as illustrated in Figure 14 below. Click the Save button to initiate the verification process.
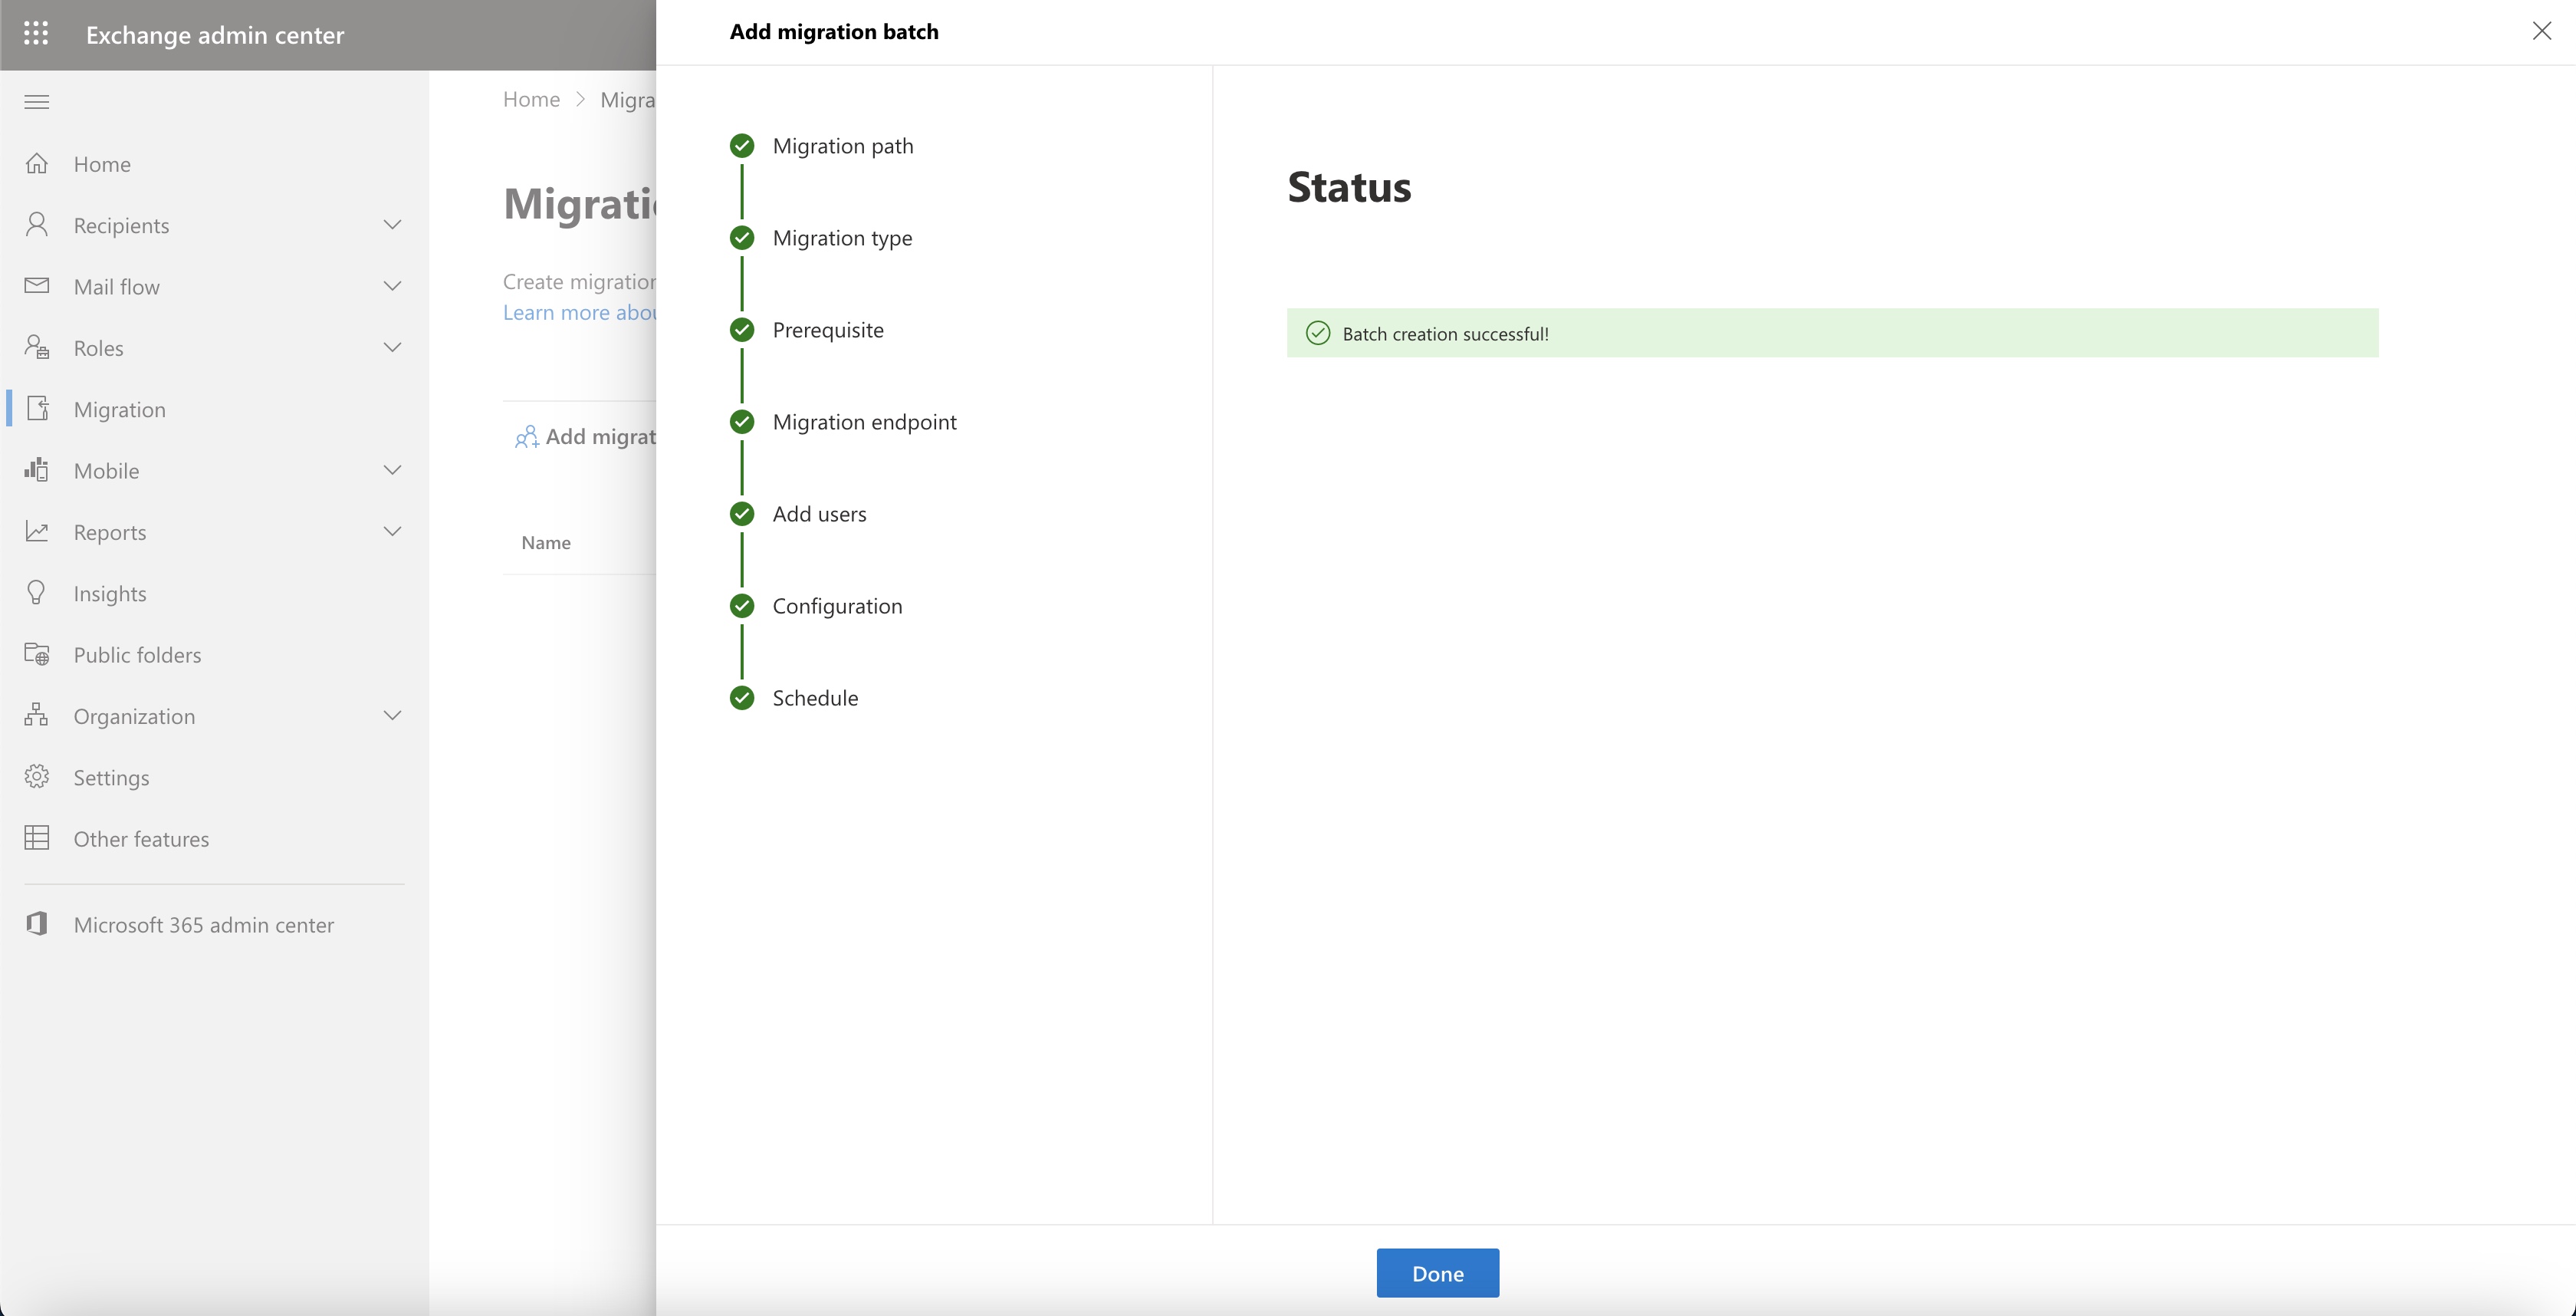
Now Microsoft will verify the migration batch is over and a success message will appear, as illustrated in Figure 15 below. Click the Done button.
Section 4: Monitoring and Adjusting Migration
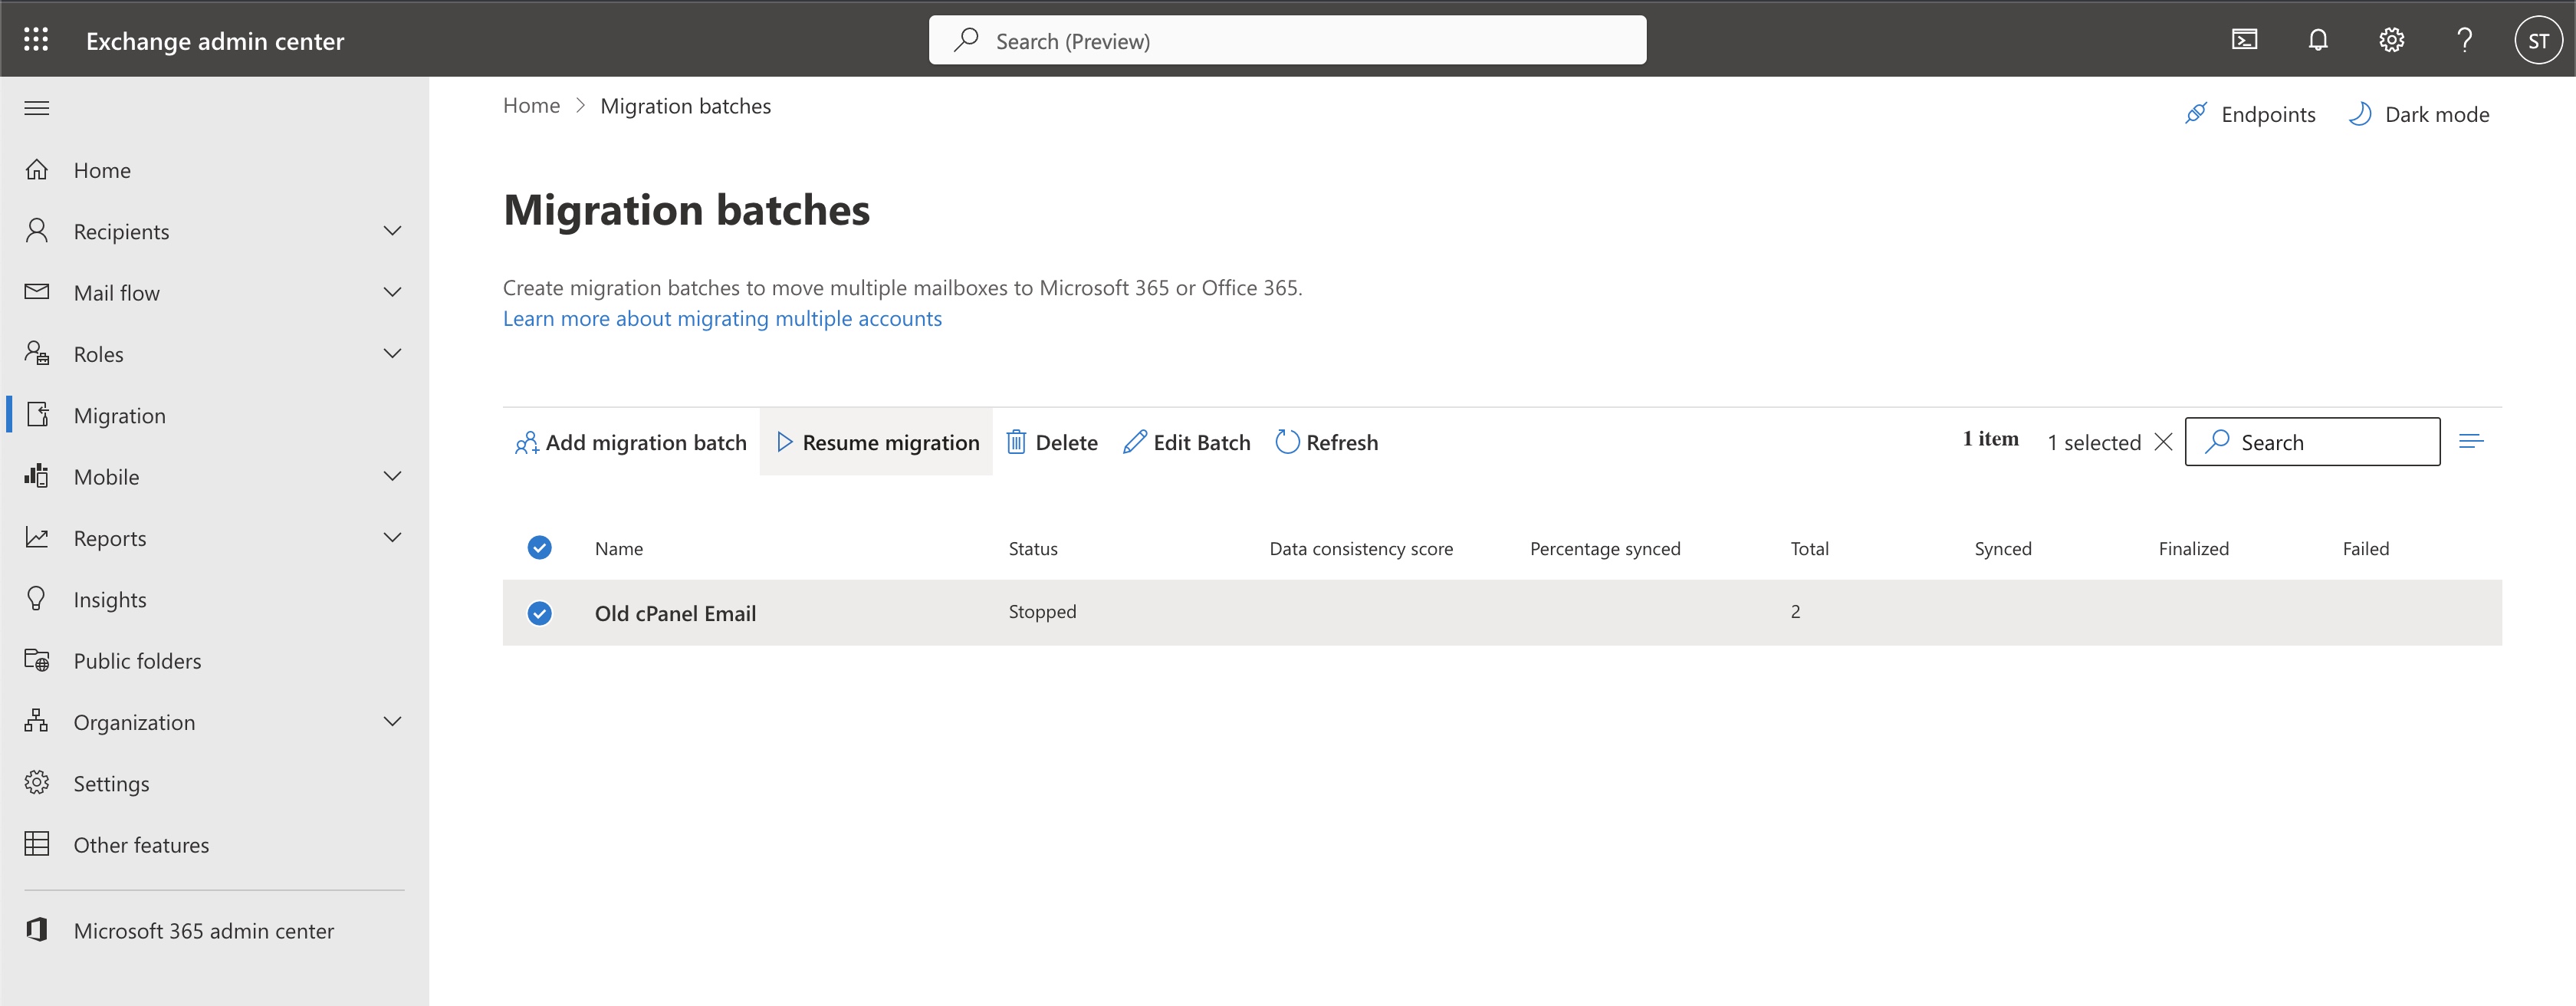
The migration batch will be listed on the list page once it is created, as illustrated in Figure 16 below.
You can perform different migration-related tasks by clicking the batch name.
- Resume migration: Pause or Start the migration process.
- Edit migration: Edit the batch setting.
- Delete: Delete the batch.
Conclusion
Successfully migrating your cPanel email to Microsoft Office 365 doesn’t have to be a daunting task. With this guide, you can transition smoothly and efficiently. For further support or inquiries, the Batoi Support Team is always here to assist you.