 Batoi Support
POP or IMAP Email Setup on an Android Phone
This article provides detailed information on how you can setup POP/IMAP mail on your android phone by following the step by step instructions.
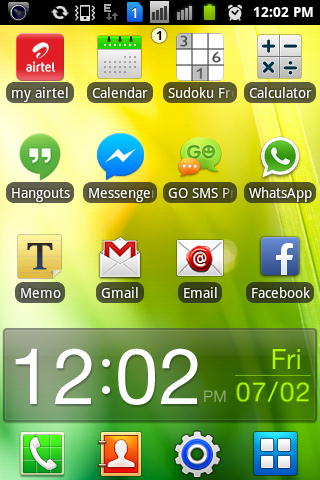
From the Home Screen or Application Menu, click the Mail icon as shown in Figure 1.
Then click the Menu button on your phone to bring up additional setting options as shown in Figure 2.
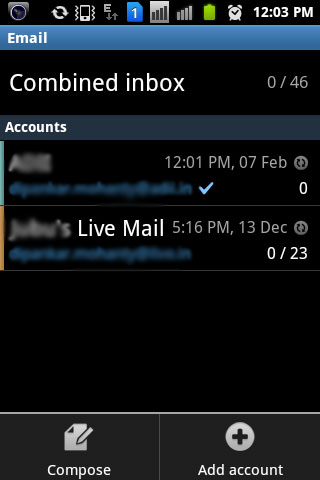
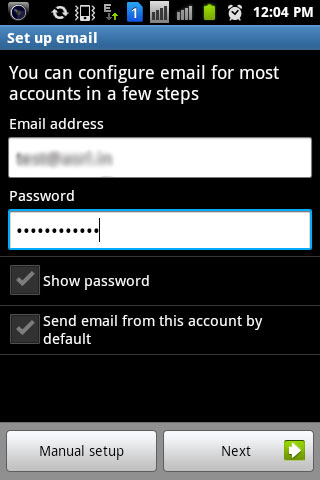
Click Add account and the account add screen will open as shown in Figure 3. Give your full Email ID and Password and click Next.
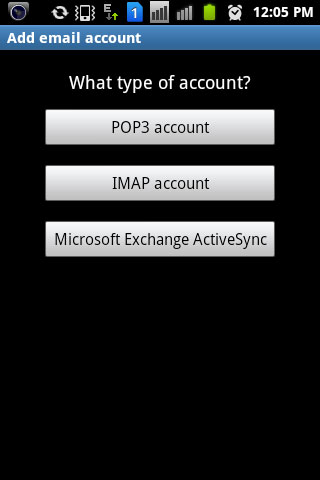
After the email address and the password gets verified, the next screen will appear where you can choose your account type as shown in Figure 4. Here you need to choose POP3 account type and it will proceed to next screen as shown in Figure 4.
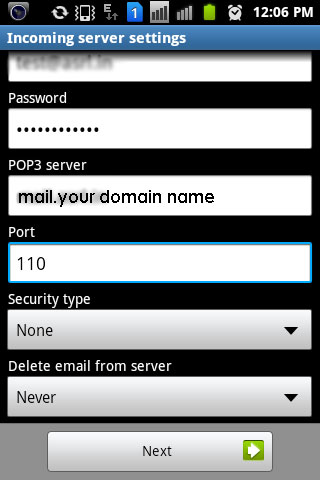
Here you need to give your POP3 account details, like Username which will be your email ID, Password, POP3 Server which will be mail.your domain name. The rest thing you do not need to change. Let the default Port which will be 110 as it is. Then click Next to continue as shown in Figure 5.
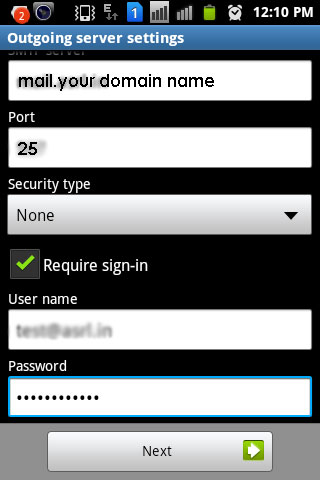
Now it is time to set the SMTP (Outgoing Server) details. Fill the details just as the POP3 server details, but here give the Port number as 25 and click Next button as shown in Figure 6.
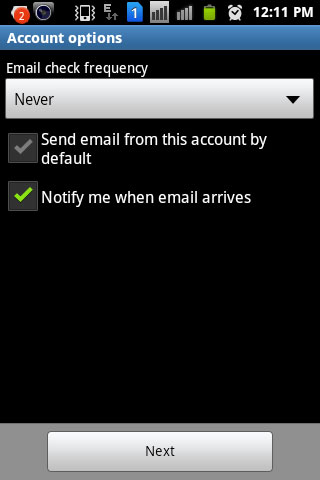
In the next screen you can select the Email Check Frequency. You can set the frequency as per your requirement as shown in Figure 7 and then press Next.
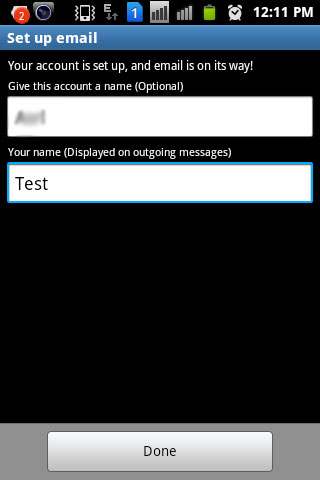
In the next step you can set the Account Name and Your Name in the outgoing message as shown in Figure 8. After setting the details click Next.
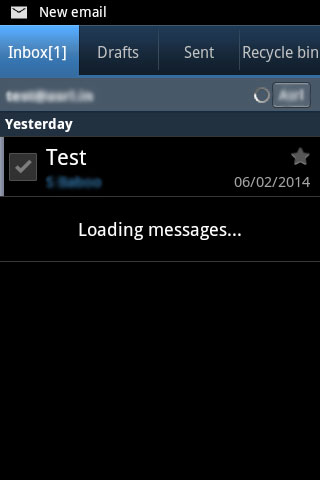
Now your Inbox is created and you can see the emails getting downloaded to your newly created email ID's Inbox as shown in Figure 9.
Now you are all set. Save the settings and then touch the Mail icon to begin retrieving your emails.