 Batoi Support
Create MySQL Databases with cPanel
This article provides detailed information on how to create and manage databases with your Linux cloud control panel.
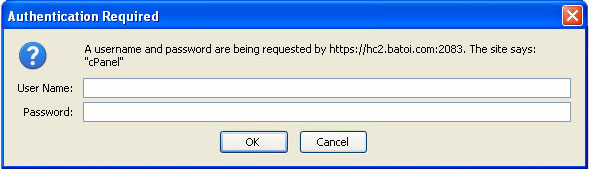
Type the cPanel access details received from Batoi Support in your browser and press enter. You will find the login screen for your hosting control panel. Type your control panel Username and Password of your hosting to login to the home page.
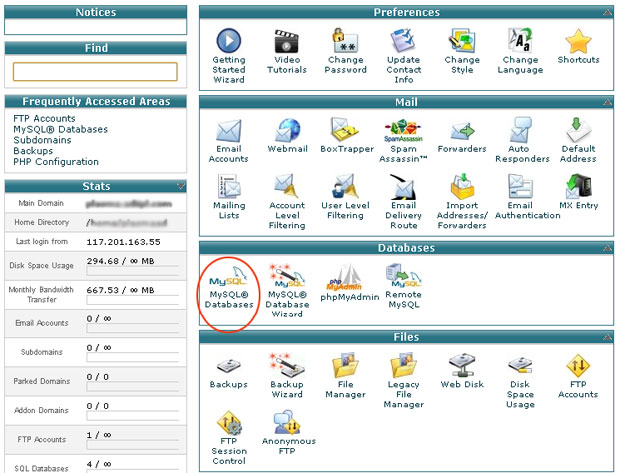
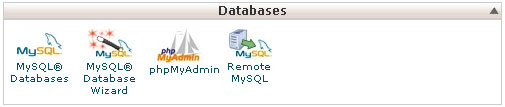
After successful login, you will land on the home page of the control panel. From the home page click MySQL Databases under category Databases as shown in Figure 2.
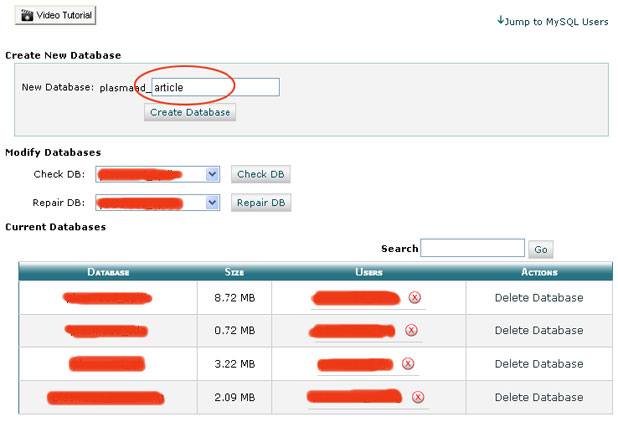
The system will take you to the database creation page as shown in Figure 3. Here, enter the name of the database that you want to create in the Create New Database section and click the button Create Database. The system will create a new database with the name provided by you as shown in Figure 3.
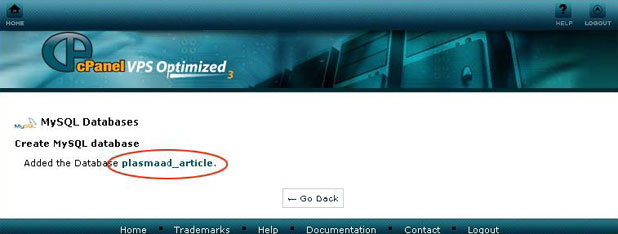
After you create the database, the system will give you a confirmation screen with the name of the database as shown in Figure 4. From the screen you can click Go back button and the system will take you to the database home page.
Now in the database home page you can see your newly created database in a tabular format. At this point no user has been assigned to the database. To add a new user, go to database home page in your control panel. Then go to Add New User section. Give your desired User Name as shown in Figure 5.
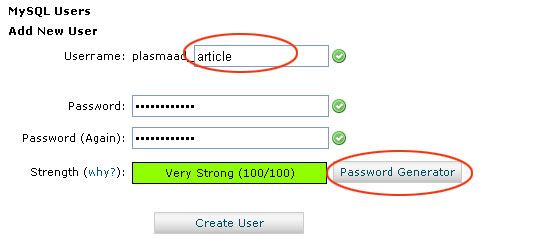
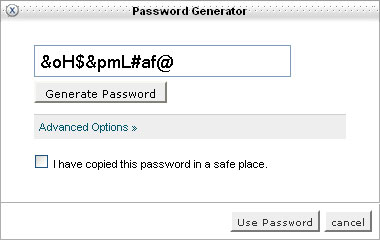
Now click the button Password Generator to have a strong password generated for your user as shown in Figure 6. After generating the password, check the checkbox for 'I have copied this password in a safe place' and then click the button Use Password and system will use the password for your user. Alternatively, you can also manually enter a password that you like as per your requirement.
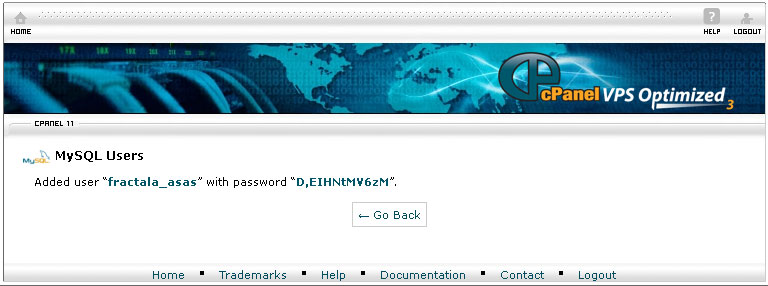
After entering the password click the button Create User and system will create a new user for you and give you a confirmation screen as shown in Figure 7.
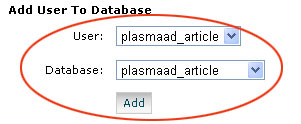
After creating a user, it is the time to assign the user to the database. To do so, go to MySQL home in your control panel and then go Add User To Database section as shown in Figure 8. Select the desired User and Database from the drop-down menu and click Add button as shown in Figure 8.
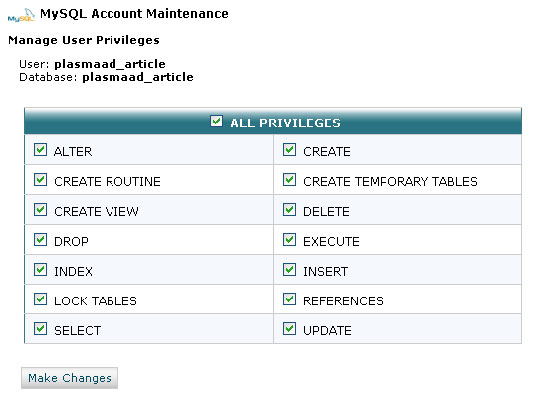
The system will then open a page as shown in Figure 9. Click the checkbox All Privileges and click the button Make Changes to apply all changes made to the page as shown in Figure 9.
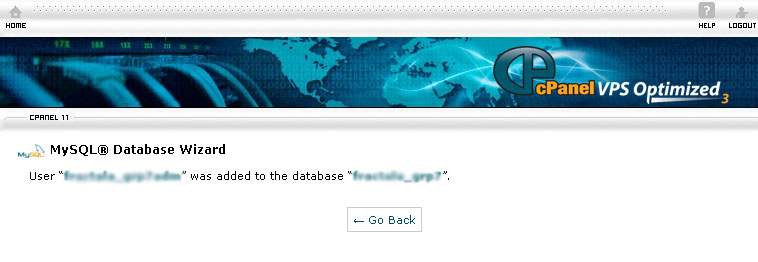
Upon doing so, the system will give you a confirmation screen that the user has been added to the database as shown in Figure 10.
Manage MySQL Databases through phpMyAdmin
Type the cPanel access details received from Batoi Support in your browser and press Enter. You will find the login screen for your hosting control panel. Type your control panel Username and Password of your hosting to login to the home page.
Note: The Username and Password to log into cPanel shall be provided to you by Batoi Support after you sign up for hosting services at Batoi. If you do not have the correct login credentials, please contact Batoi Support via phone or create a support ticket for help.
After successful login, you will land on the home page of the control panel as shown in Figure 12. From the home page click phpMyAdmin under category Databases.
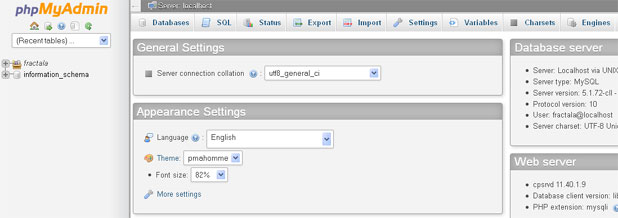
Upon clicking the link, system will open phpMyAdmin in a new tab as shown in Figure 13.
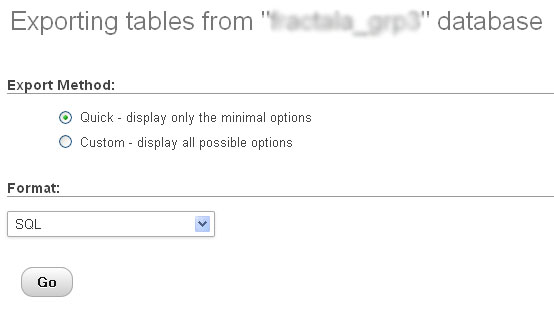
Here you can find the list of all the databases that has been created under your hosting on the left side of the page. Choose the database which you want to download and click Export link from the top menu. After clicking the link, system will open the export database page as shown in Figure 14. Click the Go button and the database will be downloaded to your local system.
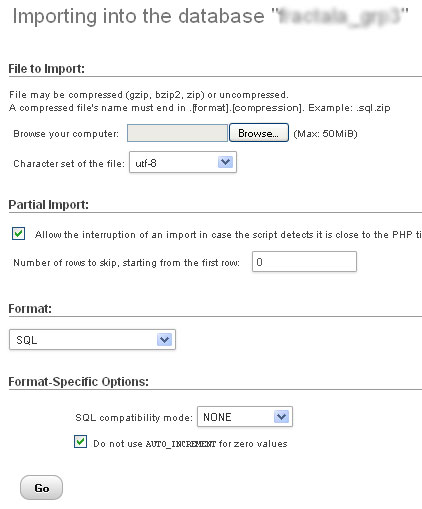
Now you can upload the database to another location. To do so, click the database to which you want to upload your database dump file and then click Import link from the top menu as shown in Figure 15. After clicking the link, system will open the import database page as shown in Figure 15. Click the Browse button and select the database dump file that you want to upload. The database dump file should be in the .sql format. After choosing the database from your local system click the 'Go' button and system will upload the database to your hosting.
Now when you click the database name from the left side of your phpMyAdmin, it will show all the tables that have been uploaded to your database as shown in Figure 16.
