- Manage LMS as an Organization User
- Create and Manage a Course
- Individual Course Settings
- Participant Management
- Create Master Wiki for Courses
- Manage Course Assignment
- Create Forum Threads
- News and Announcements
- Manage Course Files
- Create Course Test
- Assign Rank Parameters
- Generate Course Certificate
- Access Course as a Member
Access Course as a Member
Once you are added as a participant of any course to Batoi, you can log in as a member user at https://www.batoi.com/login, as shown in Figure 1 below.
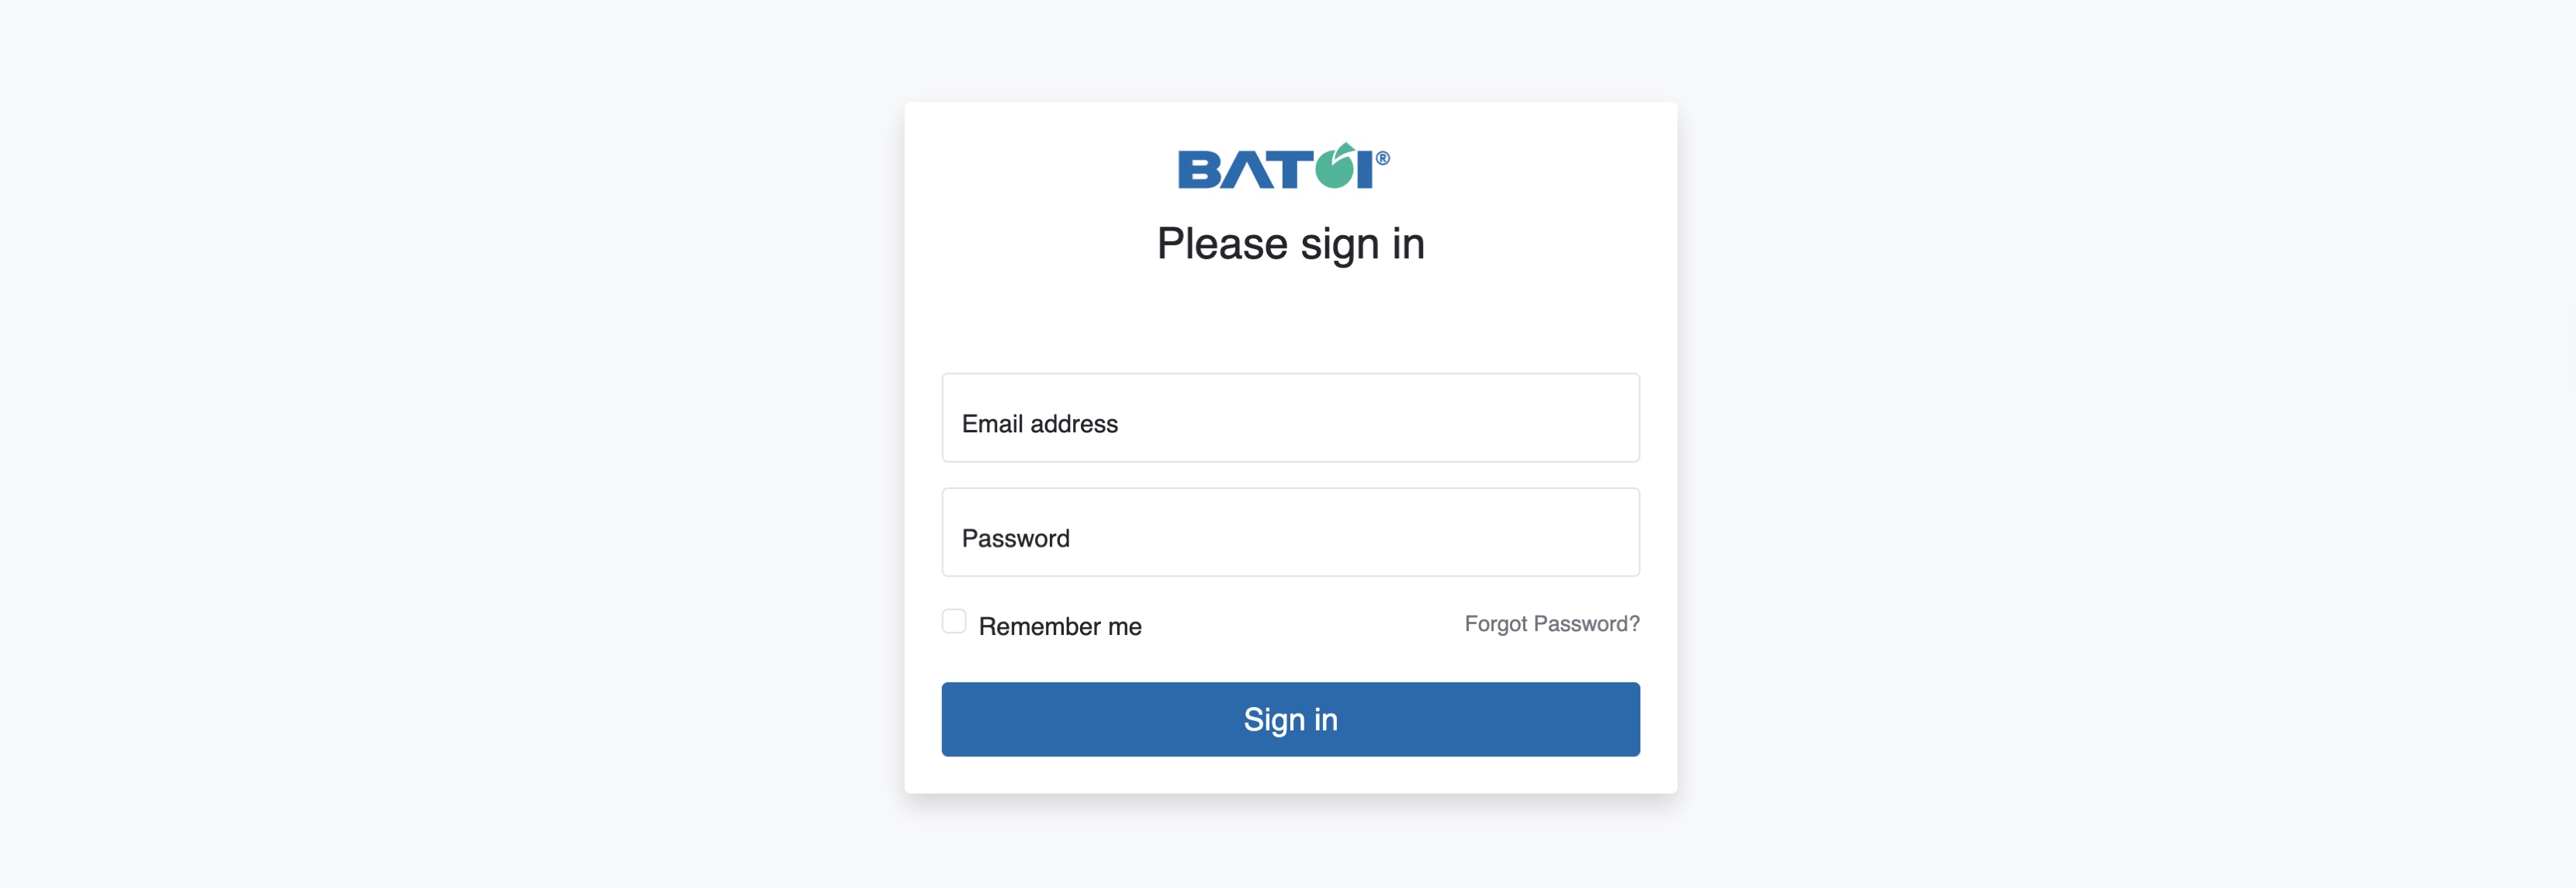
Enter your Email Address as your username and your Password, and click the Sign in button, as shown in Figure 1 above.
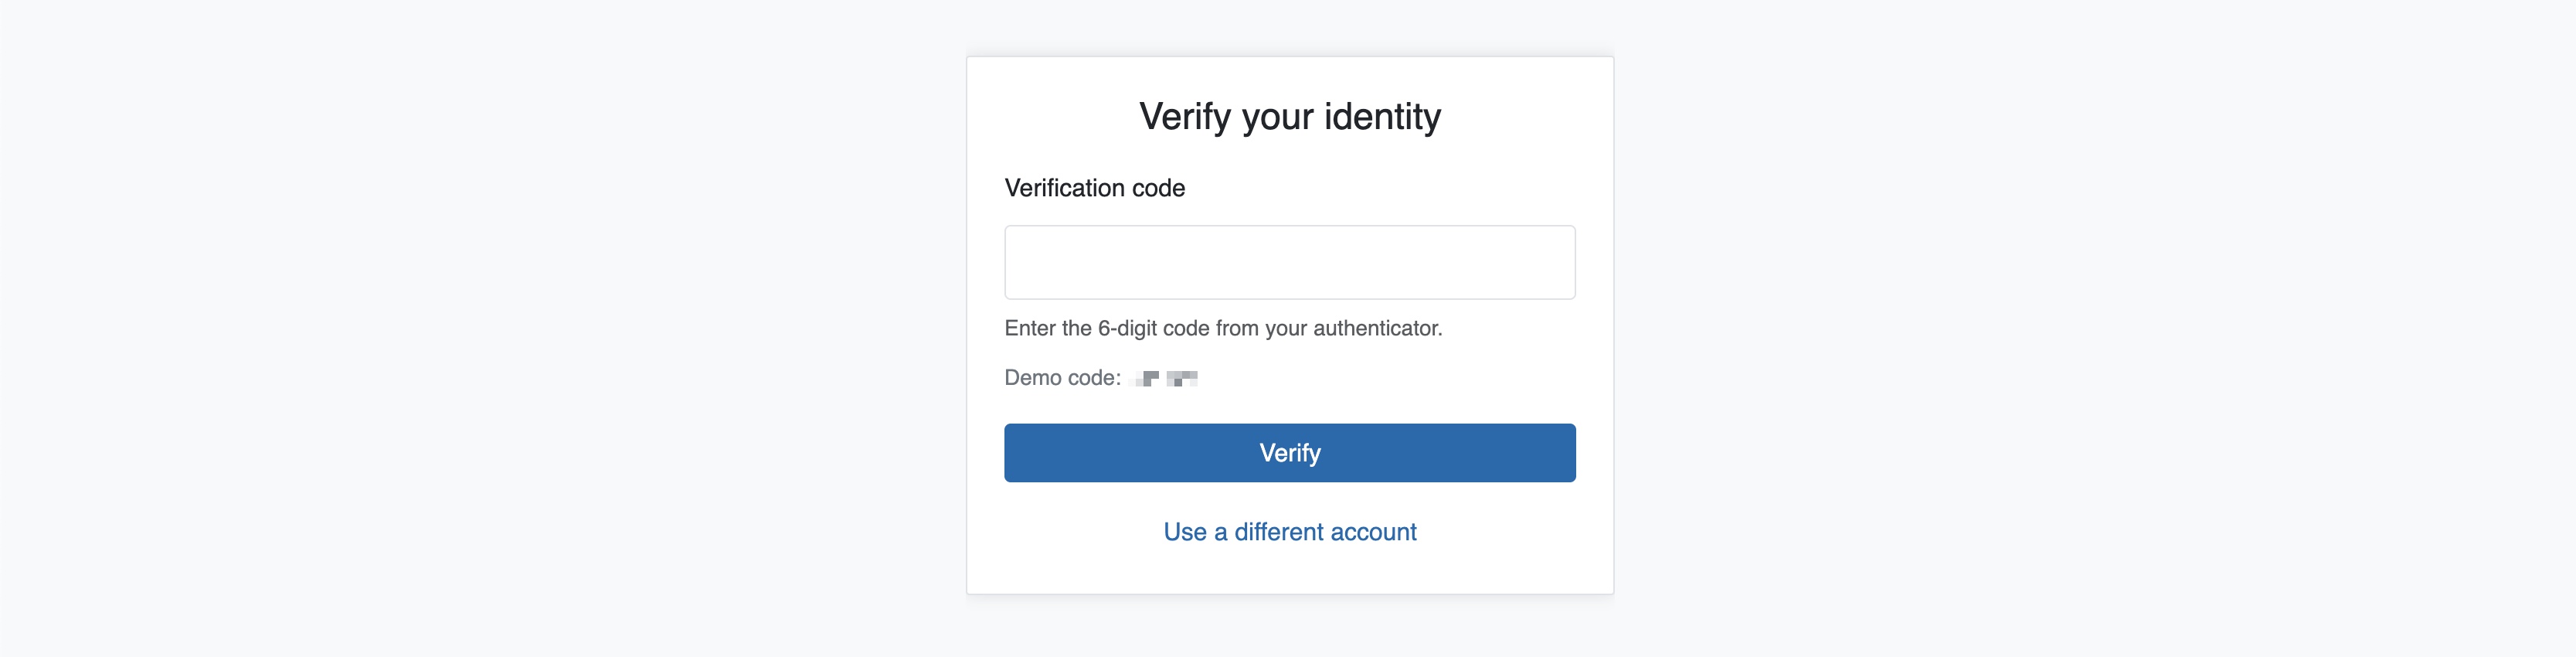
The system prompts you with the verification code. Enter the 6-digit Demo code available on your screen, as shown in Figure 2 below, and click the Verify button. After successful verification, the system redirects you to the My Workspaces, as shown in Figure 3 below.

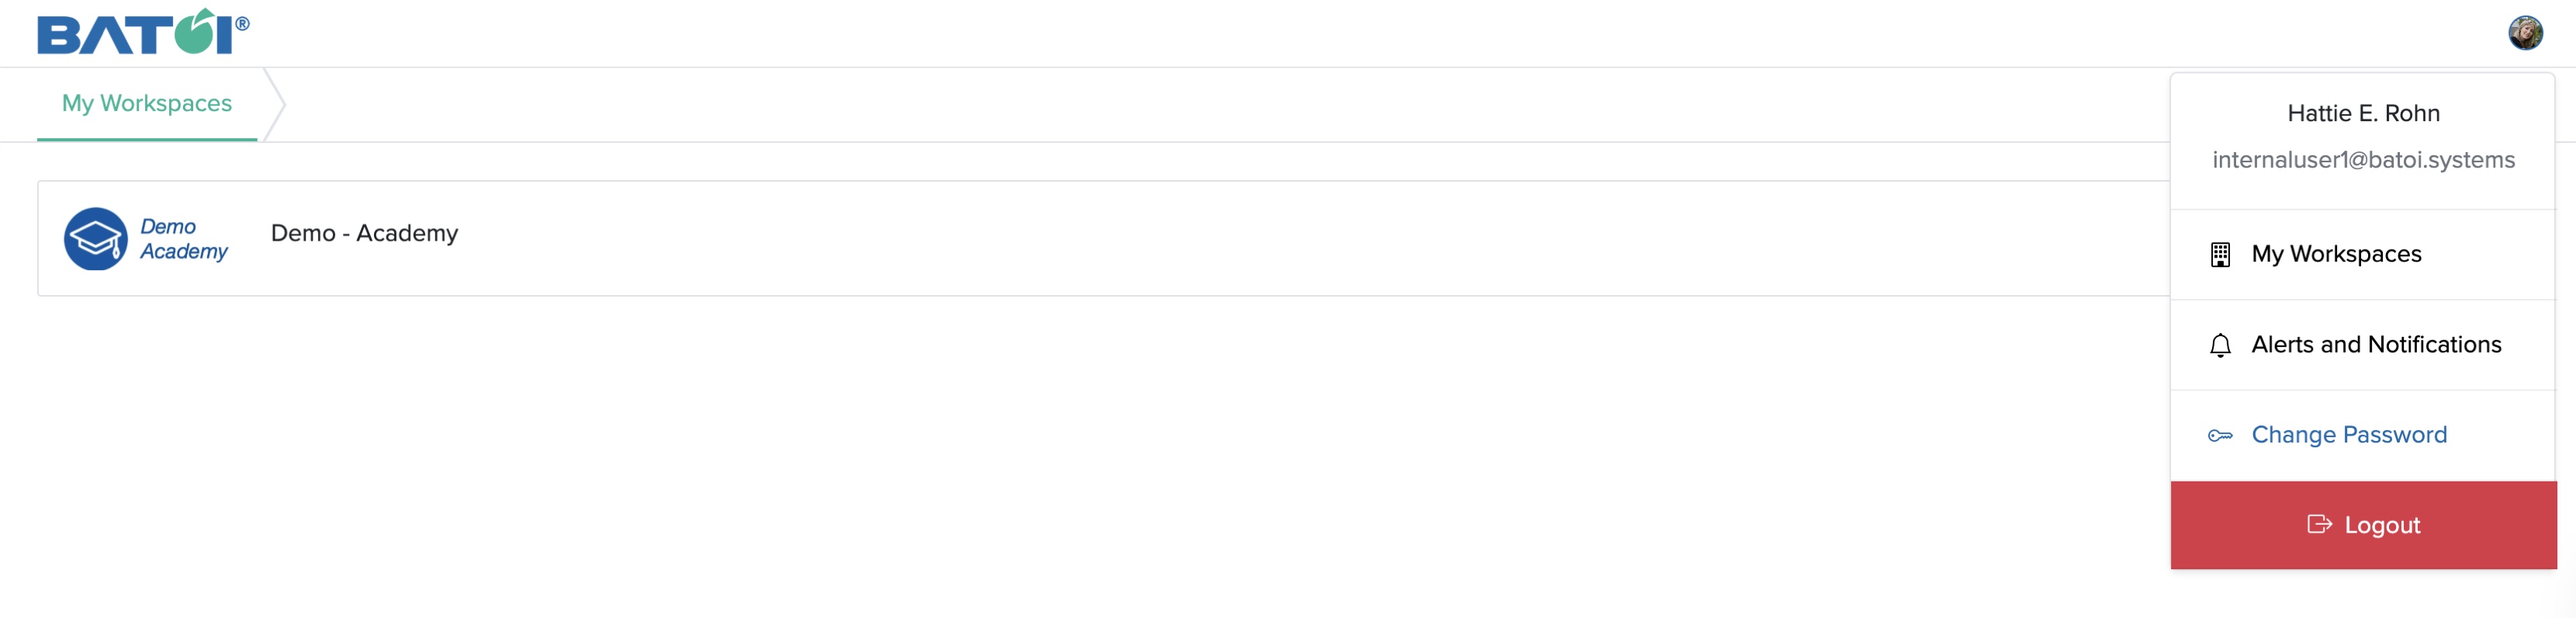
My Workspaces
On My Workspaces, you can see all the spaces assigned to you in card format, as shown in Figure 3 above. Each space is associated with a Bridge Portal button.
Forgot Password
Click the Forgot Password link on the login screen, as shown in Figure 1 above, and the system redirects you to the Forgot Password page, as shown in Figure 4 below.
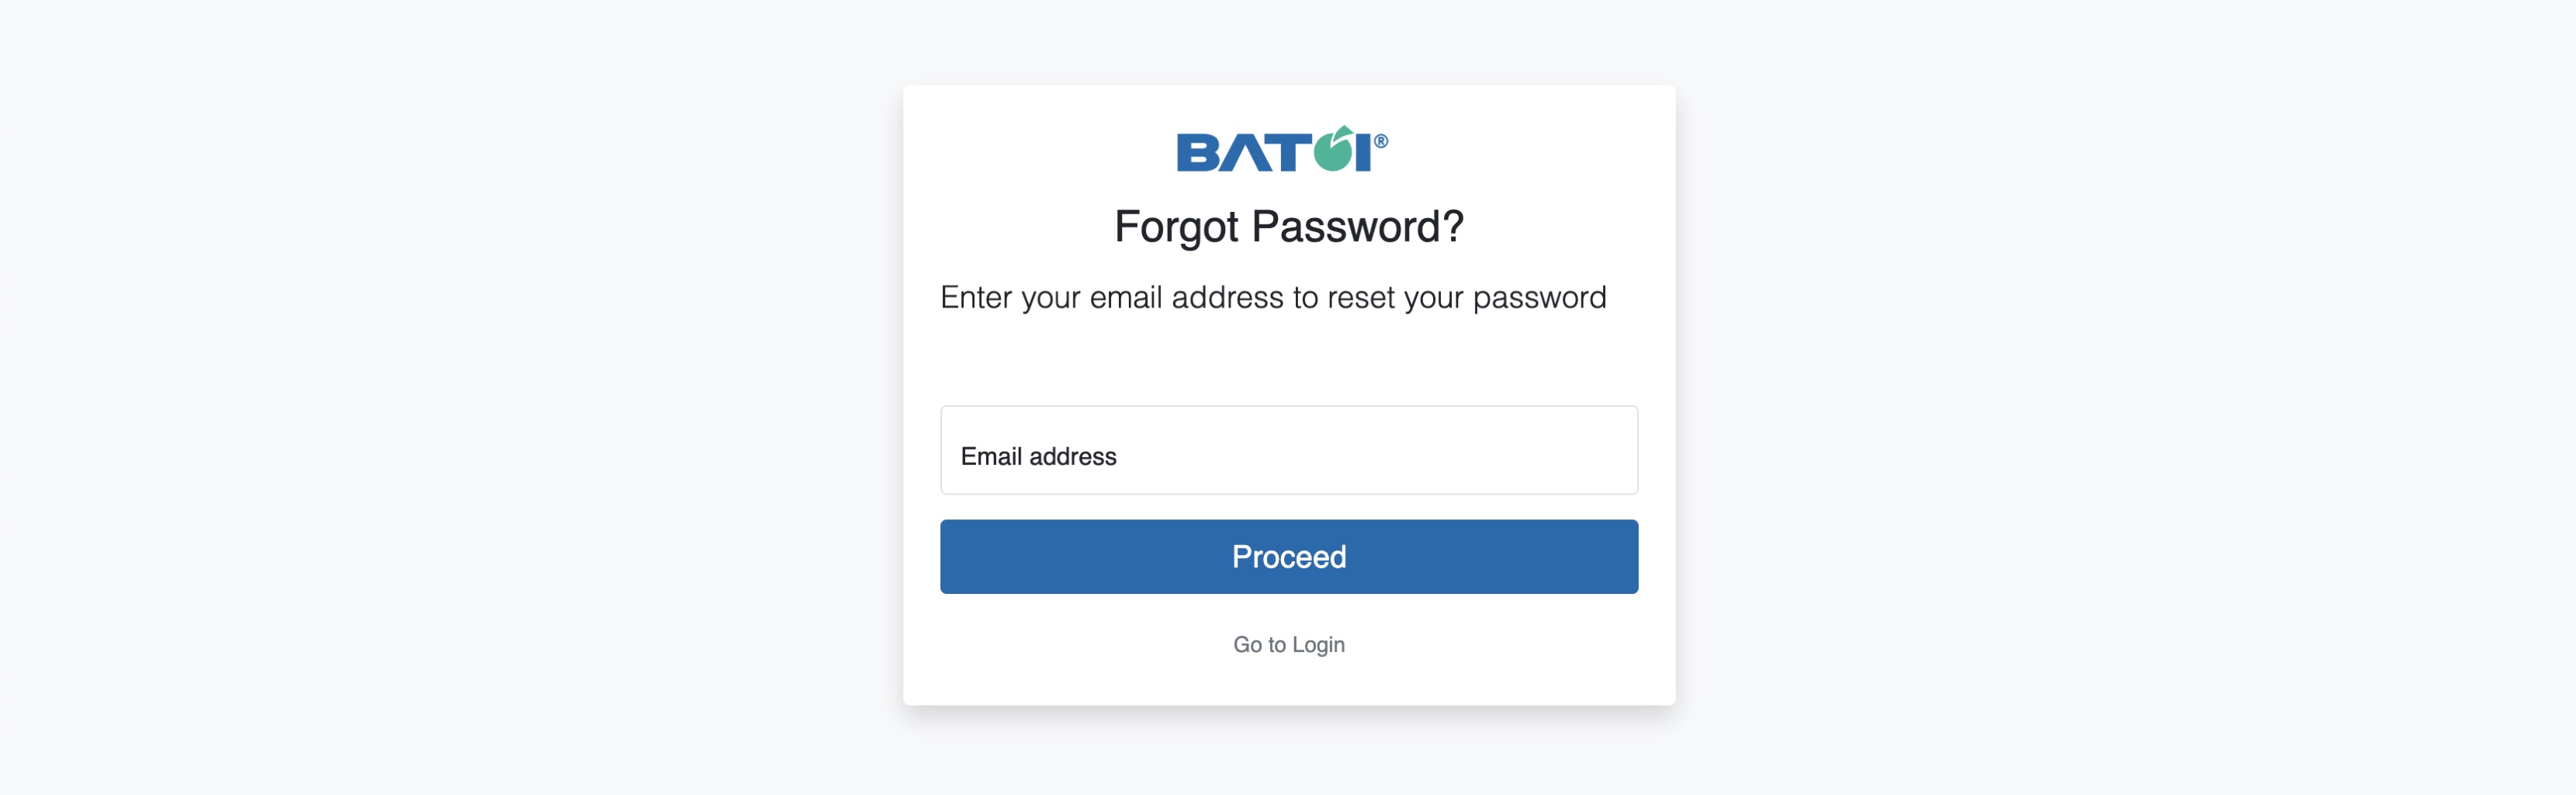
Enter your registered Email Address and click the Proceed button, and the system generates your new password and sends it to your email ID, as shown in Figure 5 below.
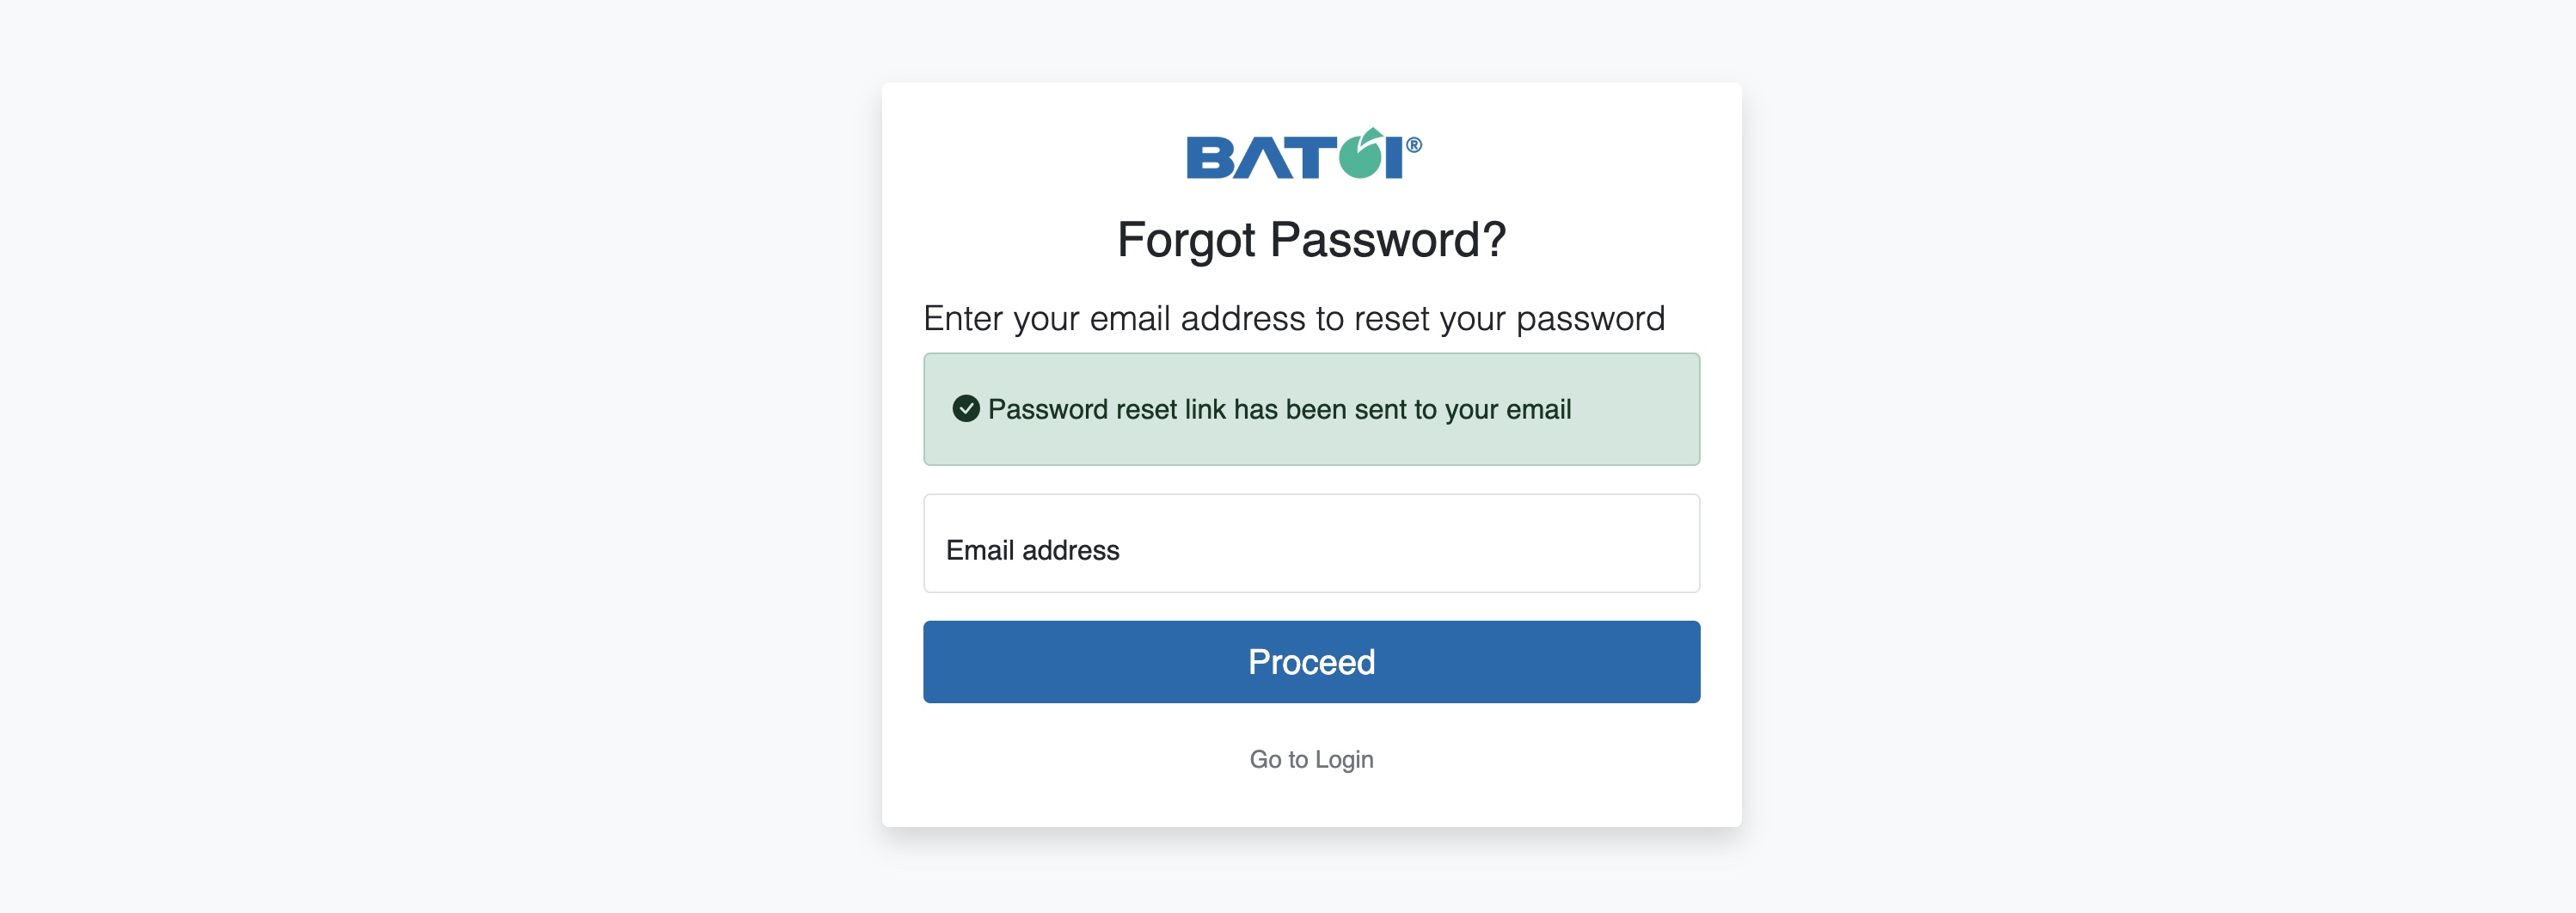
Click the Go to Login link, as shown in Figure 5 above, to return to the login screen.
Change Password
Click the Profile icon on the top-right side of the screen, as shown in Figure 3 above, and the profile drop-down menu opens, as shown in Figure 6 below.
Click the Change Password link on the drop-down menu, as shown in Figure 6 above, and the change password page opens, as shown in Figure 7 below.
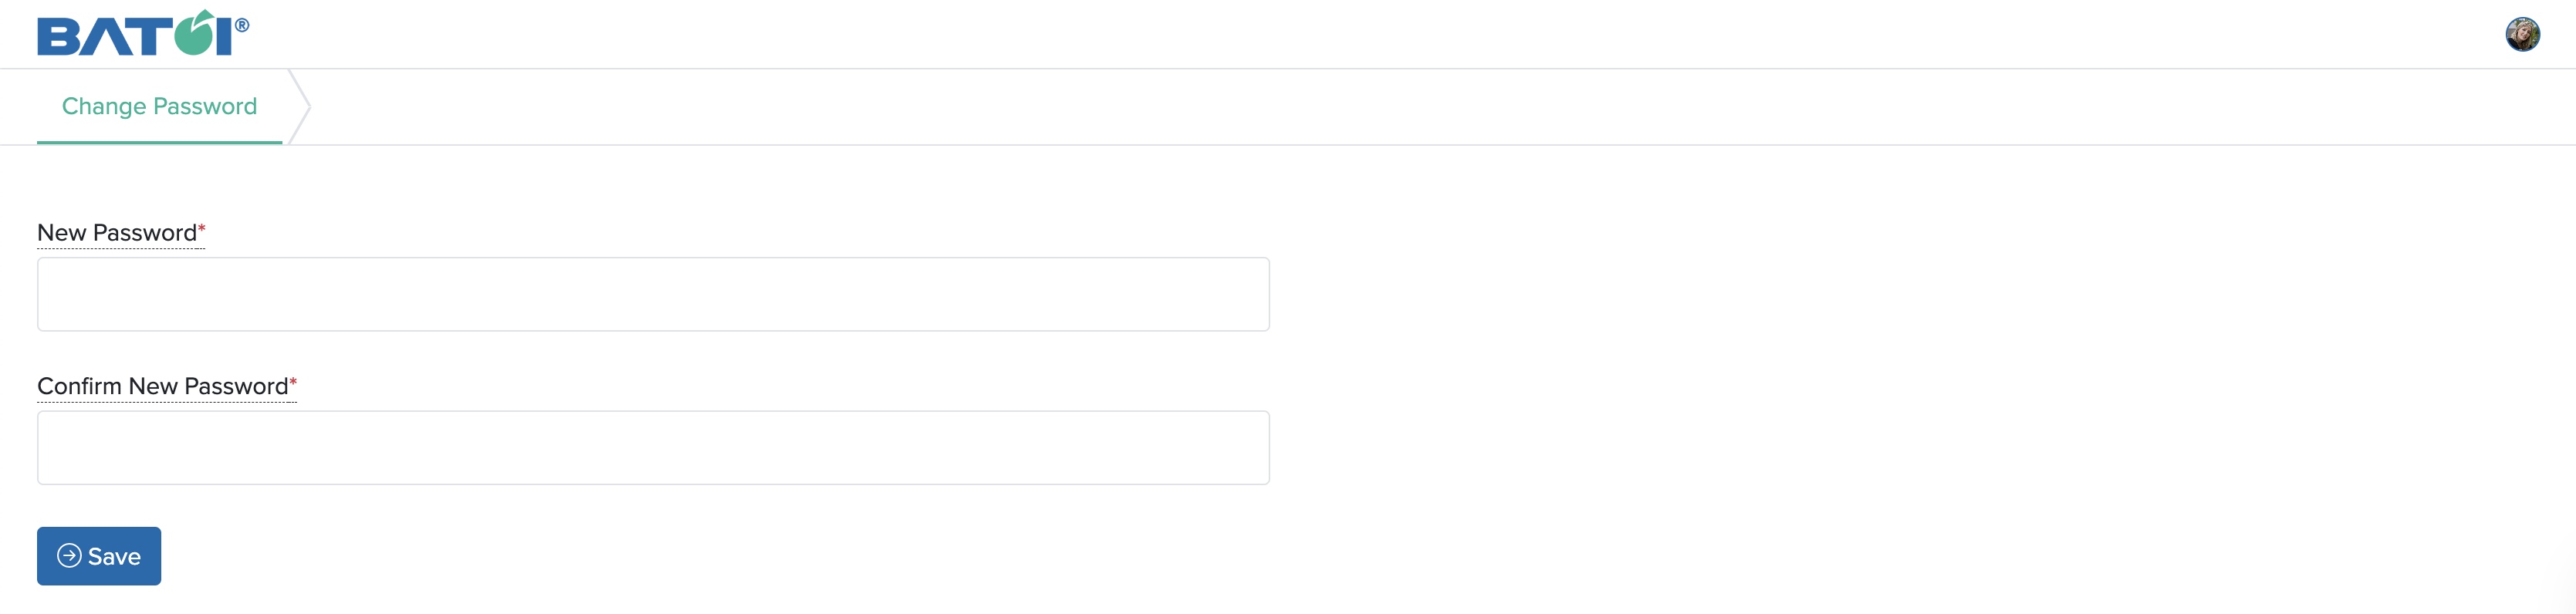
Enter the New Password and then Confirm New Password in the textboxes, and click the Save button to change the password, as shown in Figure 7 above.
Bridge Dashboard
Click the Bridge Portal button for the specific space as shown in Figure 3 above, and the Dashboard page opens, as shown in Figure 8 below.
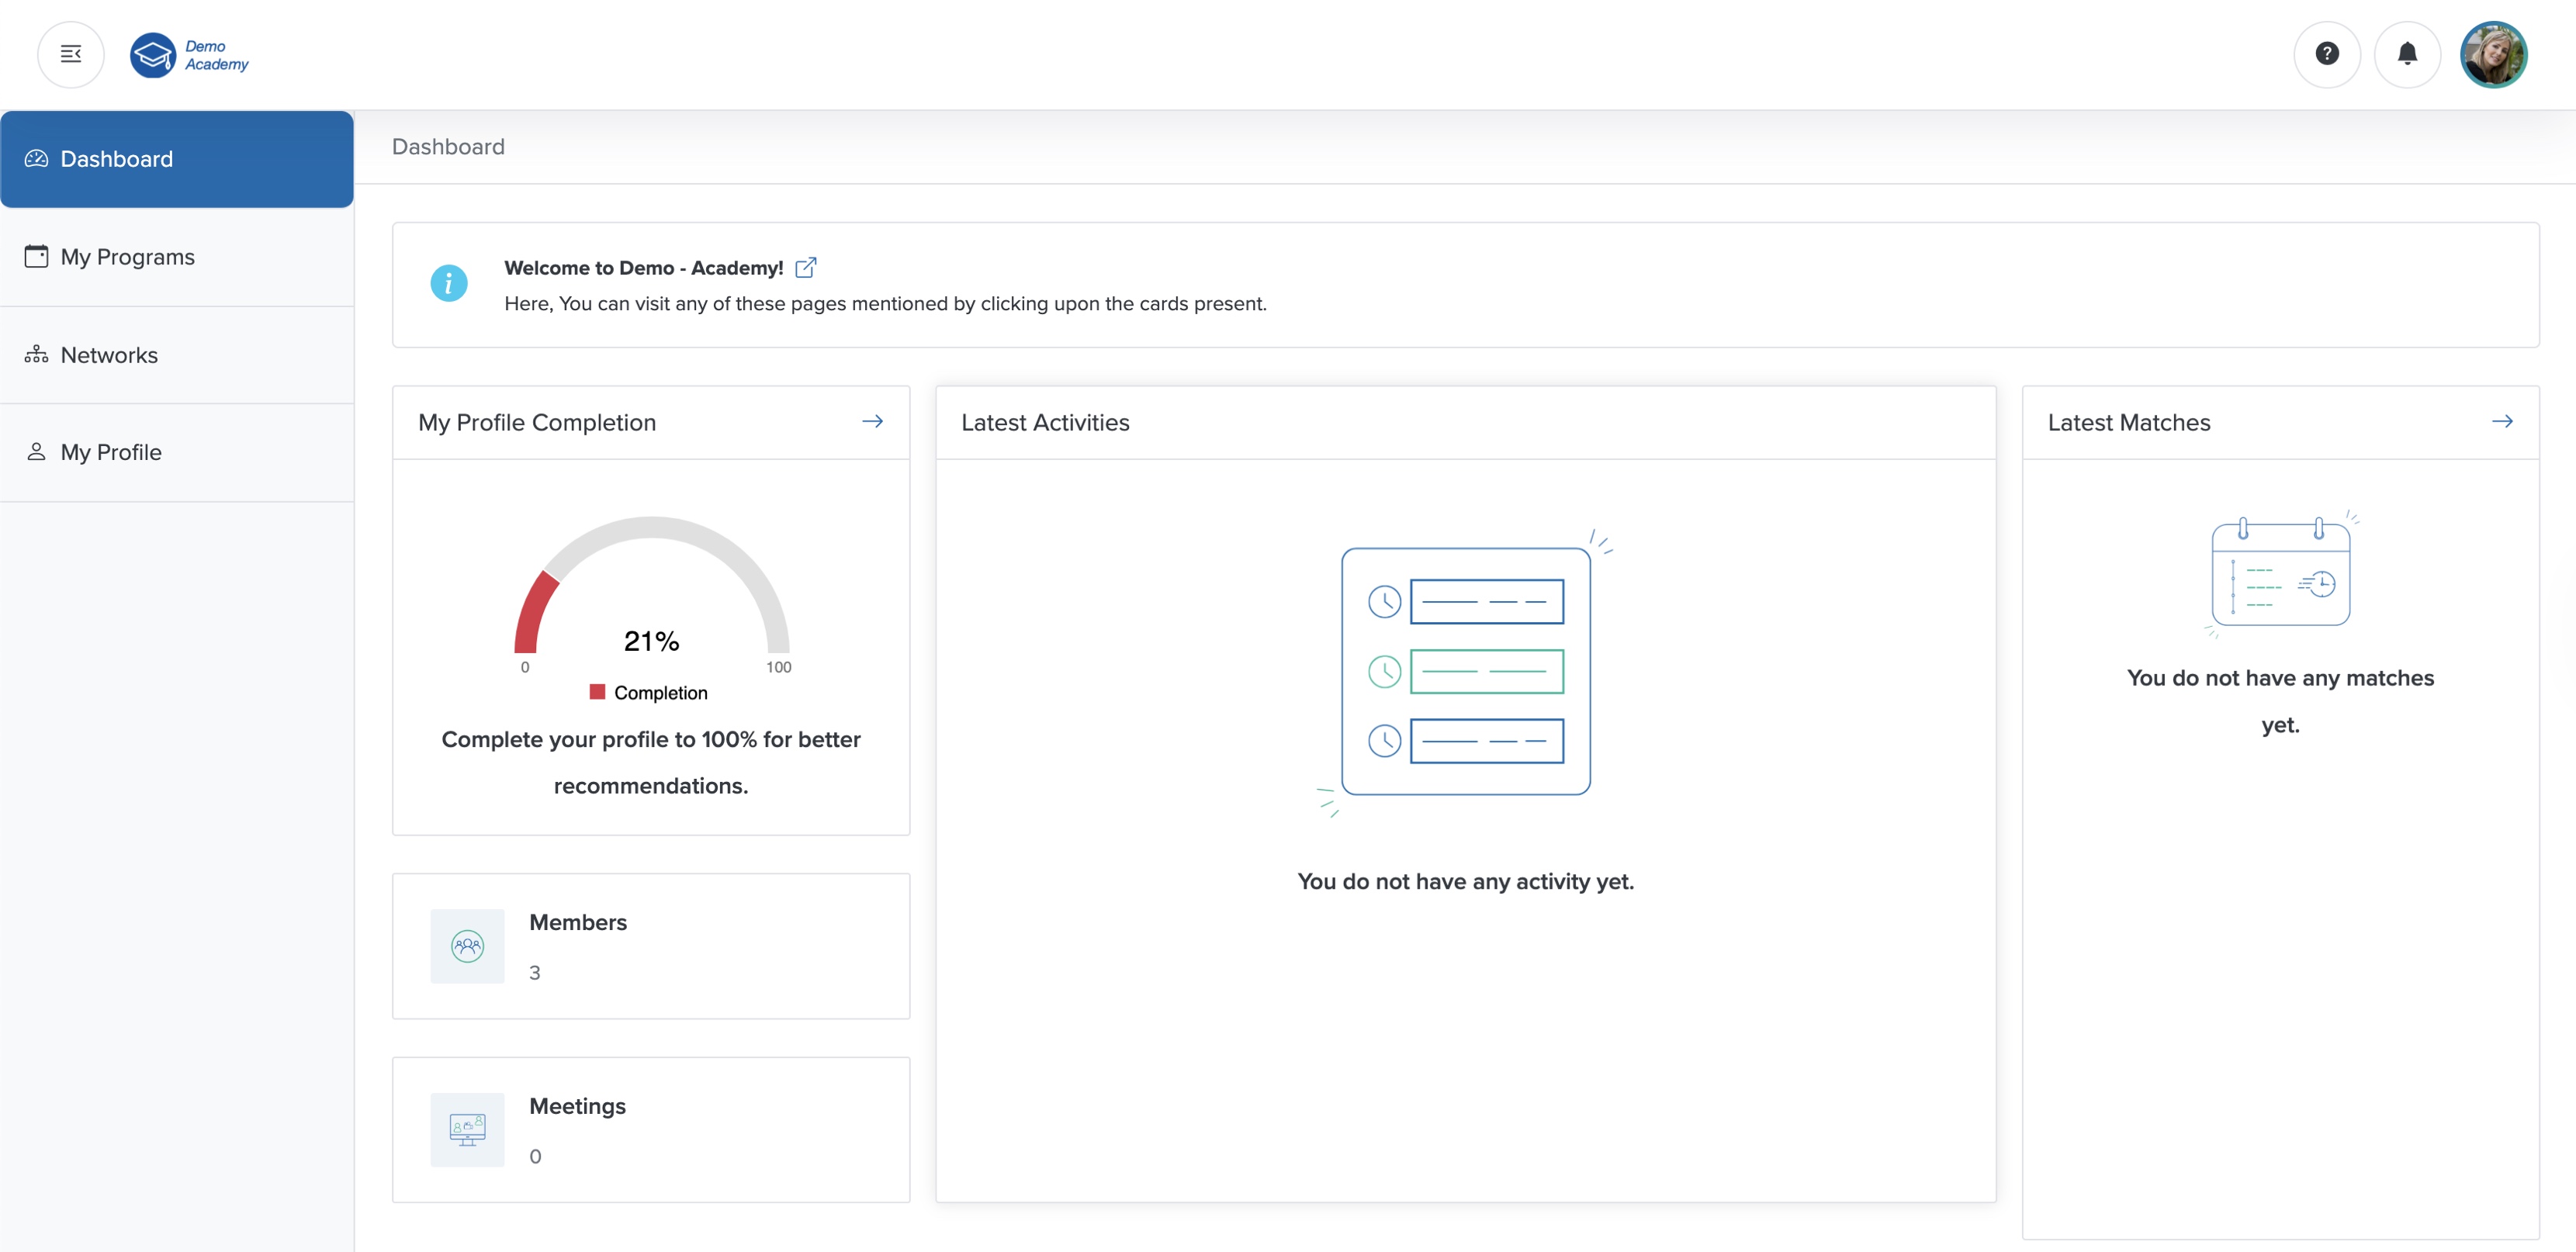
As a member, you can access the menus ‘Dashboard’, ‘My Programs’, ‘Networks’, and ‘My Profile’, as shown in Figure 8 above.
On the left side of your Dashboard, you can see the My Profile Completion status, number of Members, and number of Meetings details in card format, as shown in Figure 8 above.
In the middle of the Dashboard, you can see the latest Activities details in card format, as shown in Figure 8 above.
On the right side of your Dashboard, you can see the latest Matches details in card format, as shown in Figure 8 above.
My Profile
Click the Arrow on the header row of the My Profile Completion card or click the My Profile menu from the sidebar, as shown in Figure 8 above, and the My Profile page opens, as shown in Figure 9 below.
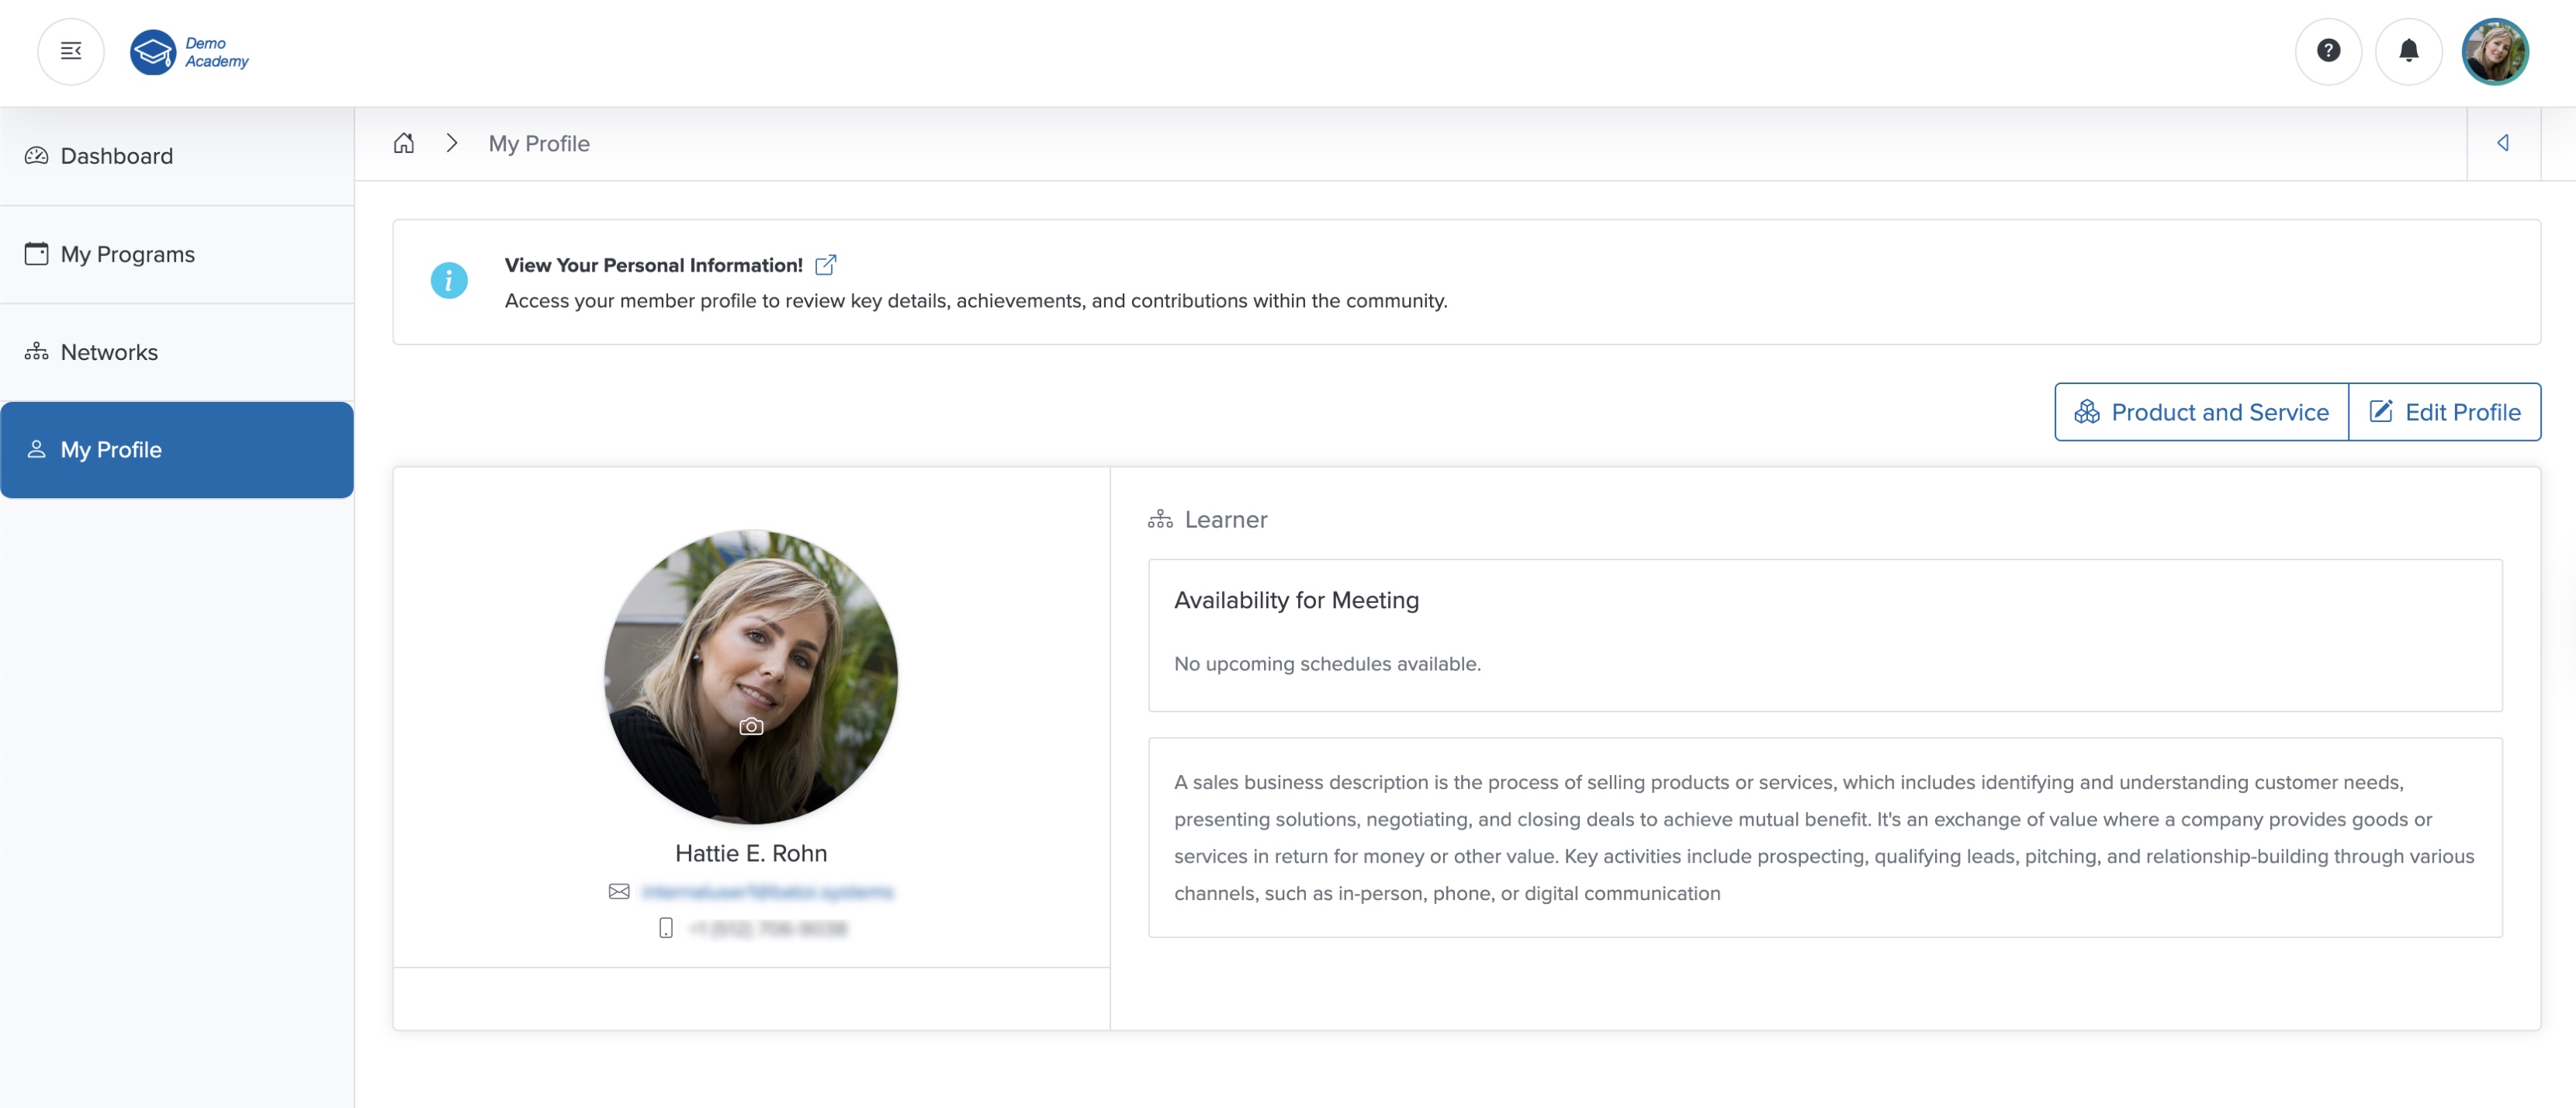
Click the Camera icon, as shown in Figure 9 above, and the image upload pop-up screen appears, as shown in Figure 10 below.
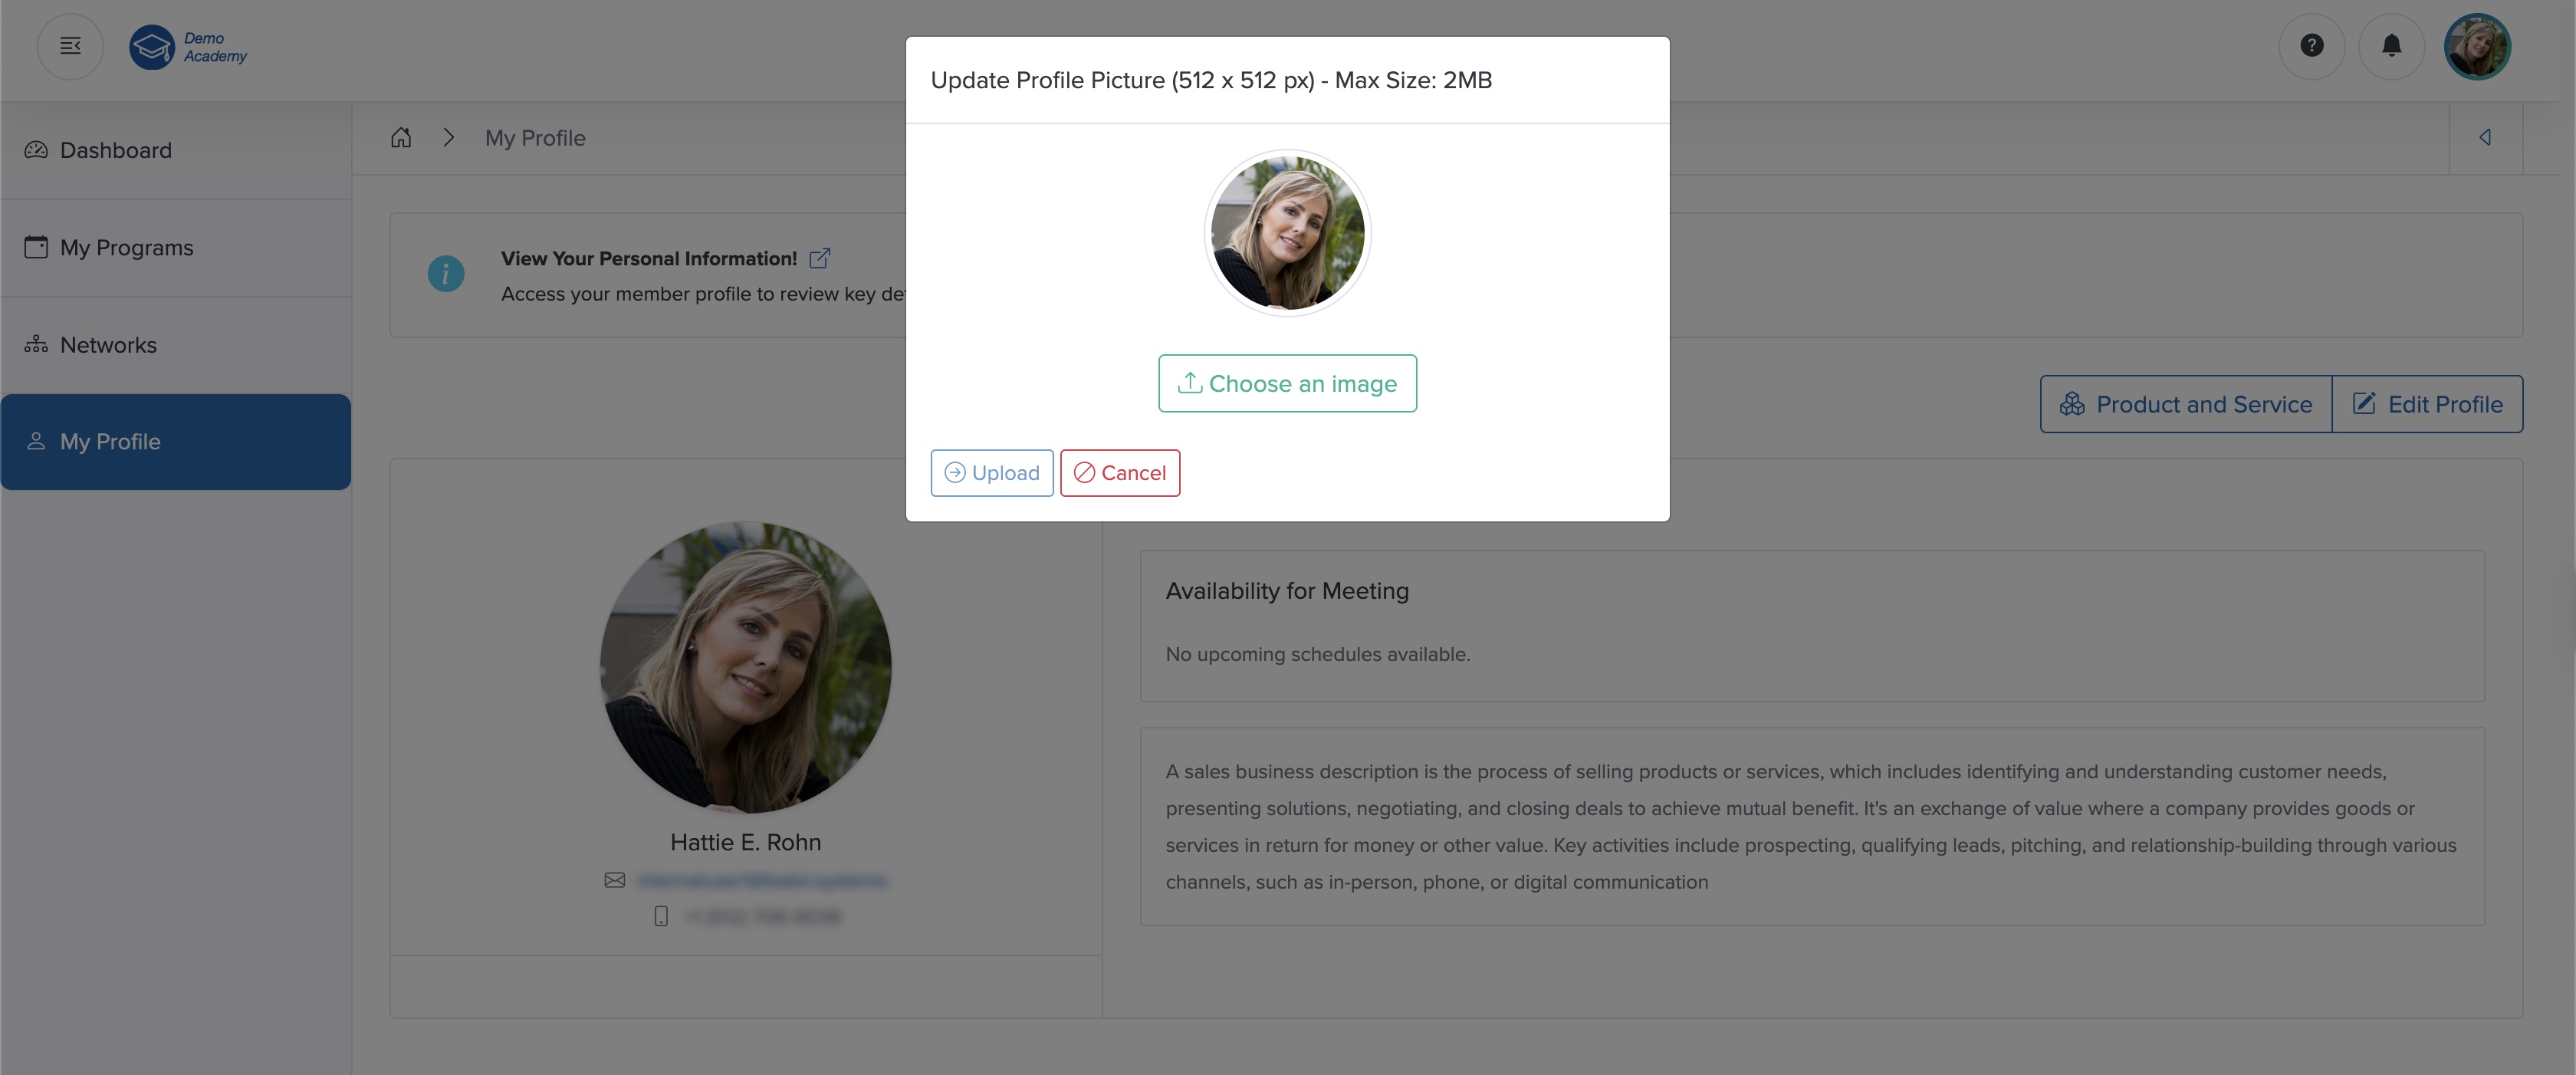
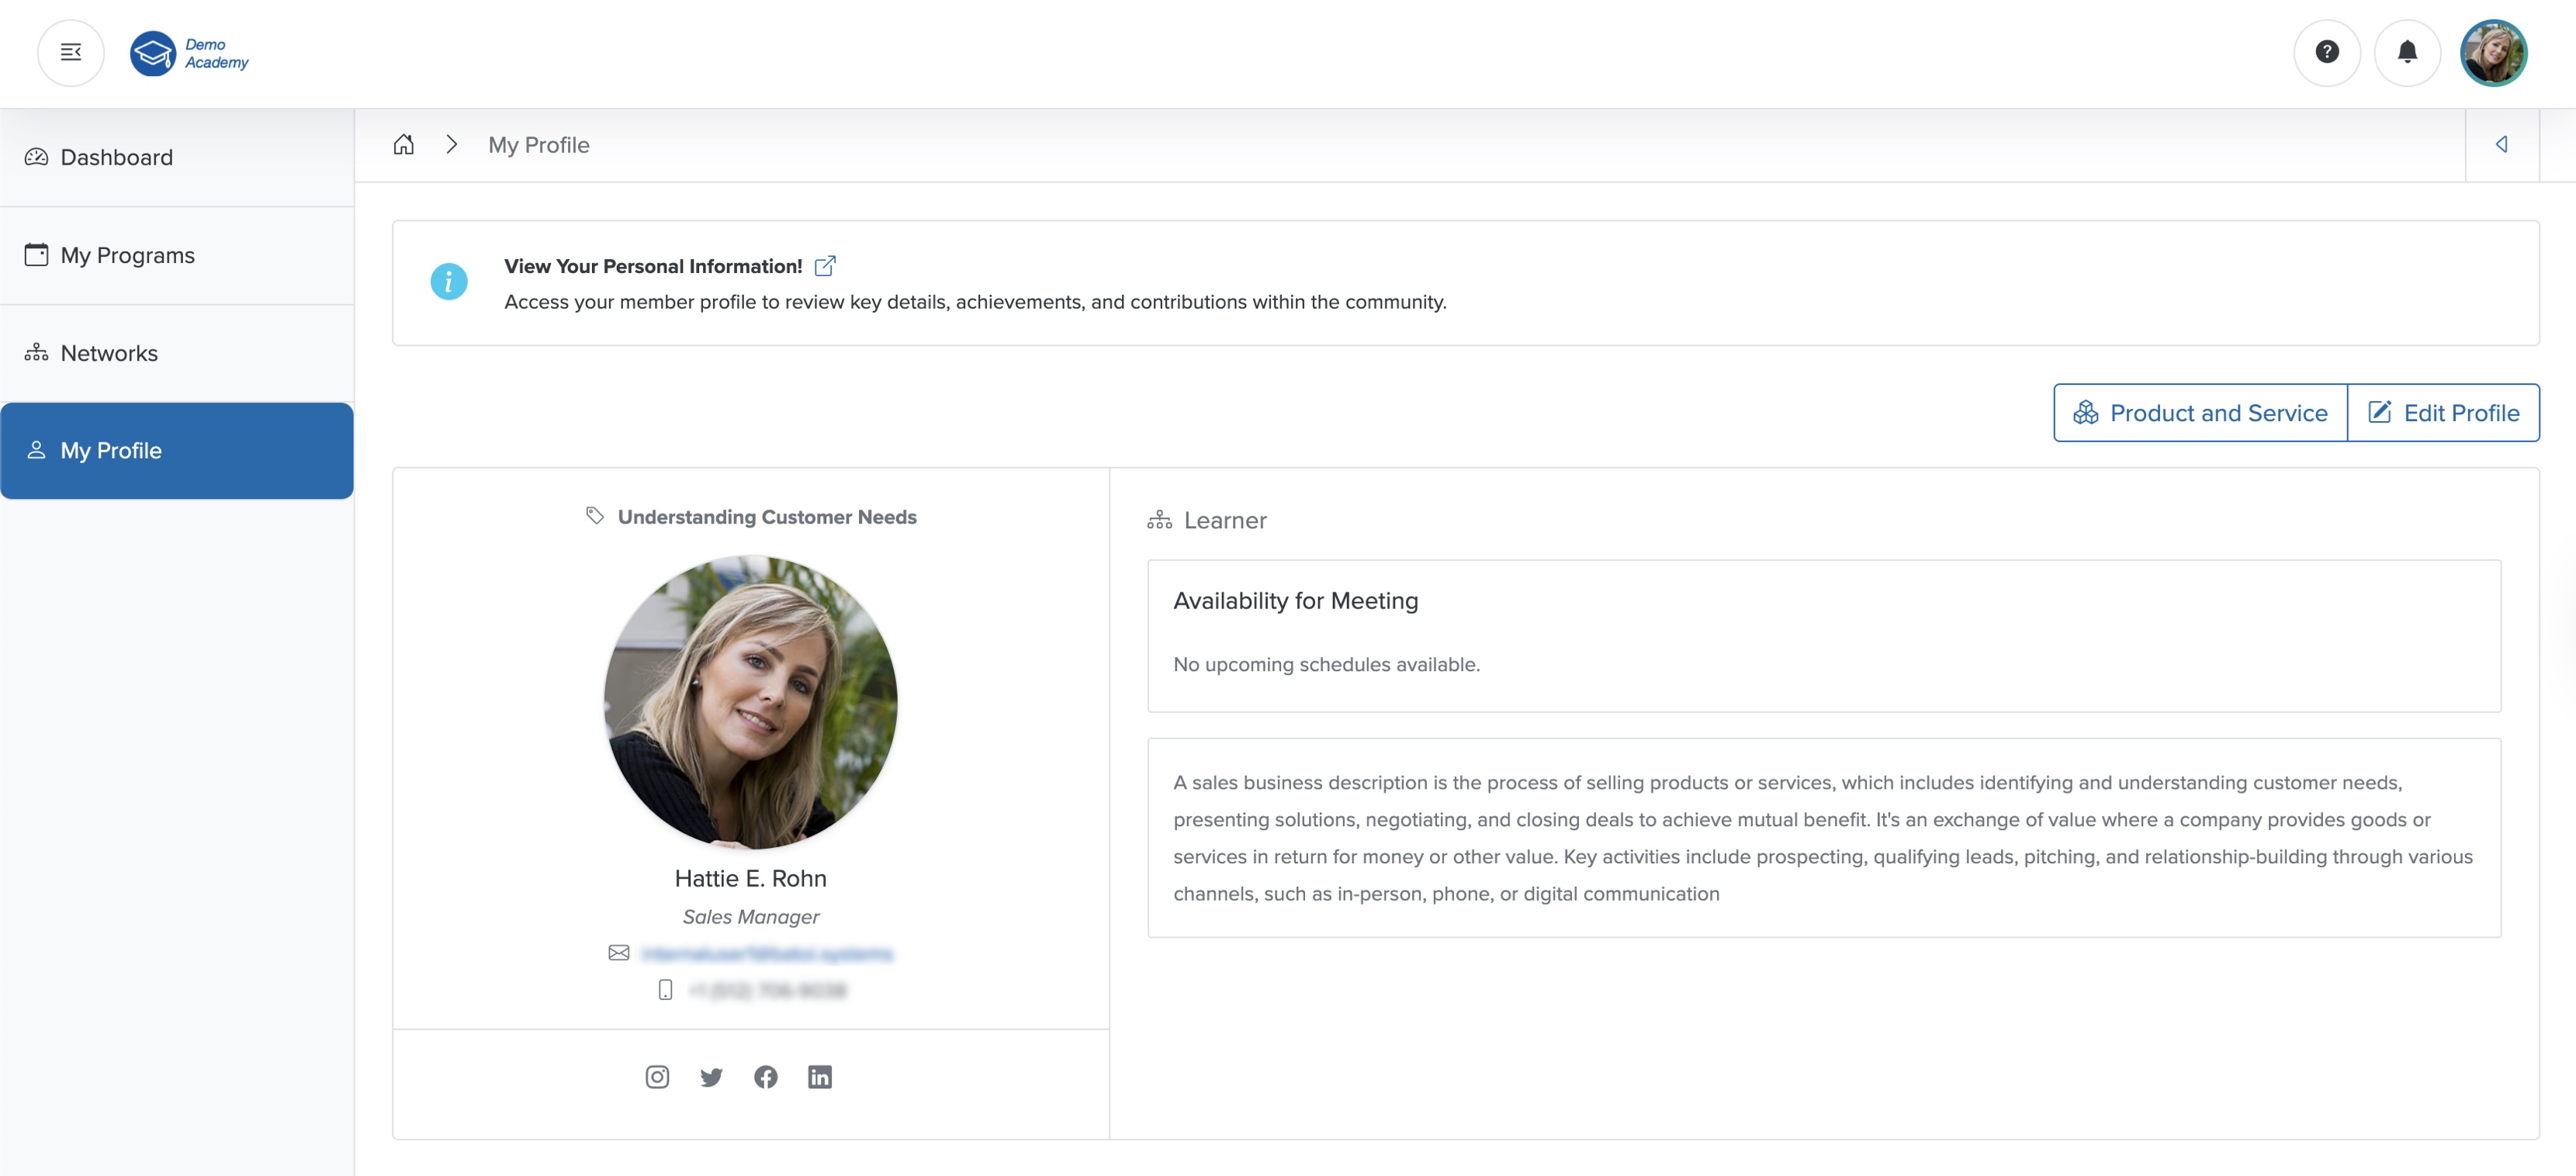
After uploading your profile image, you can see your updated profile picture, as shown in Figure 11 below.
Edit Profile
Click the Edit Profile button on the top-right side of the profile detail screen, as shown in Figure 11 above, and the profile edit page opens, as shown in Figure 12 below.
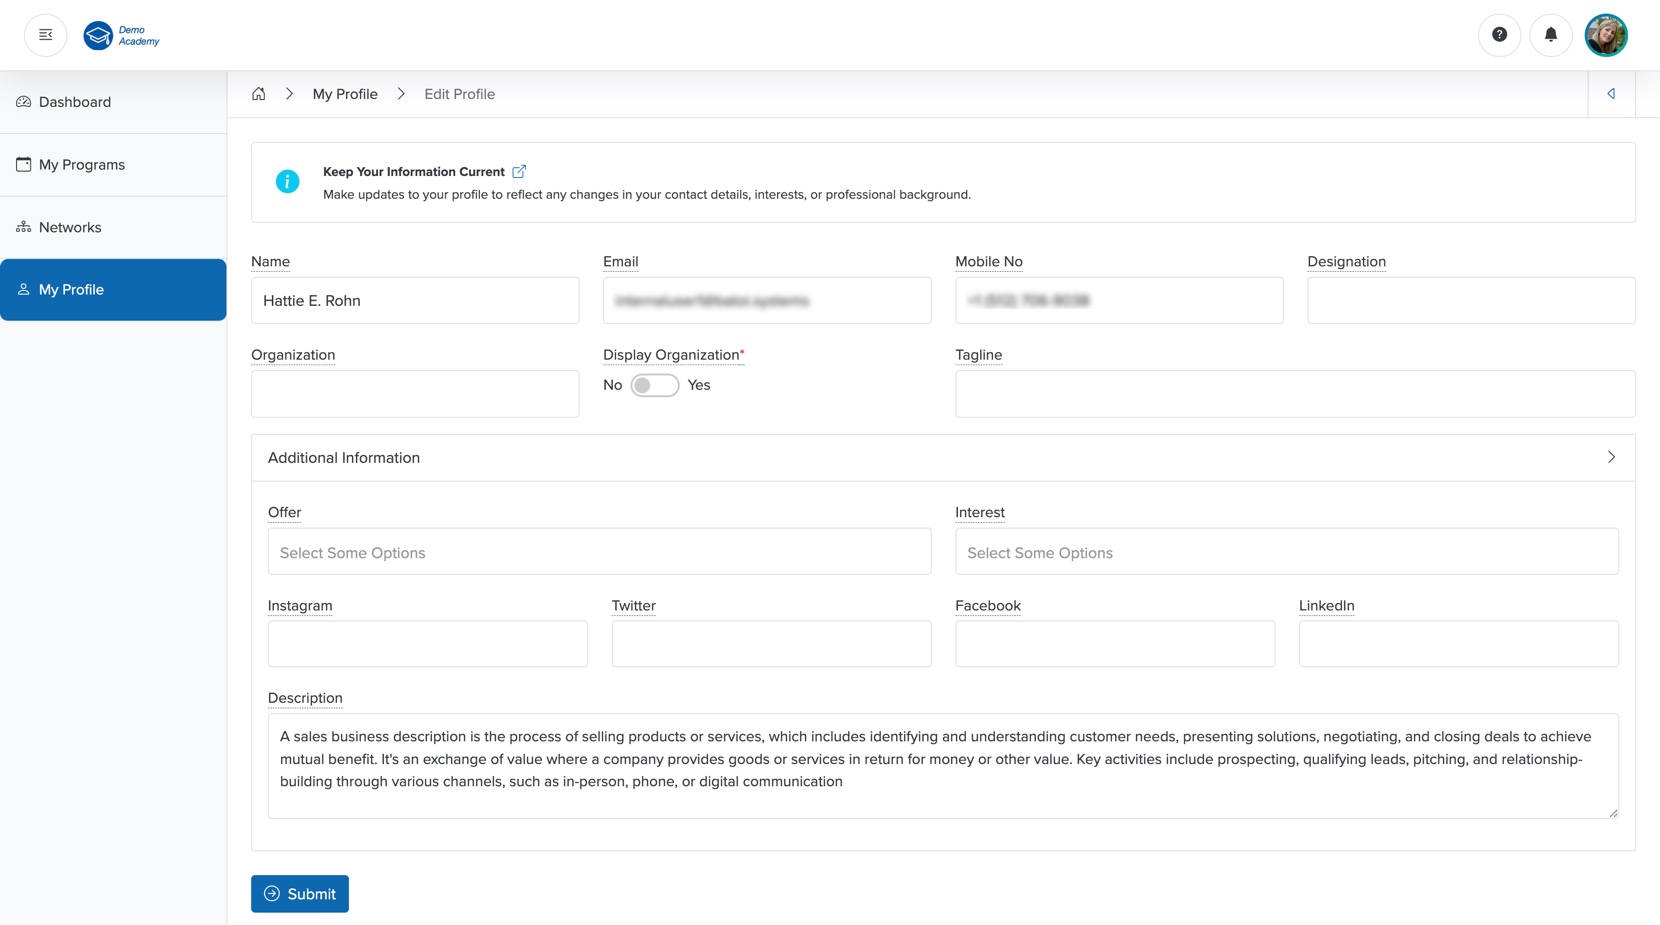
You cannot edit the Name, Email, and Mobile No fields on the edit profile page. To modify these fields, you must contact your Organization User.
You can edit the details below and click the Submit button to update your profile, as shown in Figure 12 above. You can set the following details:
- Designation (Textbox - Optional): Your Designation
- Organization (Textbox - Optional): Name of your Organization
- Display Organization (Radio Button - Optional): Select if you want to display the organisation name of your profile page or not. (If you selected Yes, then the Organization name and logo will come first, and the contact name will come below that.)
- Tagline (Textbox - Optional): Tagline to describe you
- Offers (Multi-select - Optional): Select the category of service you offer from the options available
- Interest (Multi-select - Optional): Select the category of service you are looking for from the options available
- Social Media Handles
- Description (Textarea - Optional): Write about you or your organisation
After you update your profile, you can see your updated details, as shown in Figure 13 below.
My Programs
Click the My Programs menu as shown in Figure 13 above, and the program list page opens, as shown in Figure 14 below.
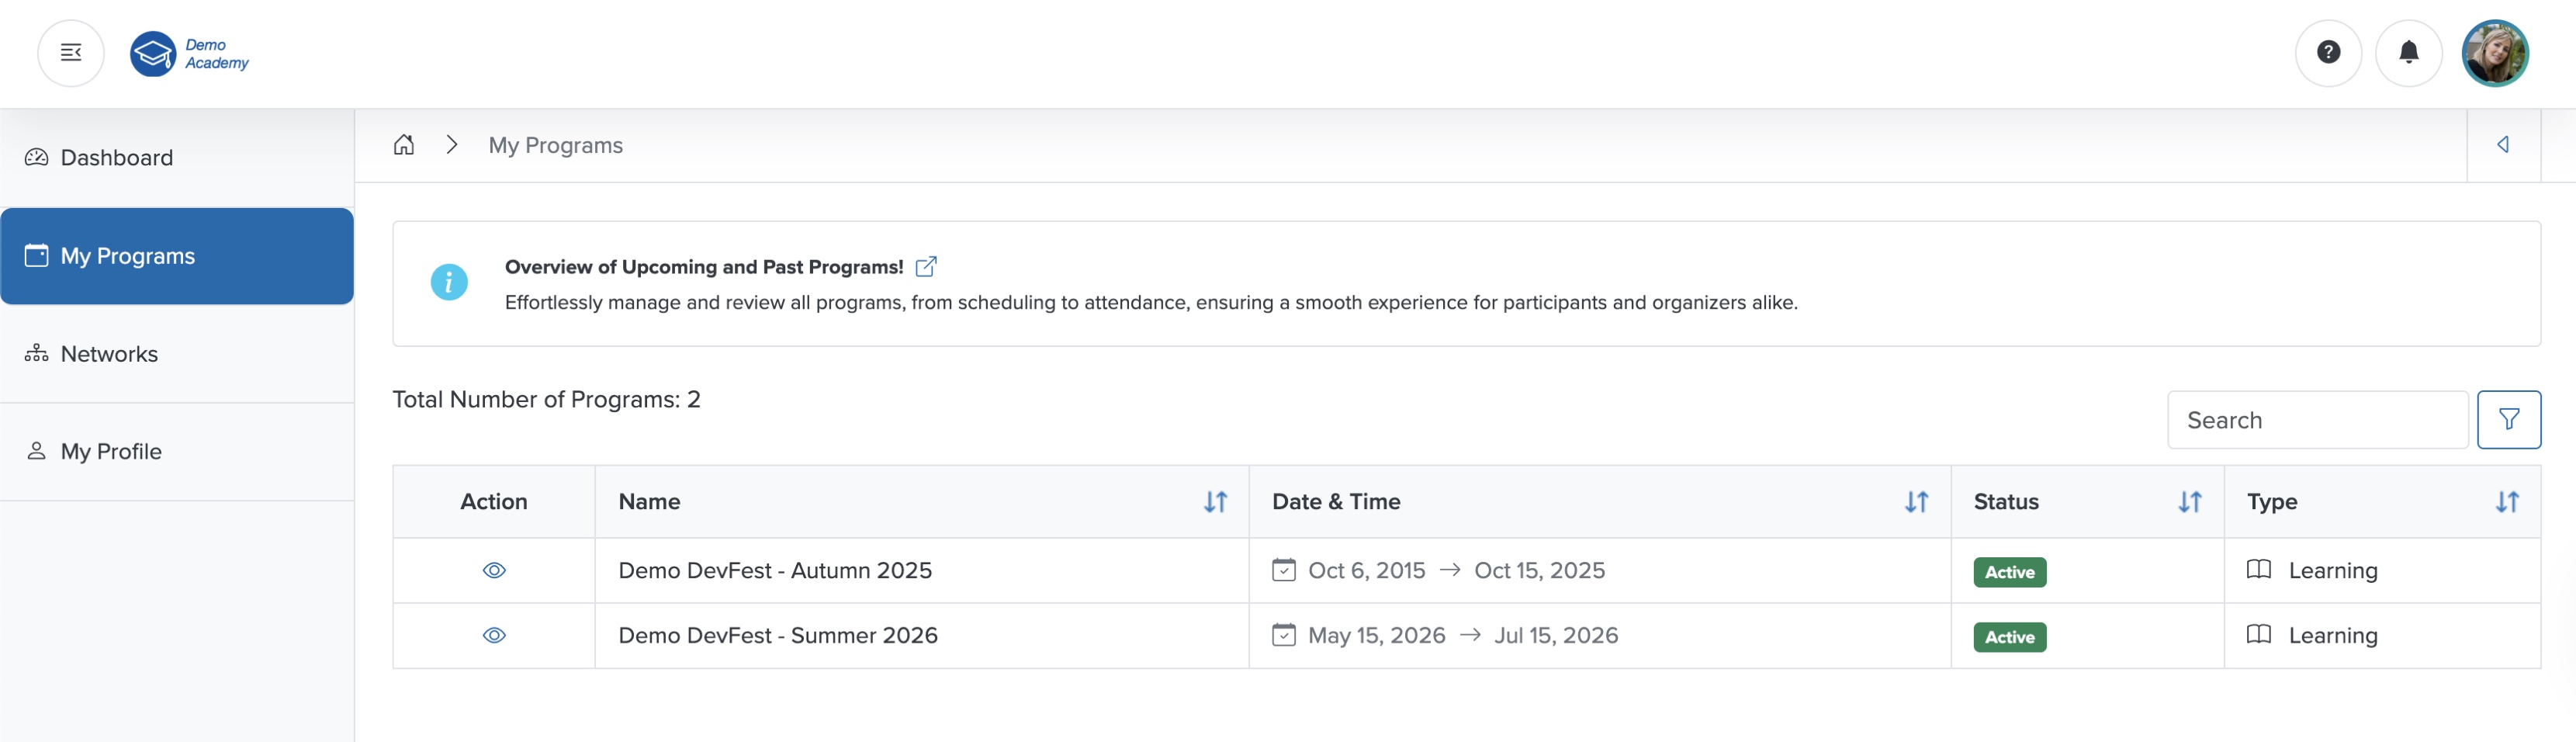
In the Program list page, you can see all the programs listed in tabular format, as shown in Figure 14 above. To filter the program, enter the details in the Filter Textbox located at the top-right corner of the screen, as shown in Figure 14 above. To sort the program by 'Name', 'Date and Time', 'Status', and 'Type', click the sorting arrow in the header row of the corresponding column of the table, as shown in Figure 14 above.
Course Dashboard
Click the View icon associated with any Learning program in the Action column, as shown in Figure 14 above, and the course dashboard page opens, as shown in Figure 15 below.
In the extreme left side of the individual course dashboard screen, you can see the menu structure available for the course, as shown in Figure 15 above.
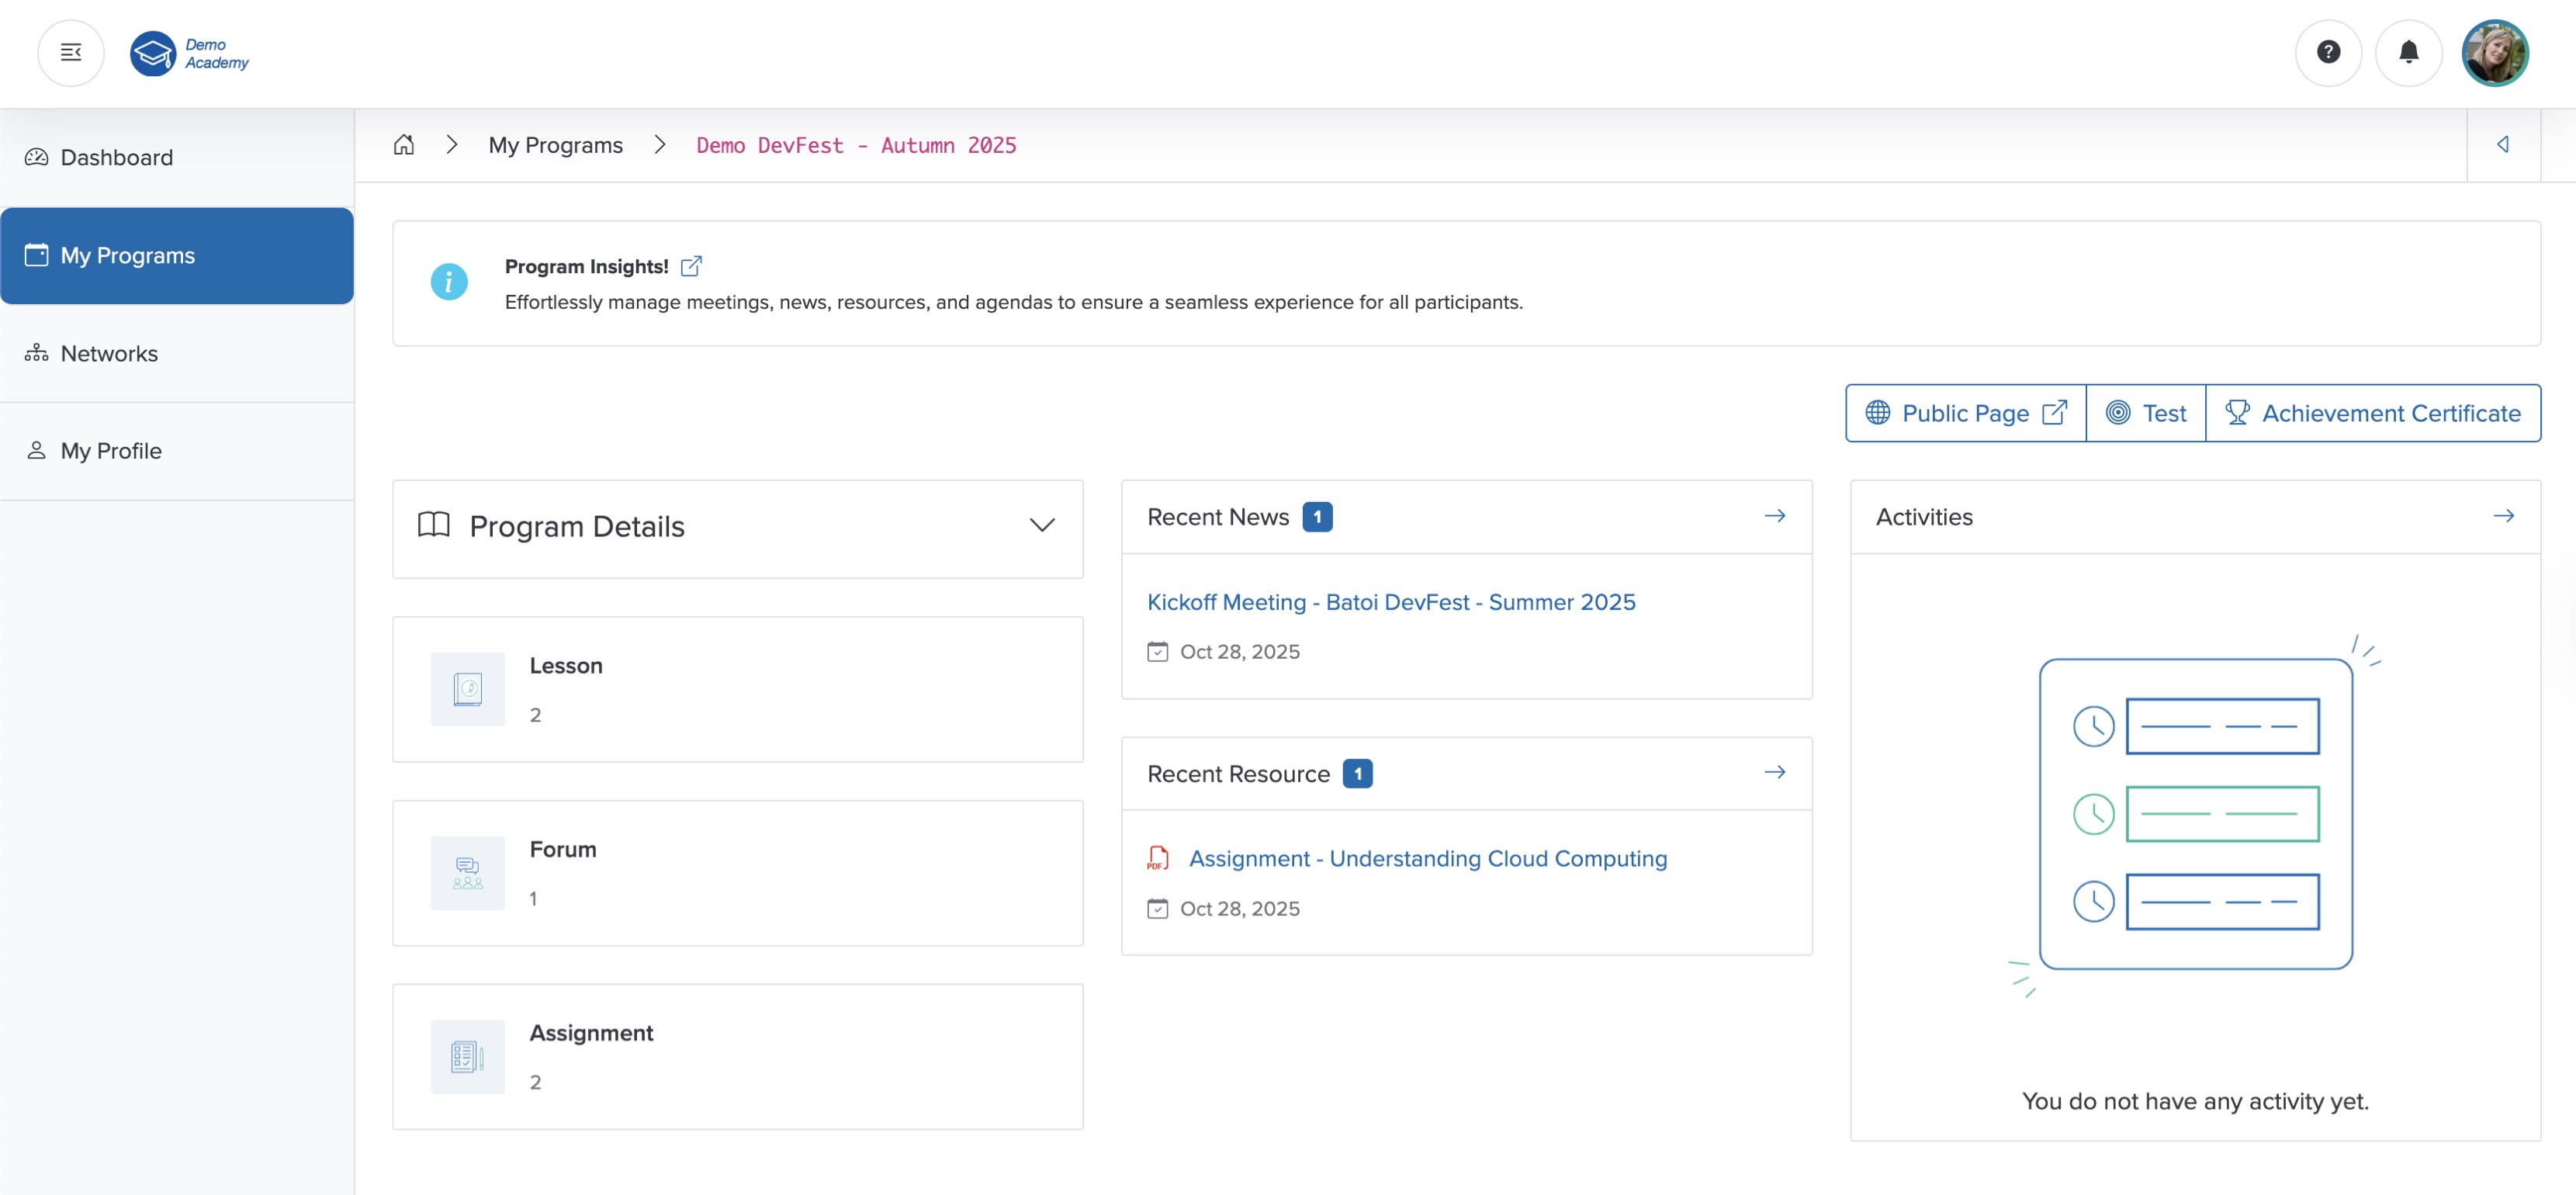
In the course dashboard, you can find the Program details, number of Lessons added, number of Forum threads created, and number of Assignments added on the left side in a card format, as shown in Figure 15 above.
In the middle section, you can see the latest News published and the recent Resources added to the Learning program, as shown in Figure 15 above.
On the right side, you can see the Activities, as shown in Figure 15 above.
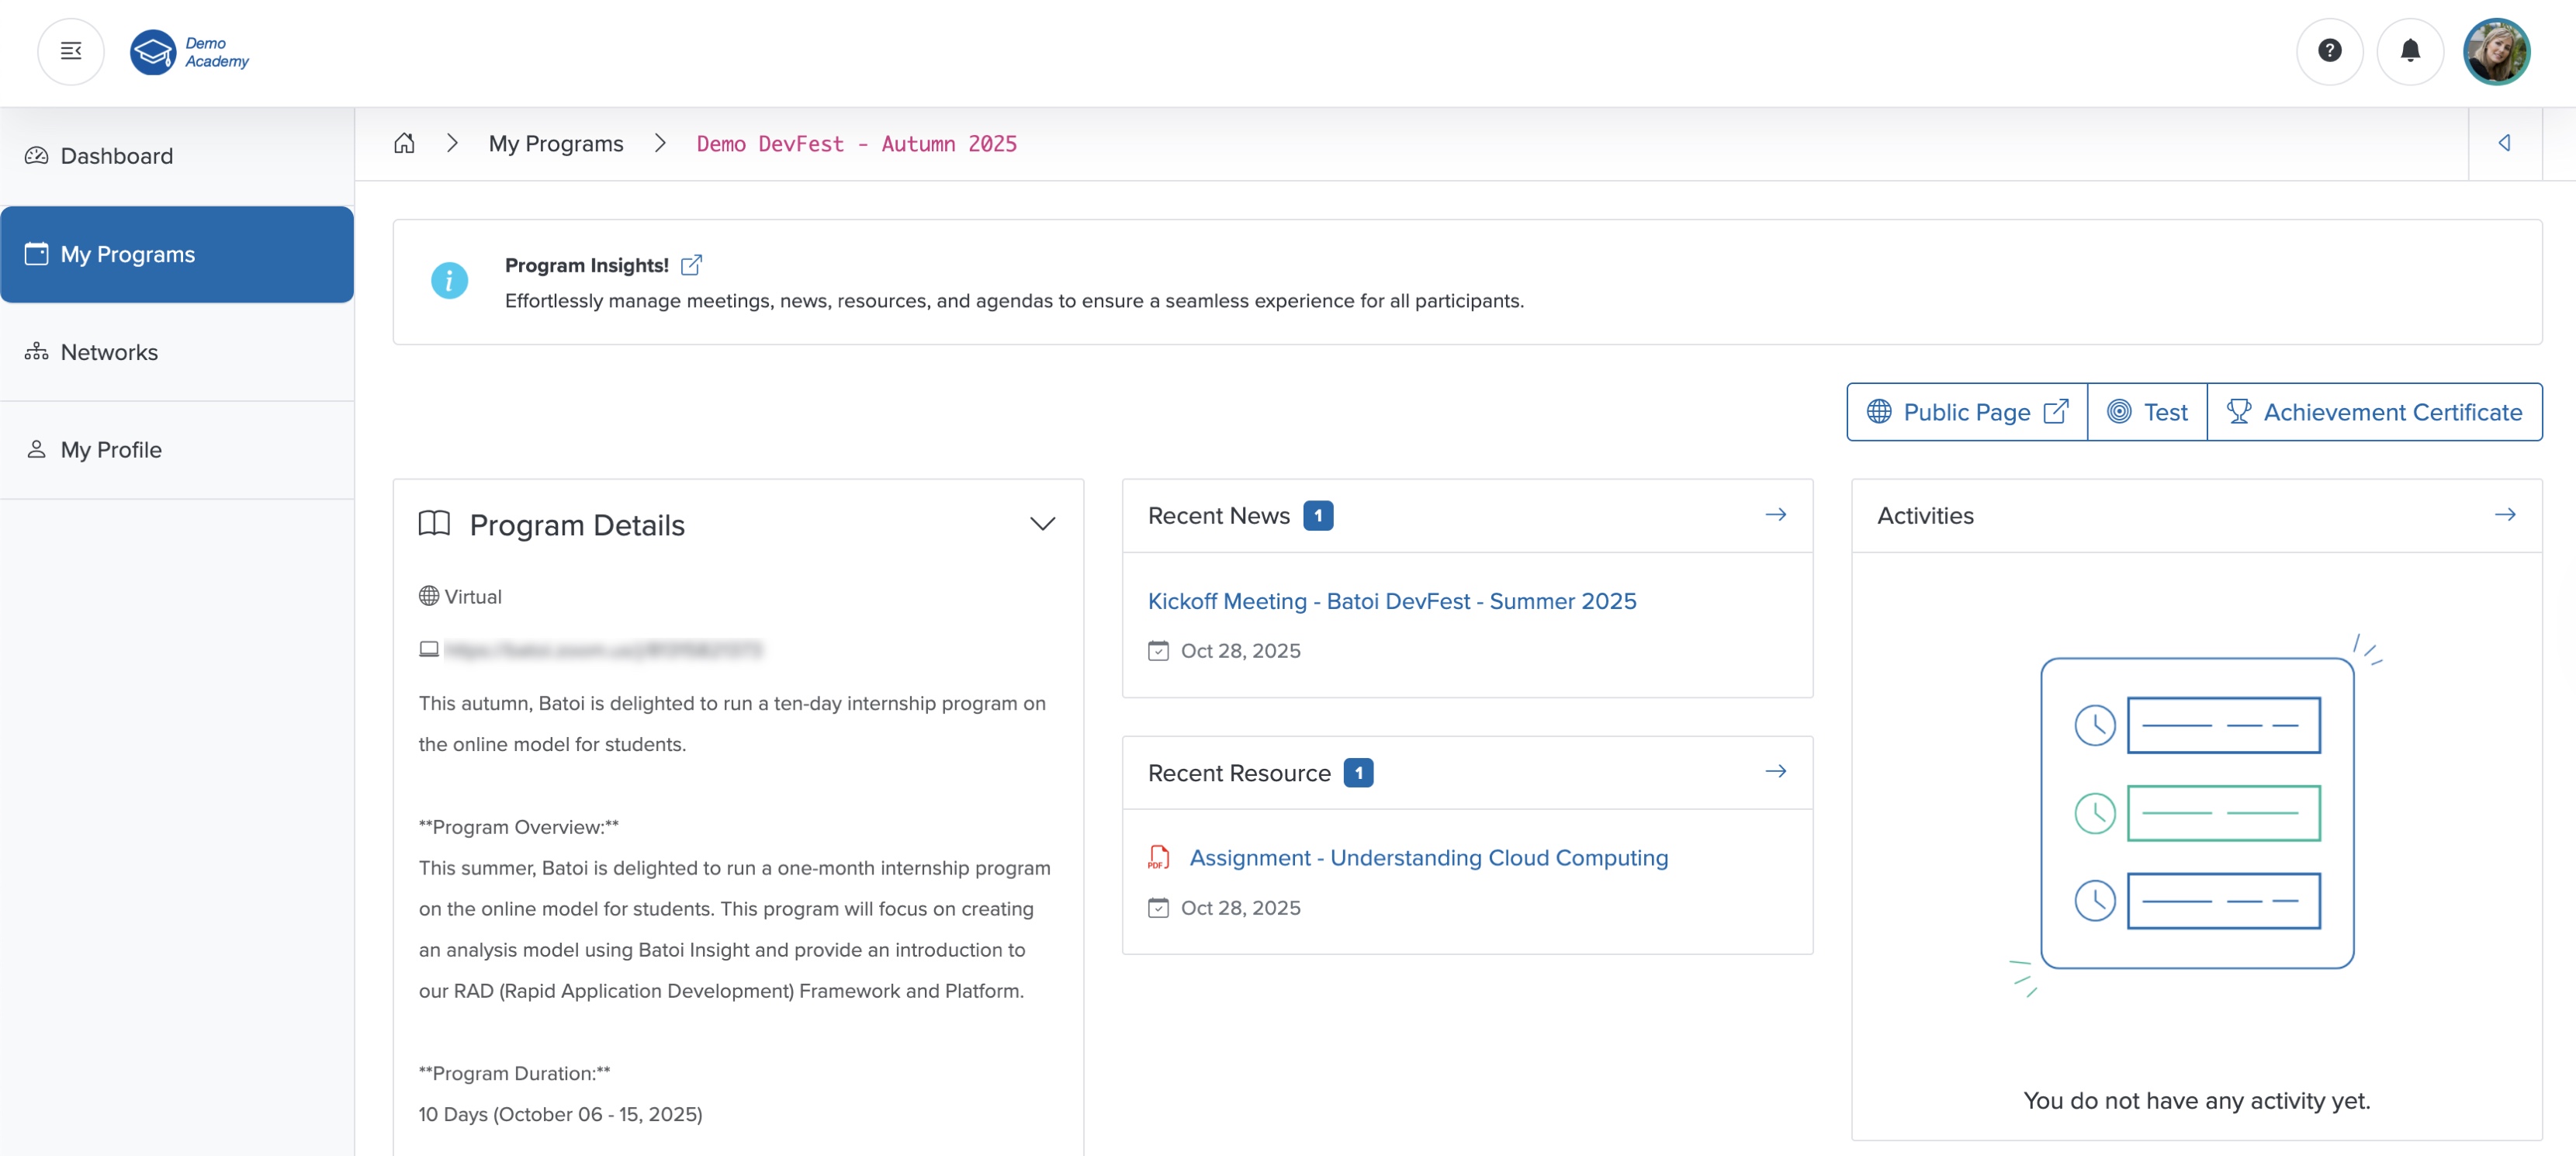
Program Details
Click the Down Arrow on the Program Details card on the course dashboard, as shown in Figure 15 above, and the section expands, displaying the details such as course Type and Location, as shown in Figure 16 below.
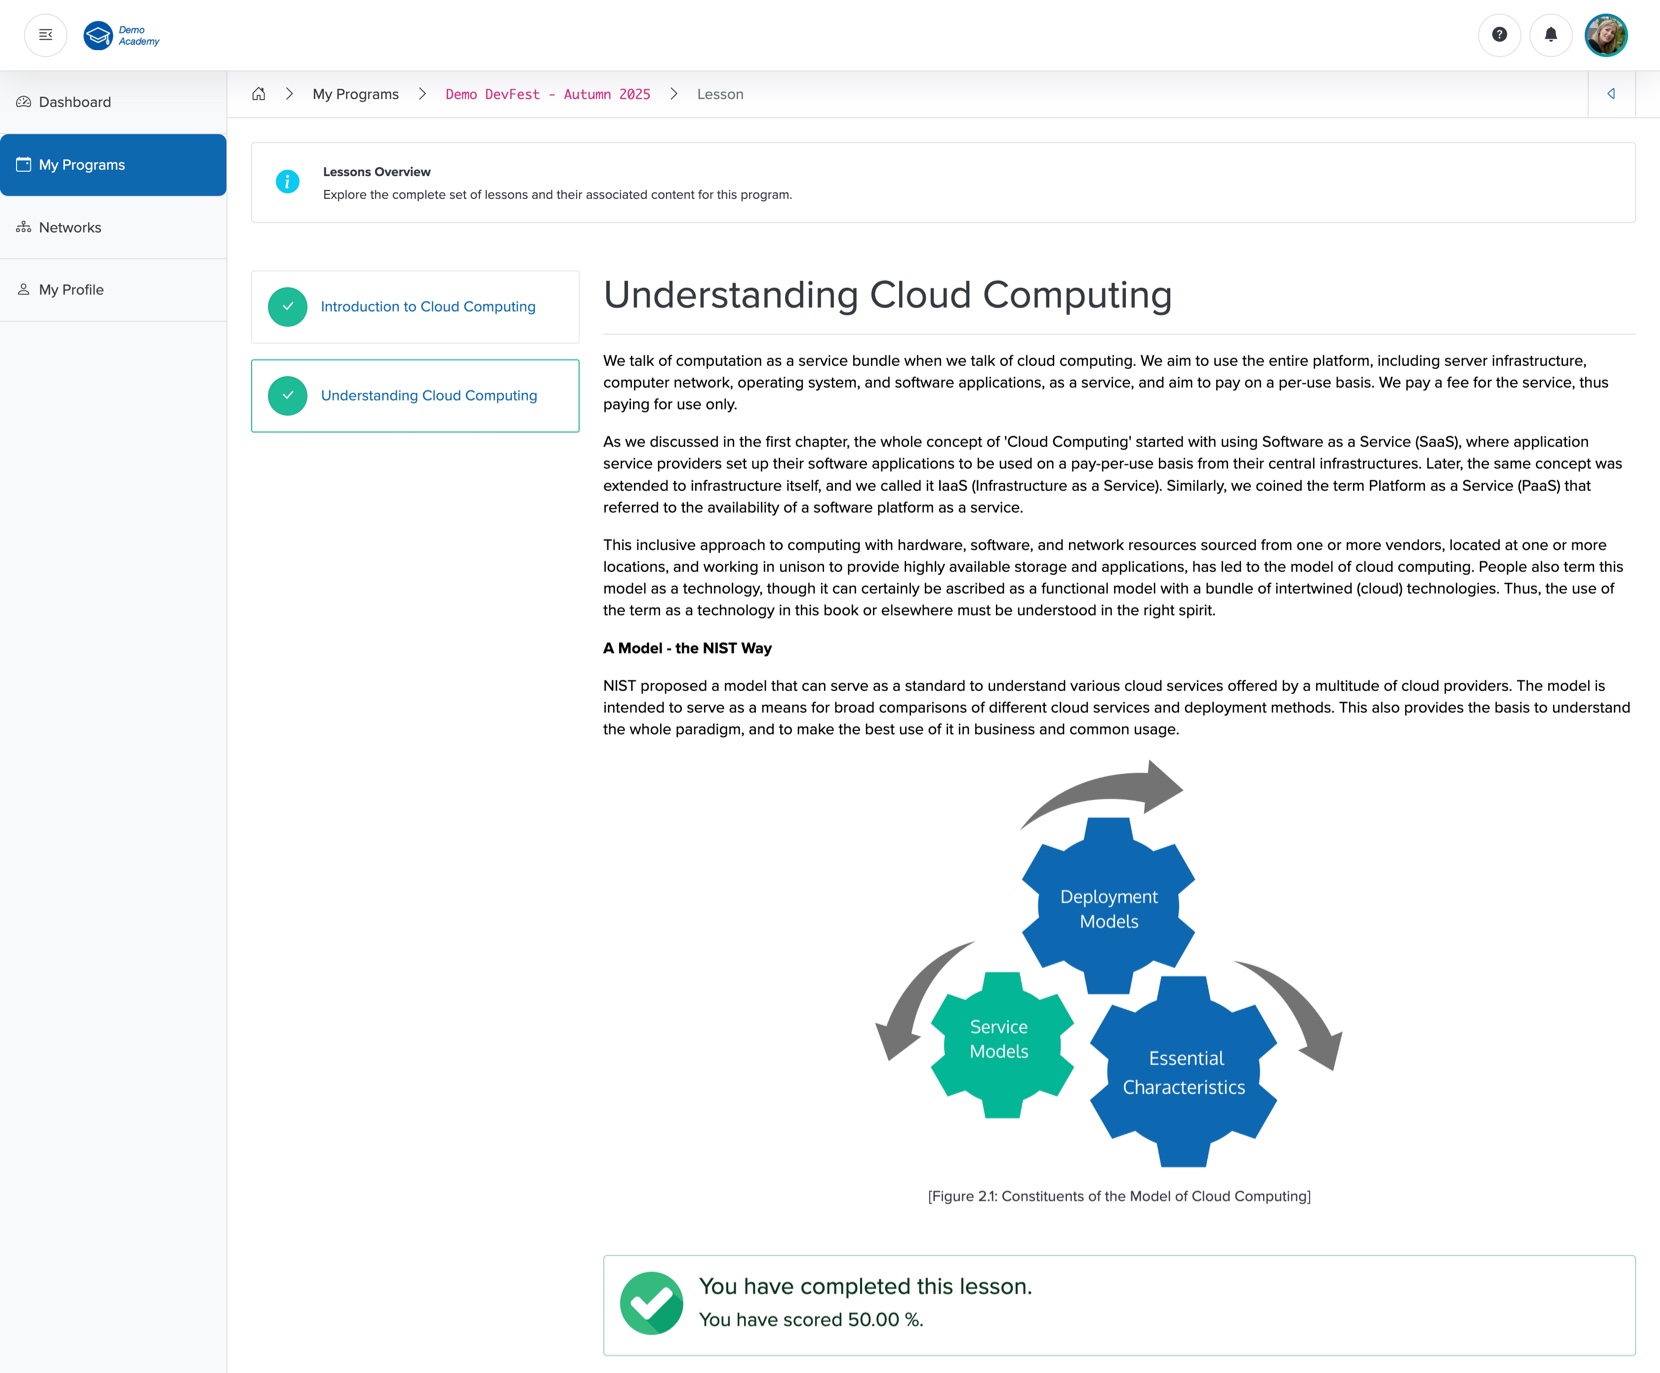
Lesson
Click the Lesson card from the course dashboard, as shown in Figure 15, and the lesson page opens, as shown in Figure 17 below.
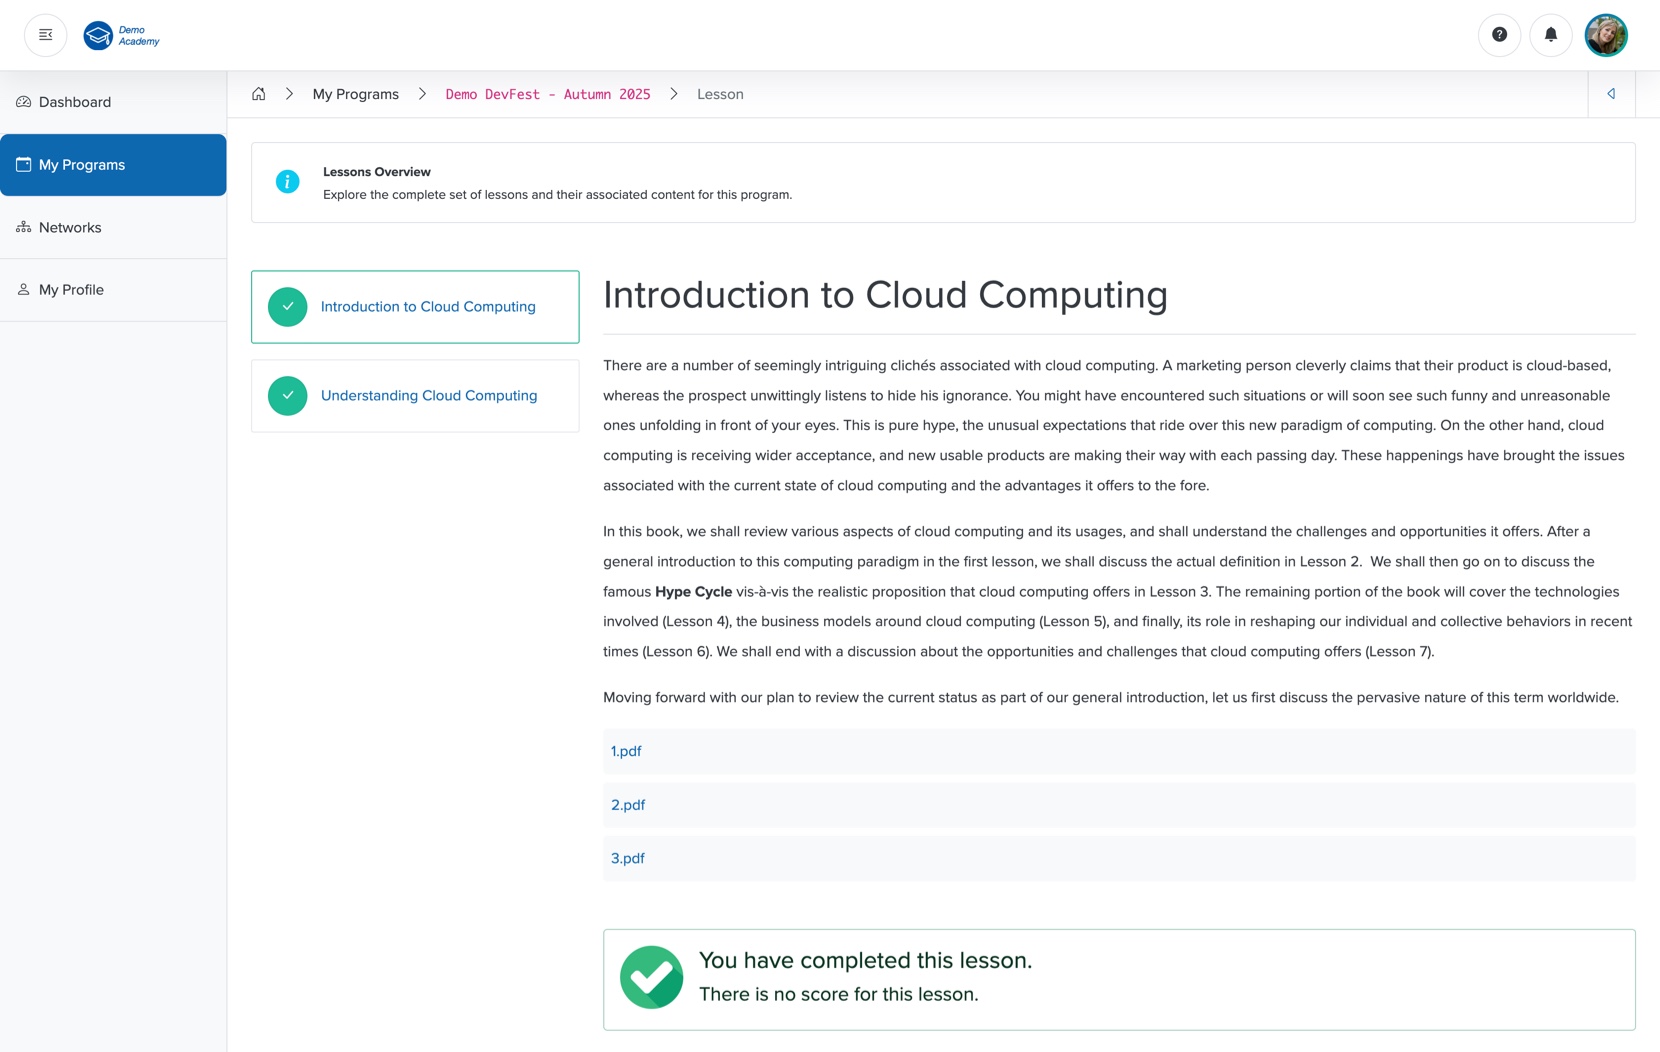
On the left side of the screen, the list of lessons appears in a tab format, as shown in Figure 17 above. Click the lessons from the tab, as shown in Figure 17 above, to view the lessons.
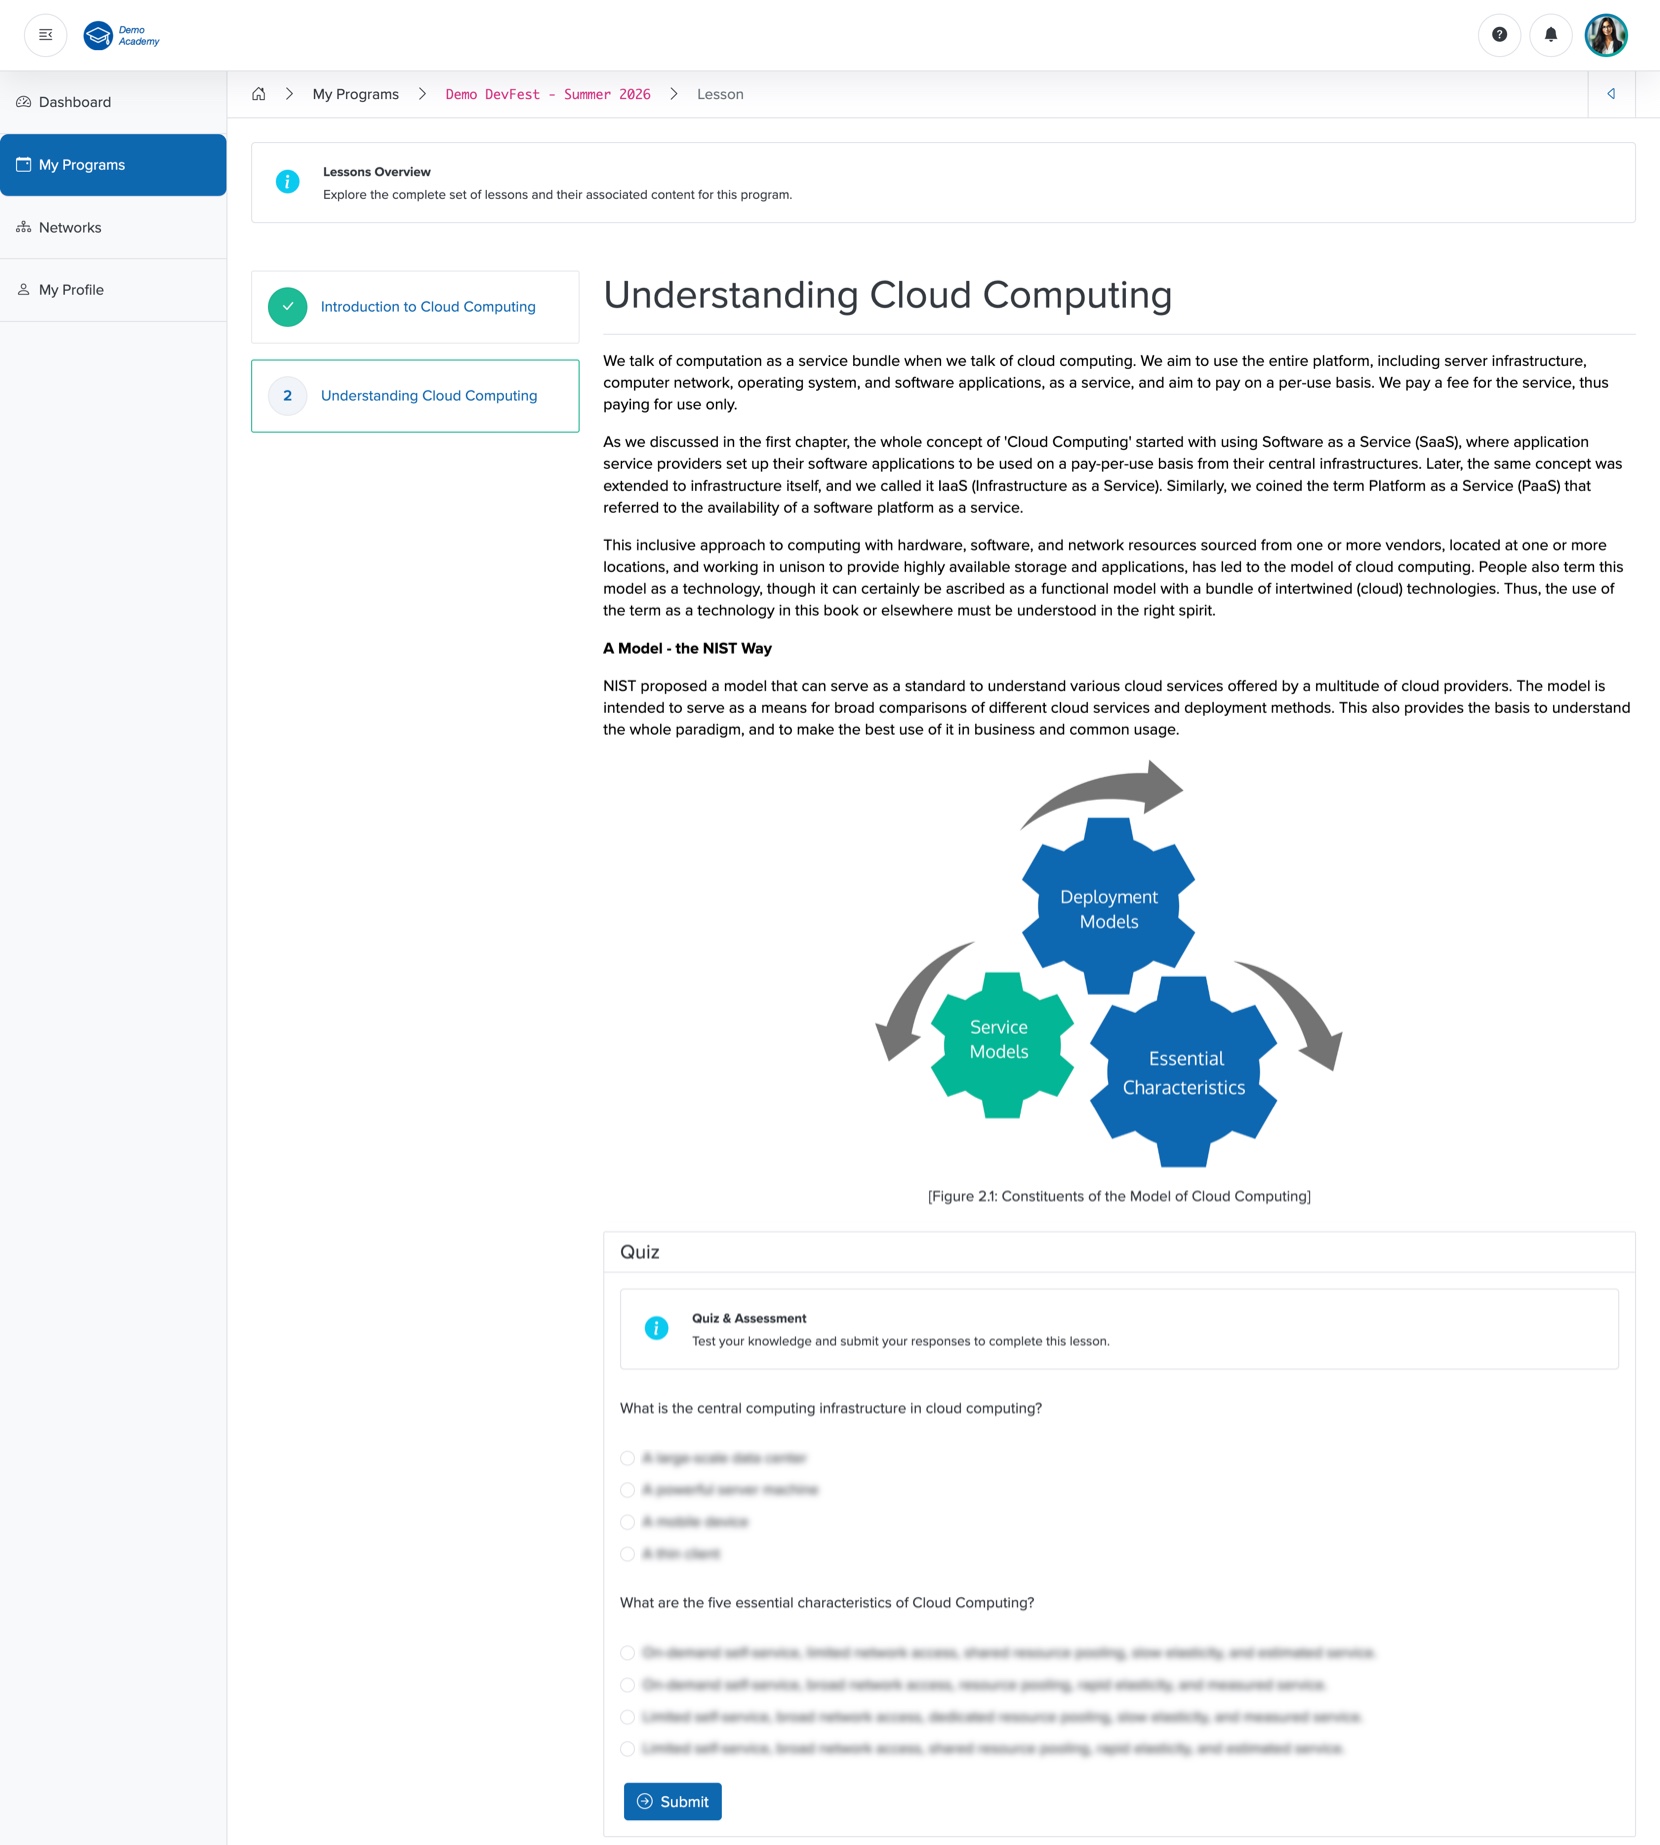
You can find the quiz for a lesson at the bottom of the lesson screen, as shown in Figure 18 below.
Click the Submit button at the bottom of the screen, as shown in Figure 18 below, after you complete the lesson, and a green tick mark appears with a note, as shown in Figure 17 above. You can also see the green tick mark appear on the lesson tab, as shown in Figure 17 above.
NOTE: You can attempt all the quizzes associated with individual lessons before you mark them as complete. Once the lesson is marked as completed, you will not be able to access the quiz associated with it.
You can see the score you have obtained in the quiz, along with the lesson completion note at the bottom of the screen, as shown in Figure 19 below.
Forum
Click the Forum card on the course dashboard, as shown in Figure 15 above, and the forum list page opens, where you can see all the available threads in a tabular format, as shown in Figure 20 below.
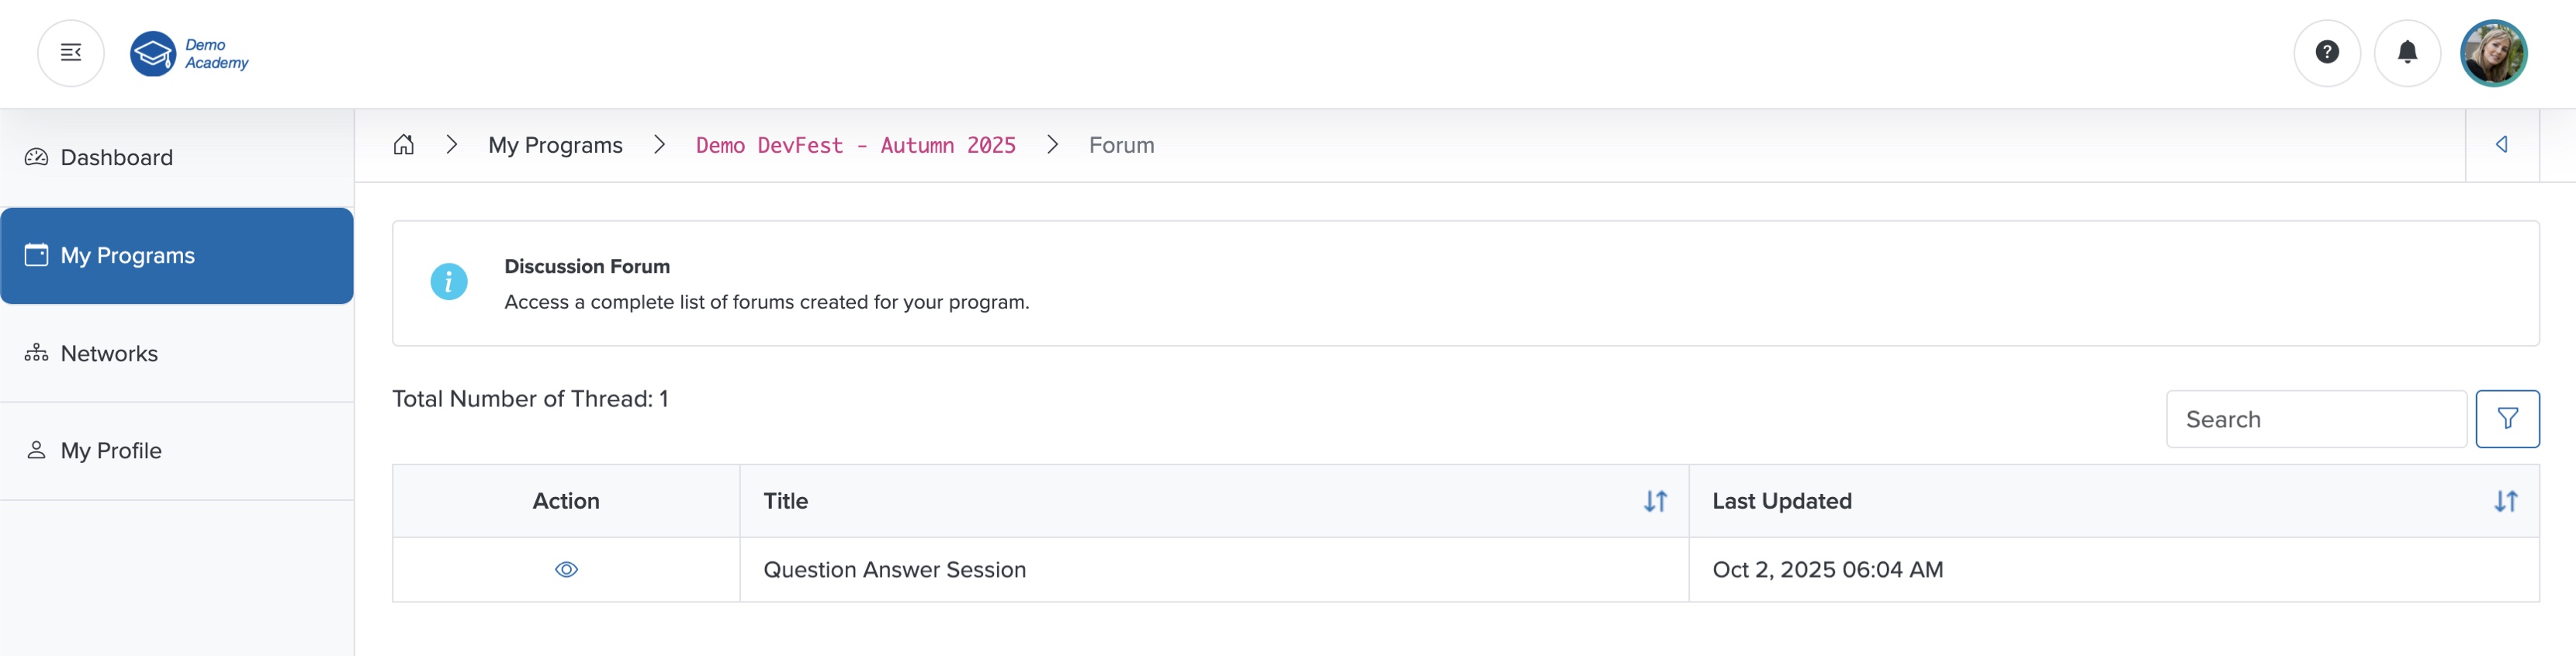
View Forum
Click the View icon in the Action column associated with each thread, as shown in Figure 20 above, and the detail page opens, as shown in Figure 21 below.
In the individual detail page, you can find all the participants' responses in threads, as shown in Figure 21 below.

Add Response
Enter your response in the Summer Note section, and click the Submit button to add your response in the forum thread, as shown in Figure 21 above.
You can also upload files using the Upload feature, as shown in Figure 21 above.
Assignment
Click the Assignment card on the course dashboard, as shown in Figure 15 above, and the assignment list page opens, where you can see all the available assignments in a tabular format, as shown in Figure 22 below.
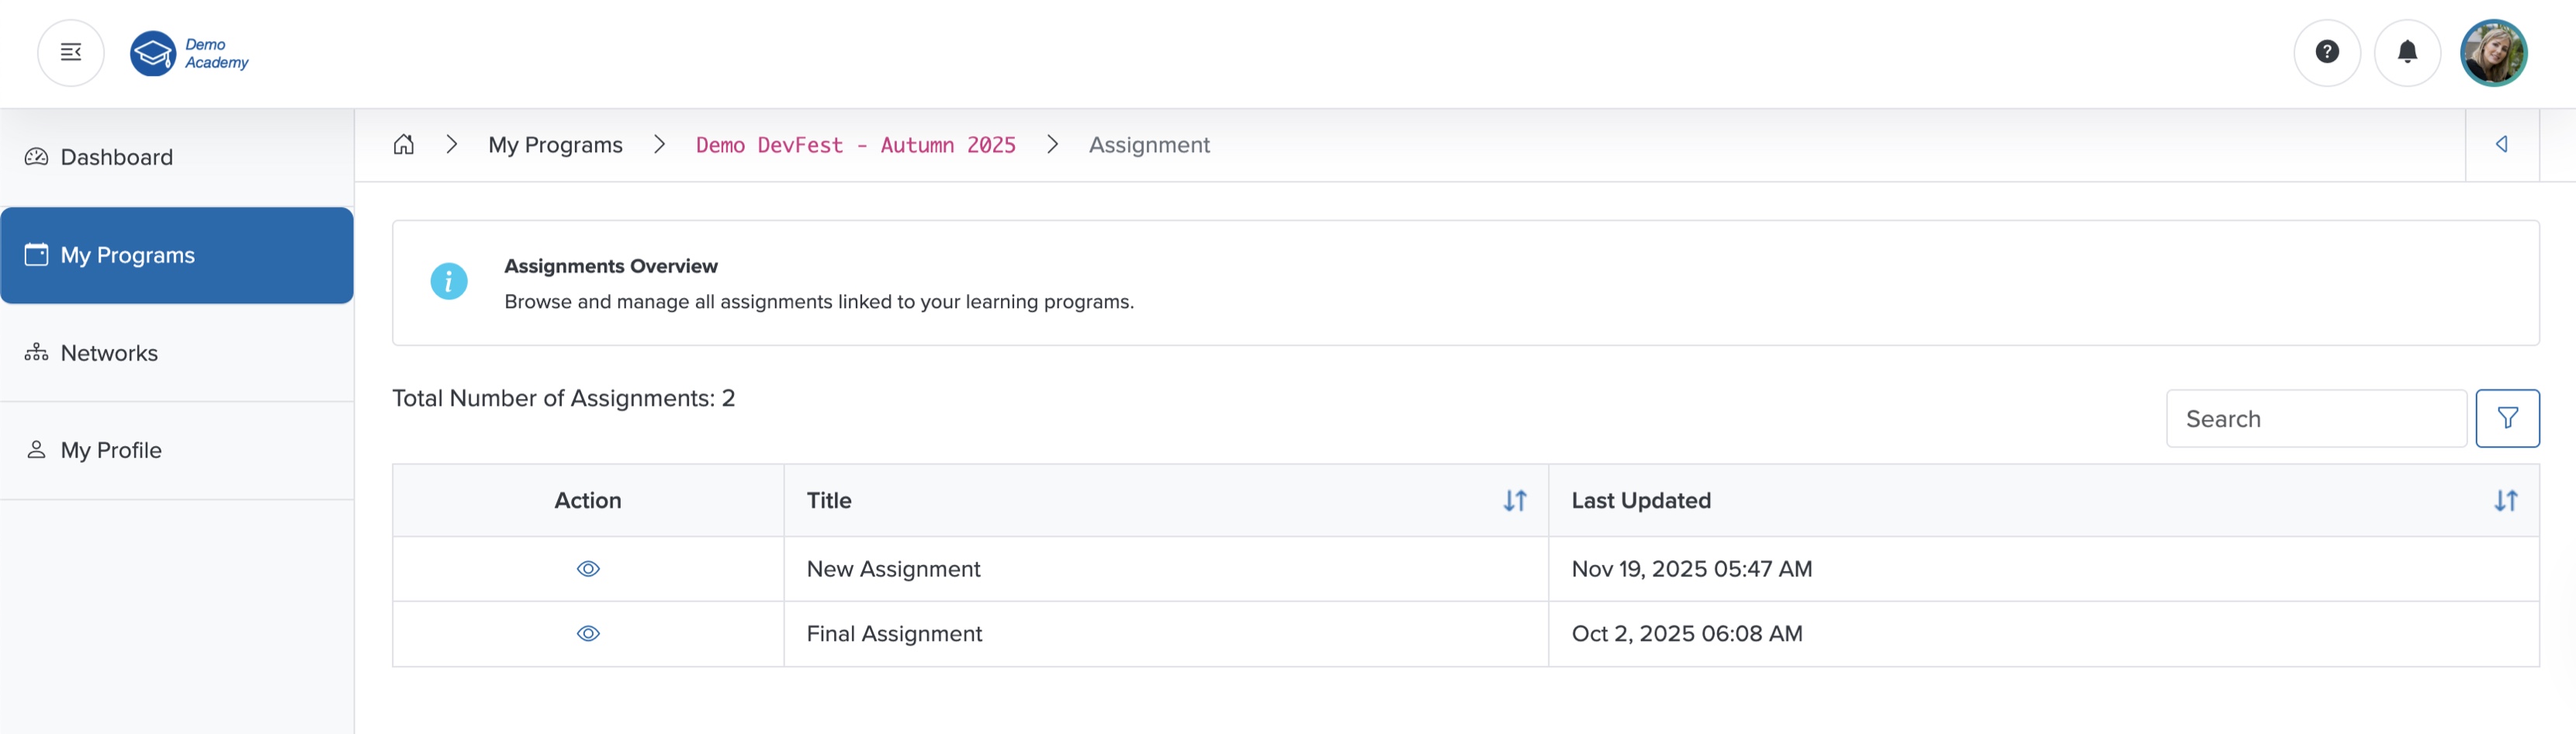
View Assignment
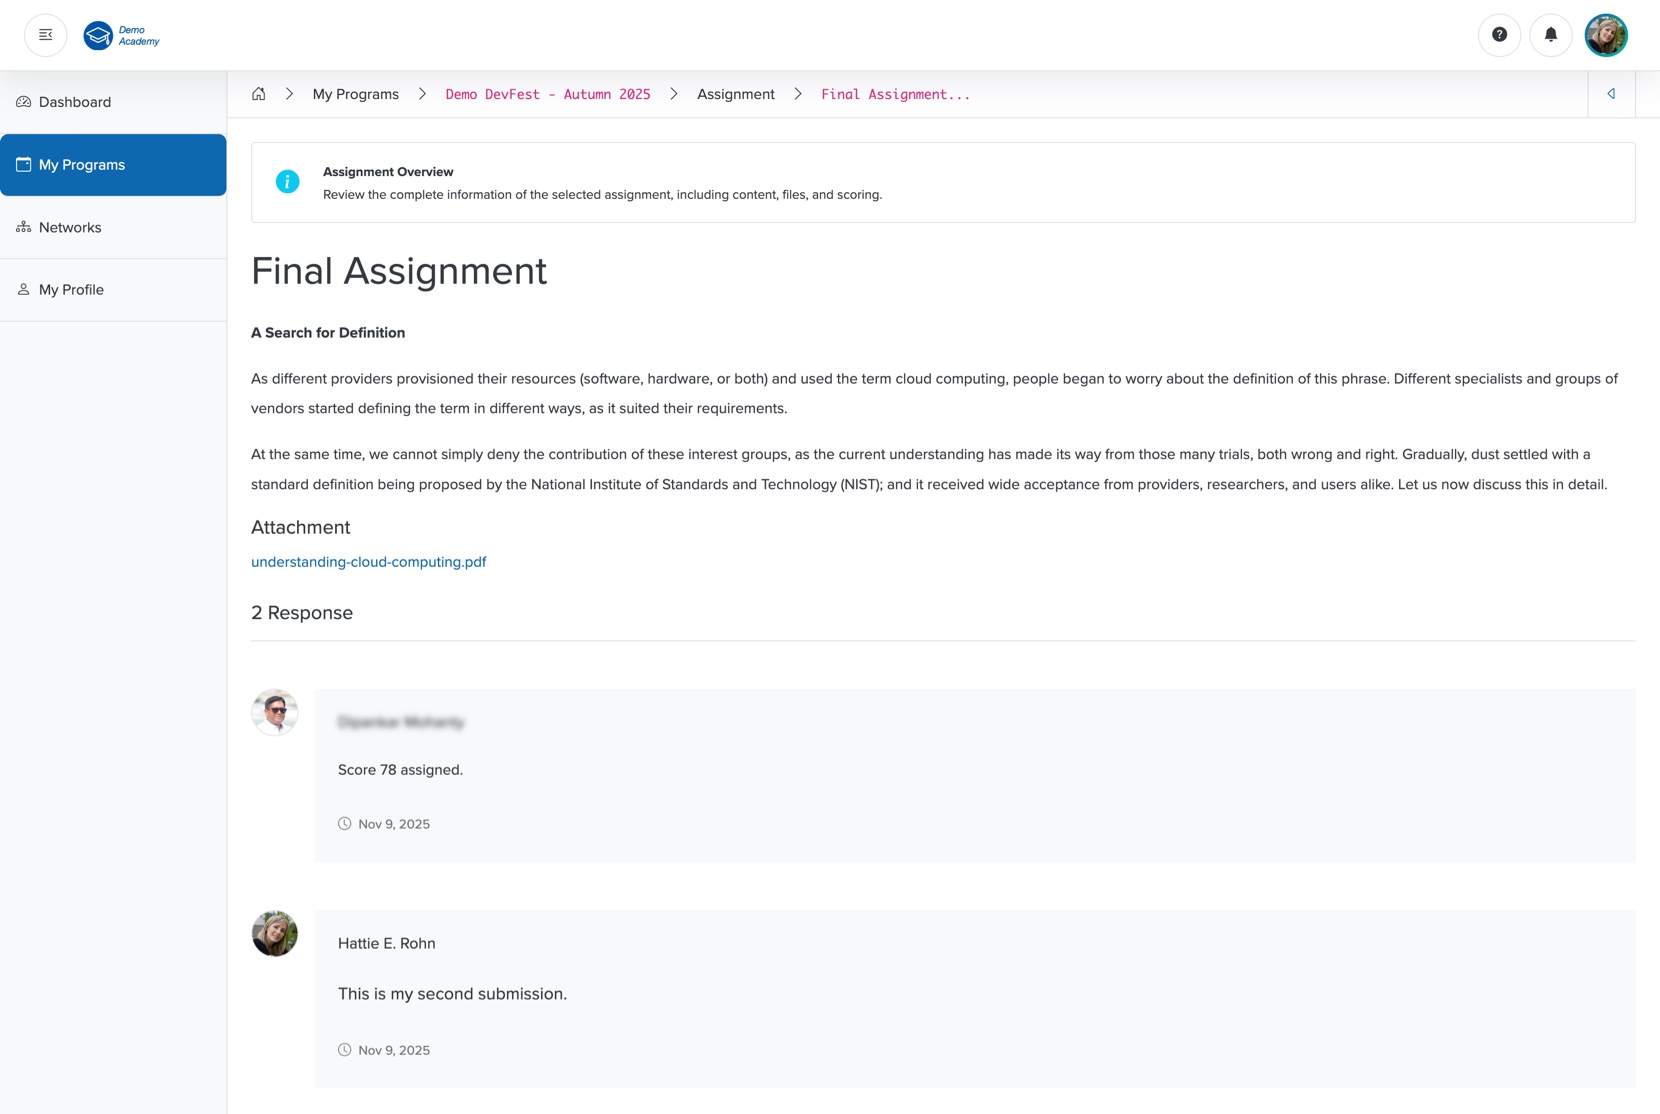
Click the View icon associated with any assignment in the Action column, as shown in Figure 22 above, and the assignment detail page opens, as shown in Figure 23 below.
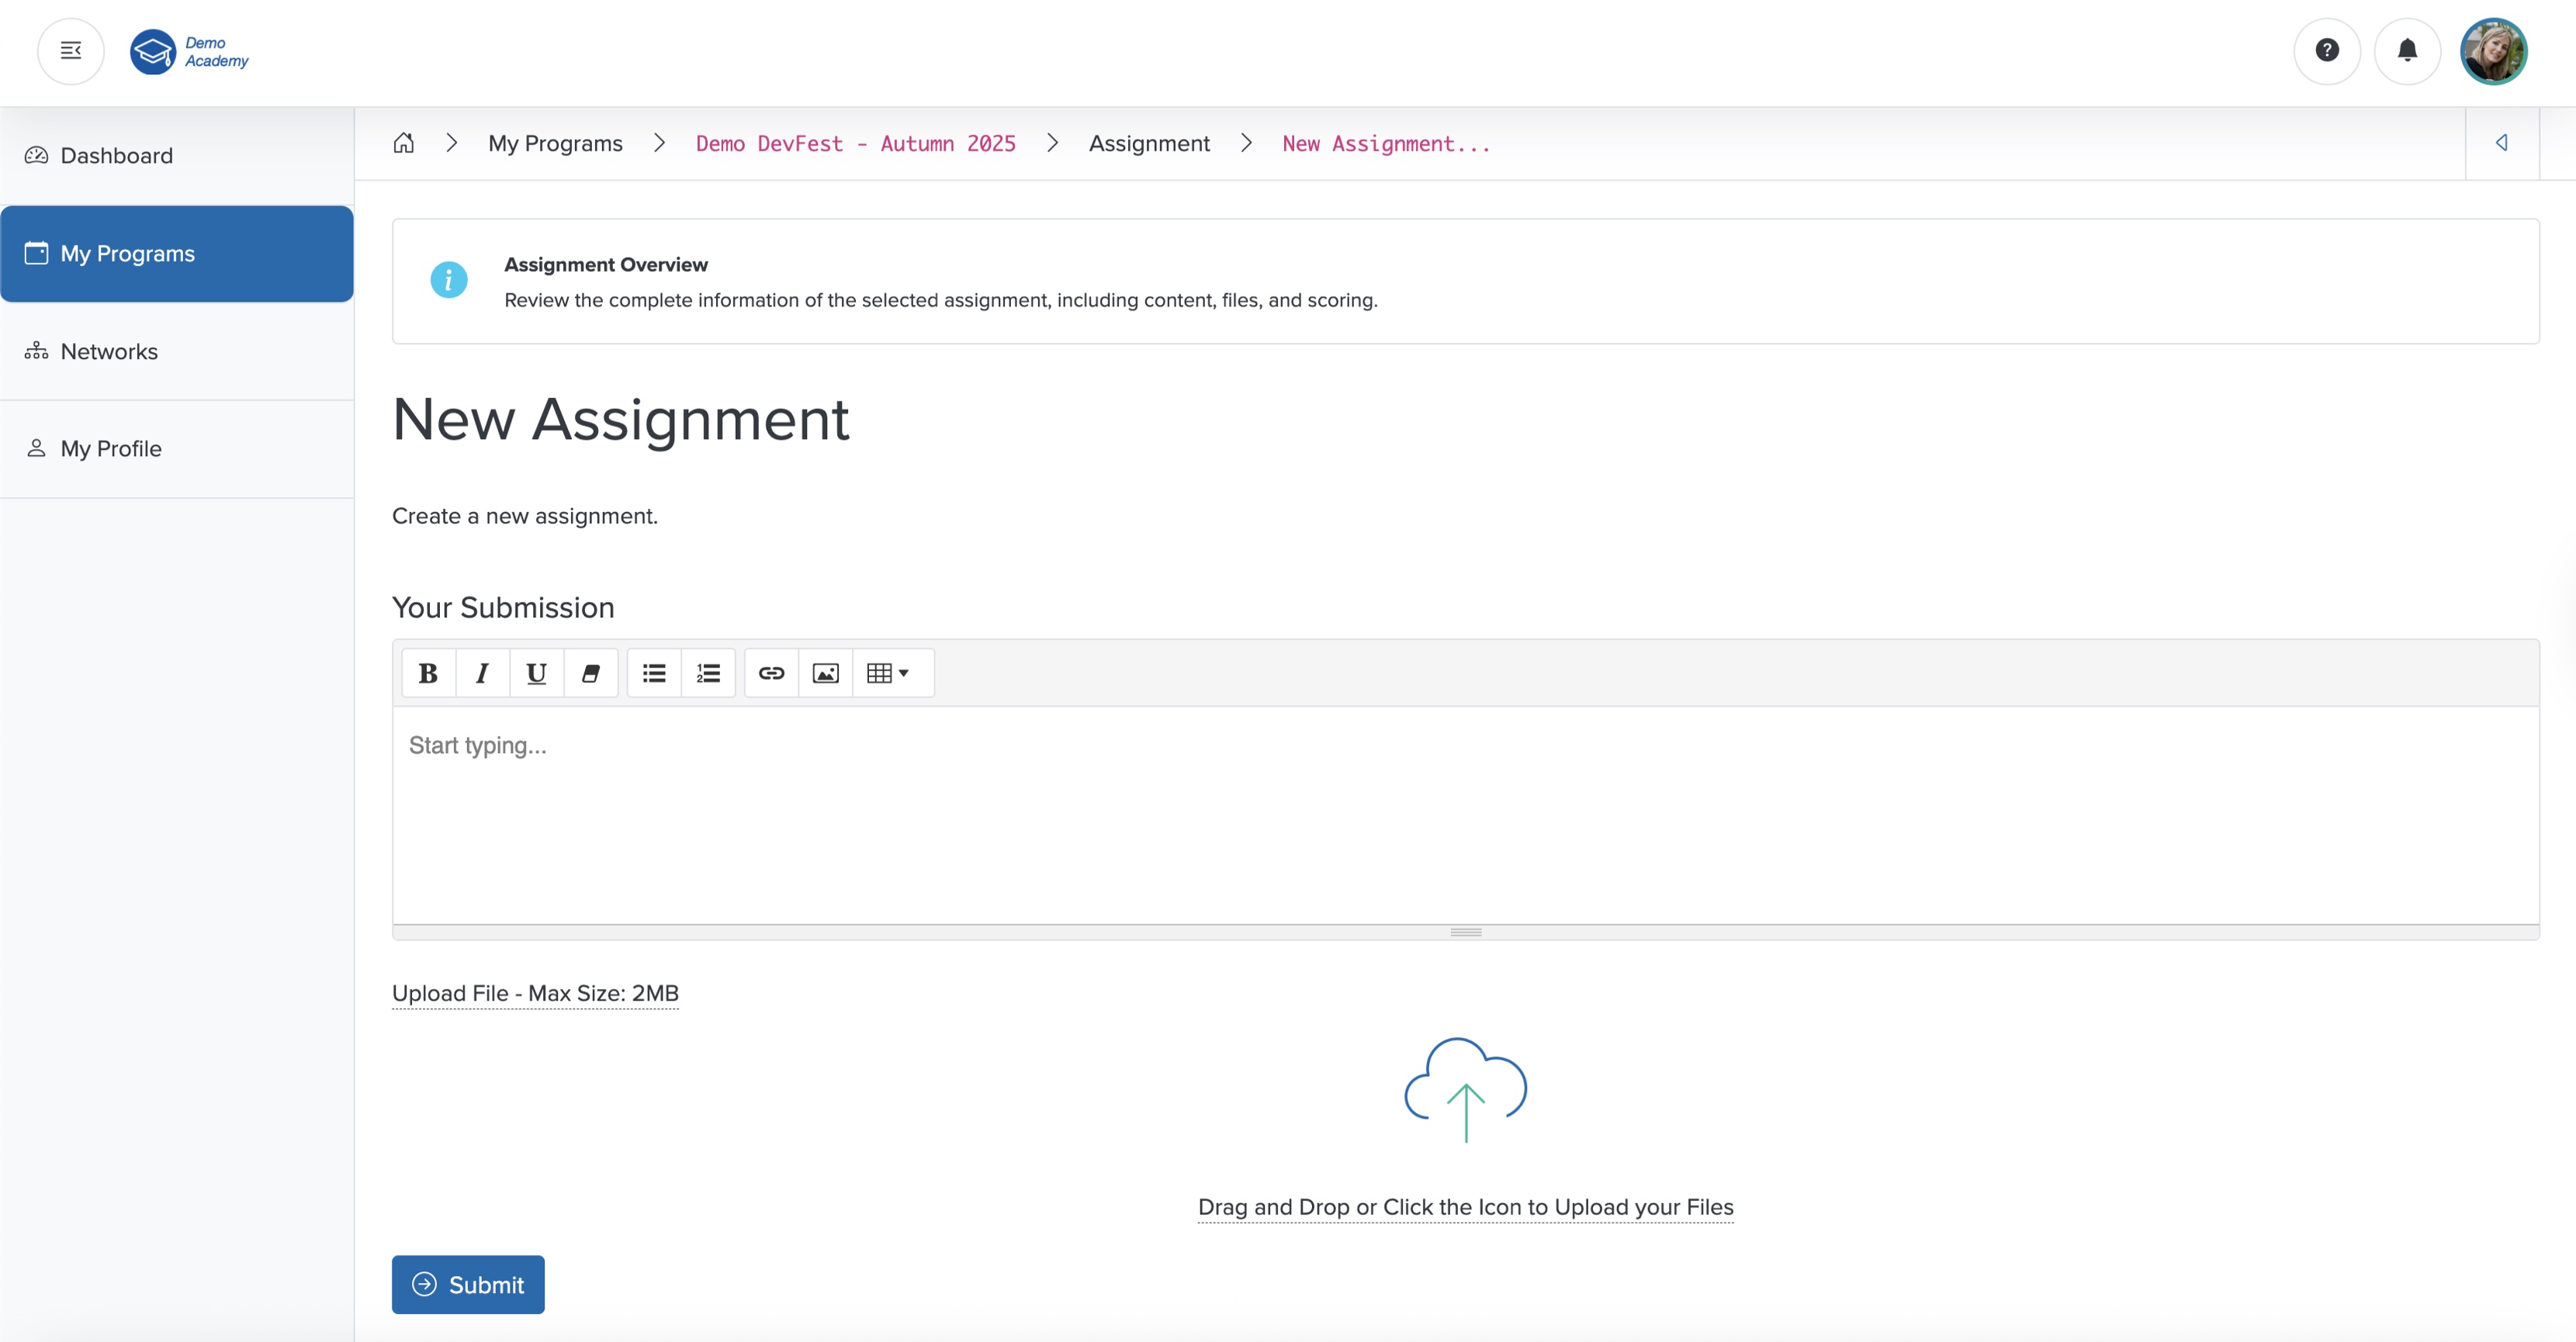
Submit Your Assignment
Enter your submission in the Summer Note section and click the Submit button to submit your assignment, as shown in Figure 23 above.
You can also upload files using the Upload feature, as shown in Figure 23 above.
Once your course instructor approves your submission, you can see your score in the response, and the system closes the assignment to prevent further submission, as shown in Figure 24 below.
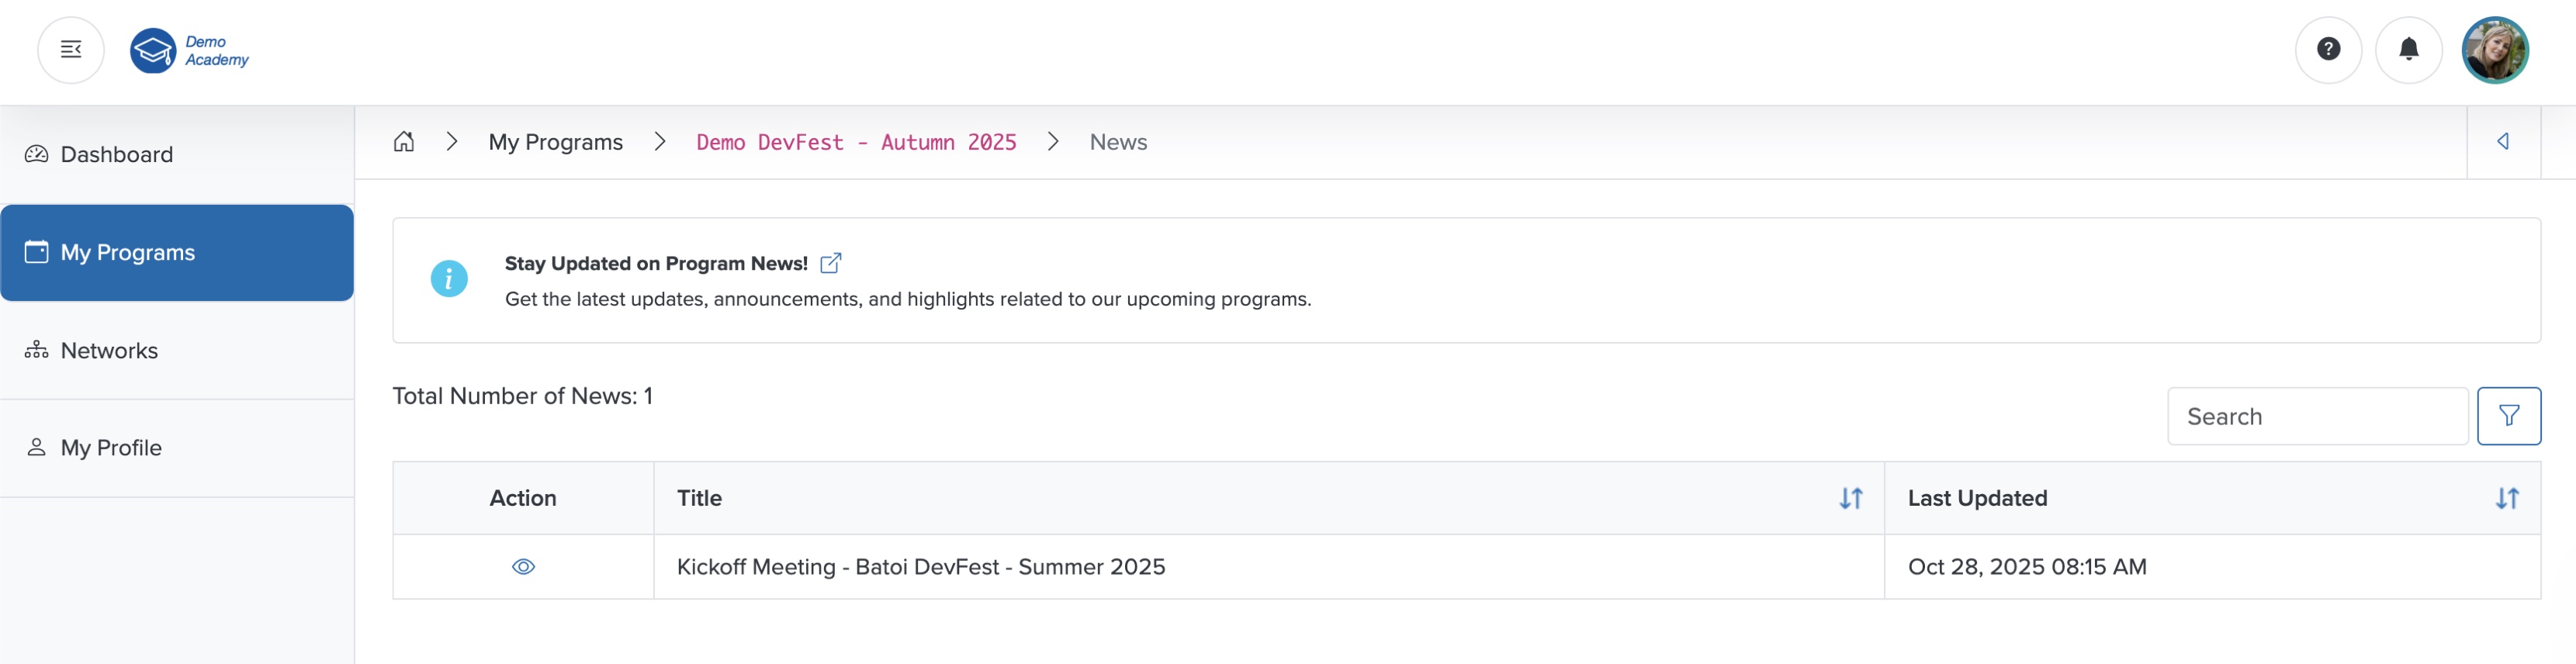
News
Click the Arrow on the right side of the News card on the course dashboard, as shown in Figure 15 above, and the news list page opens, where you can see all news items in a tabular format, as shown in Figure 25 below.
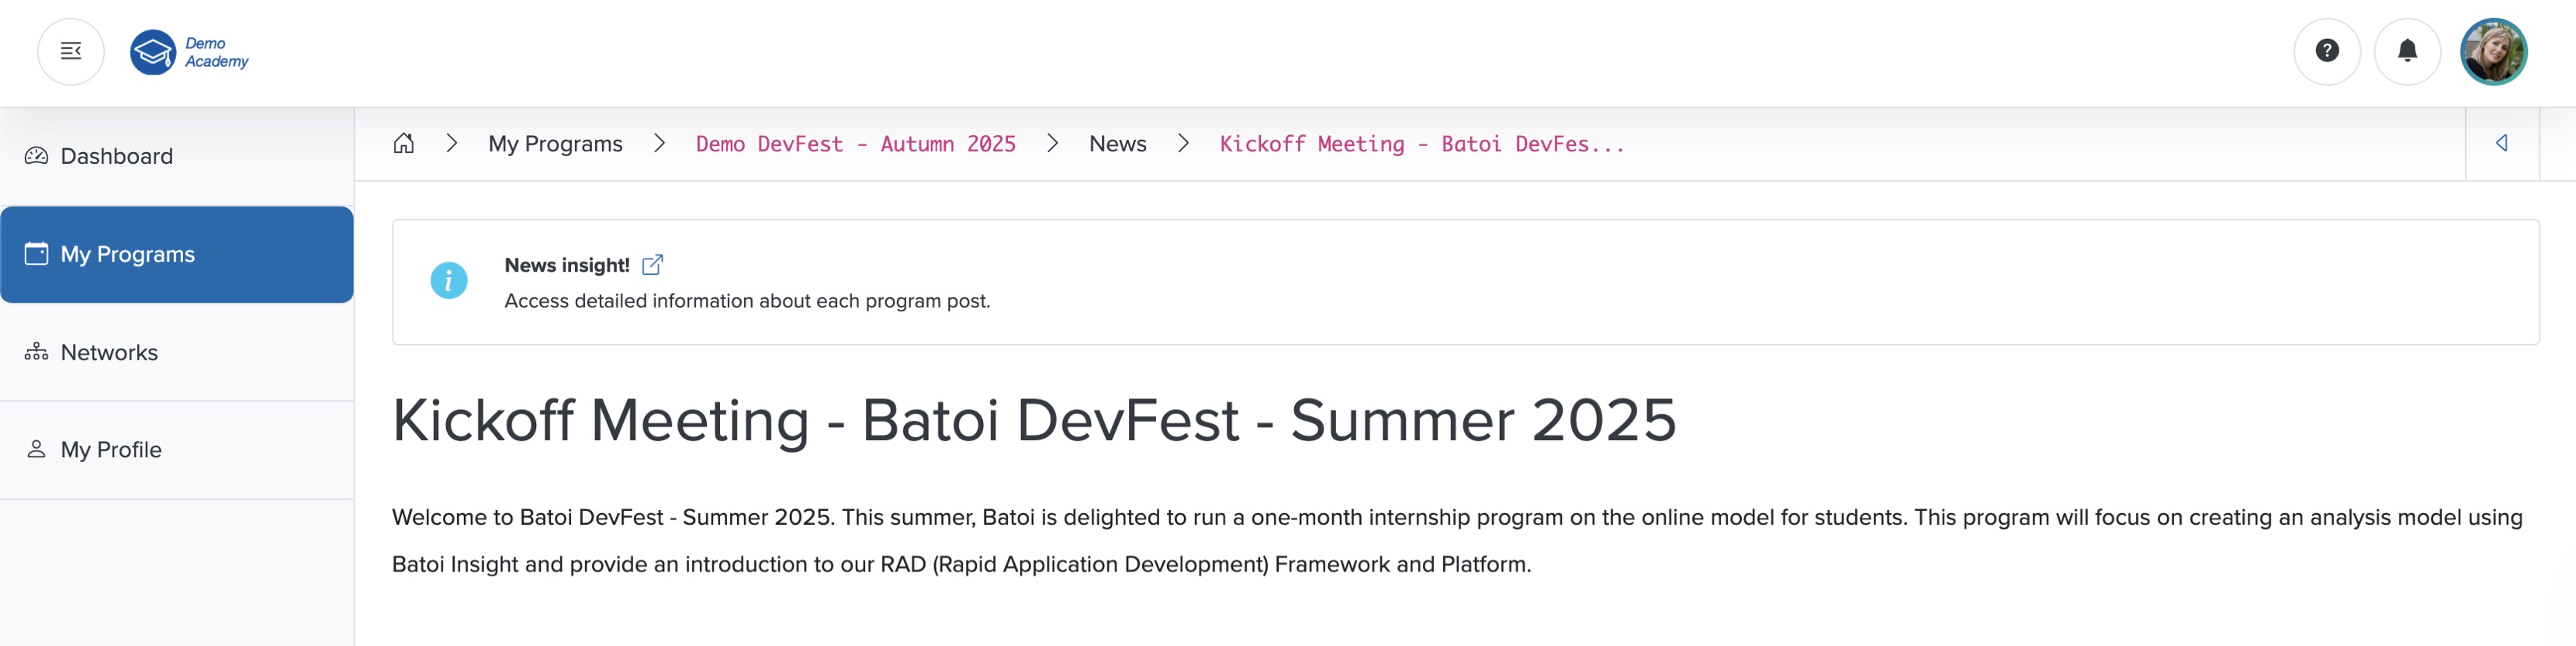
View News
Click the View icon associated with any news in the Action column, as shown in Figure 25 above, and the news detail page opens, as shown in Figure 26 below.
Resources
Click the Arrow on the right side of the Resources card on the course dashboard, as shown in Figure 15 above. This opens the resource list screen, where you can see all the resource files related to your course in a card format, as shown in Figure 27 below.

Click the List tab to view the resource files in a tabular format, as shown in Figure 28 below.
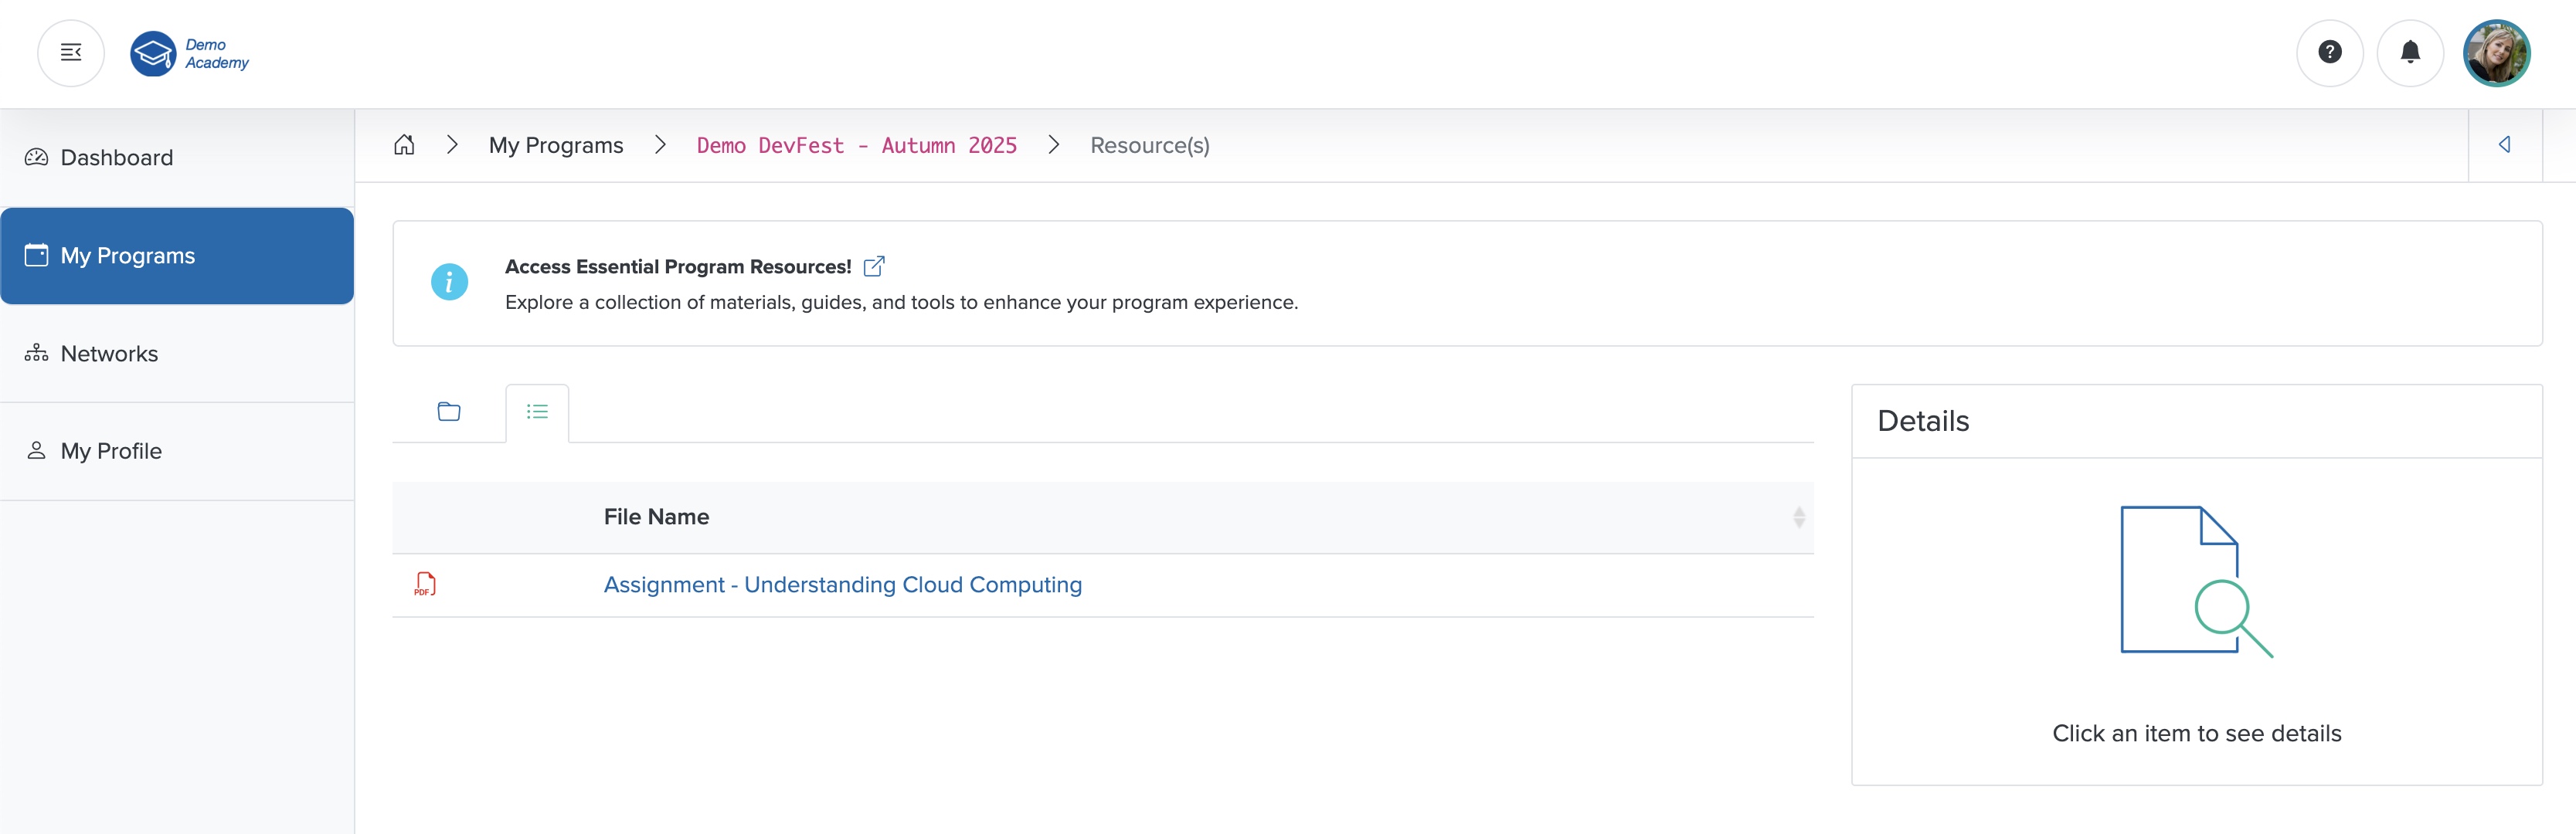
Click the Sort Arrow on the header row of the resource table to sort the resource files, as shown in Figure 28 above.
View Resource
Click the individual resource Card or Title, as shown in Figure 27 or Figure 28 above, and the view screen opens on the right side of the resource list page, as shown in Figure 29 below.
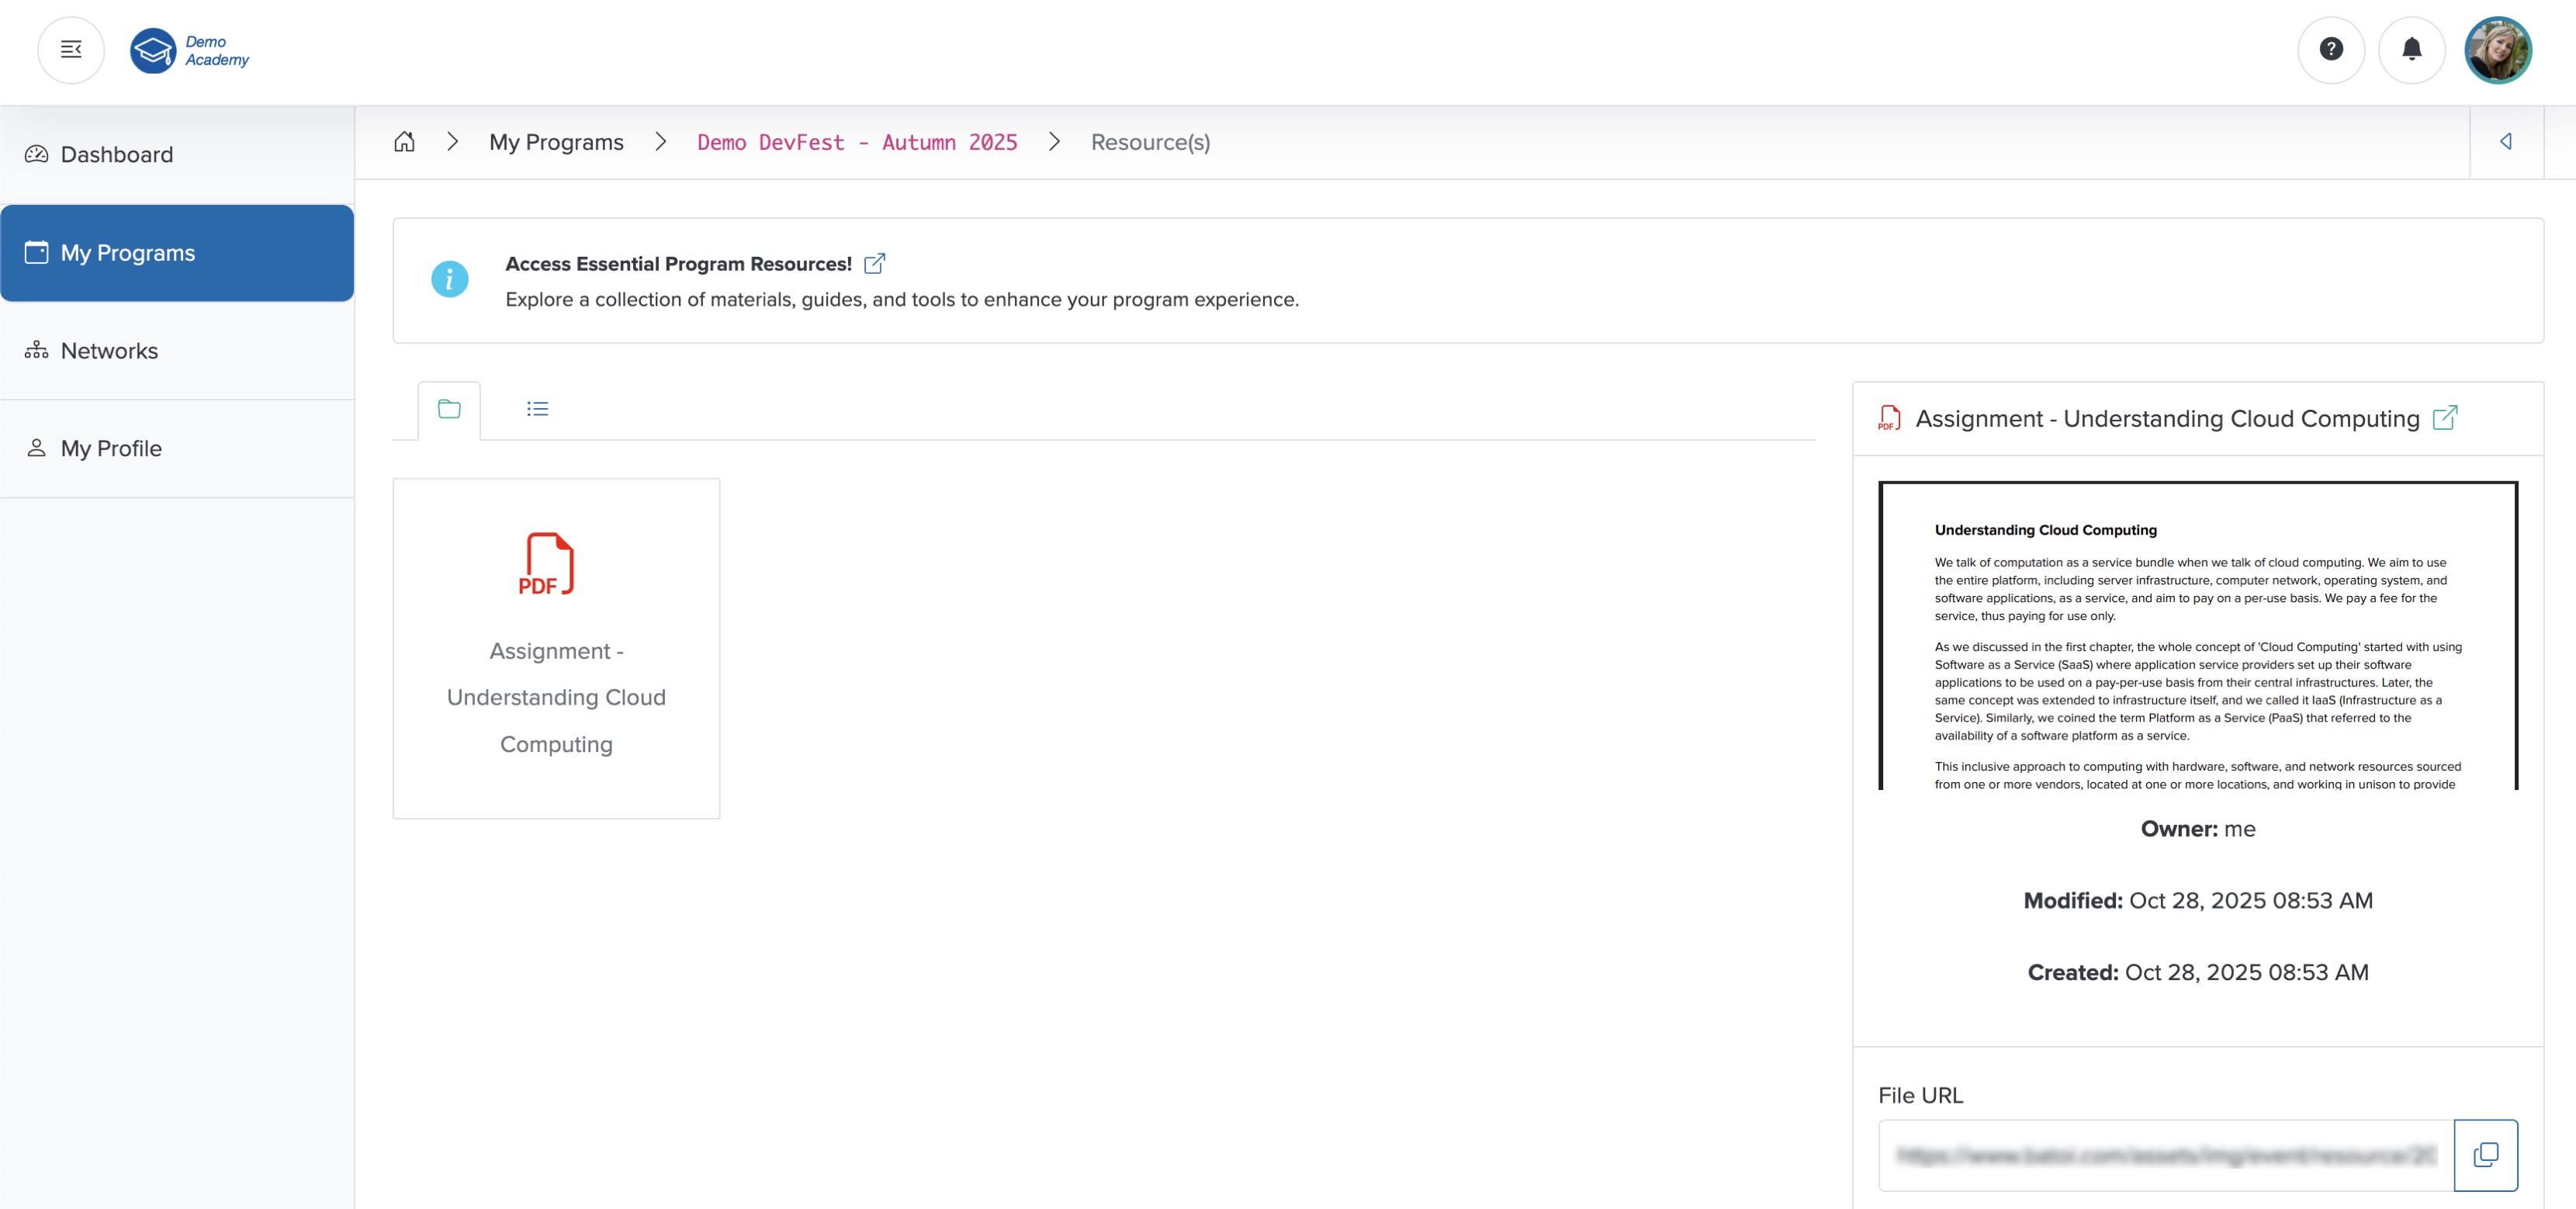
Click the External Link icon next to the file name to view the resource file in a new window, as shown in Figure 29 above.
Click the Copy Link icon on the file URL to copy the file name, as shown in Figure 29 above.
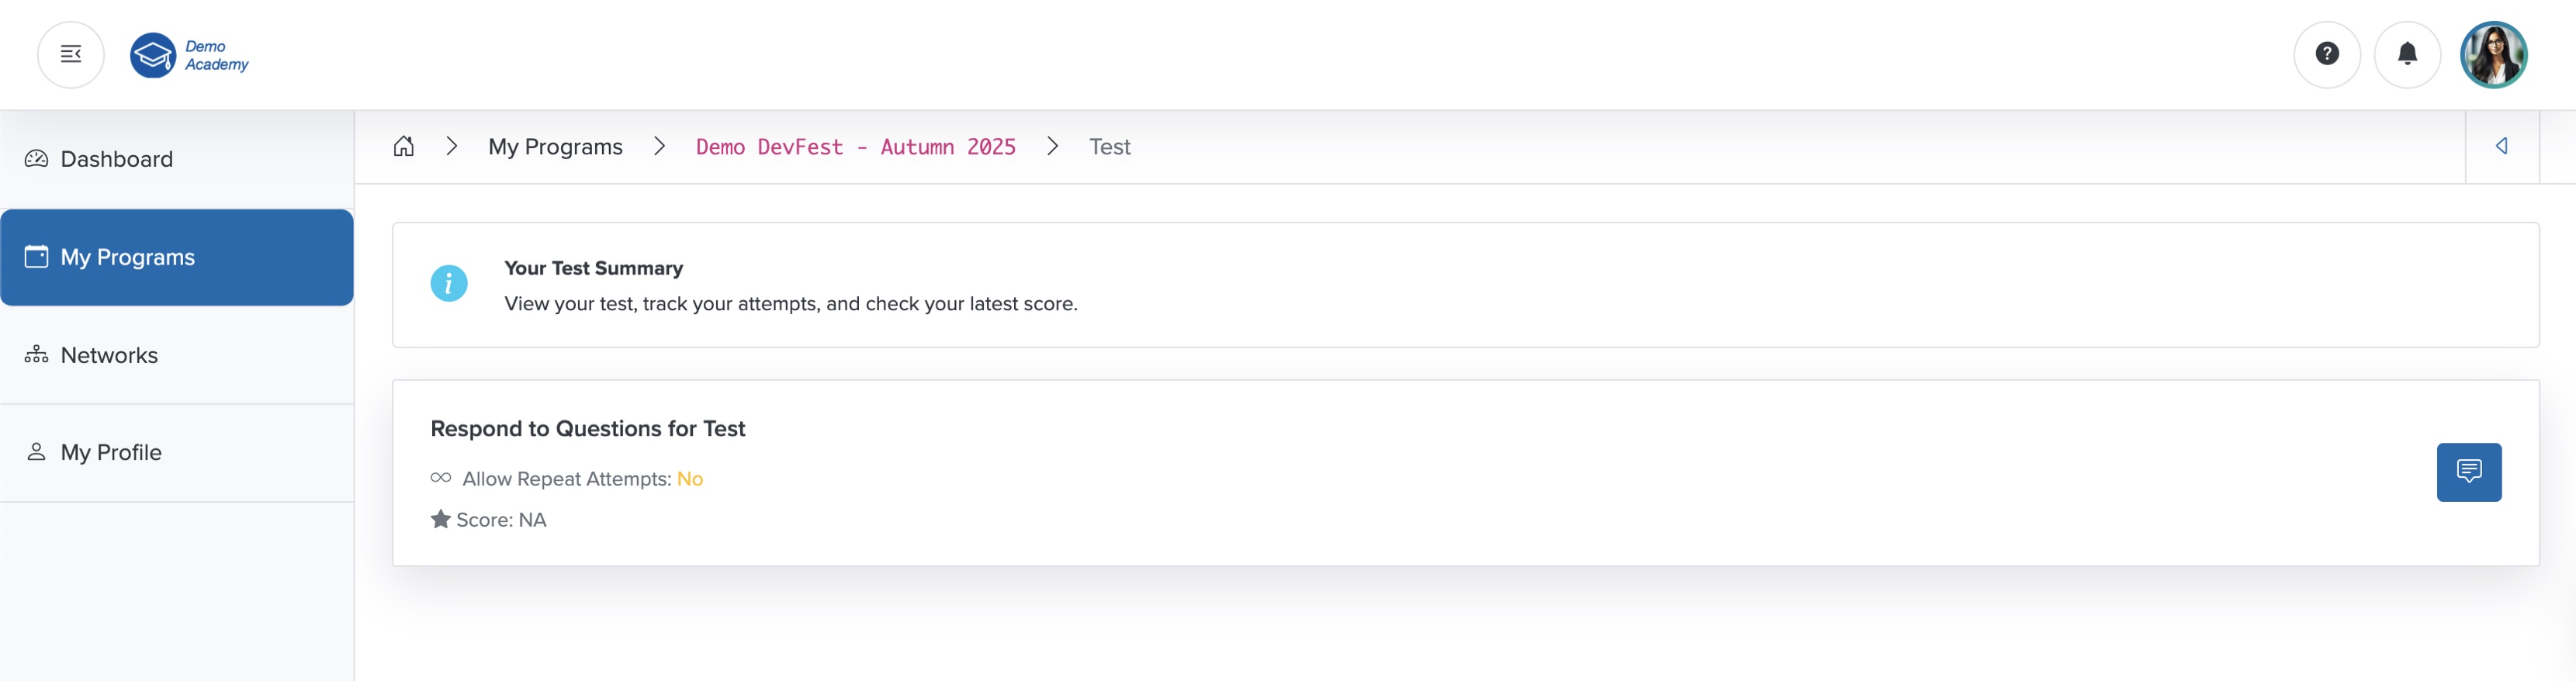
Test
Click the Test button on the course dashboard, as shown in Figure 15 above, and the test page opens, as shown in Figure 30 below.
Click the Respond to Questions for Test icon on the right side of the test card, as shown in Figure 30 above, and the test questions appear, as shown in Figure 31 below.
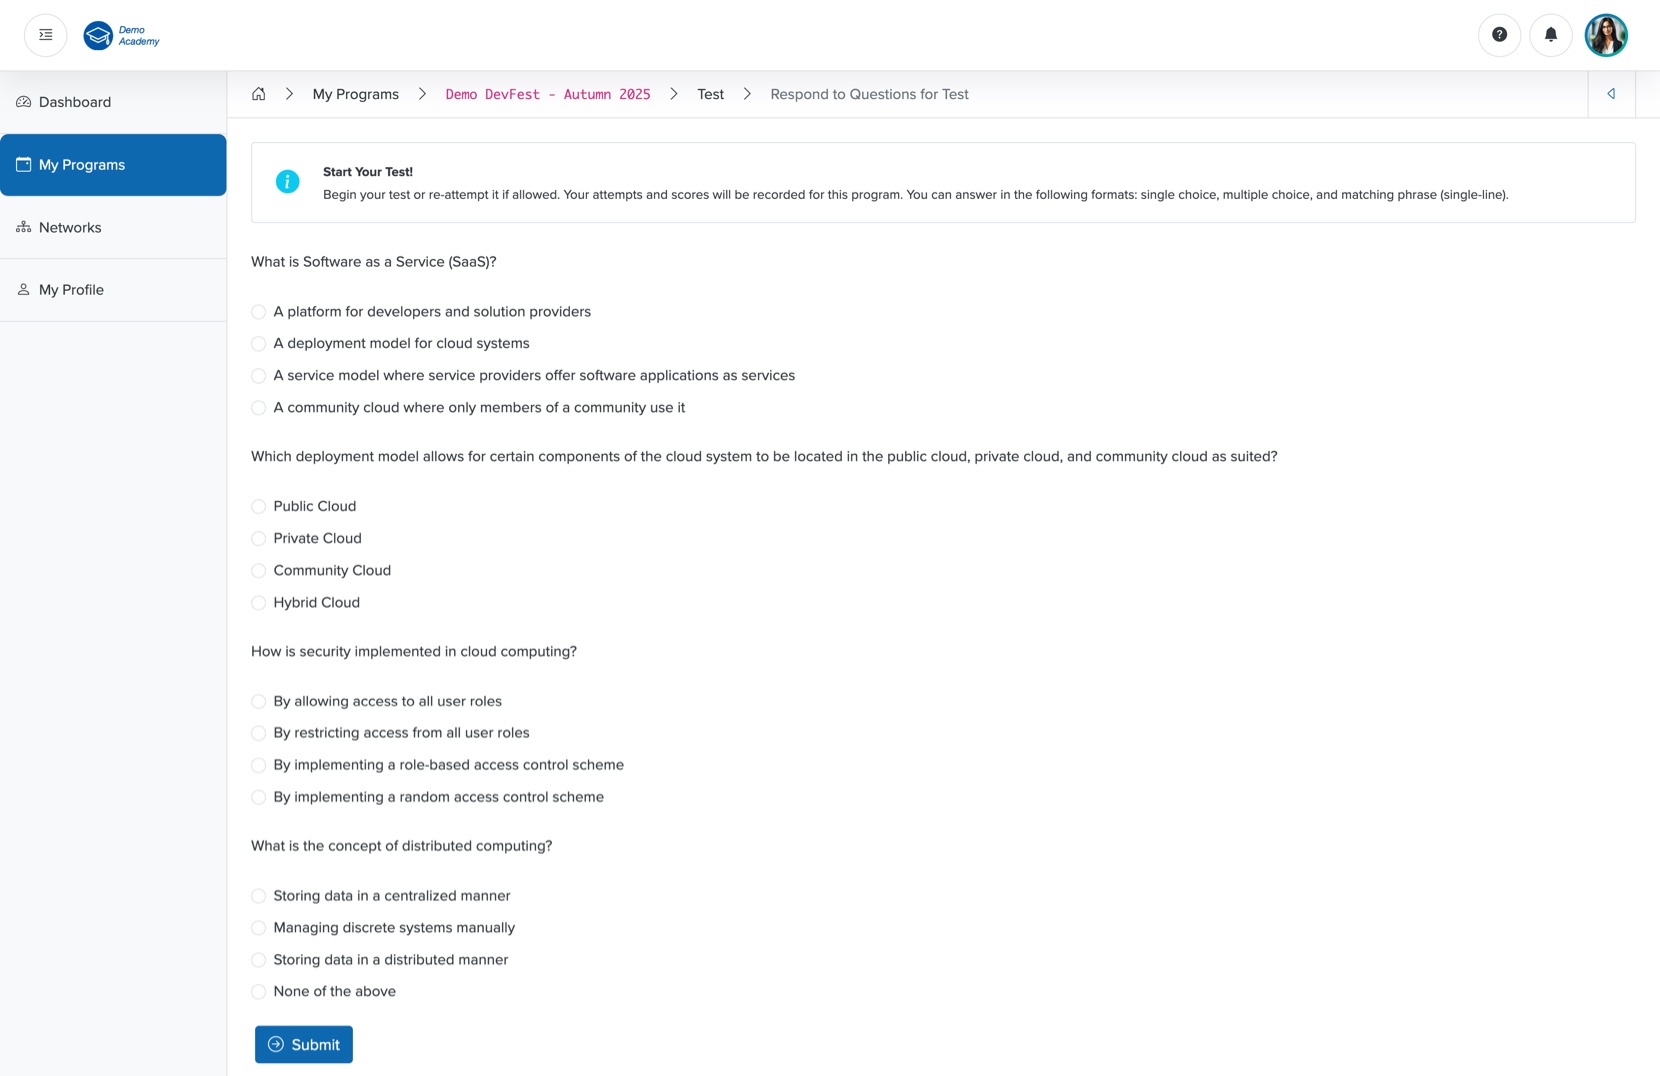
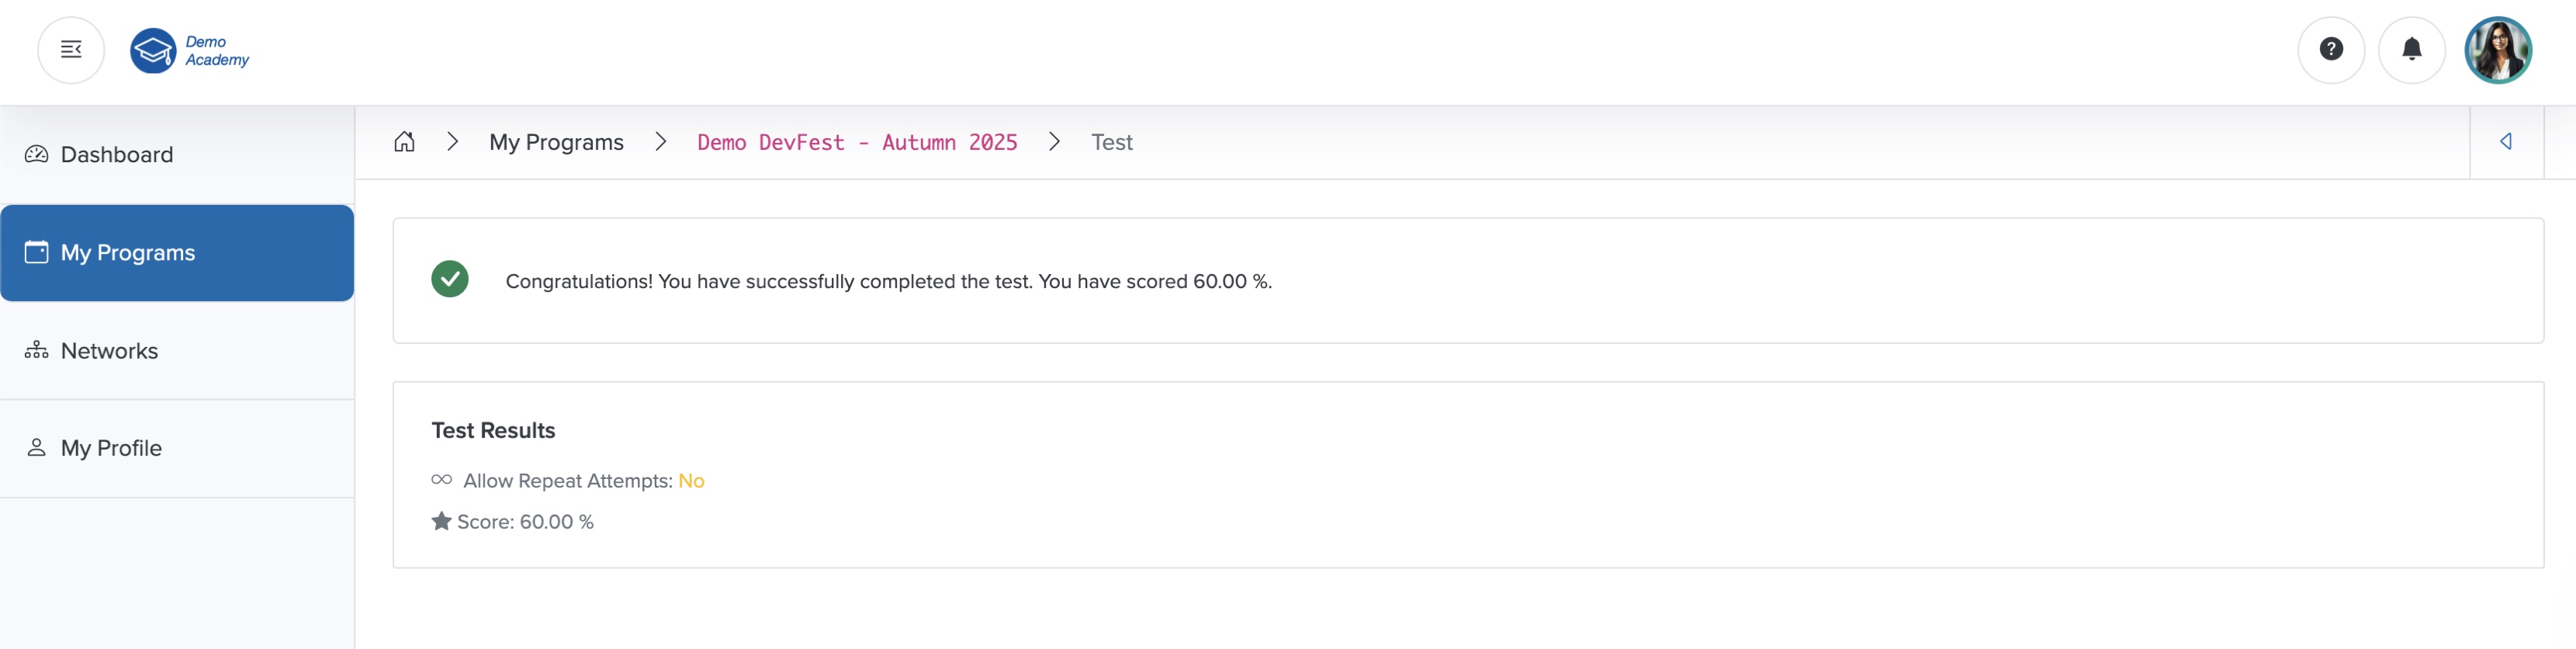
Attempt the test quiz and click the Submit button, as shown in Figure 31 above, to submit your response. Once you submit, the system redirects you to the test result page, where you can see your score as a percentage, as shown in Figure 32 below.
Certificate
Click the Achievement Certificate button on the course dashboard, as shown in Figure 15 above, and you can see your digital certificate, as shown in Figure 33 below.
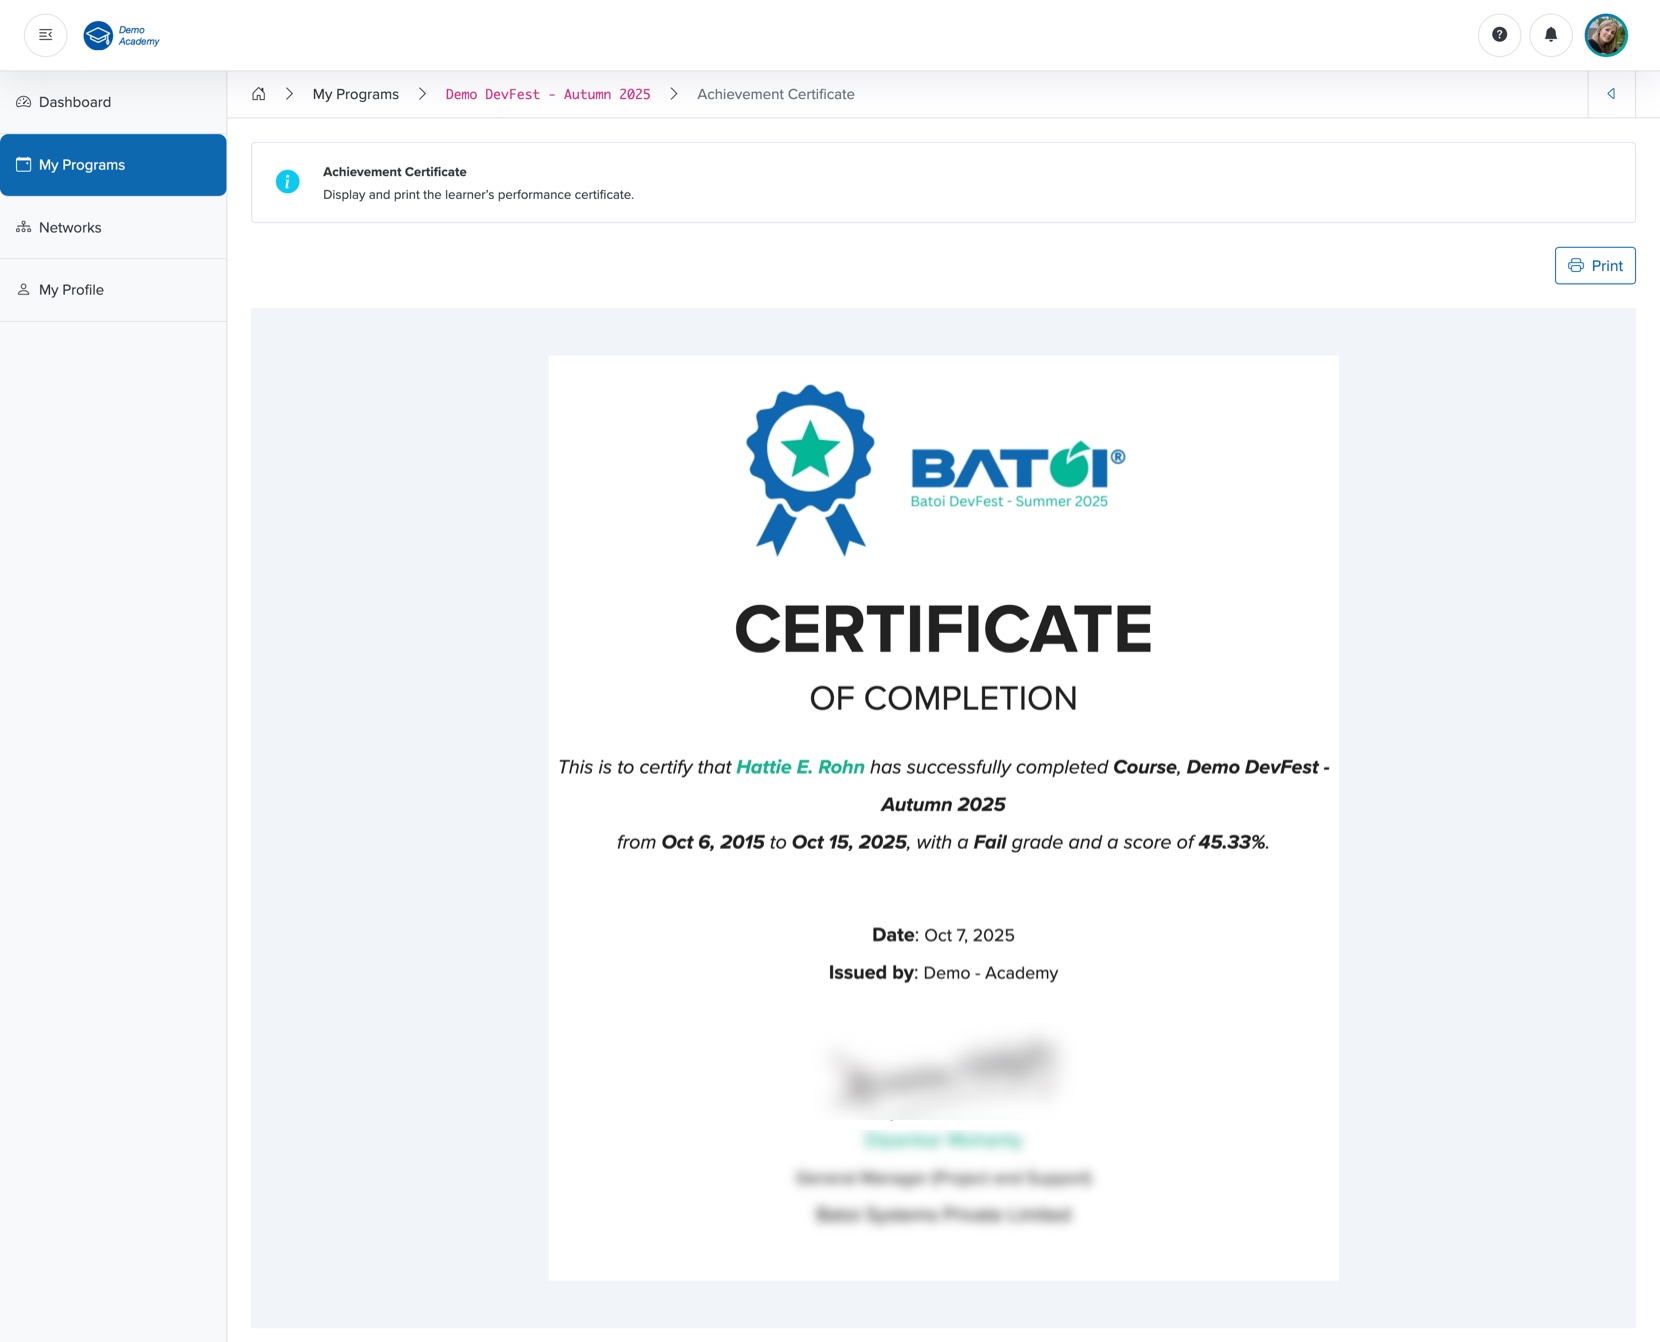
You can print your certificate by clicking the Print button on the top-right side of the screen, as shown in Figure 33 above.