Members
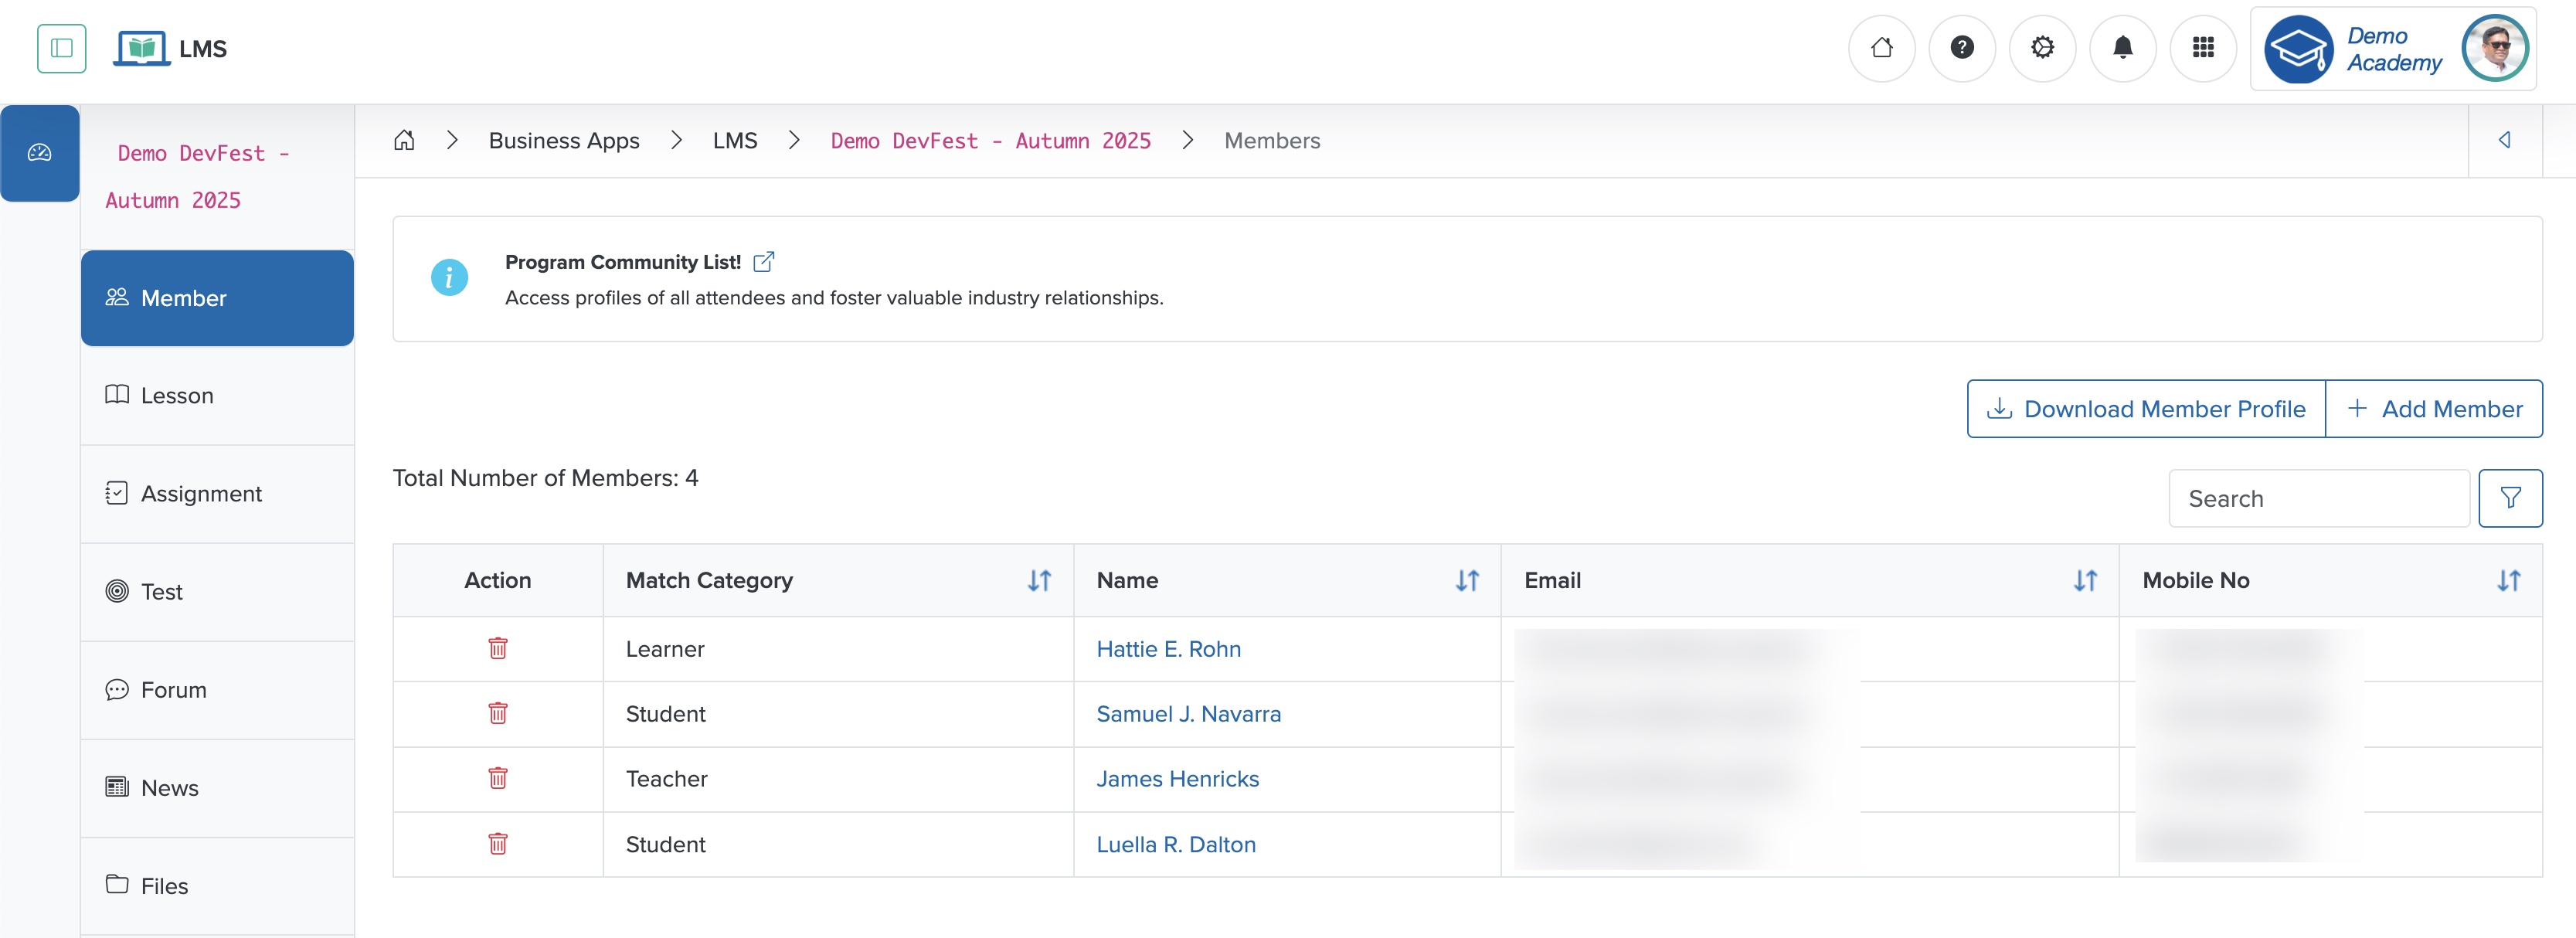
Click the Member card on the Course dashboard or from the sidebar, as shown in Figure 1 above, and the system redirects you to the member list page, where you can see all the members in a tabular format, as shown in Figure 2 below.
Add Member
To add a new participant to the Workspace, click the Identity App under the Foundation Apps, as shown in Figure 3 below. The Identity app dashboard opens, as shown in Figure 4 below.
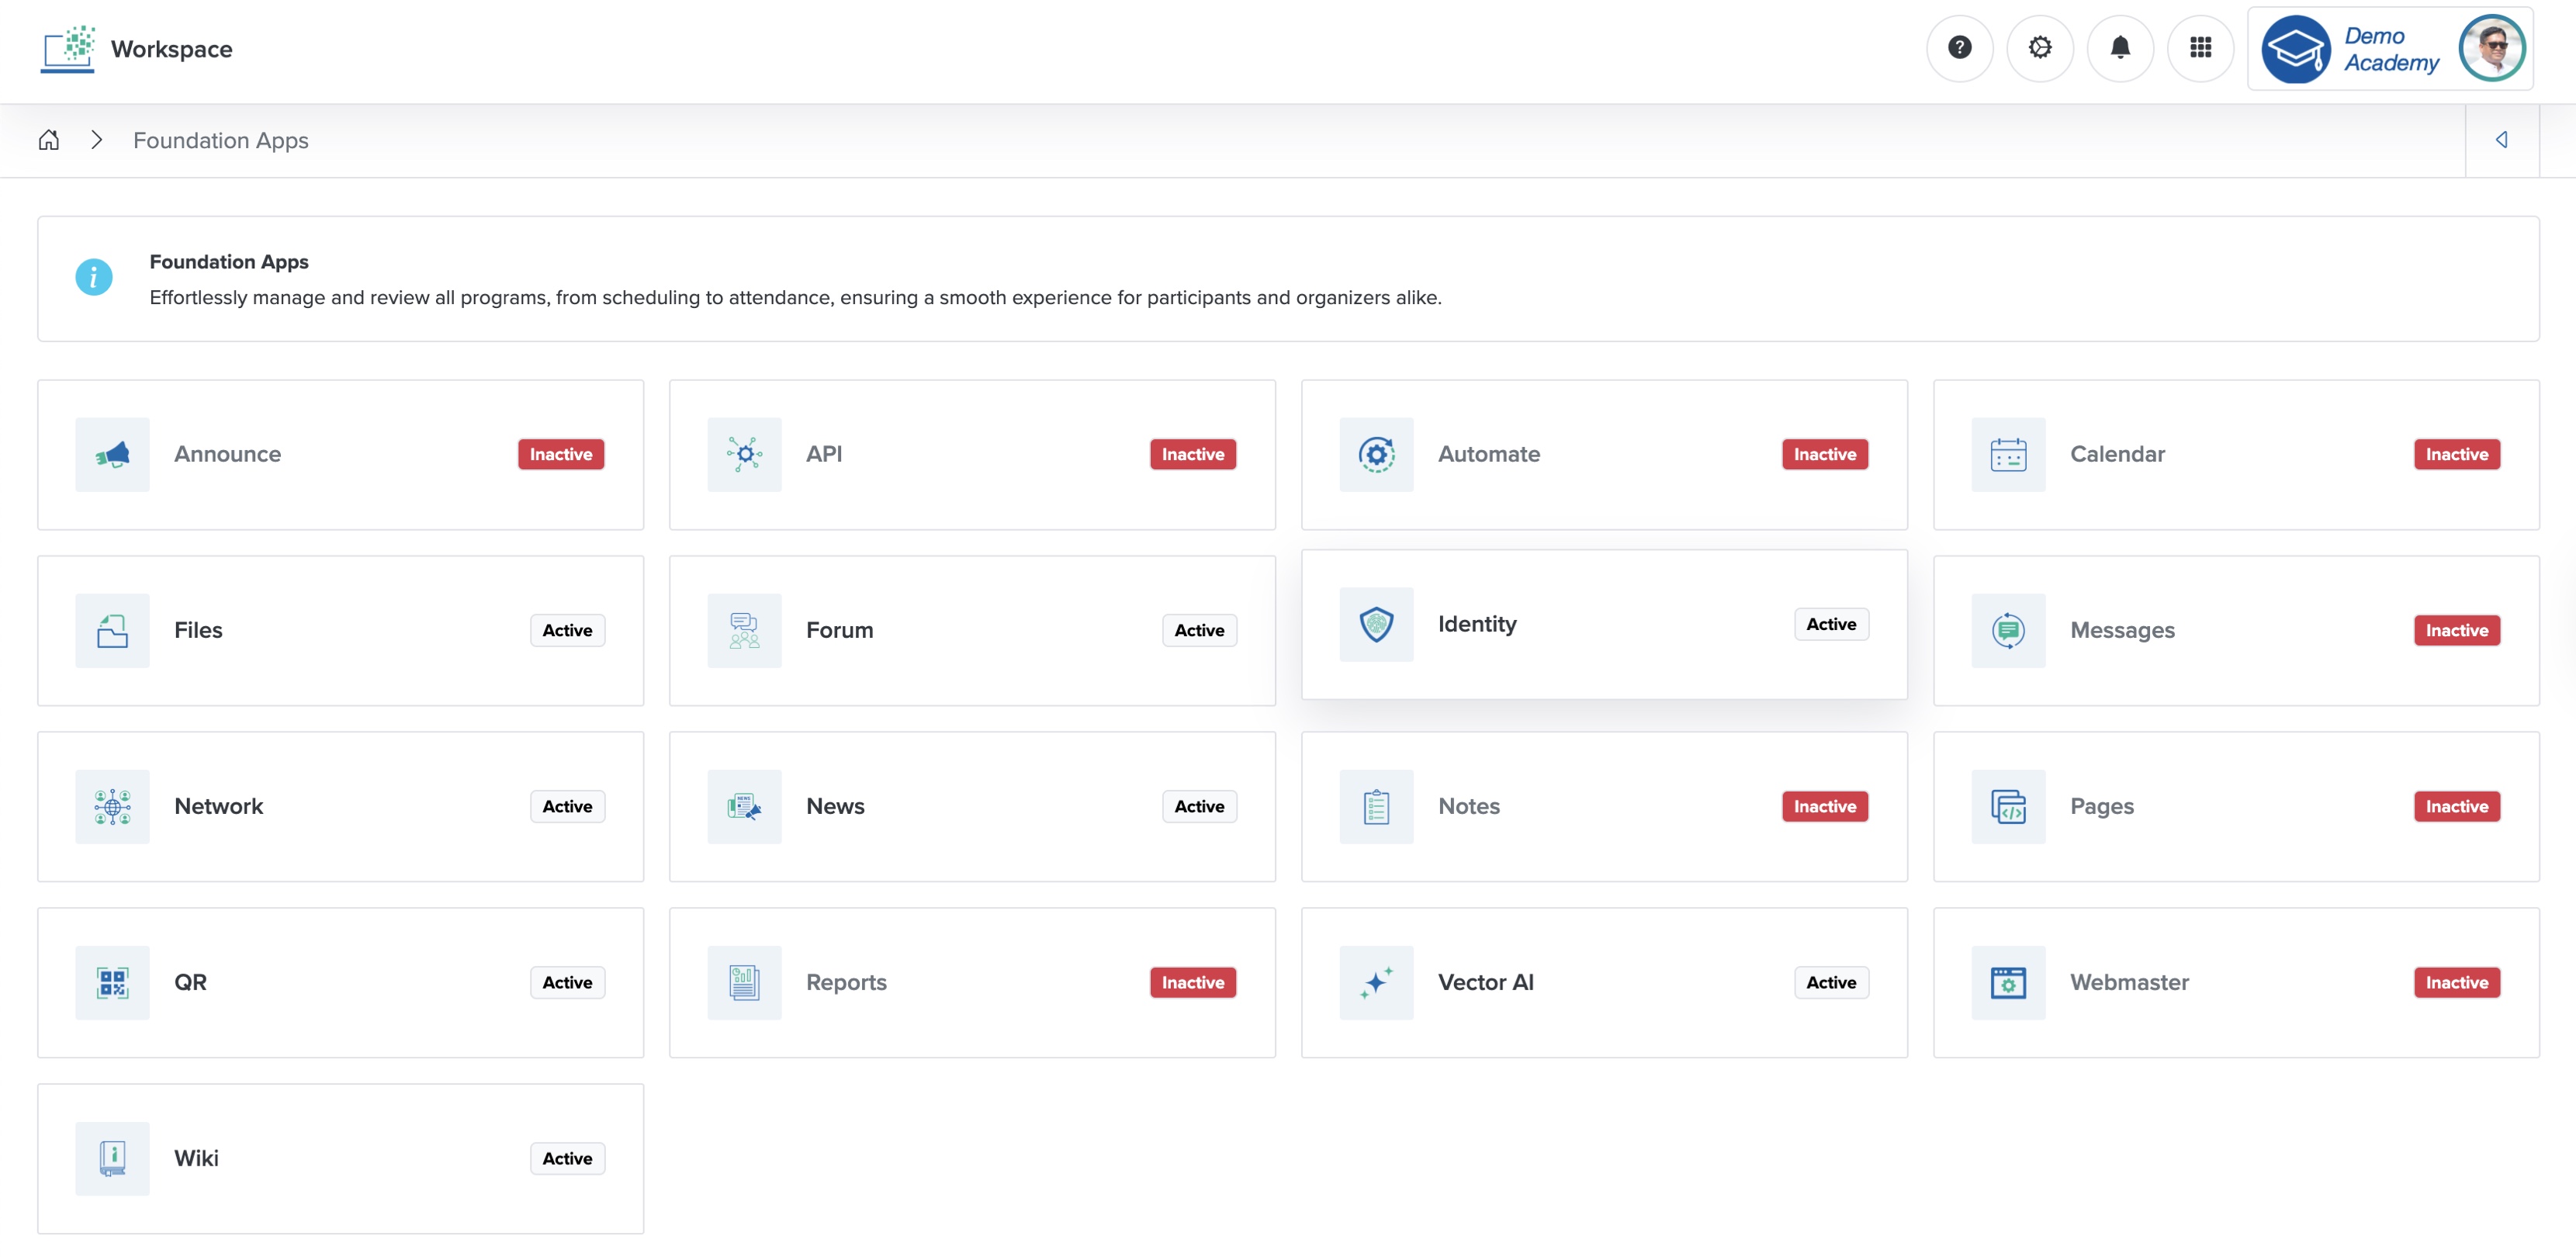
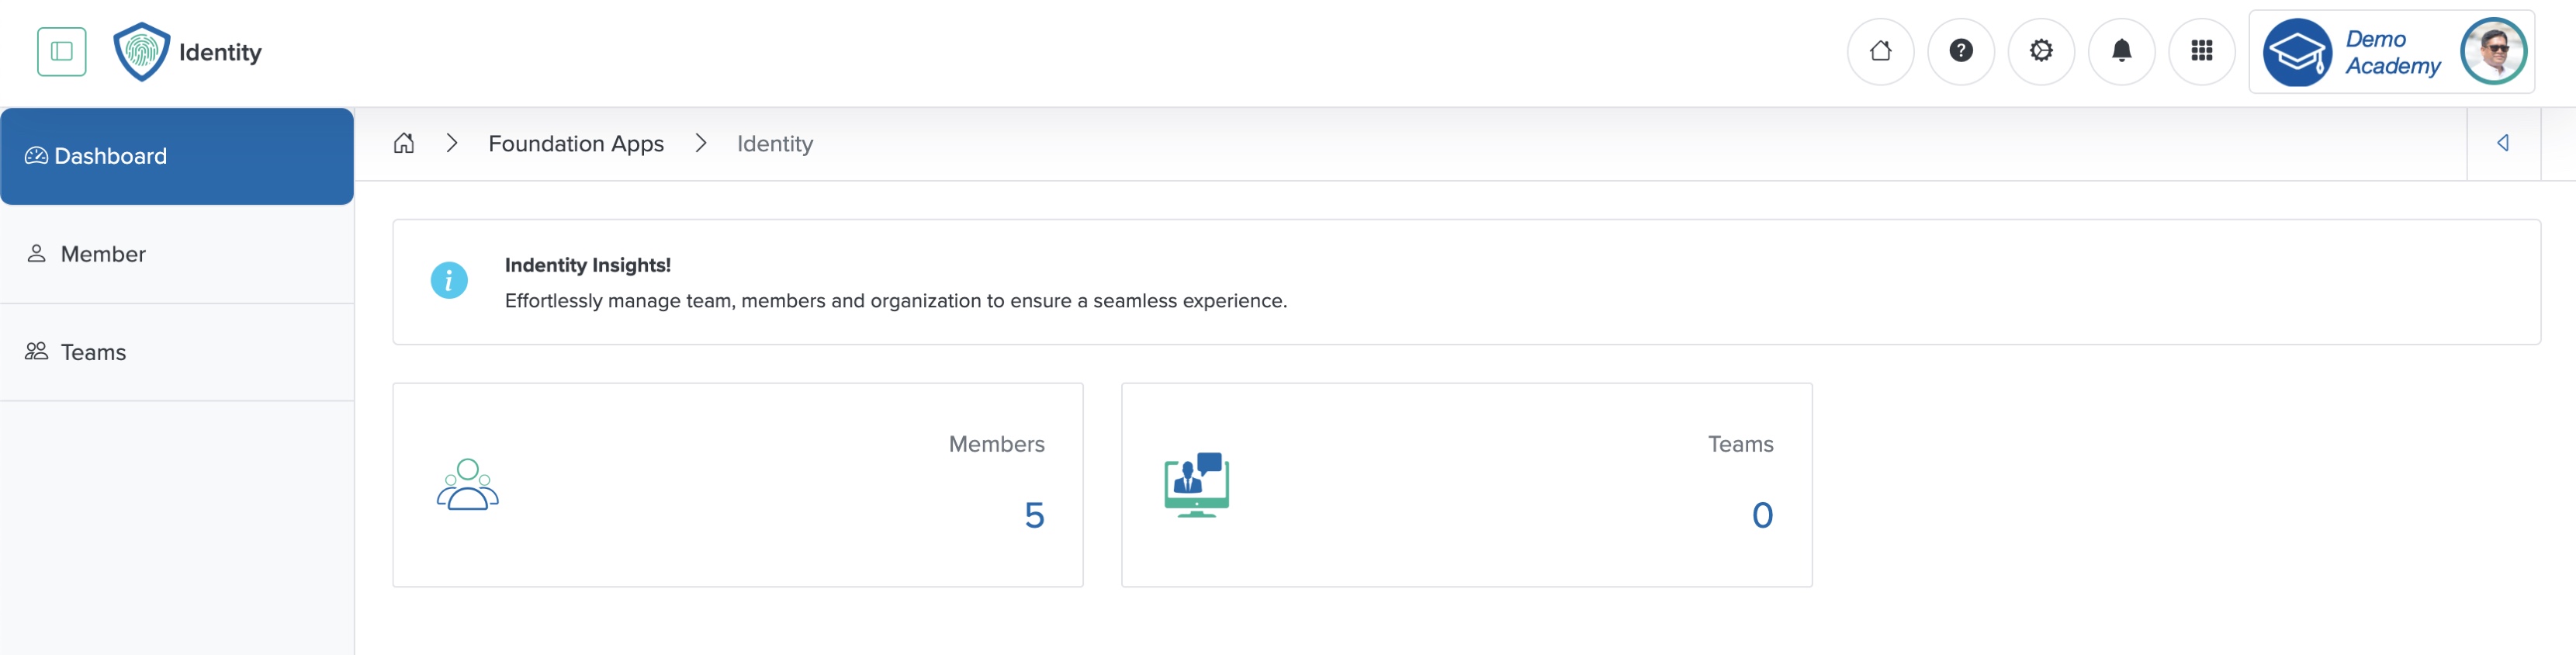
The Identity app dashboard has two cards: ‘Members’ and ‘Teams’, as shown in Figure 4 above.
Add Team
Click the Team card from the dashboard, as shown in Figure 4 above, and the team list page opens. If you have not created a team before, you cannot see any teams on the screen, as shown in Figure 5 below.
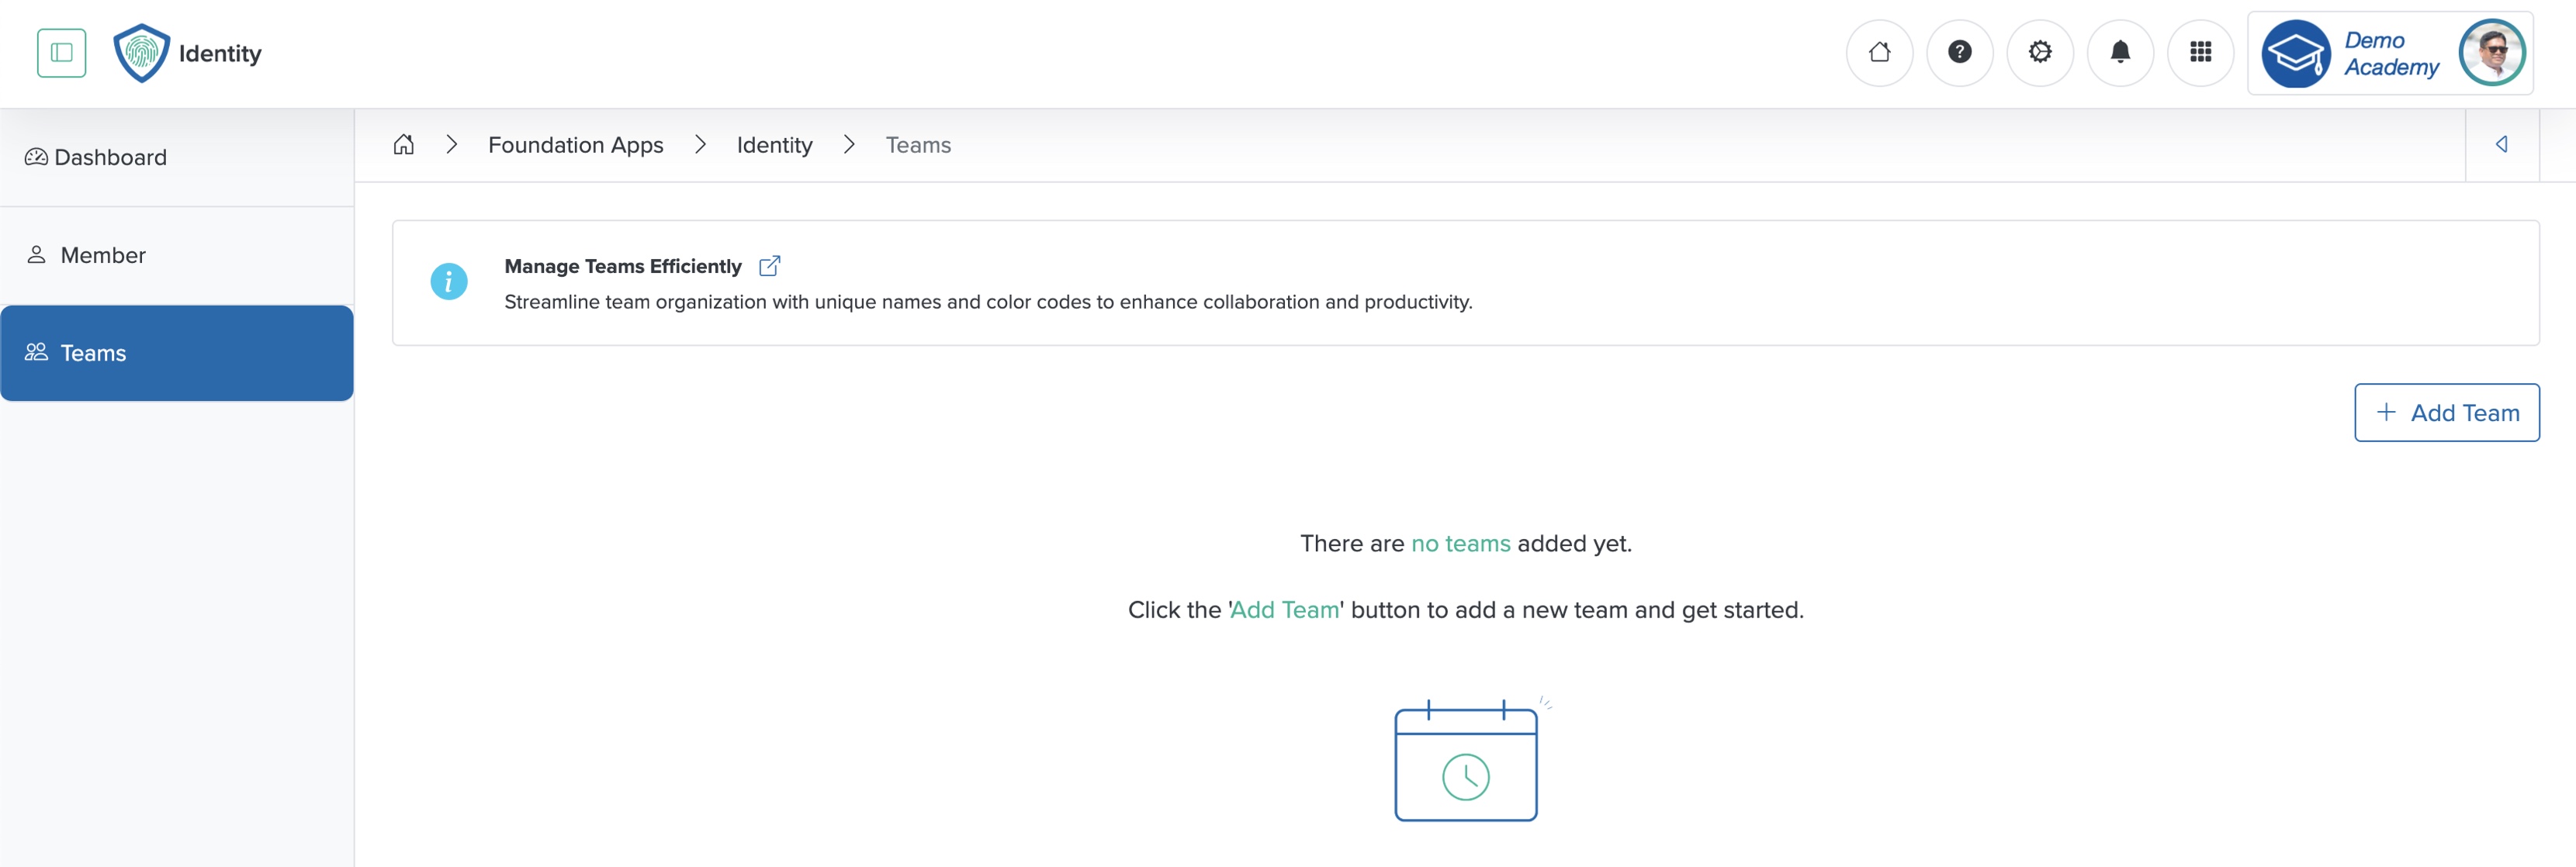
Click the + Add Team button at the top of the page, as shown in Figure 5 above, and the add team page appears, as shown in Figure 15 below.
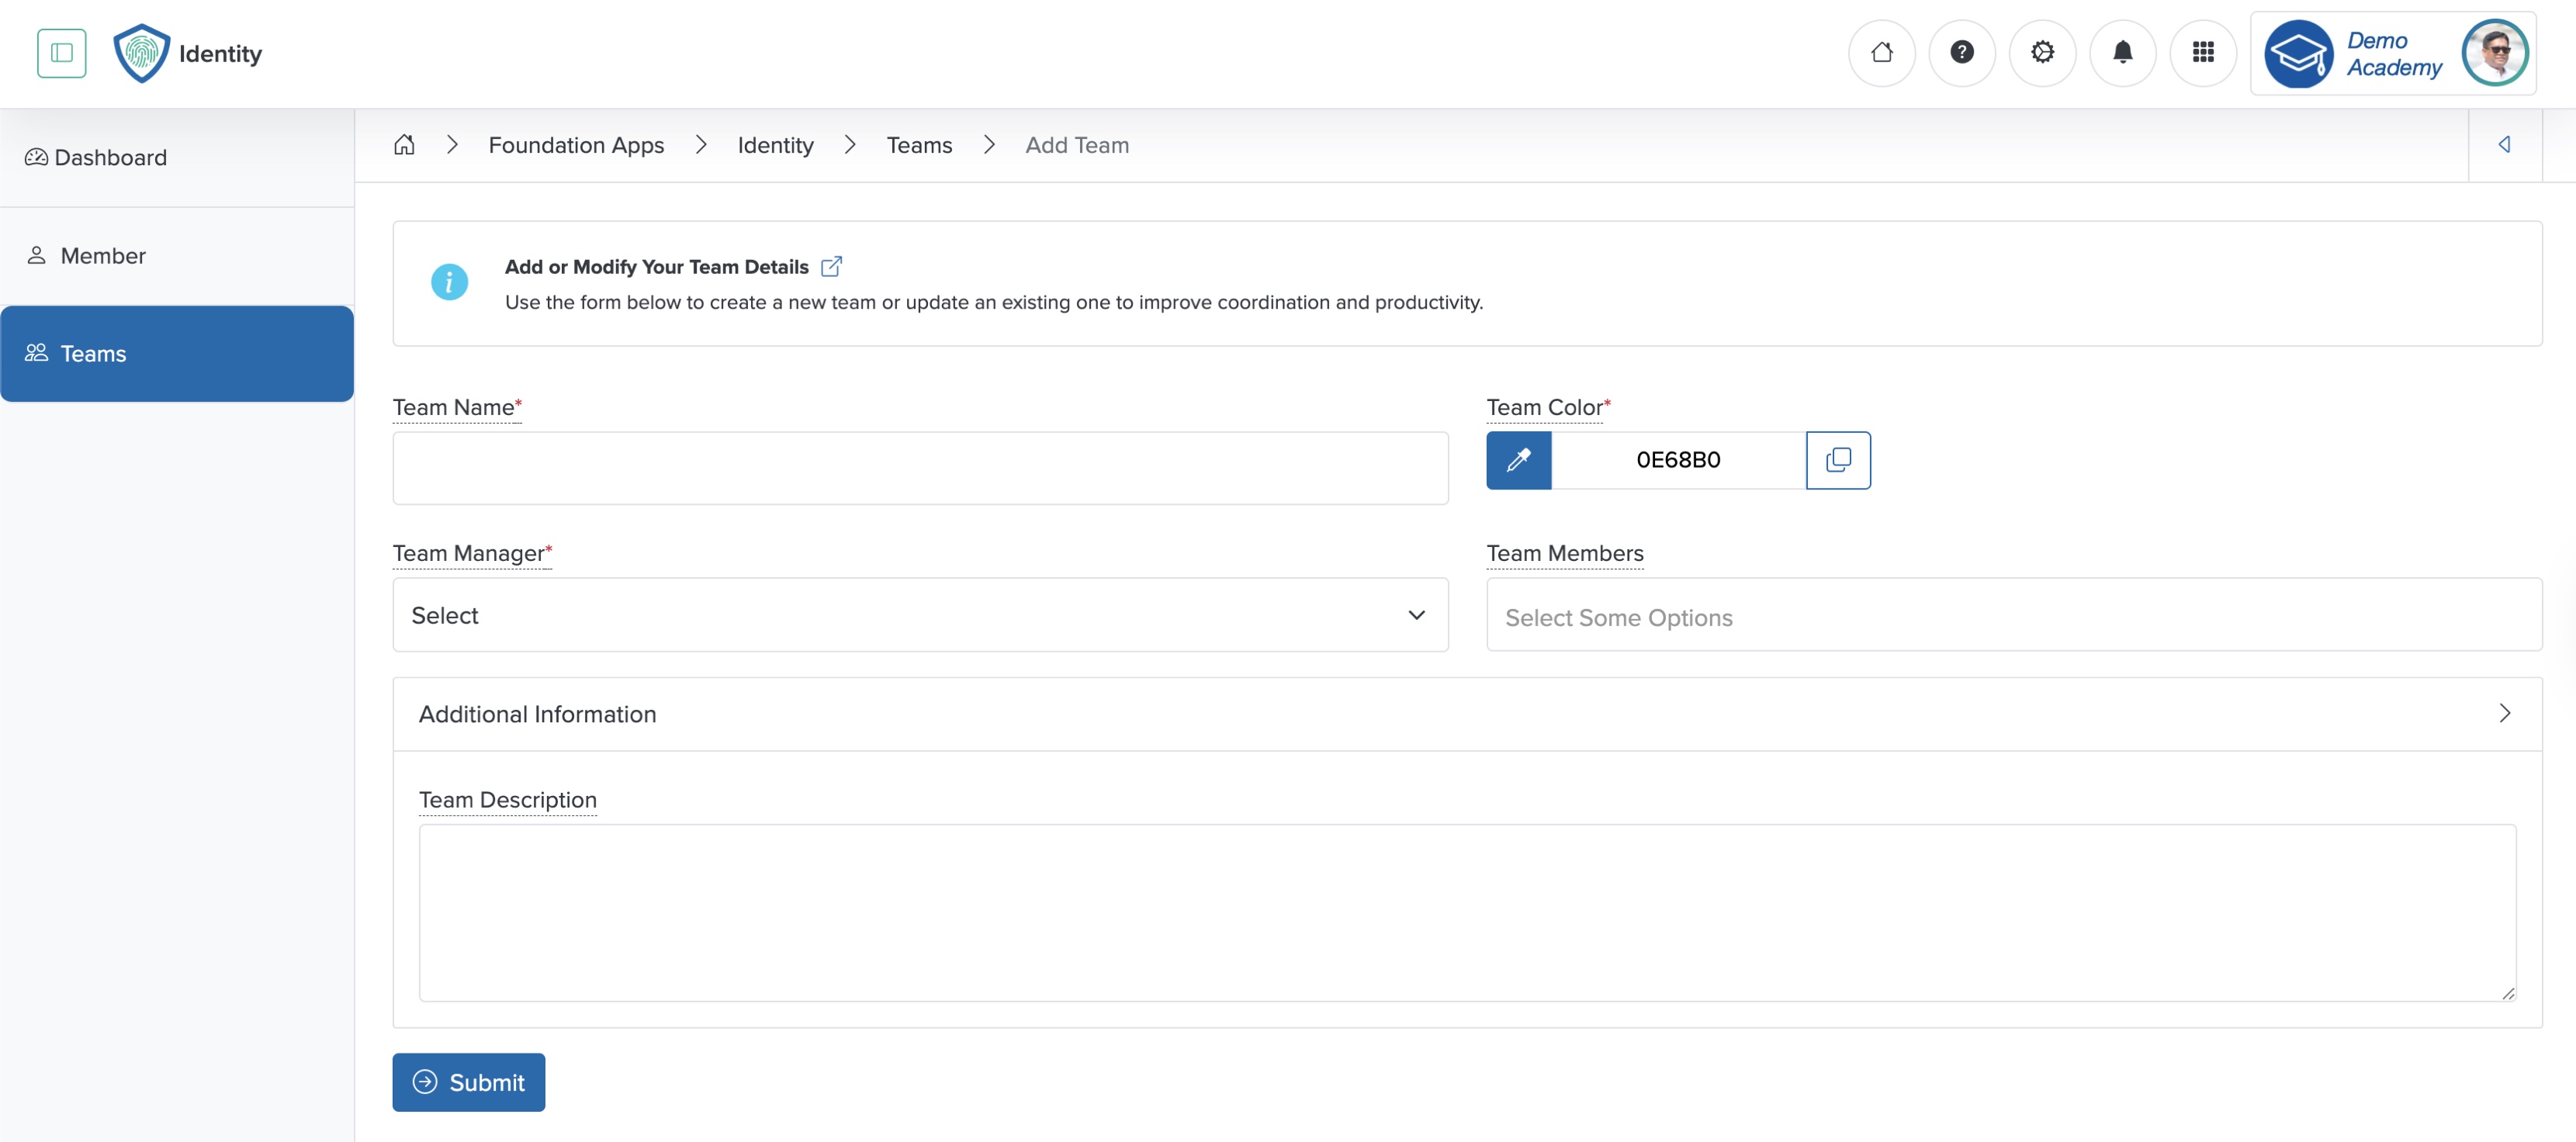
Enter the details below and click the Submit button to create a new team, as shown in Figure 5 above. You can add the following details:
- Team Name (Textbox - Mandatory): Enter the name of the team
- Team Color (Color picker - Mandatory): Select the team card background color from the color picker
- Team Manager (Select box - Mandatory): Select the team manager user from the drop-down menu. Here, all the manager users will be visible in the drop-down menu
- Team Member (Multi-select box - Mandatory): Select the team member's user from the drop-down menu. Here, multiple members can be selected from the available member-users in the drop-down menu
- Team Description (Text Area - Optional): Provide an overview or key details about the team
Click the Back icon on the top-right of the screen to return to the team list page, as shown in Figure 5 above.
Add a New Member
Click the Member card from the dashboard, as shown in Figure 3 above, and the member list page opens. If you have not added any members before, you cannot see any members on the screen. If you have added members before, you can see the member list on the screen, as shown in Figure 6 below.

Click the + Add Member button at the top-right side of the screen, as shown in Figure 6 above, and the member add page opens, as shown in Figure 7 below.
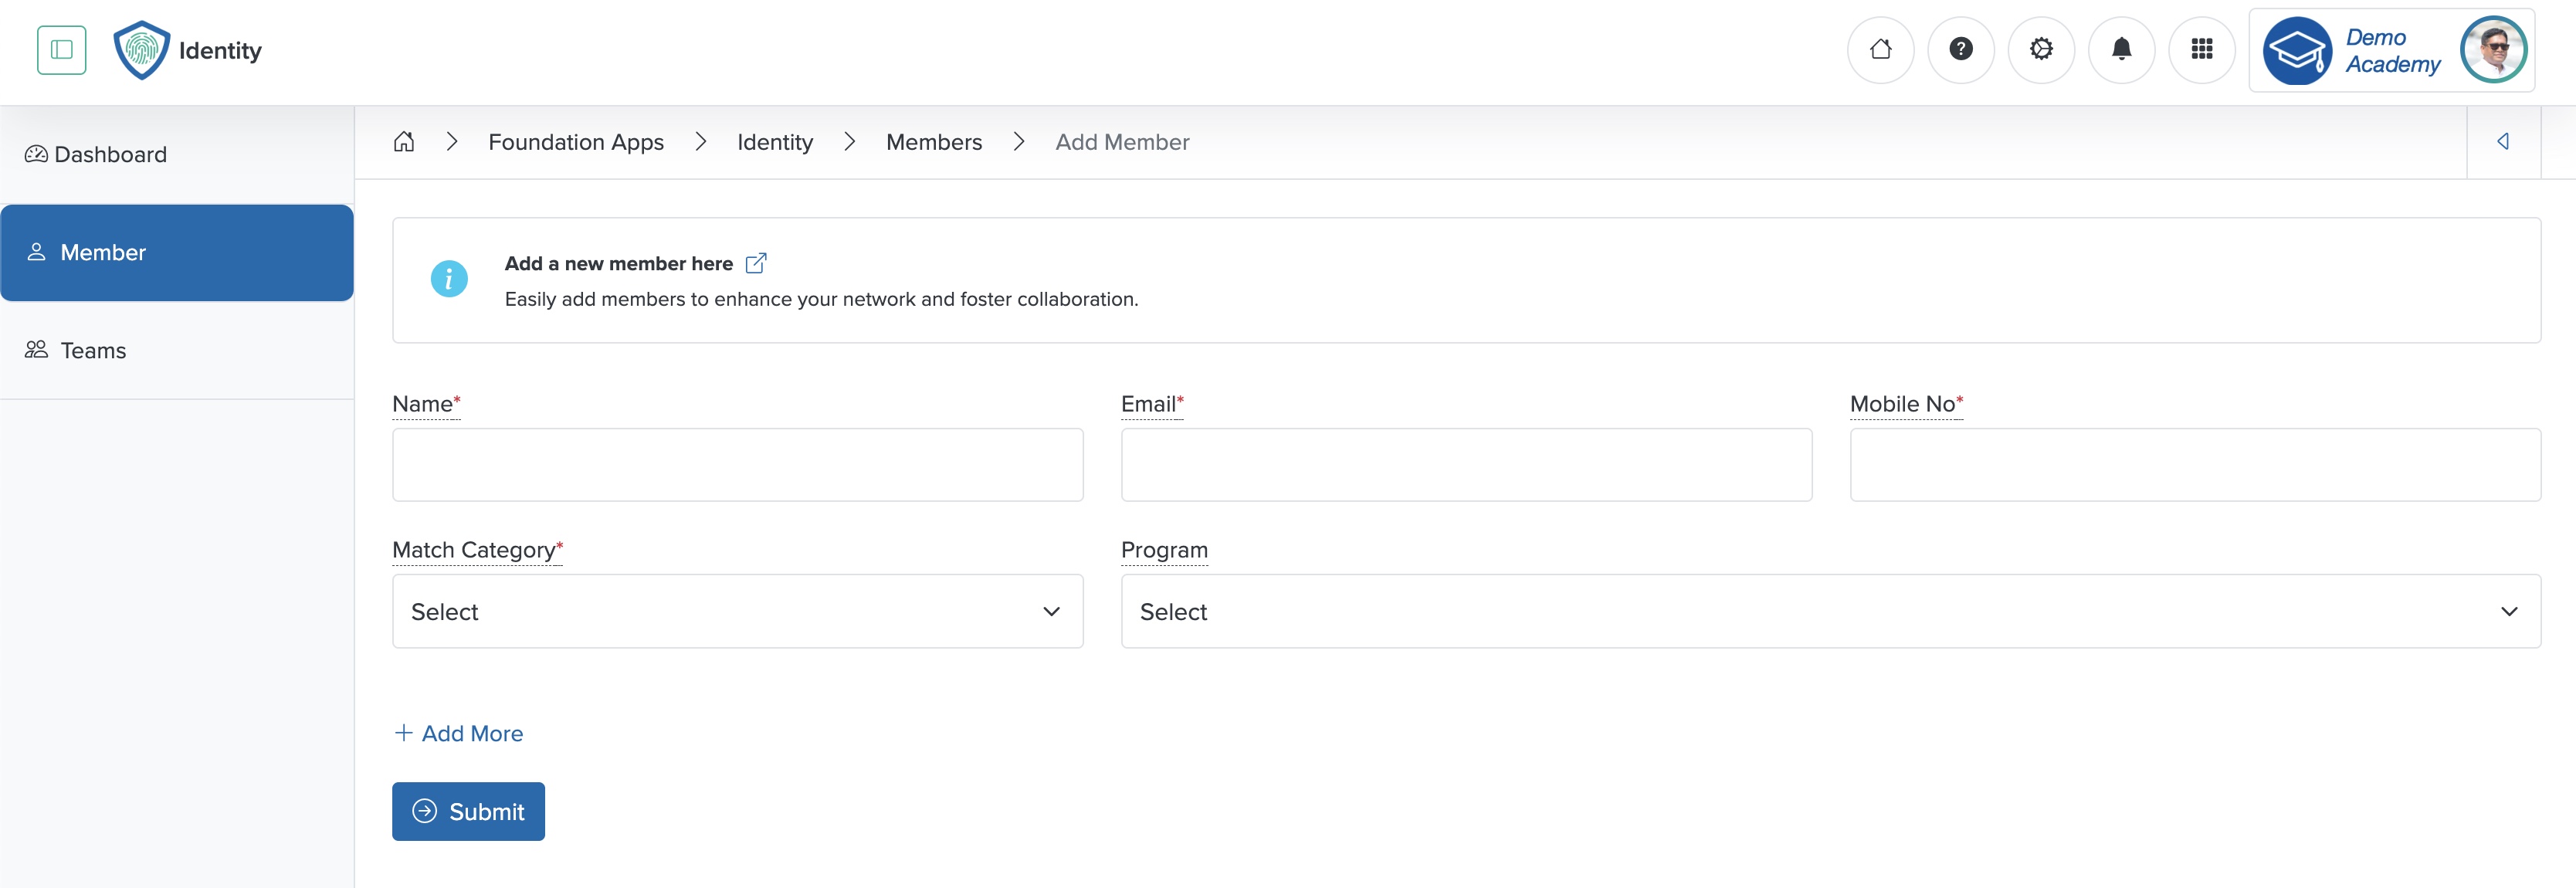
Enter the details below and click the Submit button to create a new member, as shown in Figure 7 above. You can add the following details:
- Name (Textbox - Mandatory): Enter the member name
- Email (Textbox - Mandatory): Enter the member’s email ID
- Mobile No (Textbox - Mandatory): Enter the member’s mobile number
- Match Category (Select box - Mandatory): Select the category available from the drop-down menu. Here, all the match categories added for the workspace under the settings will be visible in the drop-down menu
- LMS (Select box - Mandatory): Select the Course available from the drop-down menu. Here, all the Courses created for the workspace under the LMS business app appear in the drop-down menu
- + Add More (Link - Optional): Click to add multiple members at a time
Click the Back icon at the top-right of the screen to return to the member list page, as shown in Figure 7 above.
Member Pending Verification
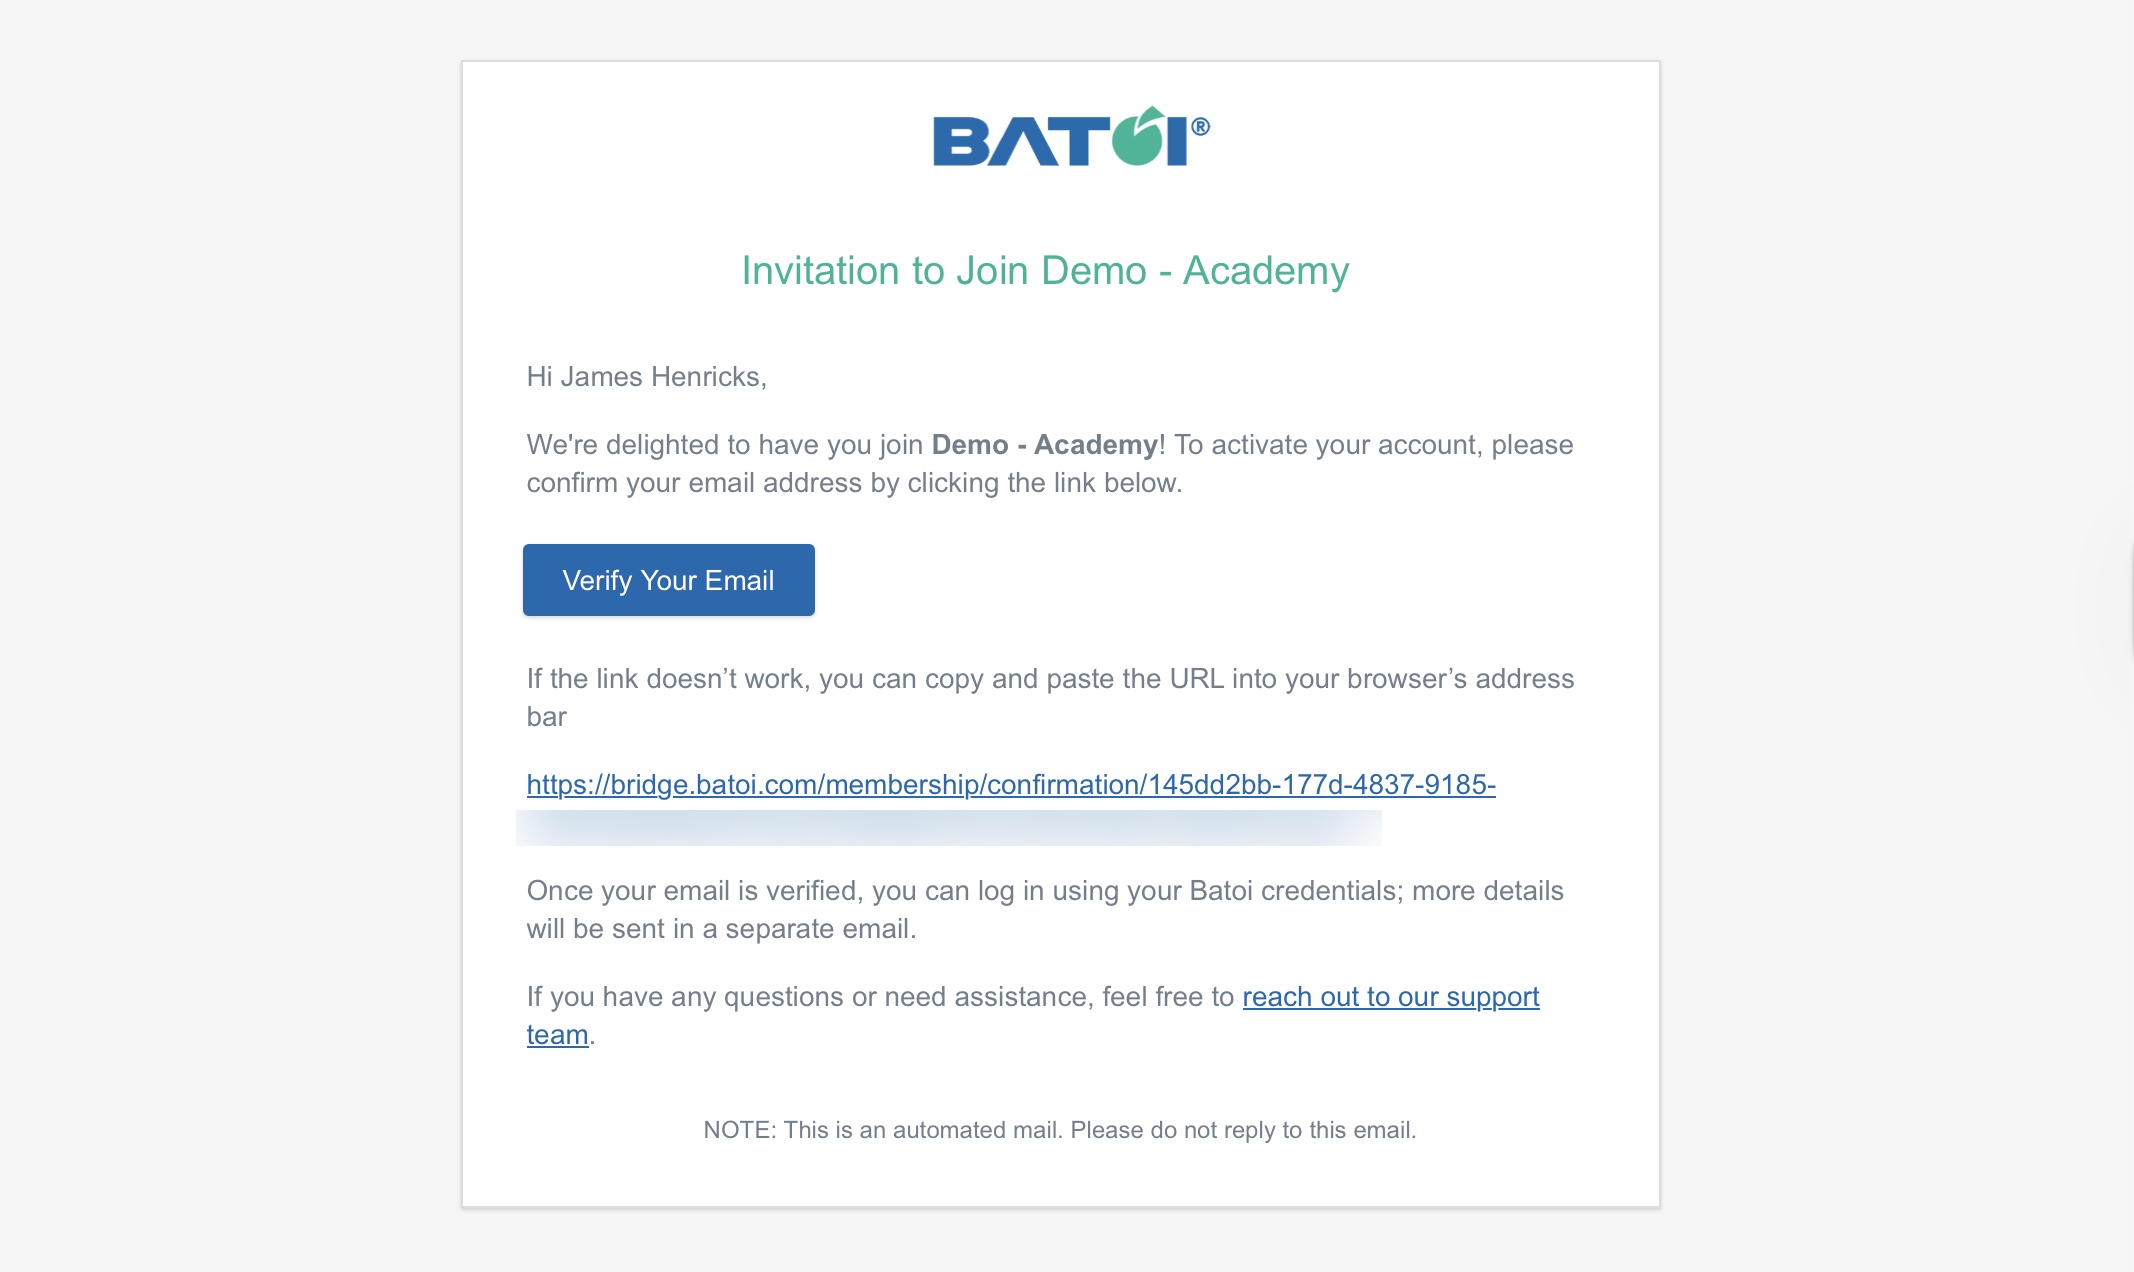
The newly added user to the Workspace receives an automated verification email, as shown in Figure 8 below.
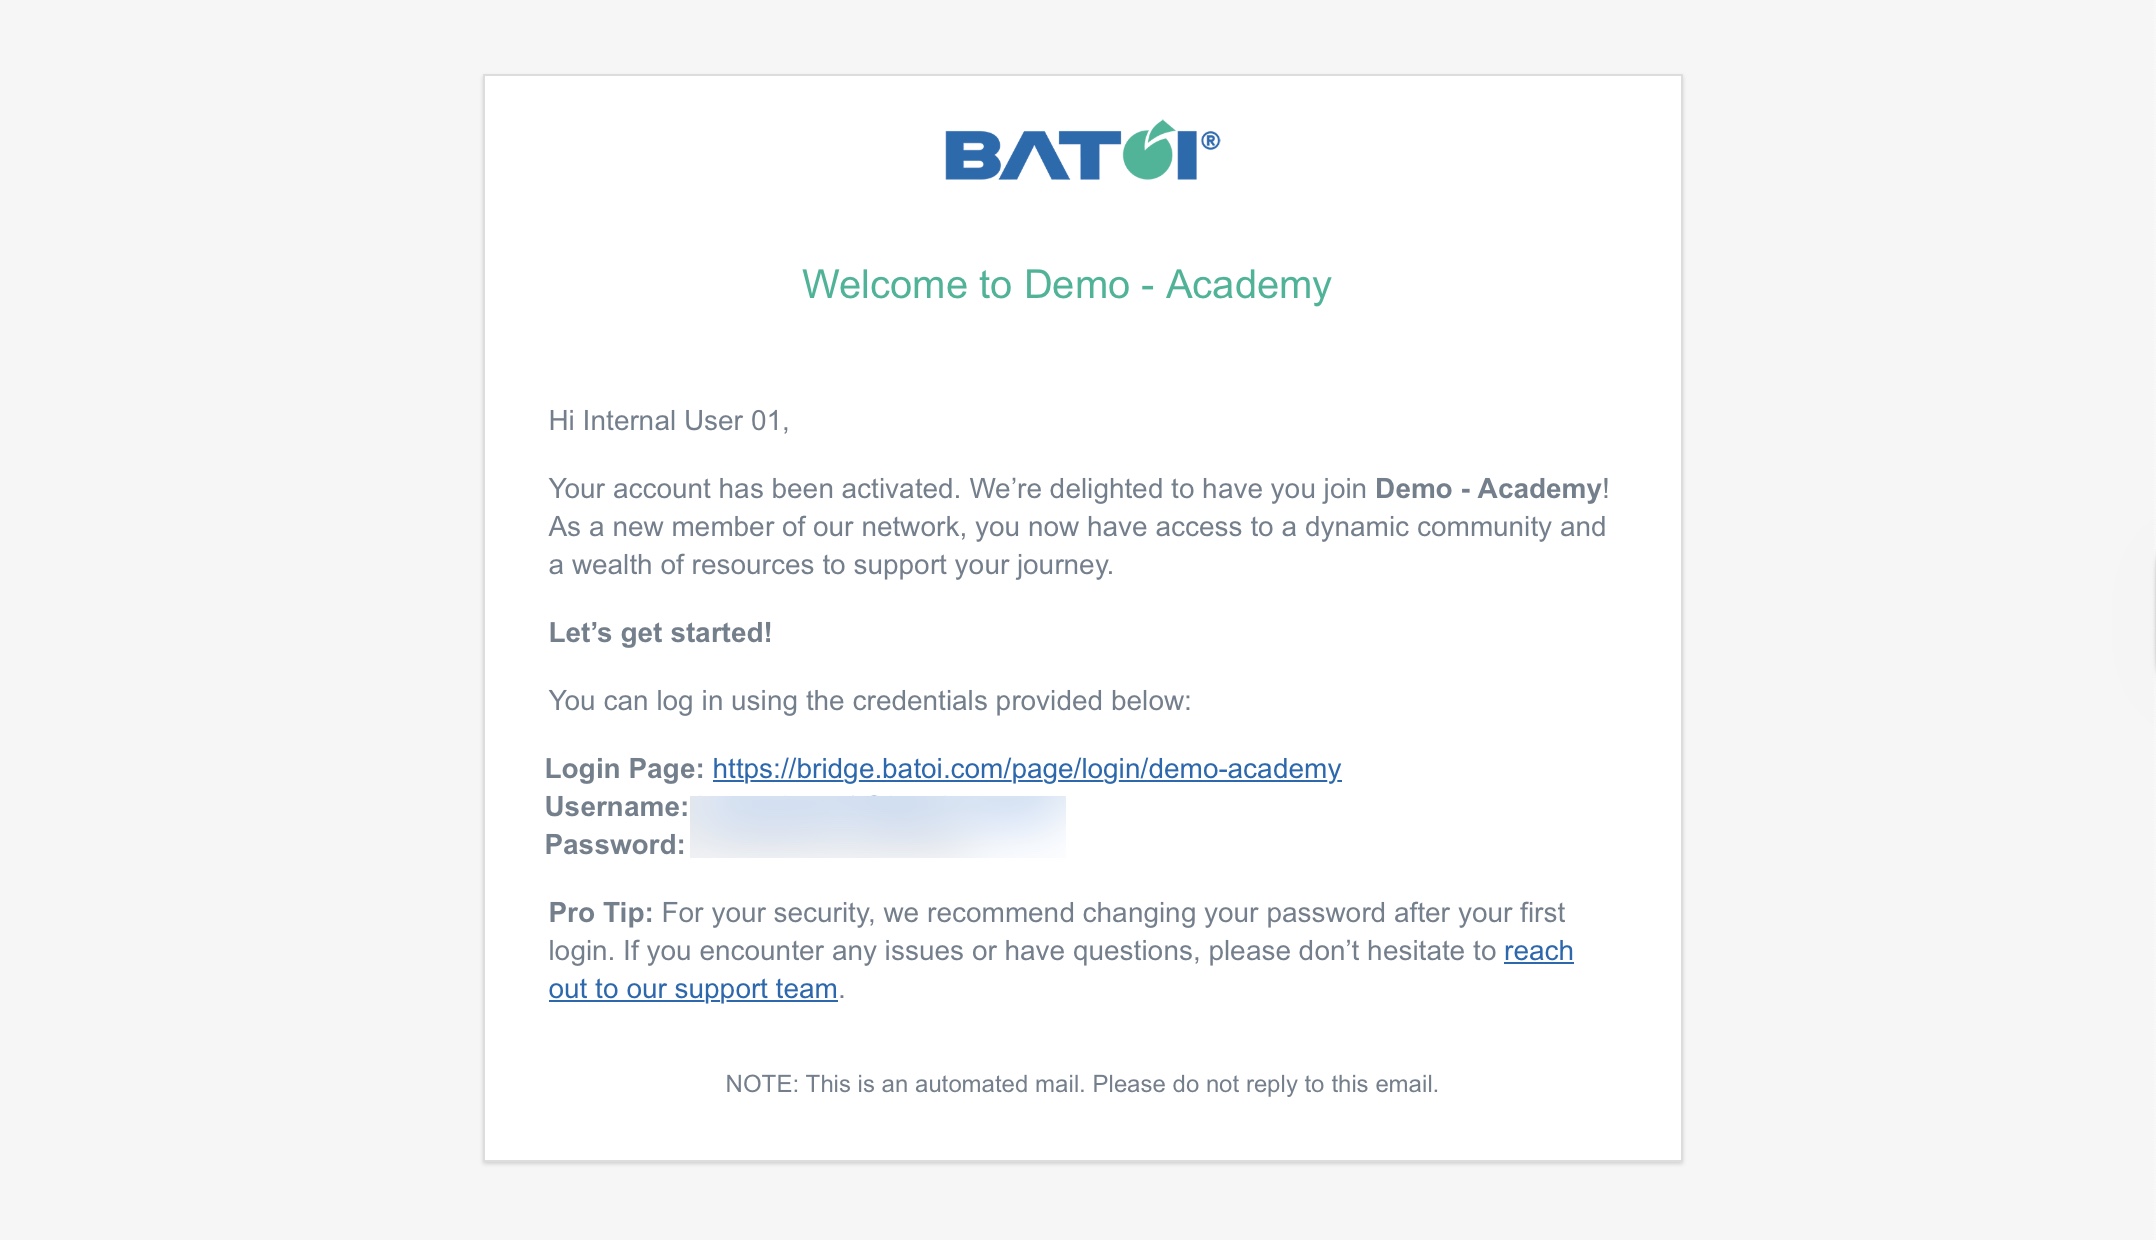
Upon successful verification of the user's email, the user receives the welcome email, as shown in Figure 9 below, and the system adds the user as a Workspace member.
Welcome Email Setting
Click the Workspace setting icon on the header screen, as shown in Figure 10 below, and the system opens the setting list page, as shown in Figure 11 below.
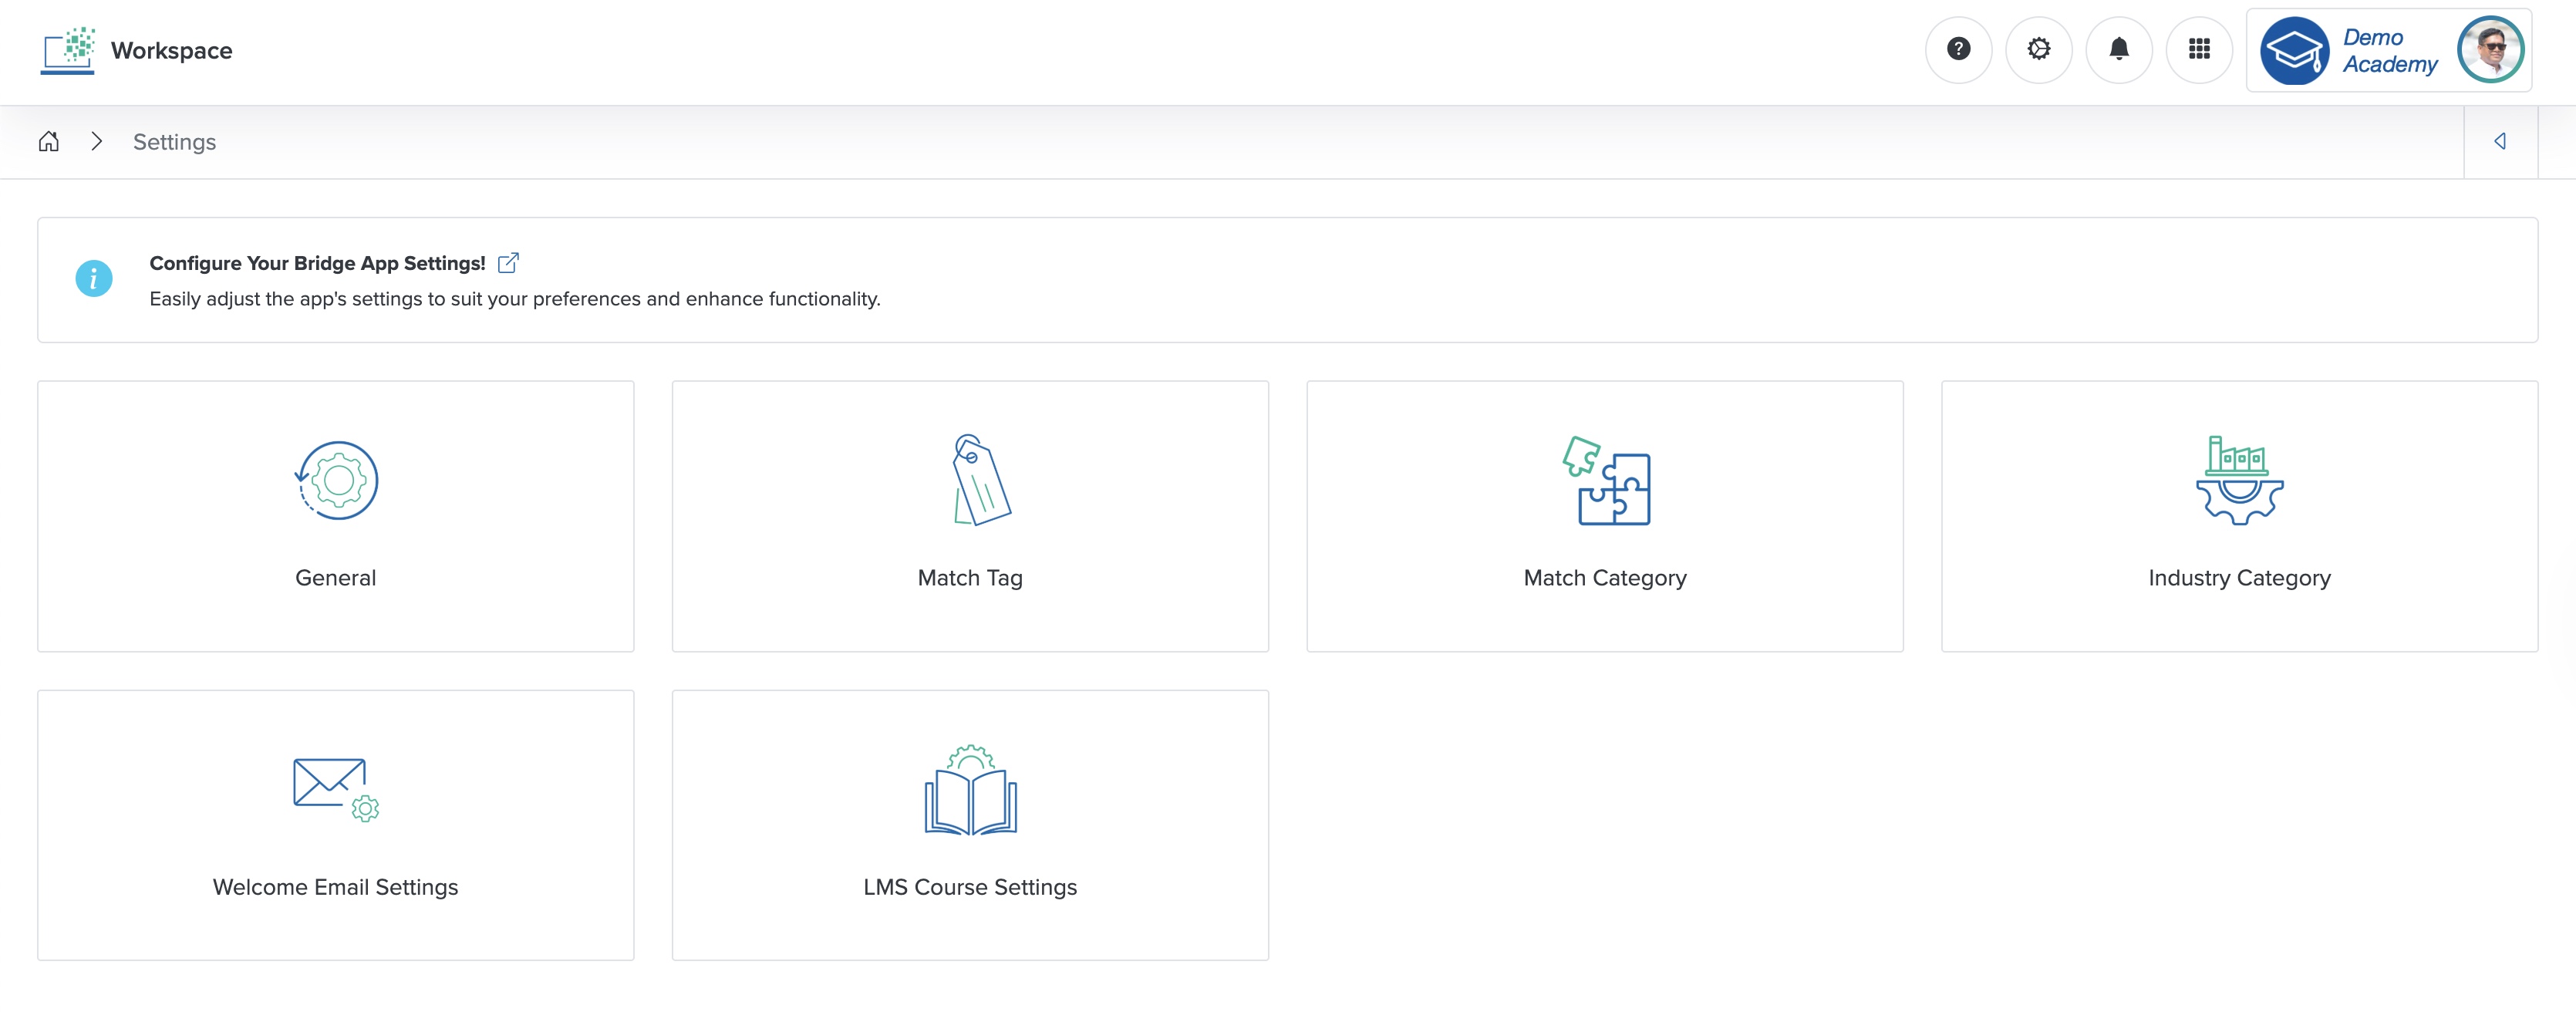
Click the Welcome Email Setting card from the list page, as shown in Figure 11 above, and the system opens the setting page, as shown in Figure 12 below.
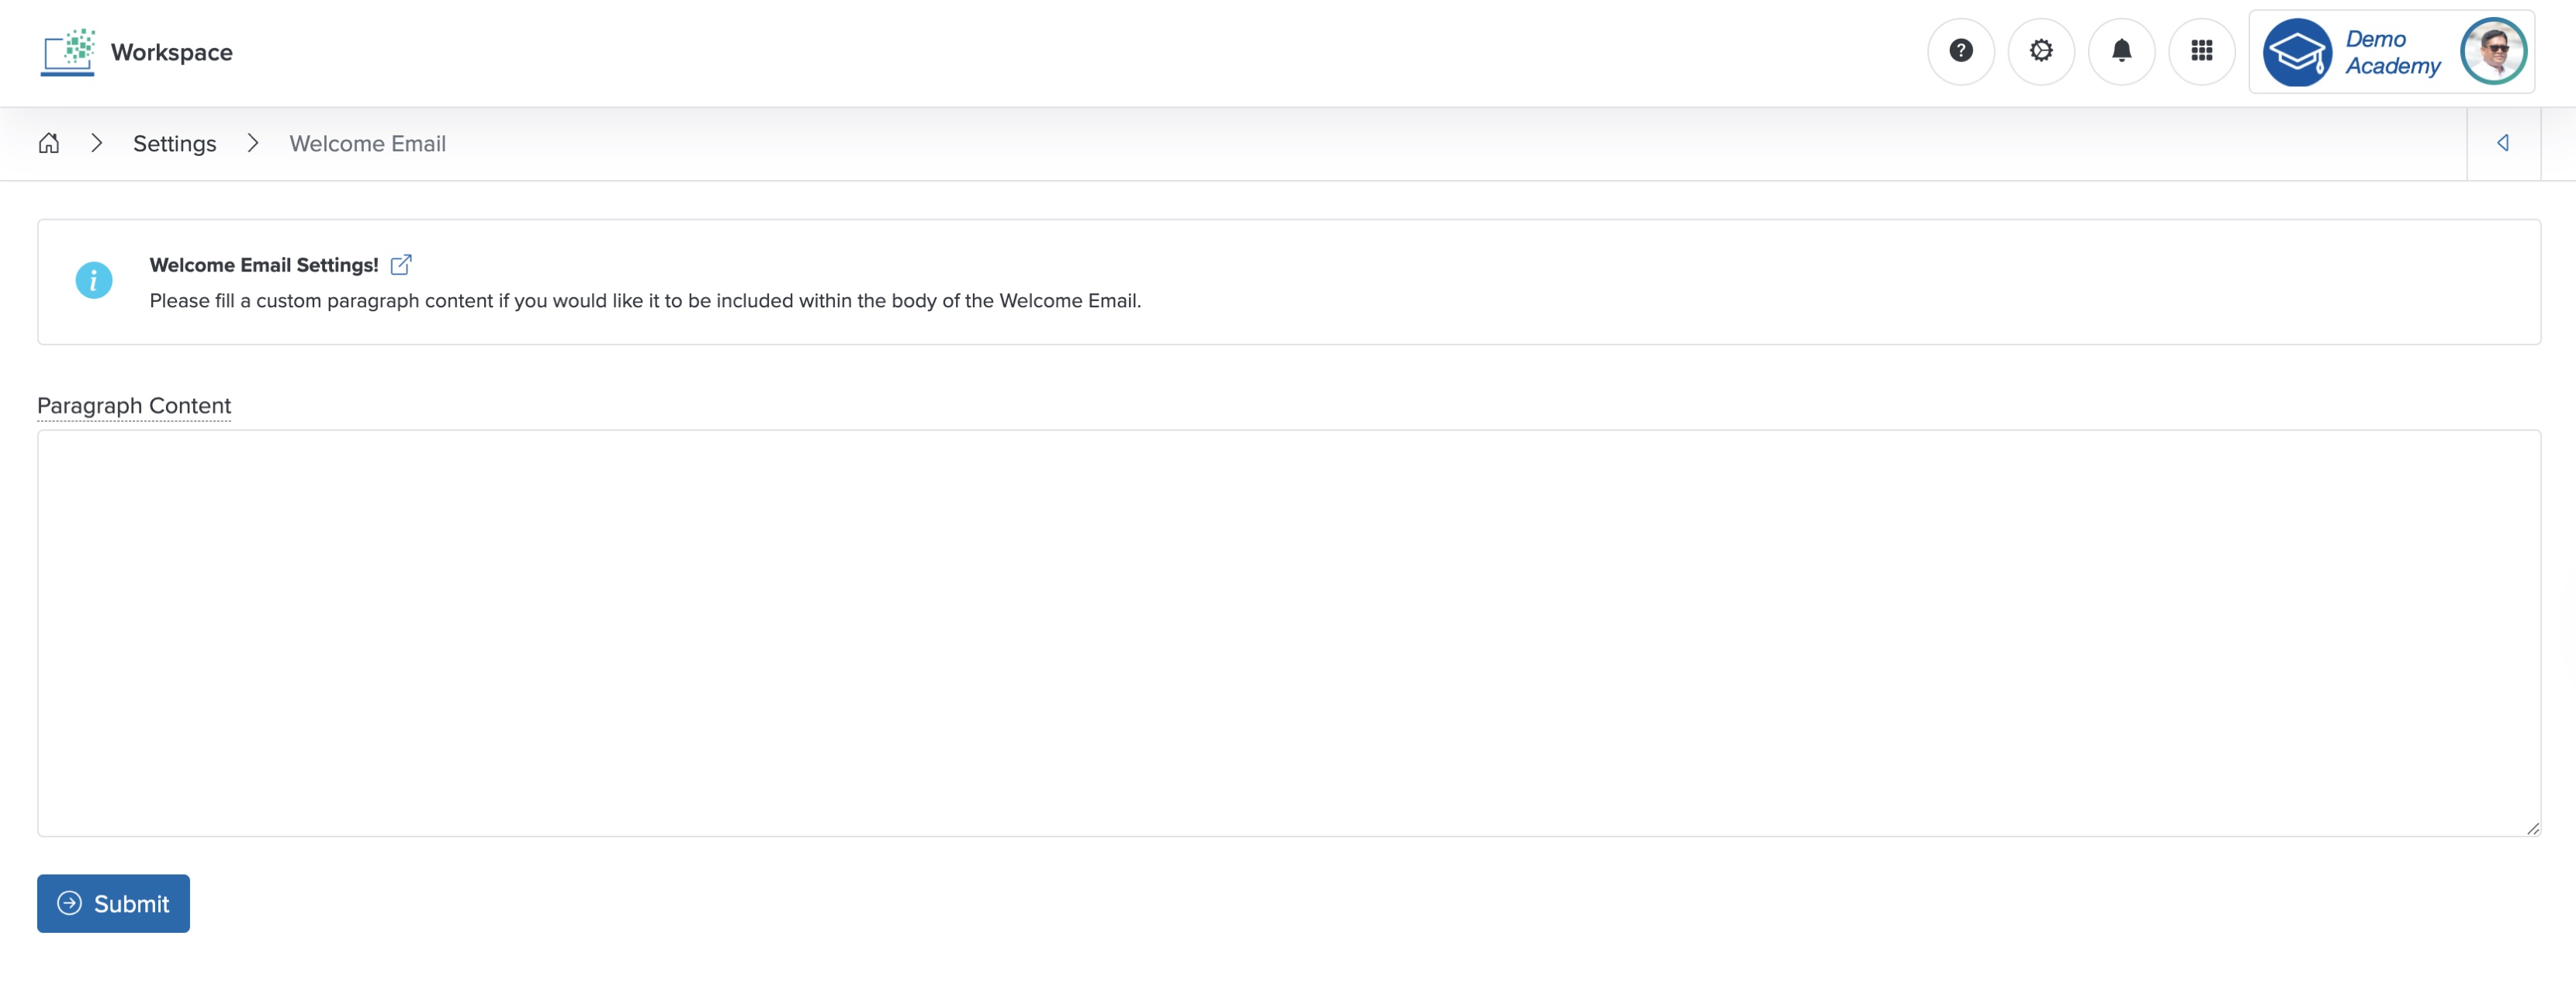
Enter the Paragraph Content in the text area and click the Submit button to set the welcome email content, as shown in Figure 12 above.
LMS Course Setting
Click the LMS Course Setting card from the list page, as shown in Figure 11 above, and the system opens the LMS course setting page, as shown in Figure 13 below.
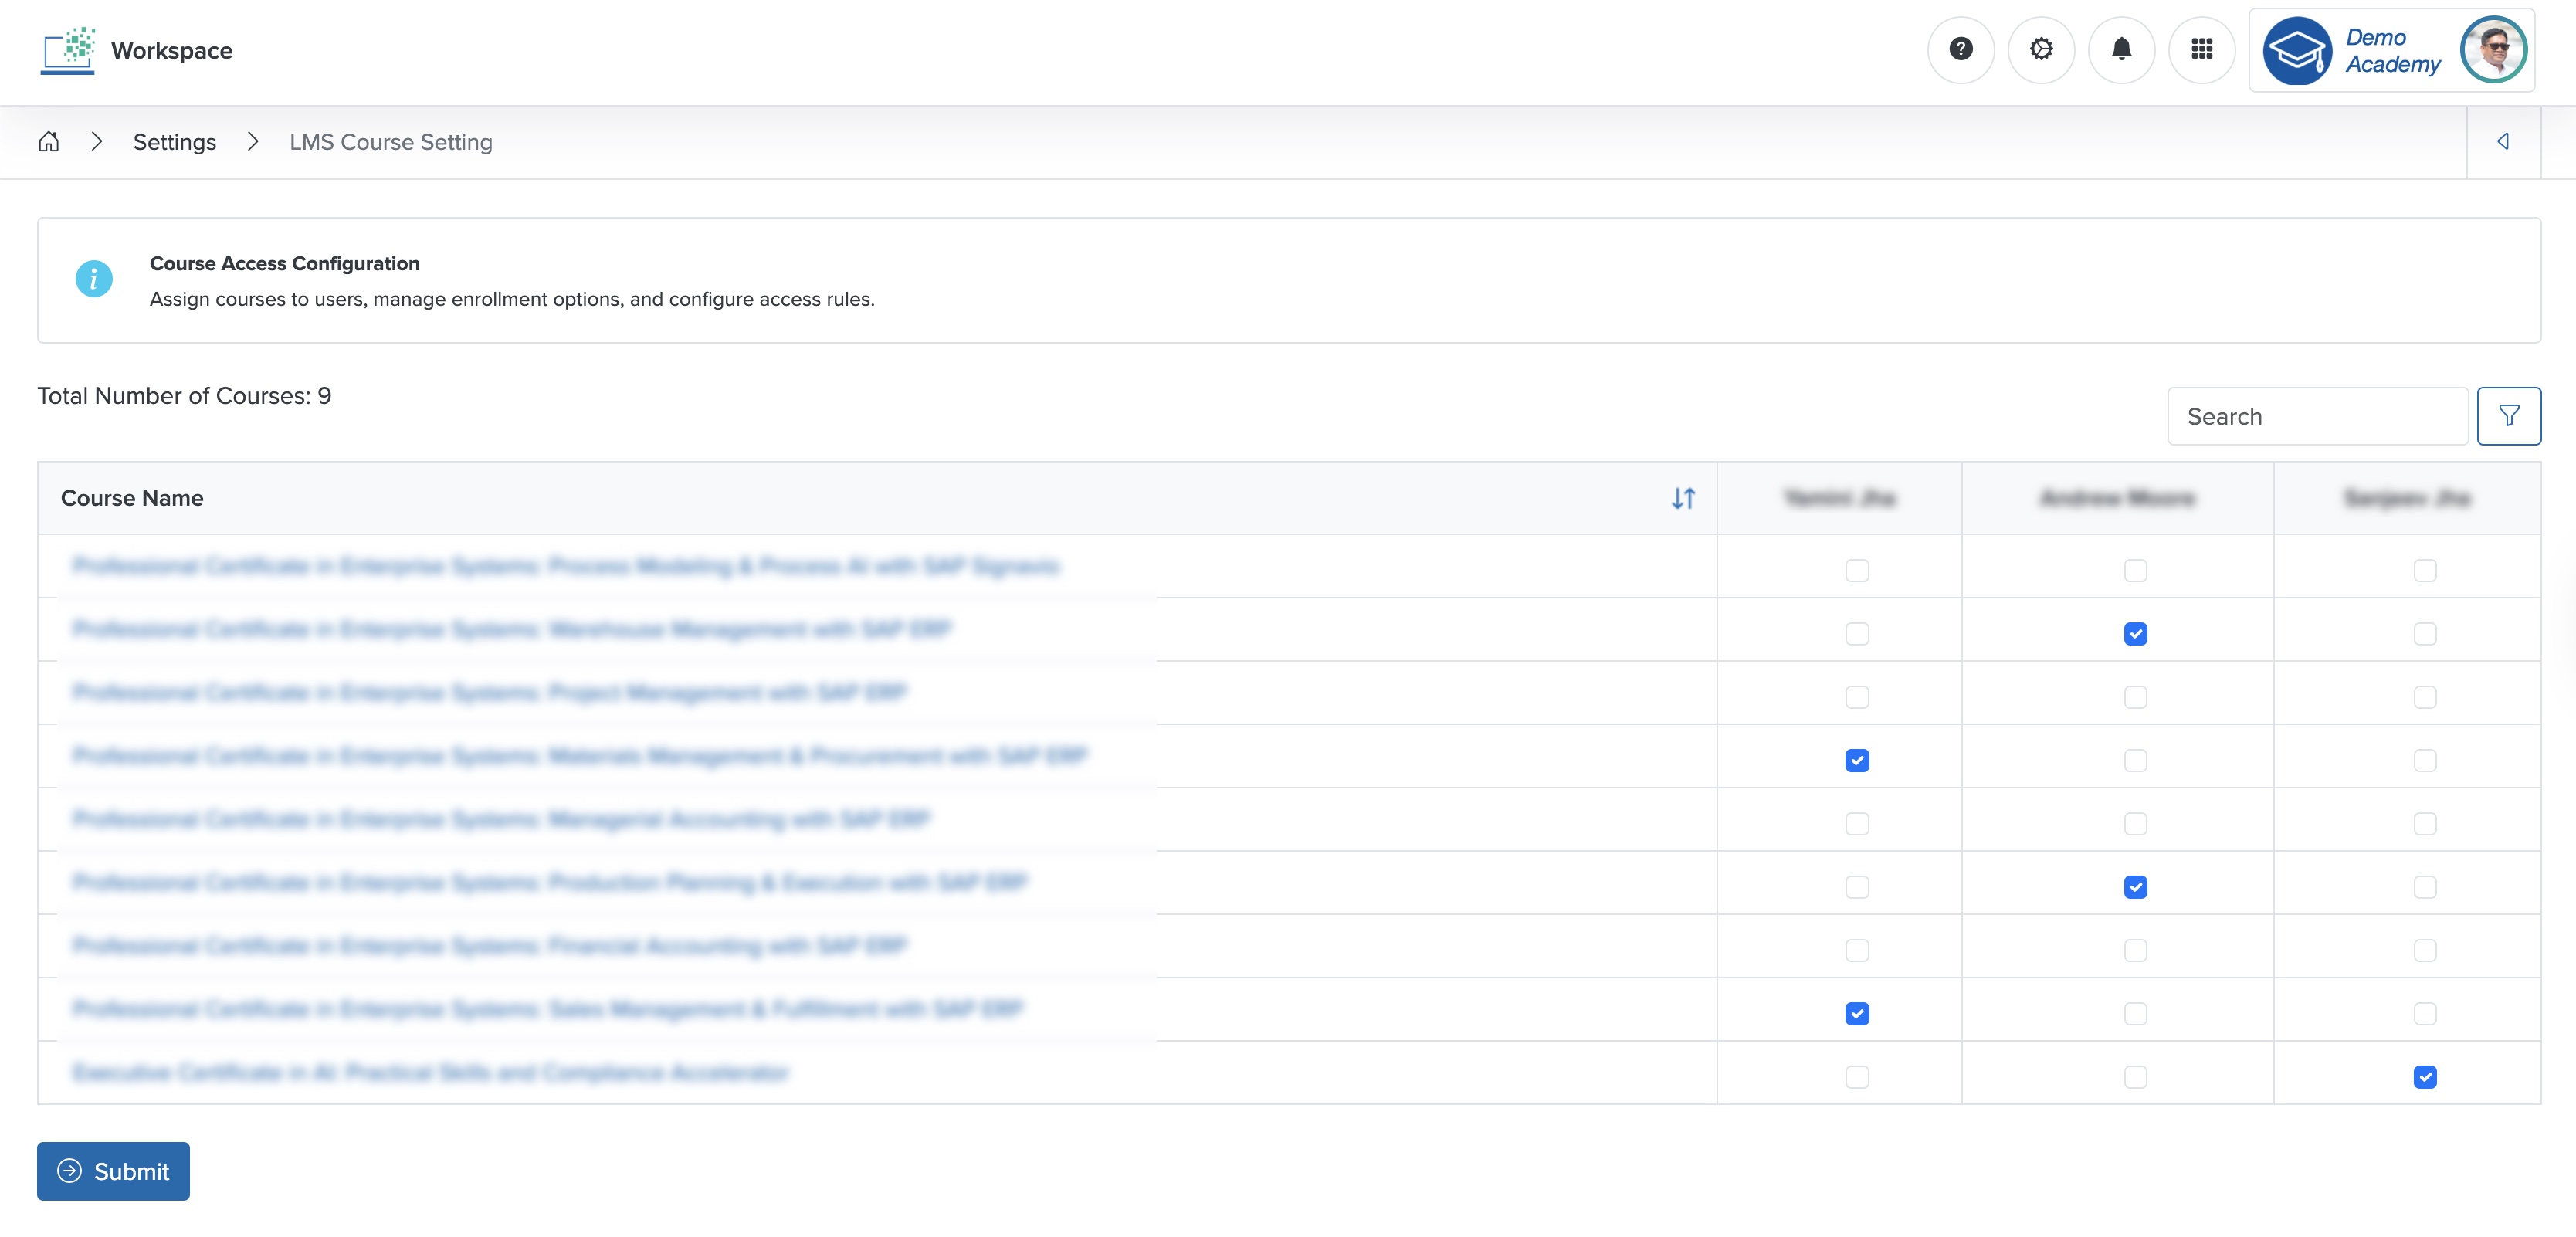
On the LMS course setting page, you can see all the courses listed row-wise in a tabular format, and each course is assigned to the LMS instructors, as shown in Figure 13 above. You can assign the courses to the instructors by selecting the checkboxes available for each instructor and for each course, as shown in Figure 13 above.
Match Category Setting
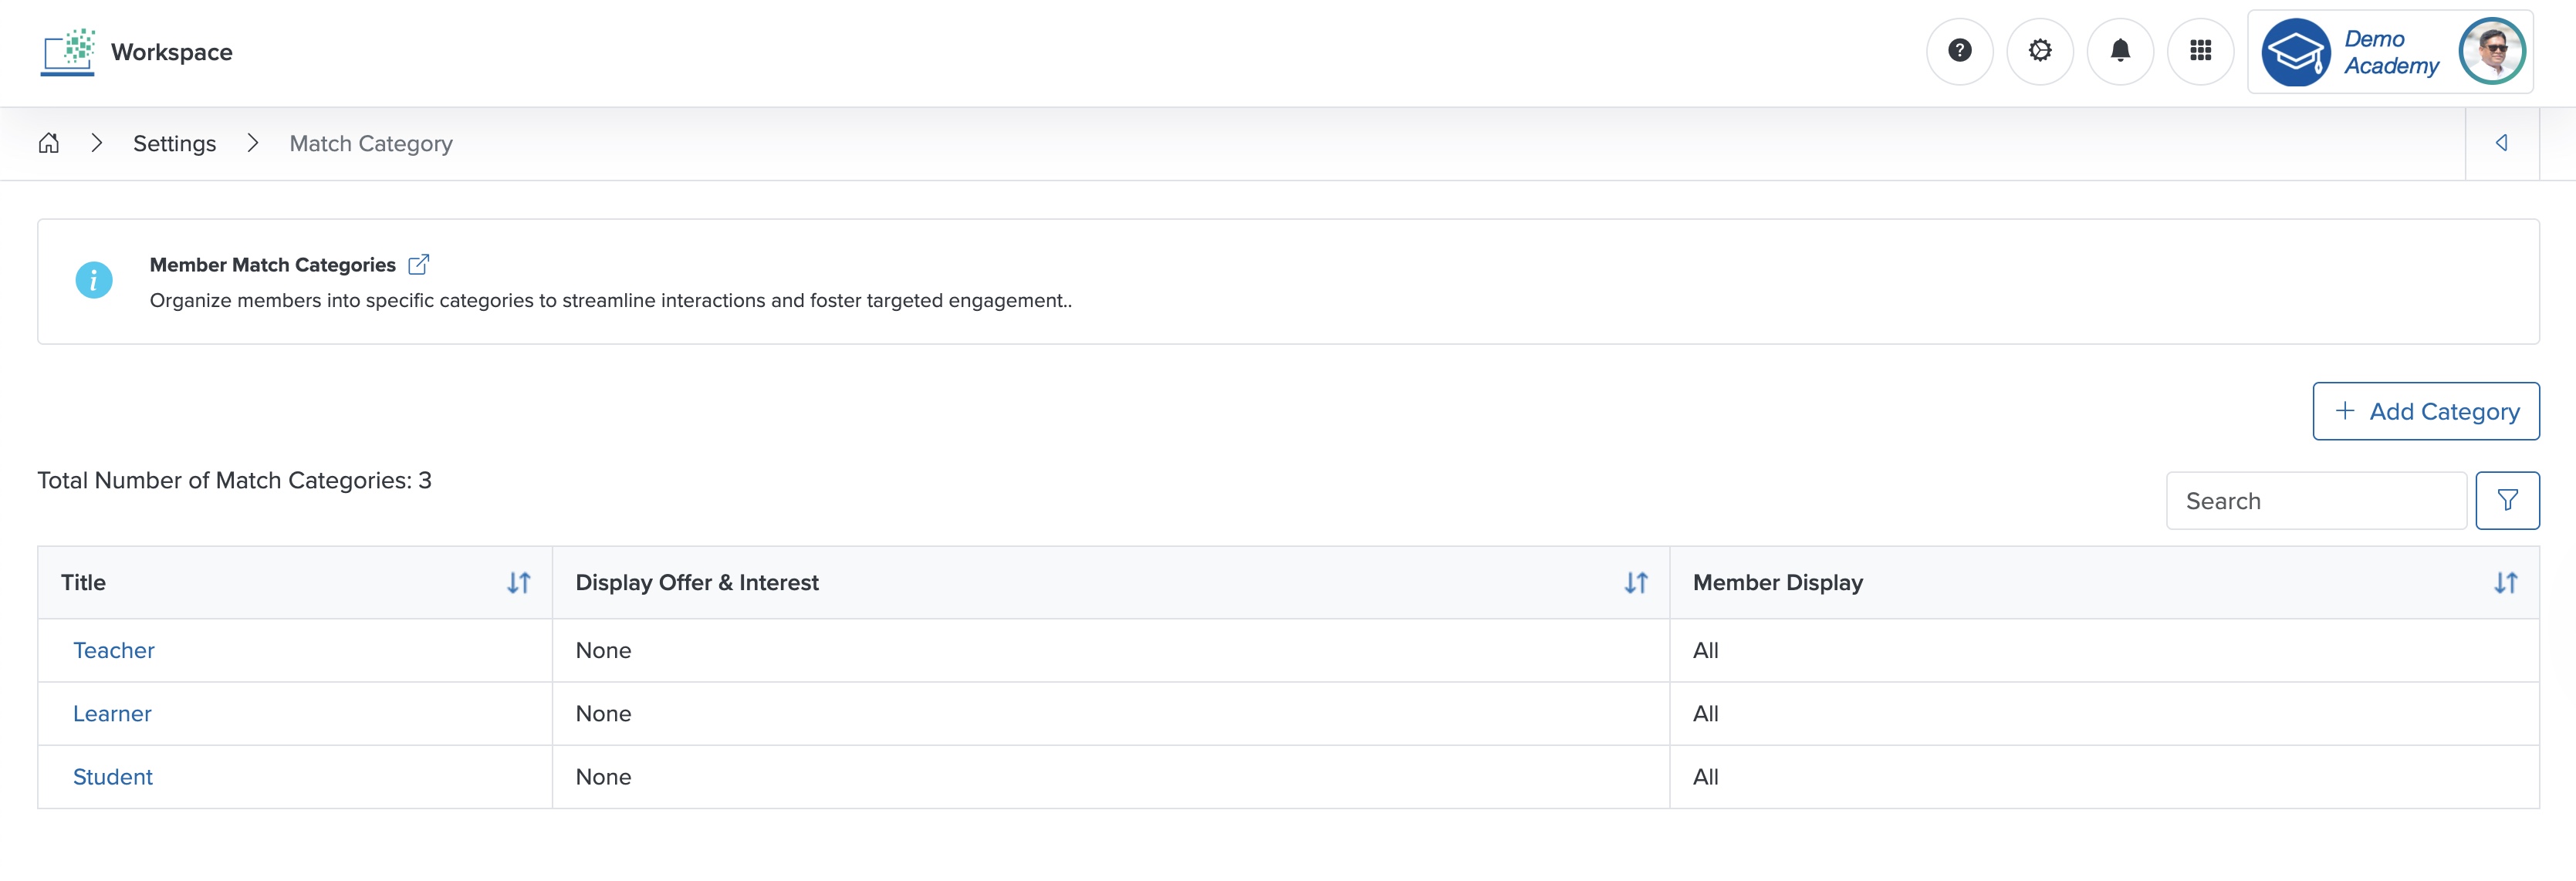
Click the Match Category card from the list page, as shown in Figure 11 above, and the system displays the match category list page, as shown in Figure 14 below. If you have not added a match category before, you cannot see any match categories on the screen. If you have added match categories before, you can see the match category list on the screen, as shown in Figure 14 below.
Click the + Add Category button on the top-right side of the screen, and the match category add page opens, as shown in Figure 15 below.
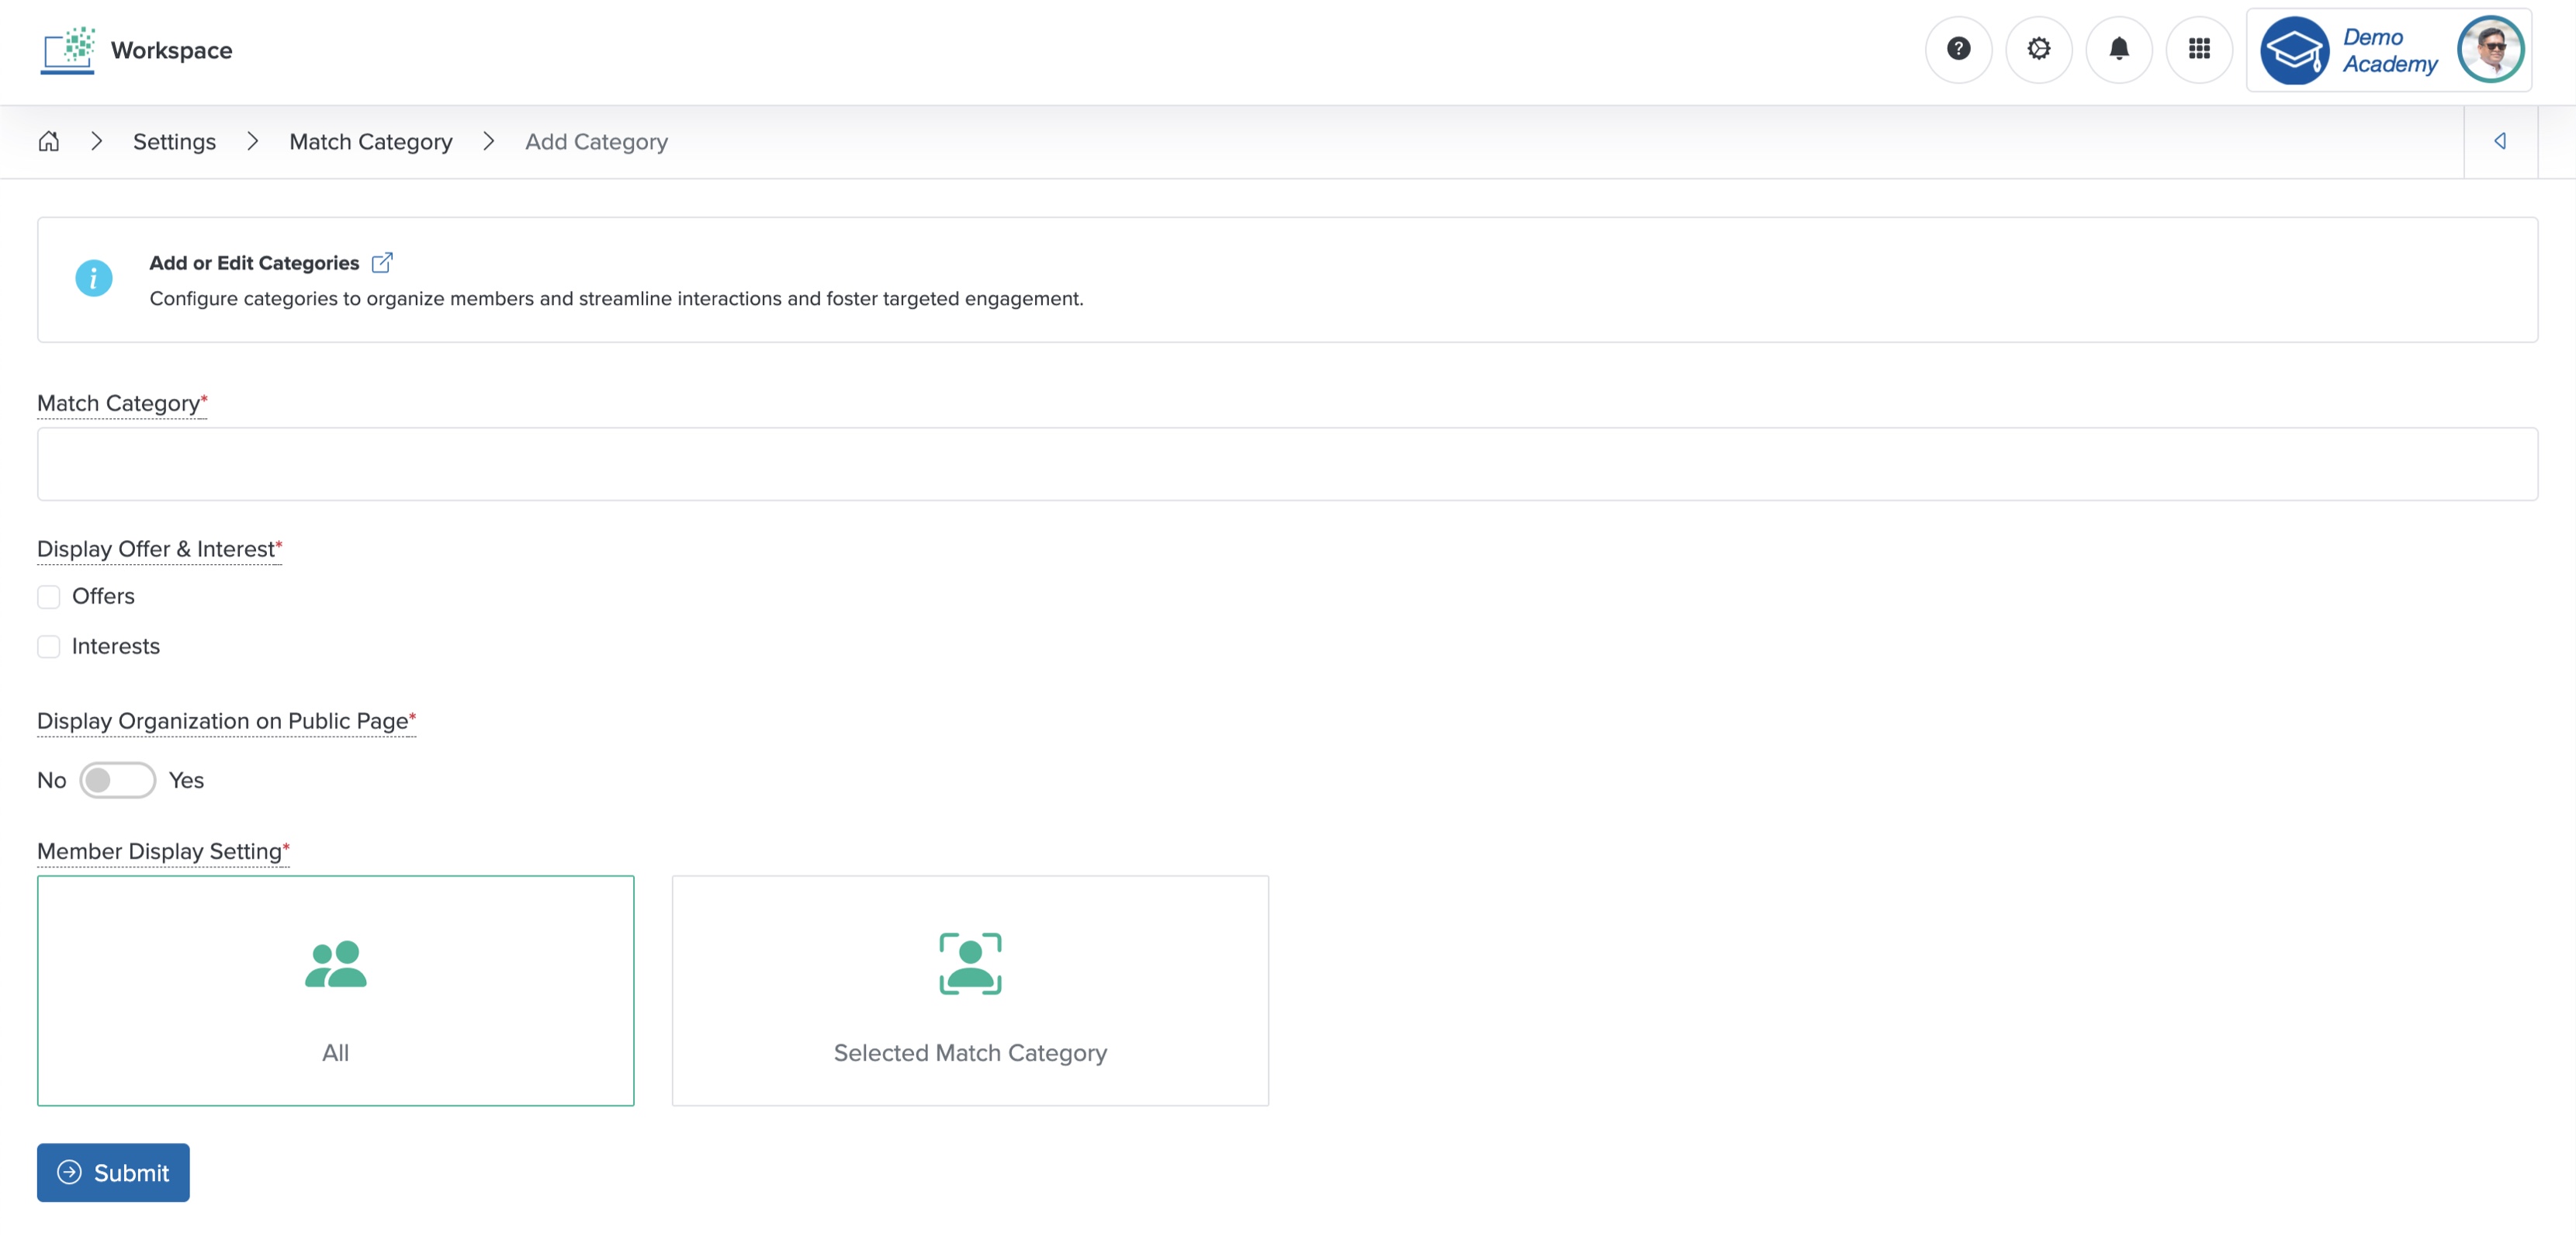
Enter the details below and click the Submit button to create a new match category, as shown in Figure 15 above. You can add the following details:
- Match Category (Textbox - Mandatory): Enter the match category name
- Display Offer & Interest (Selectbox - Mandatory): Select the option ‘Offer’ and ‘Interest’ of the member
- Display Organization on Public Page (Switcher - Optional): Select Yes to display the member’s organization name on the Course public page
- Member Display Setting (Select box - Mandatory): Select All if the member can see all other members of the Workspace, or select Selected Match Category and all the available match categories appear to the right side of the card, as shown in Figure 16 below, and select the member categories that display for this member

Figure 16: Individual Workspace - Select Match Category Screen
Click the Back icon on the top-right of the screen to return to the match category list page, as shown in Figure 15 above.
Resend Member Pending Verification Email
Click the Pending Verification button on the top-right side of the member list screen, and the pending verification email list page opens, as shown in Figure 17 below.
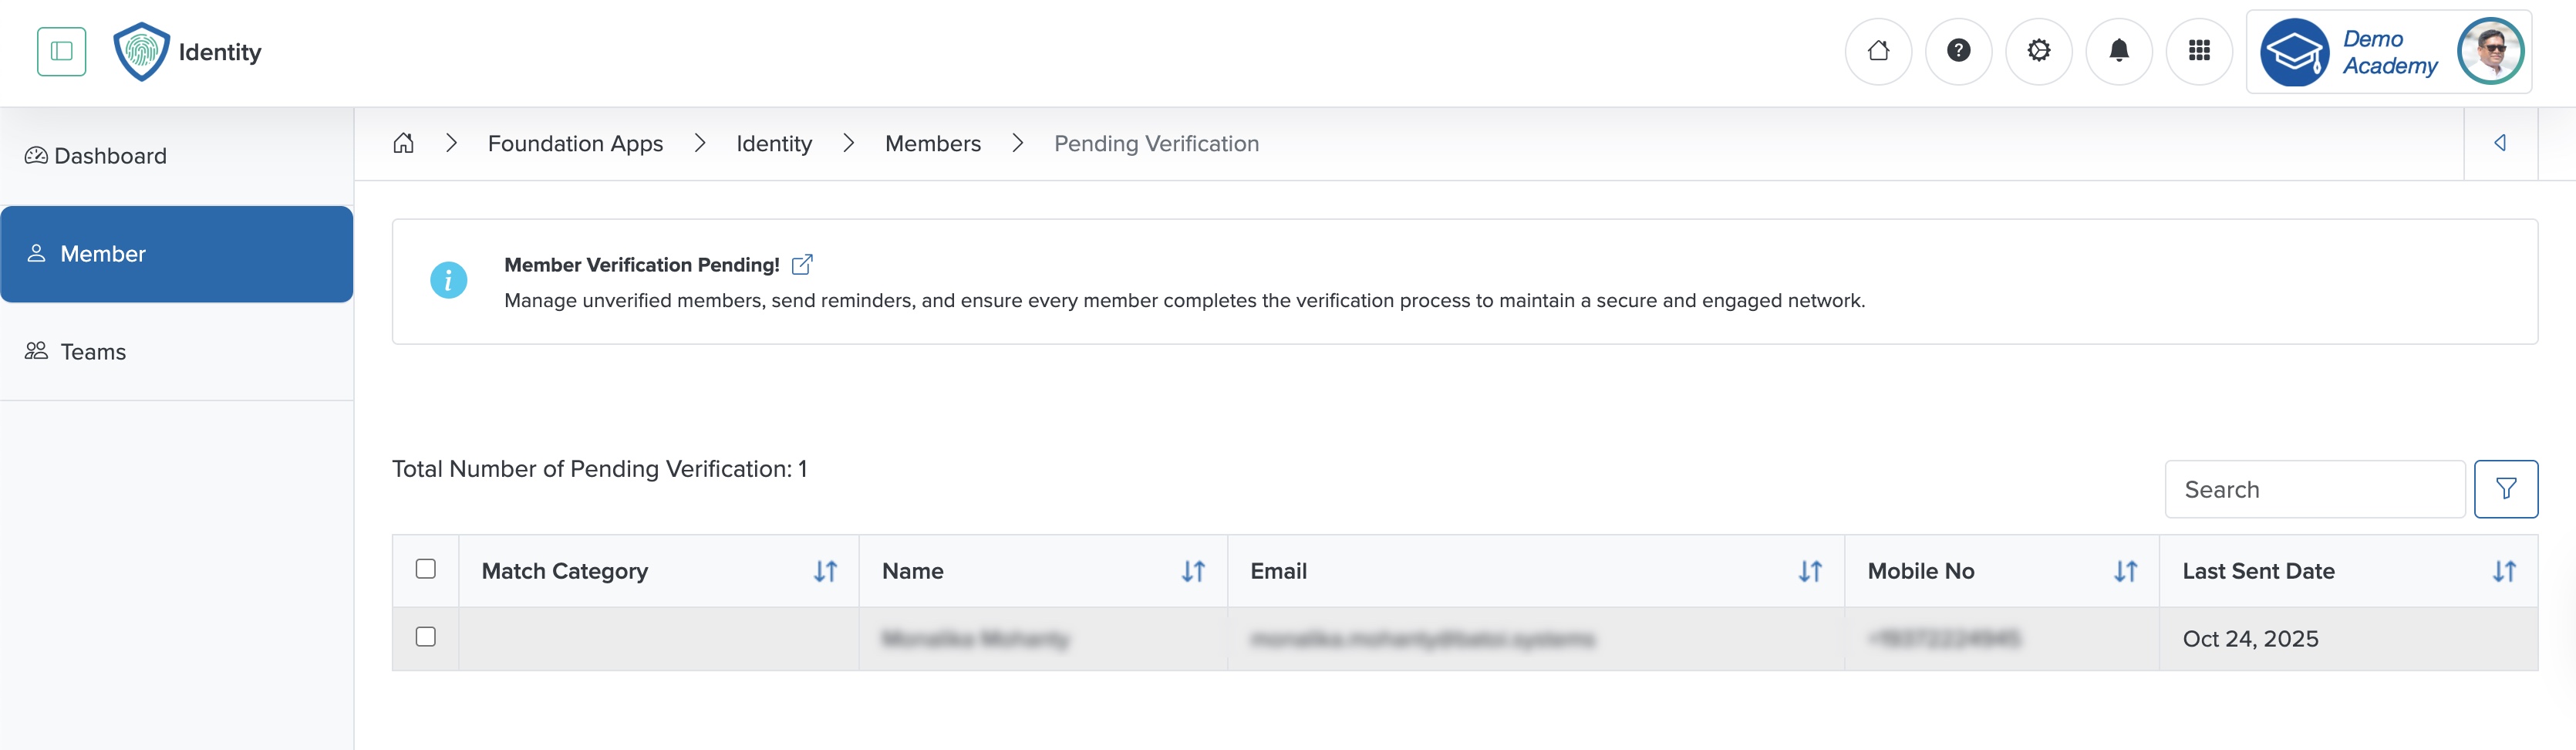
In the list page, you can see all the members whose emails are not verified, as shown in Figure 17 above. Select the Checkbox associated with each member row in the table, and the Resend Verification Email button appears on the top-right side of the screen, as shown in Figure 17 above. To select all the users, select the checkbox on the header row of the table, as shown in Figure 17 above.
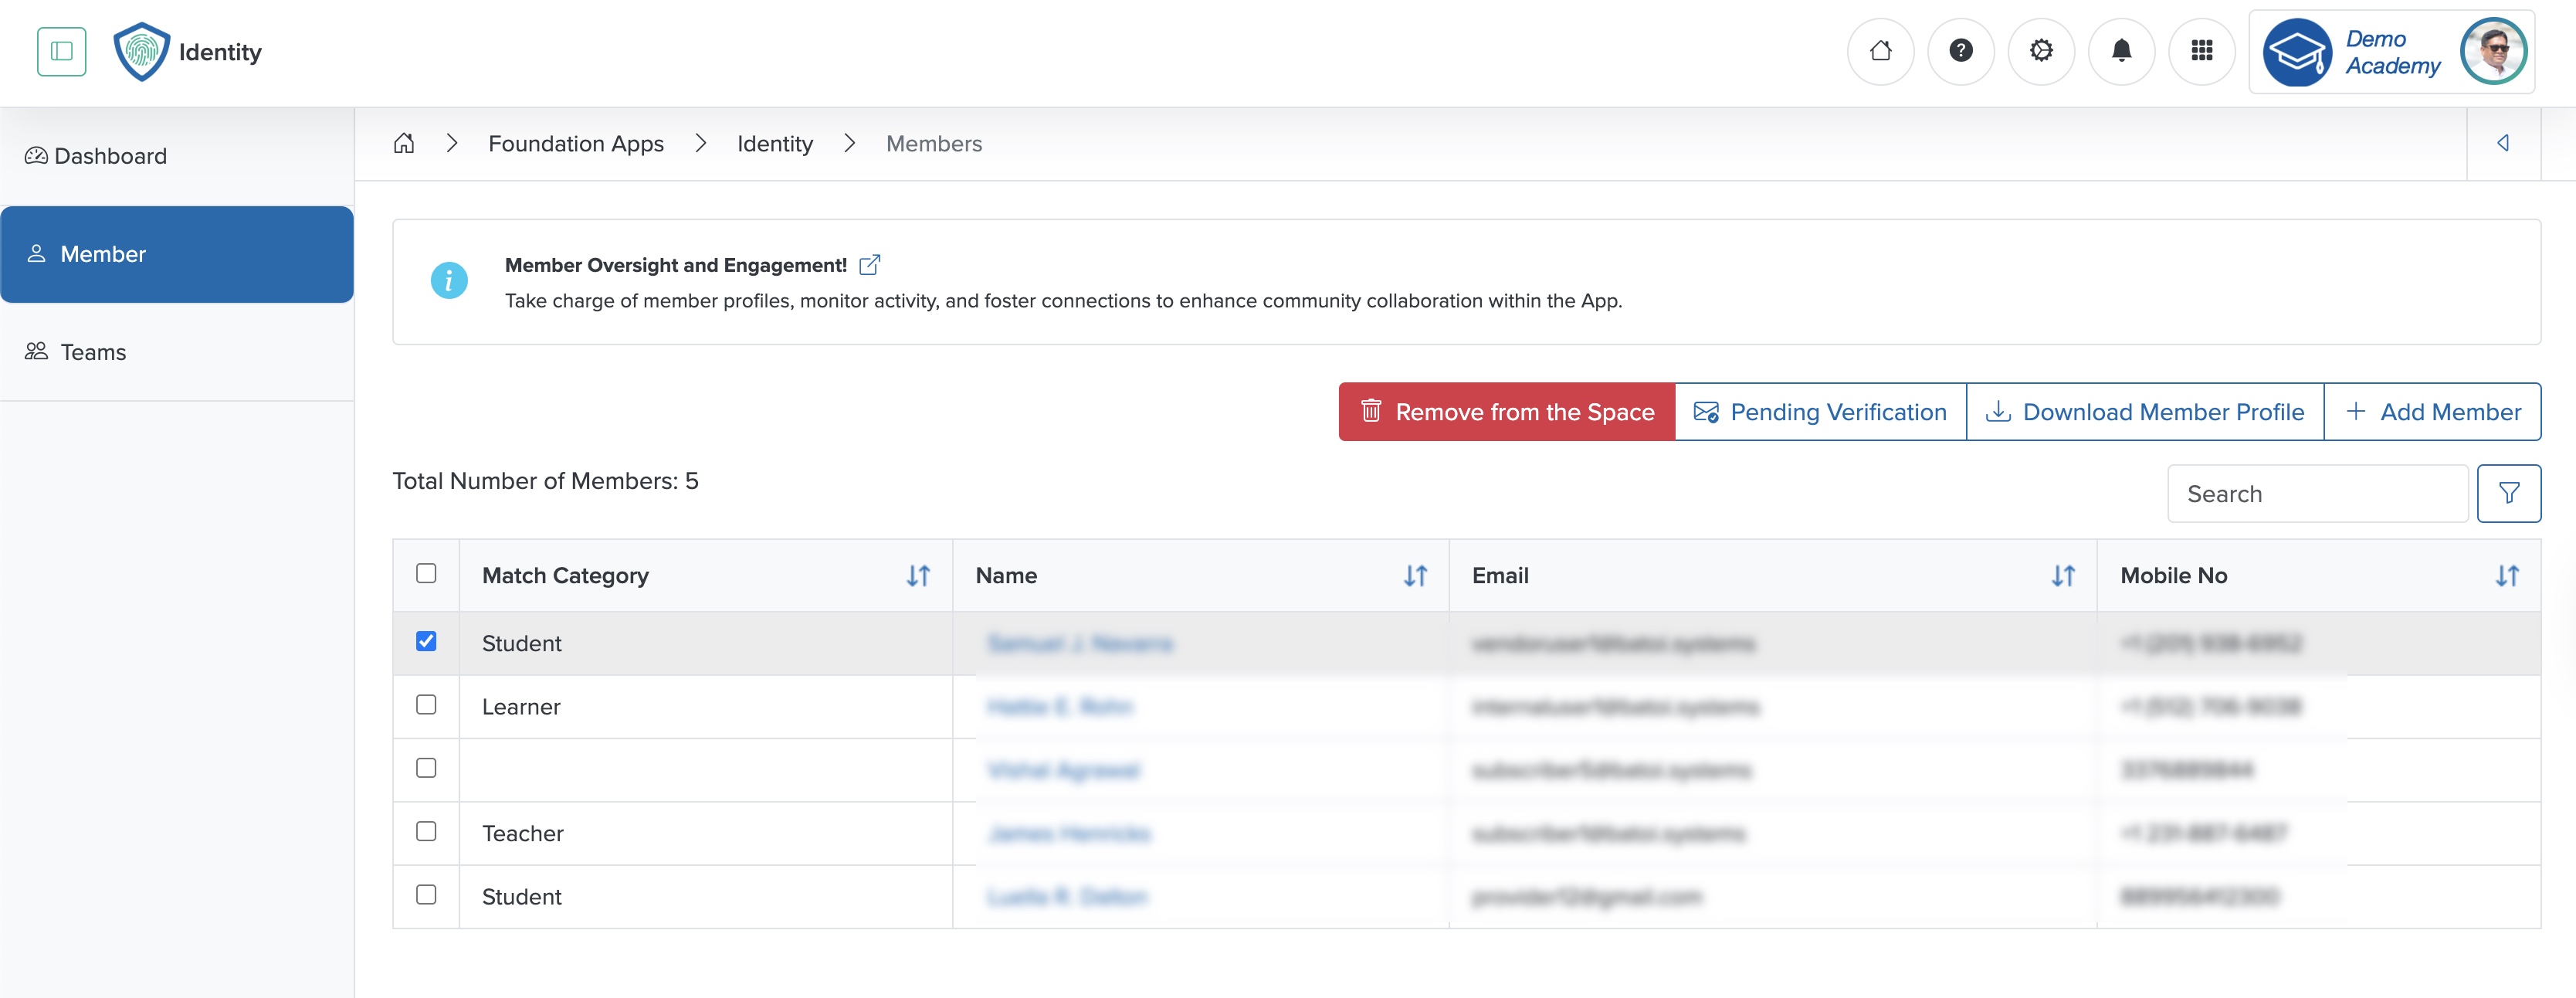
Remove Member from Workspace
Select the Checkbox associated with each member row on the member list page, as shown in Figure 6 above, and the Remove from Space button appears at the top of the screen, as shown in Figure 18 below.
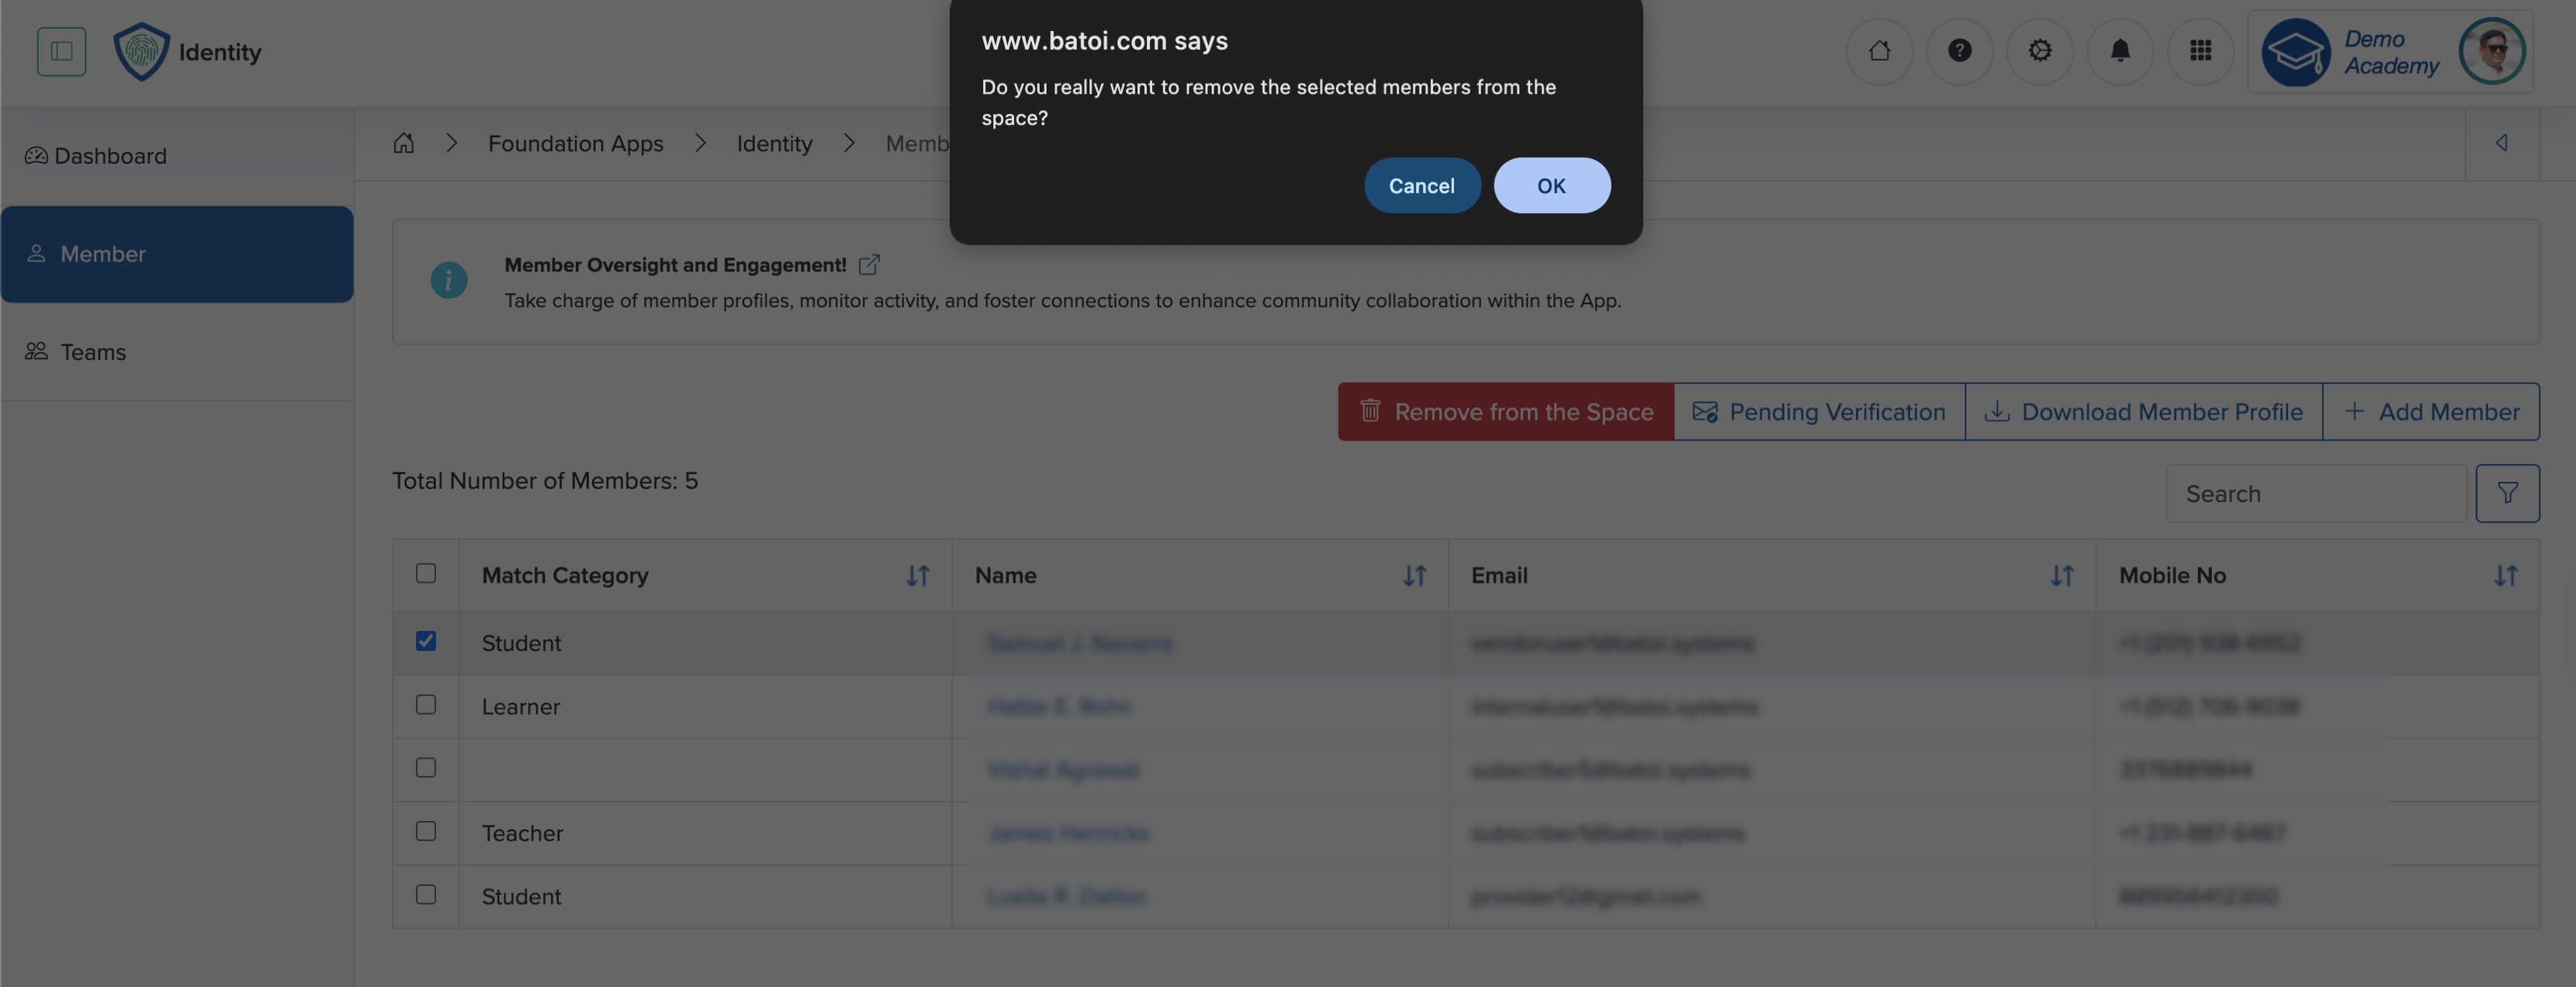
Click the Remove from Space button, and the pop-up appears; upon confirmation, you can remove the user from the workspace, as shown in Figure 19 below.
Add Member to Course
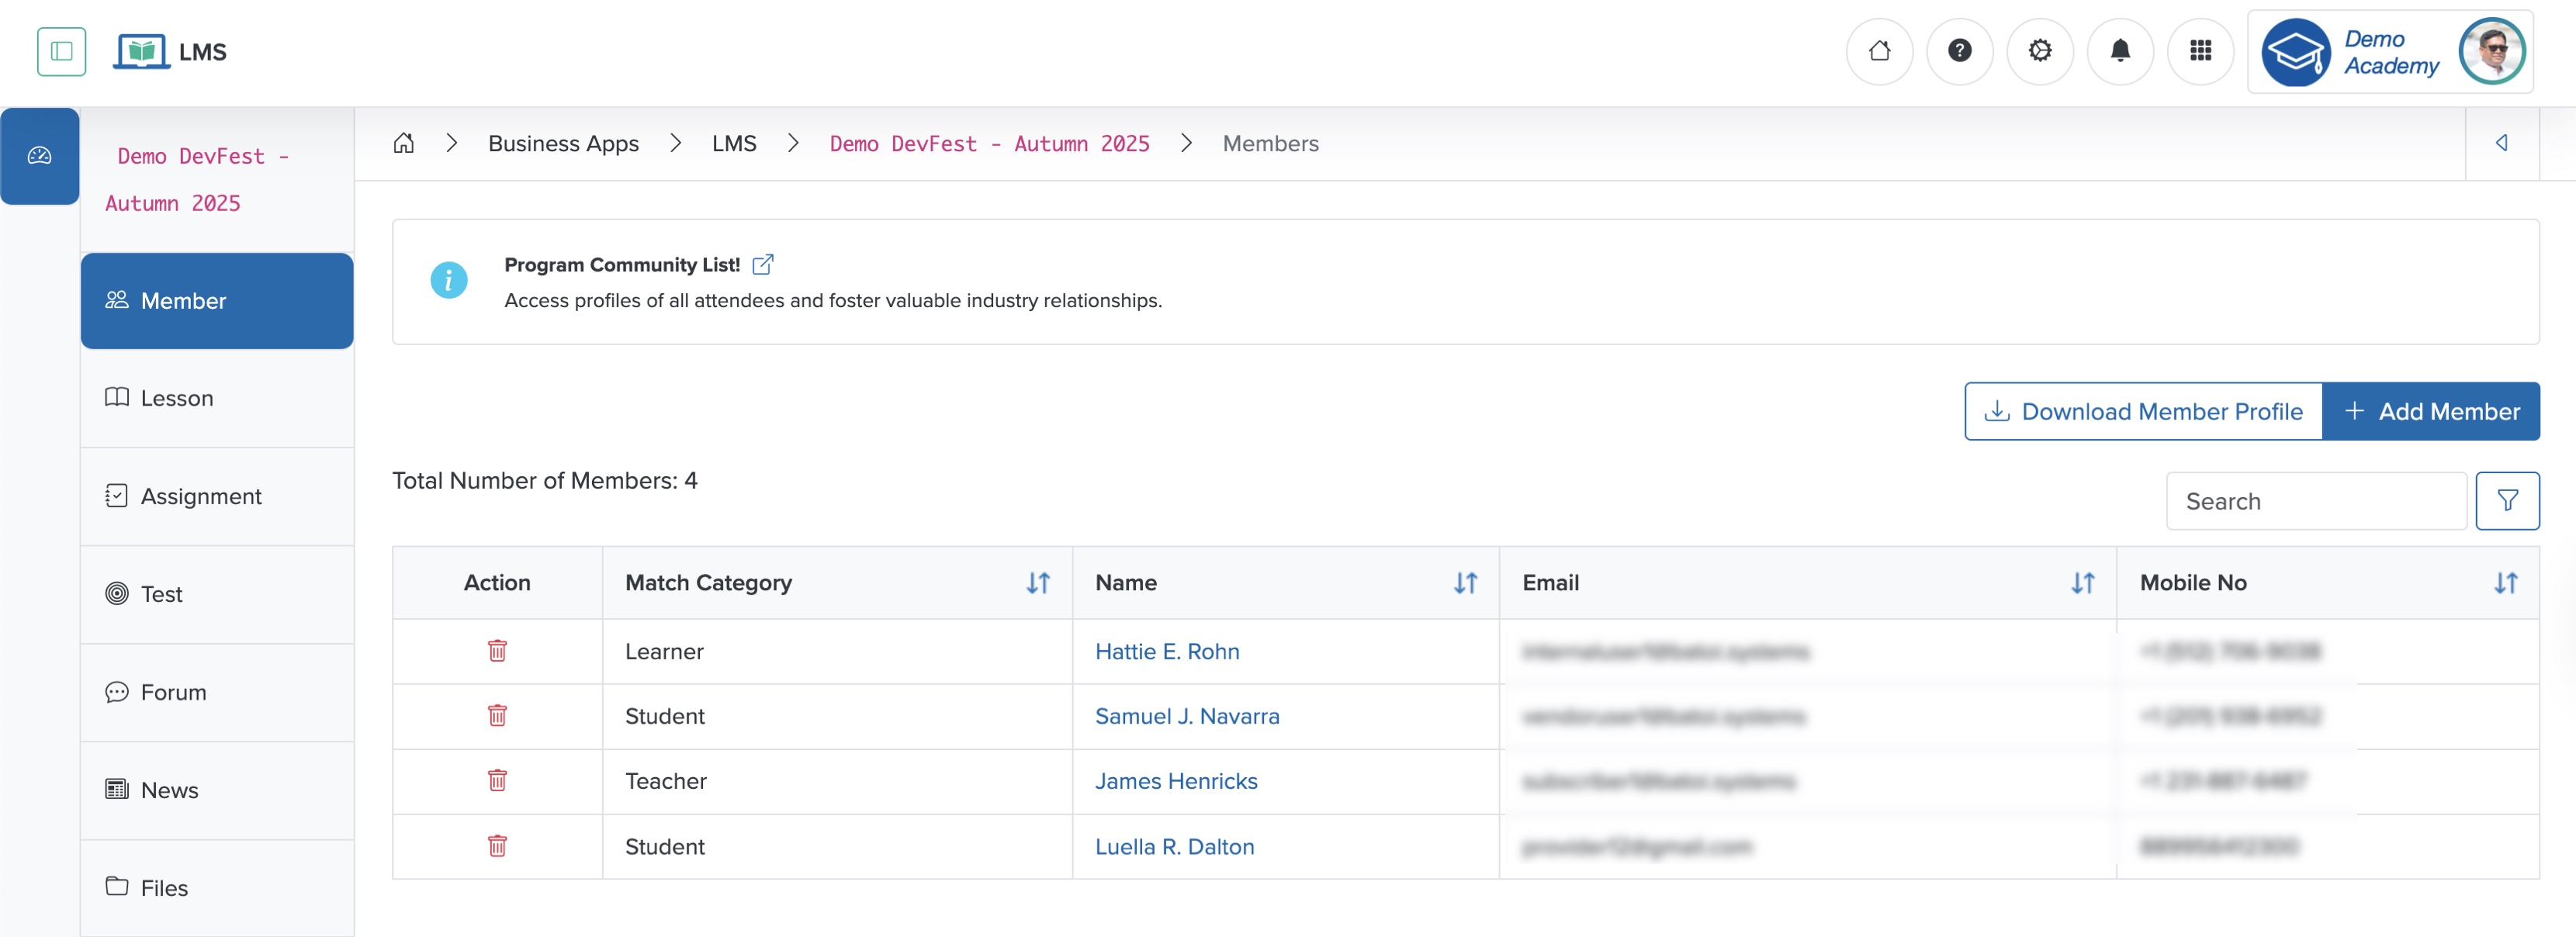
Click the Member menu or card from the individual course dashboard, as shown in Figure 1 above, and the member list page for the individual course opens, as shown in Figure 20 below.
Click the + Add Member from the list page, as shown in Figure 20 above, and all the available members of the Workspace appear with a checkbox, as shown in Figure 21 below.

Select the checkboxes, as shown in Figure 21 above, then click the Submit button; the system adds the members you have selected to the Course. To add all the members at once, click the Select All checkbox, then click the Submit button, as shown in Figure 21 above.
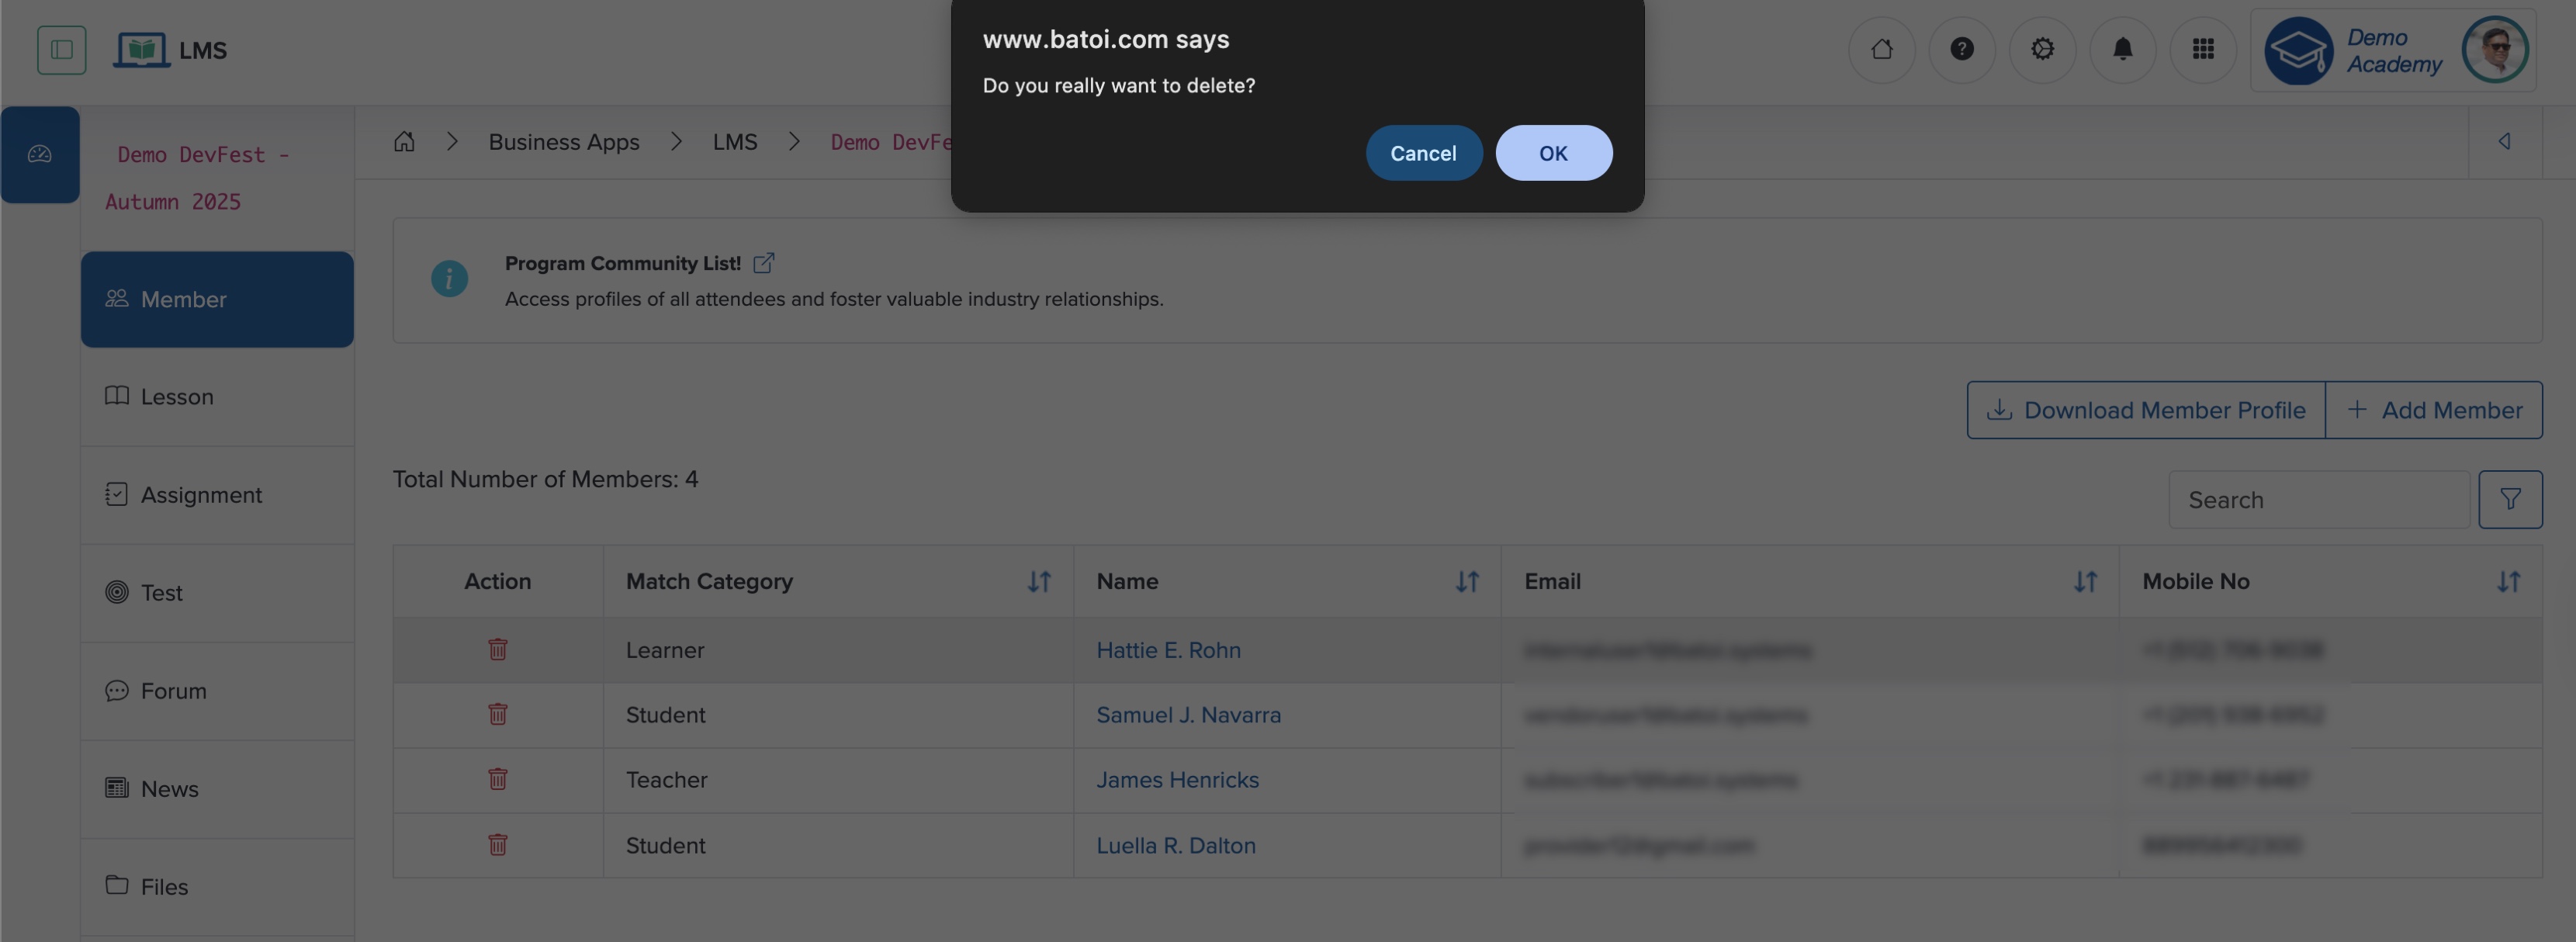
Remove Member from Course
Click the Delete icon associated with each member on the member list page, as shown in Figure 6 above. The pop-up opens, as shown in Figure 22 below. Upon confirmation, you can remove the member from the individual Course, but the system still makes them available on the Workspace under the Identity App.
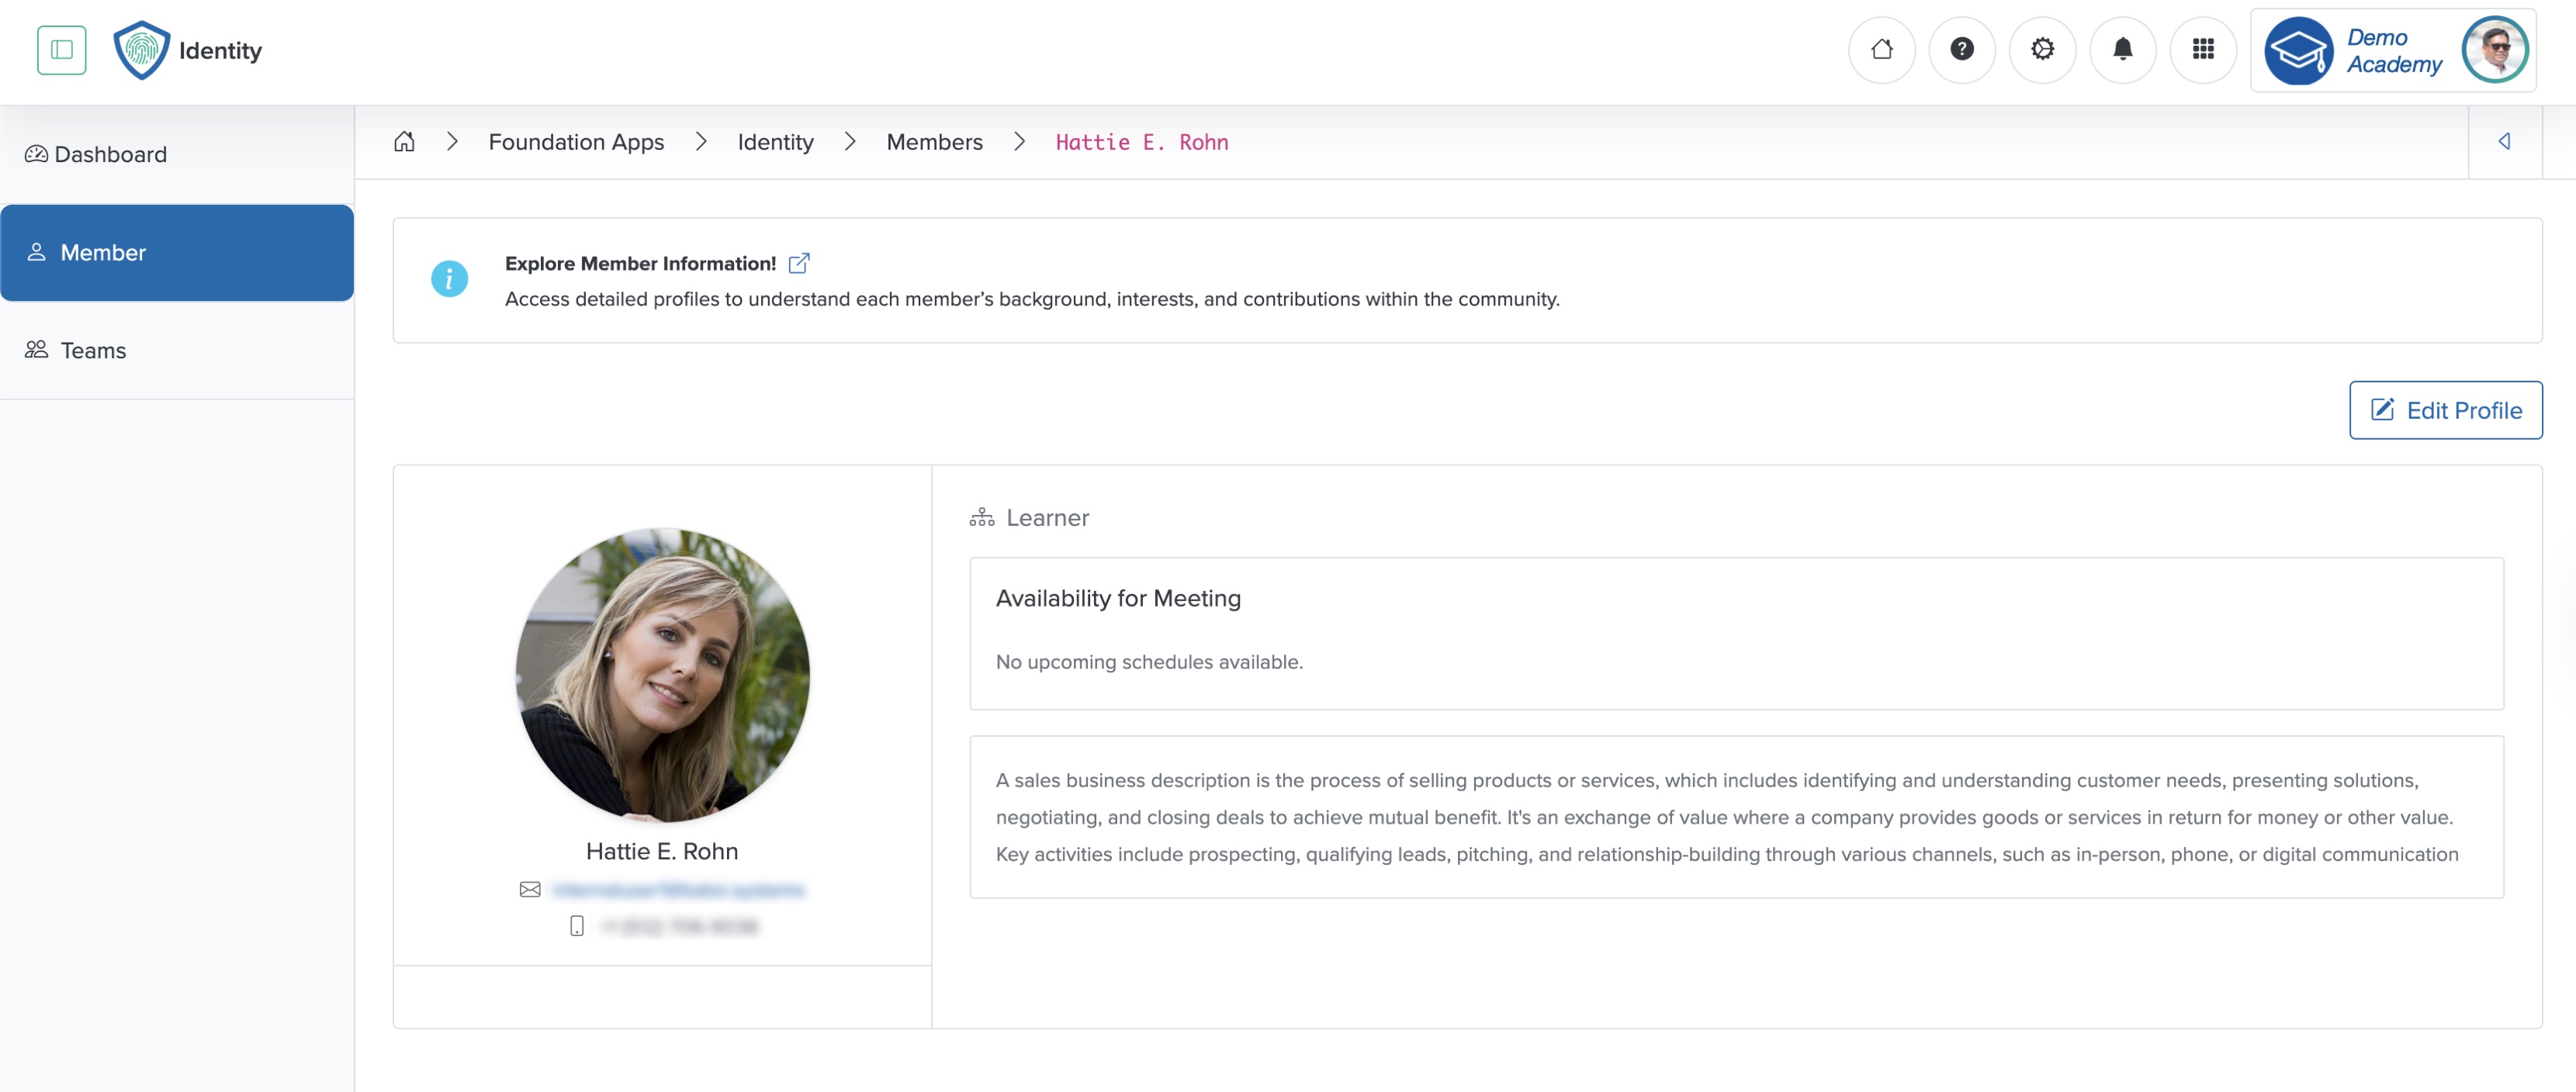
View Member Profile
Click a specific Member Name from the table, as shown in Figure 6 above, and the member profile page opens, as shown in Figure 23 below.