Questionnaire
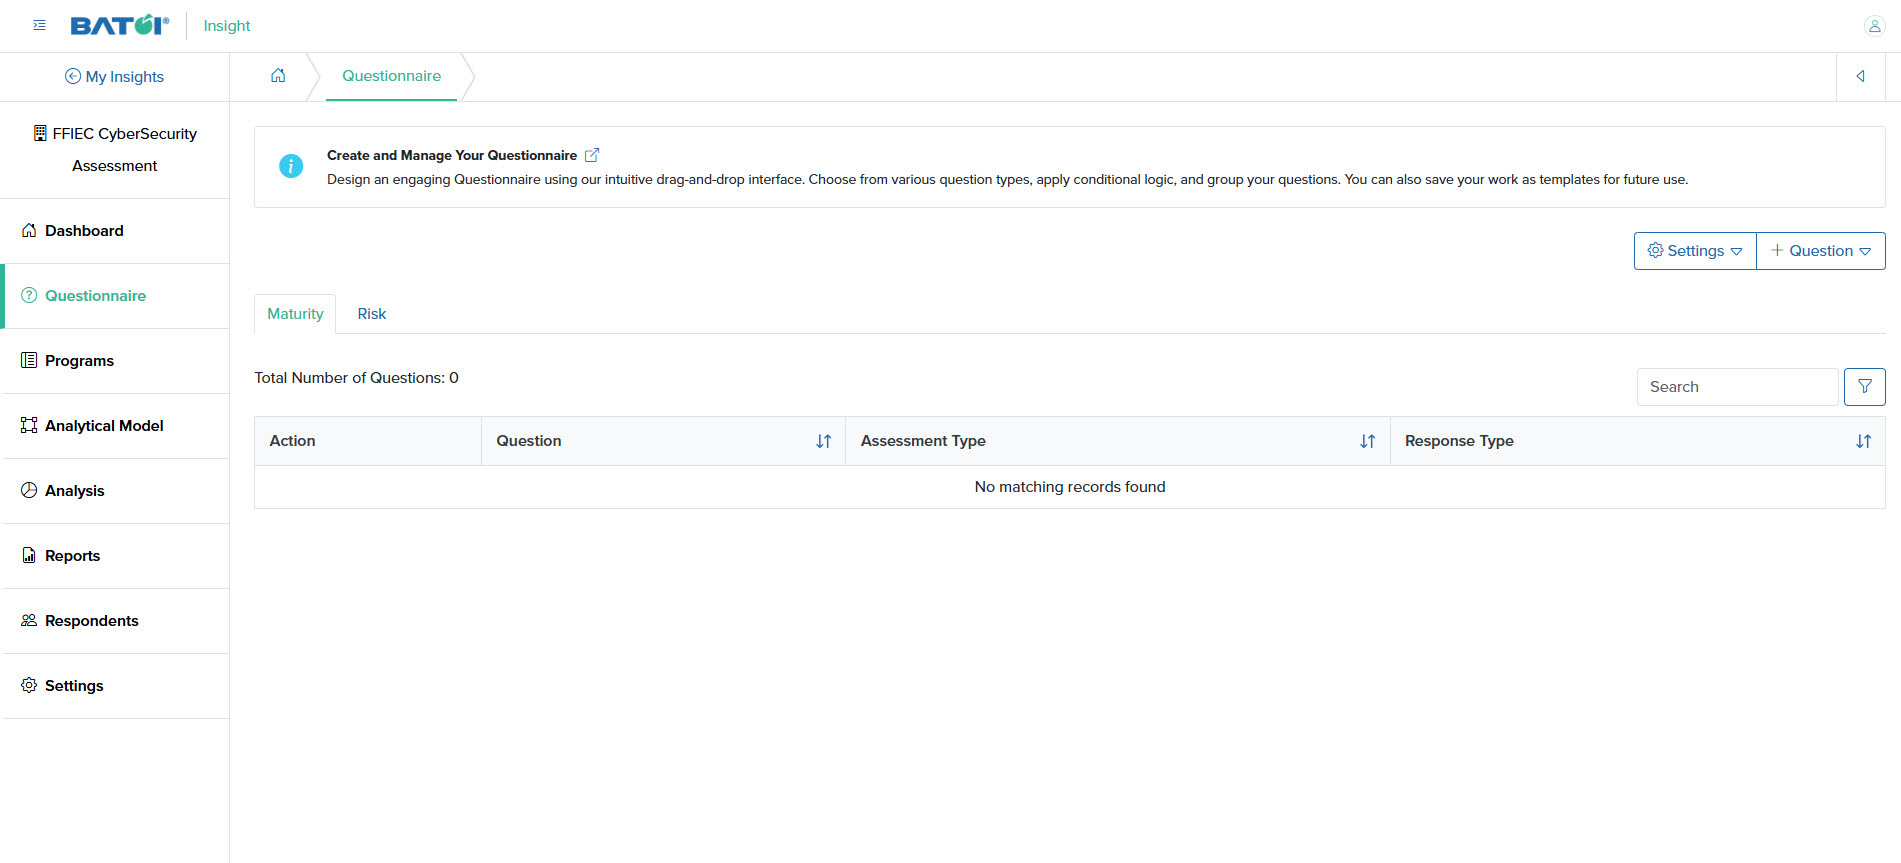
Click the Questionnaire menu from the primary menu section, and the questionnaire list page opens, as shown in Figure 1 below.
Add Question
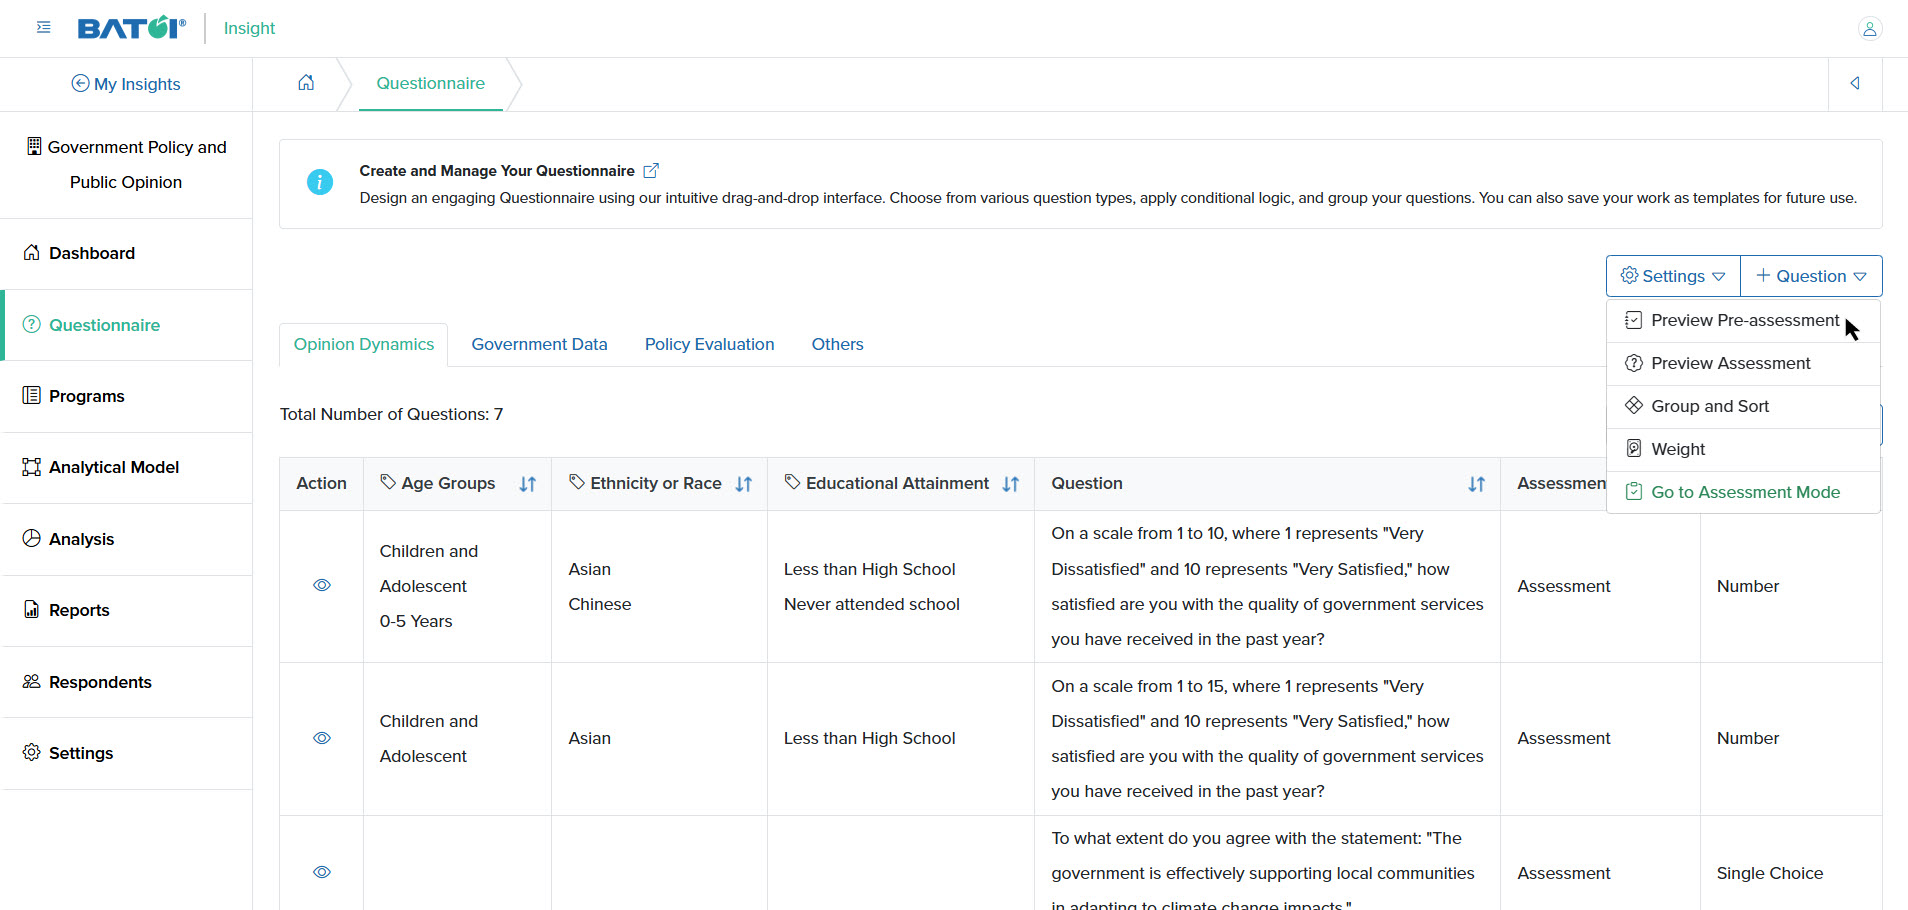
Click the Add Question button, as shown in Figure 1 above, and a drop-down menu with the value Add Question appears. Clicking on which, the add question page opens, as shown in Figure 2 below.

You can enter the details below and click the Submit button to save the questions, as shown in Figure 2 above. The details that need to be filled in are:
- Title (Textbox - Mandatory): Title of the question
- Assessment Type (Dropdown menu - Mandatory): Select the type from:
- Pre-Assessment (Appears if Double Tier is selected in the General Setting page)
- Assessment
- Response Type (Dropdown menu - Mandatory): Select the type from:
- Single Choice
- Multi Choice
- Matching Phrase
- Numbers
- Free Flow Text
- Free Flow Text with Document (Appears if Pre-Assessment is selected in the Assessment Type drop-down menu)
- Likert Scale (Appears if Assessment is selected in the Assessment Type drop-down menu)
- Description (Text area - Optional): Description of the question
- Group (Dropdown menu - Optional): Select the group to which the question belongs
Response Options
- Title (Textbox - Mandatory): Title of the Response
- Description (Text area - Optional): Description of the Response
- Lead Question (Dropdown menu - Optional): Select the Lead Question
Click the Add More button to add more Response Options to the question.
NOTE: For response types ‘Matching Phrase’, ‘Numbers’, and ‘Free Flow Text’, the response options will not be available.
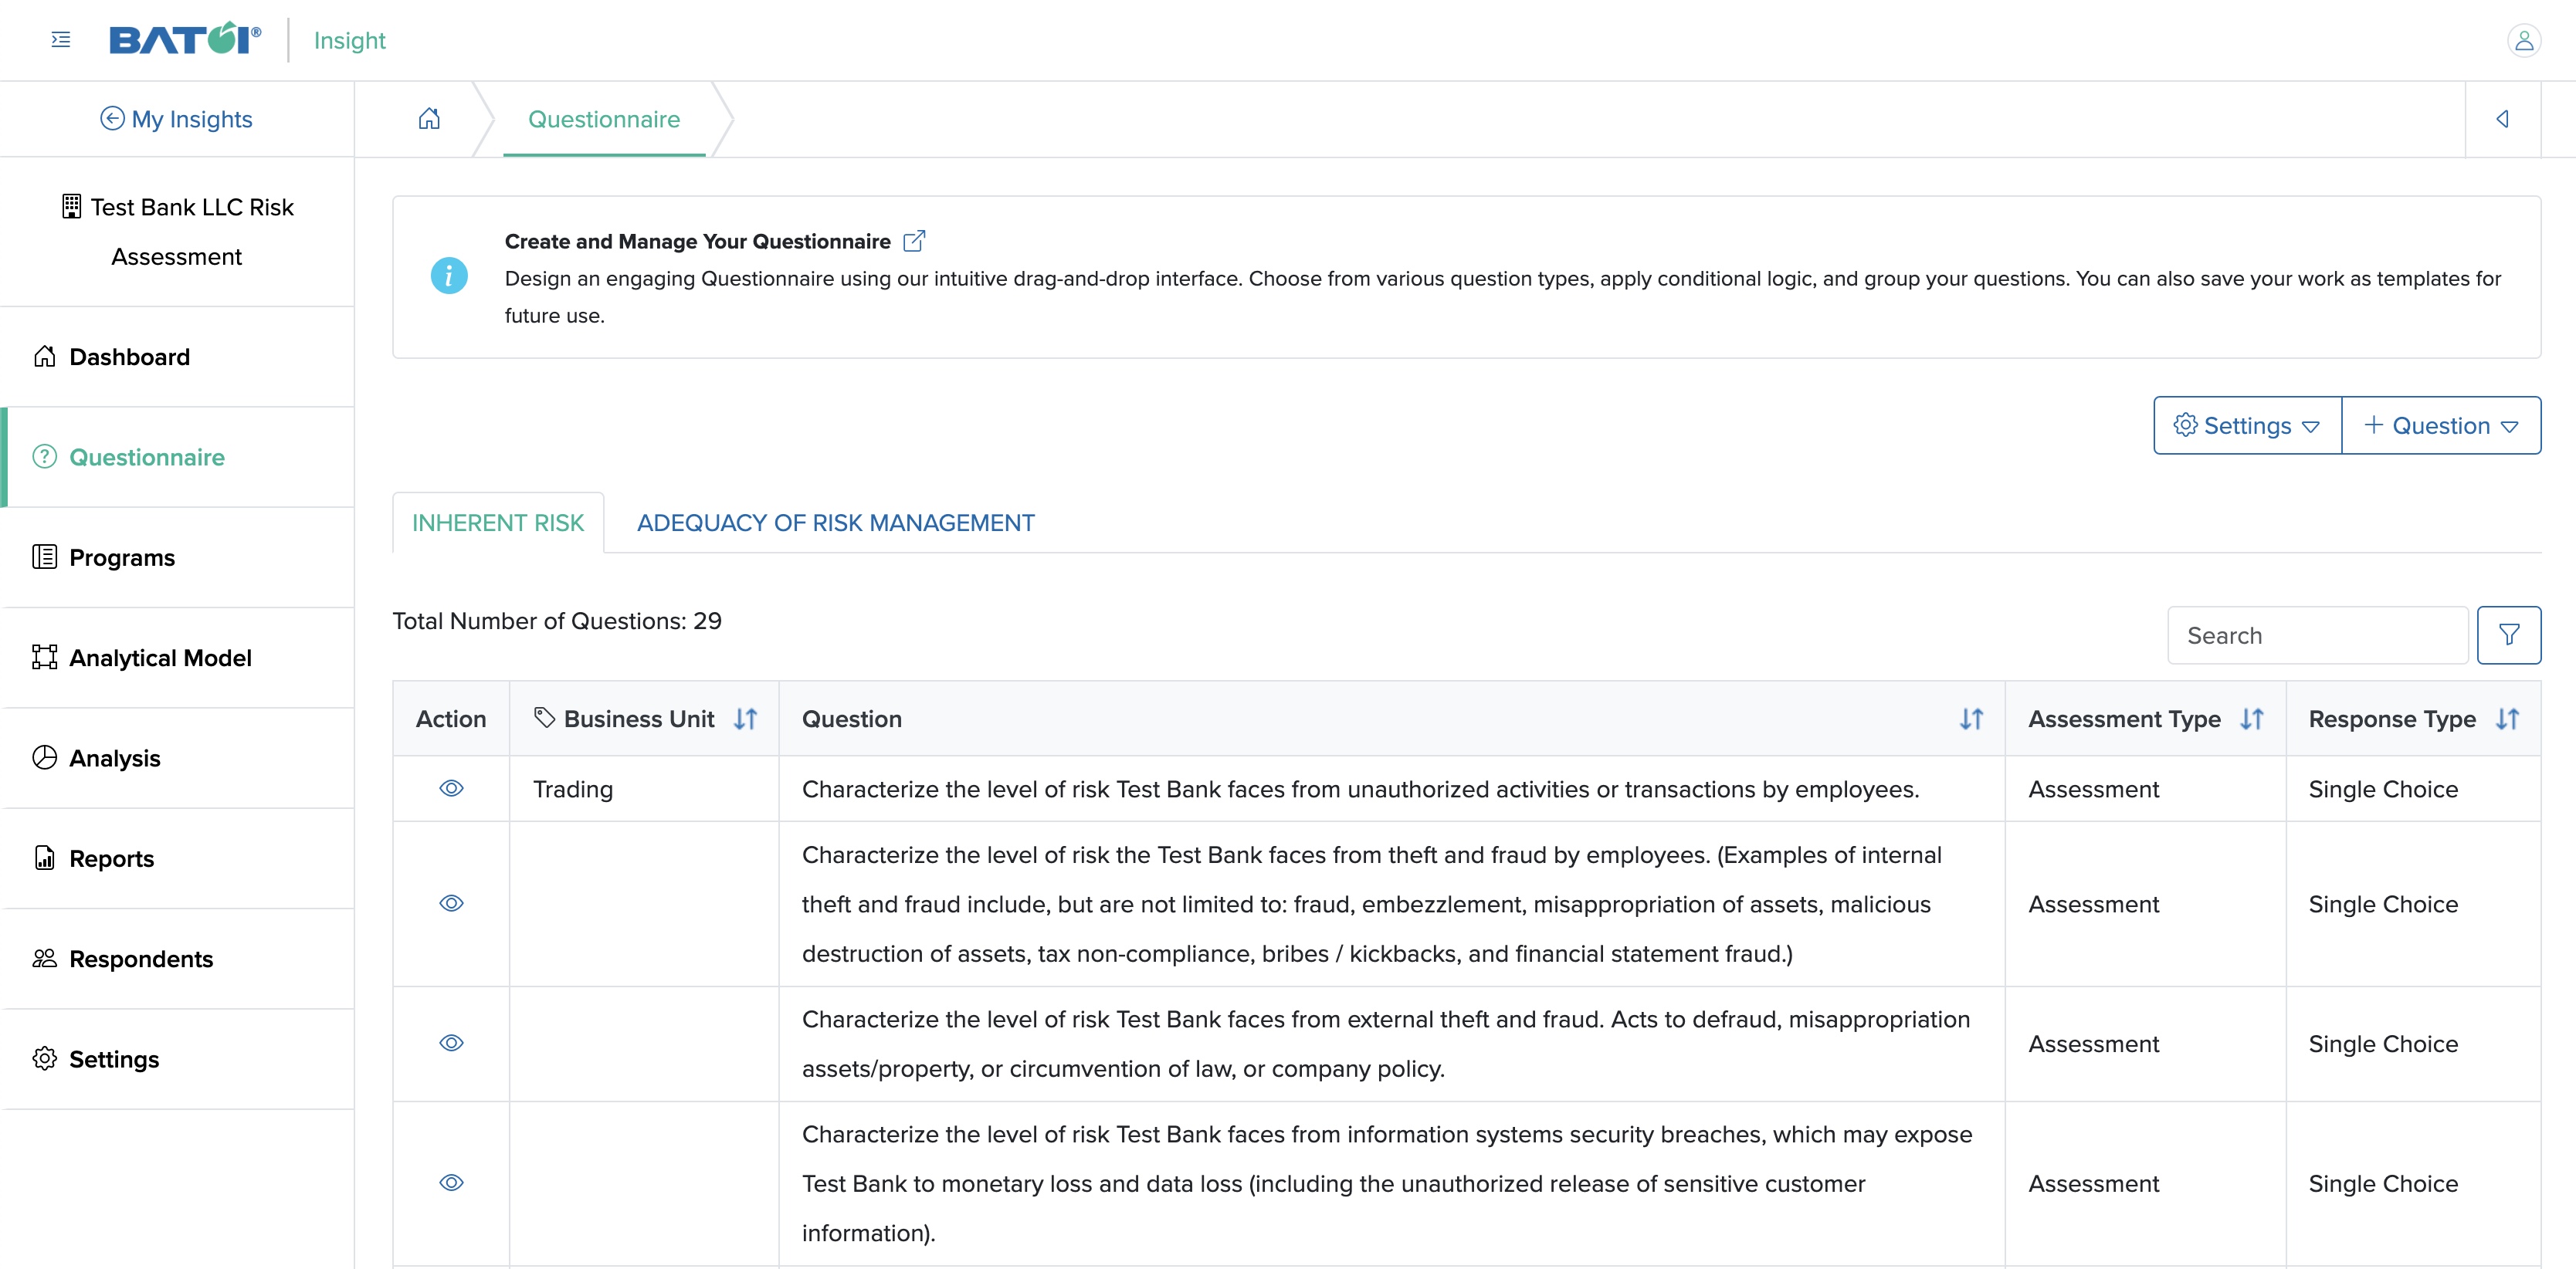
All questions added are listed group-wise in a tab on the Questionnaire list page, as shown in Figure 3 below.
To view a question, click the View icon associated with it, as shown in Figure 3 above. The page opens with all the details, as shown in Figure 4 below.
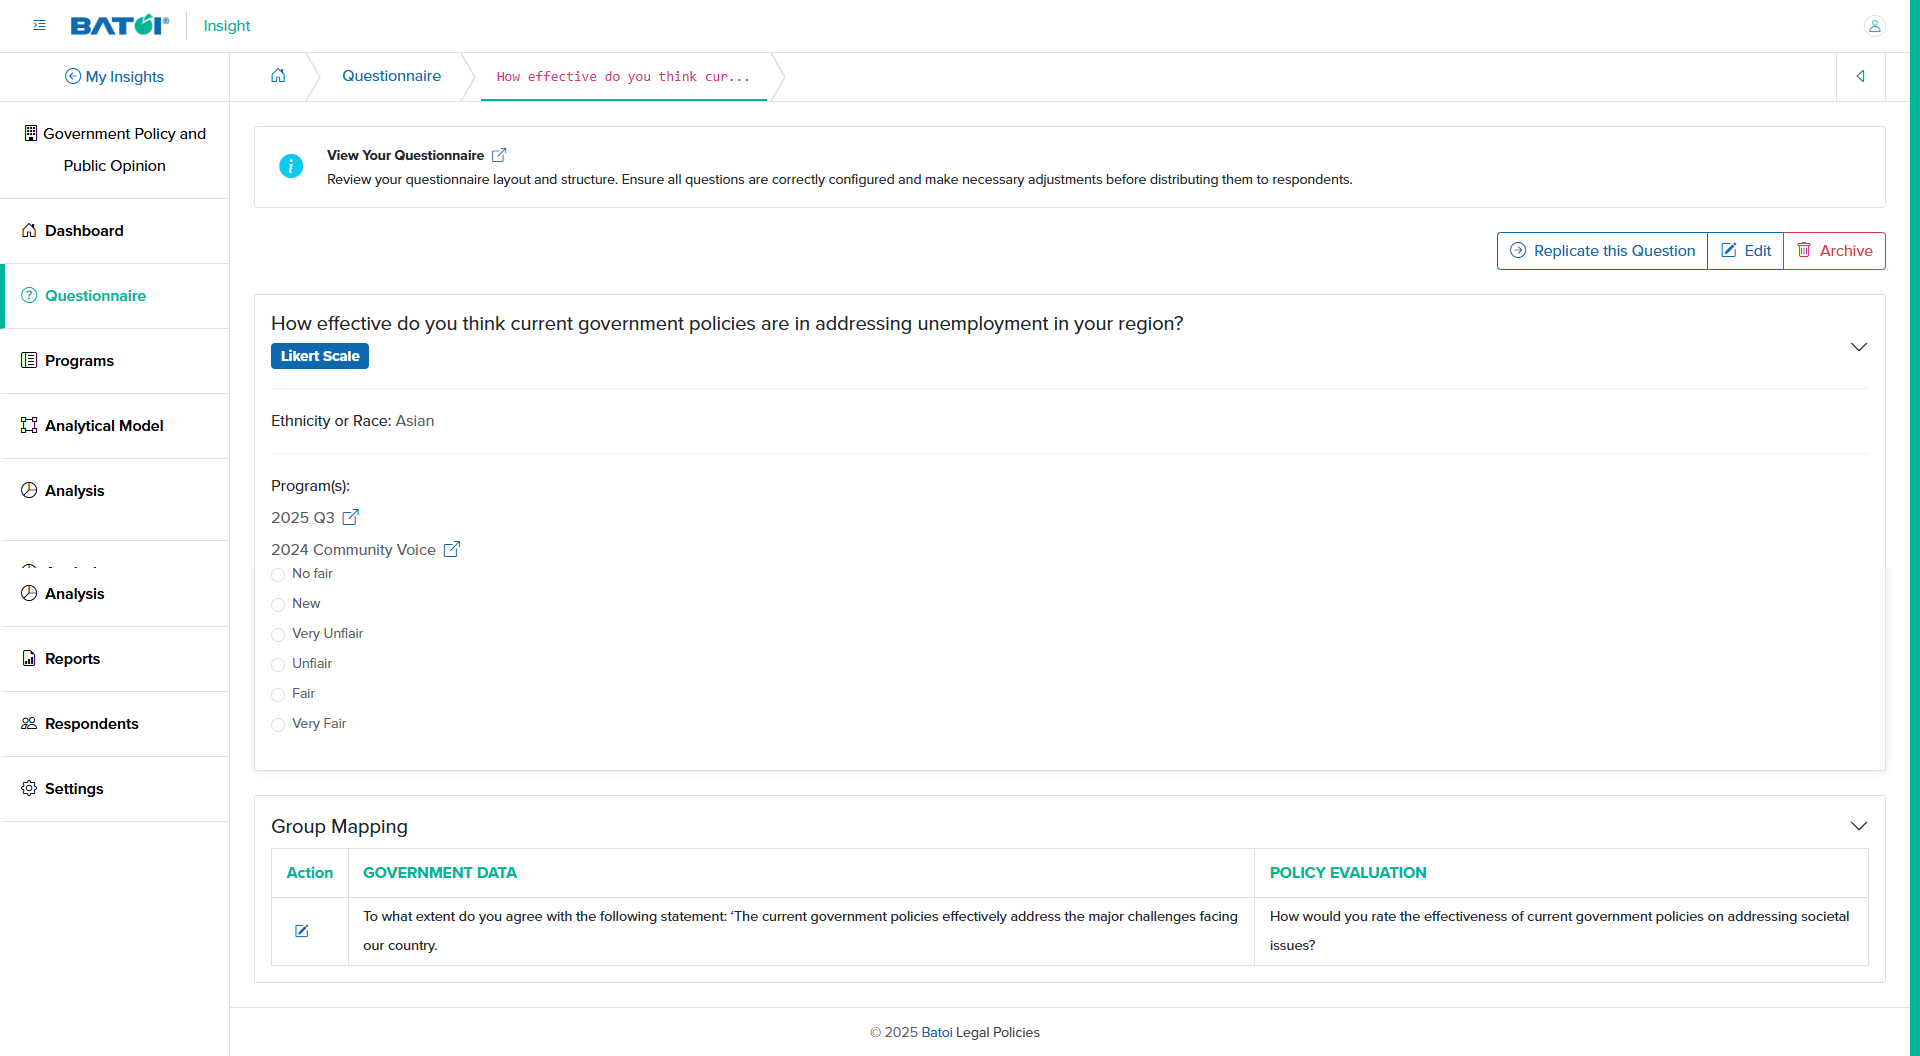
Click the Replicate this Question button to replicate the entire question, as shown in Figure 4 above.
You can archive the question by clicking the Archive button, as shown in Figure 4 above.
The responses to the question are listed in a tabular form, as shown in Figure 4 above.
You can add more responses to the question by clicking the Add button under the response section, as shown in Figure 4 above.
You can sort the response options to the question by clicking the Sort button under the response section, as shown in Figure 4 above.
Edit Question
You can edit the question by clicking the Edit button, as shown in Figure 4 above. On the edit question page, you can edit the details as shown in Figure 5 below:
- Title (Textbox - Mandatory): Title of the Response
- Assessment Type (Read-only)
- Response Type (Read-only)
- Description (Text area - Optional): Description of the Response
- Categorical Parameter (Dropdown menu - Optional): Select the categorical parameter of the question
- Group (Dropdown menu - Optional): Select the group to which the question belongs
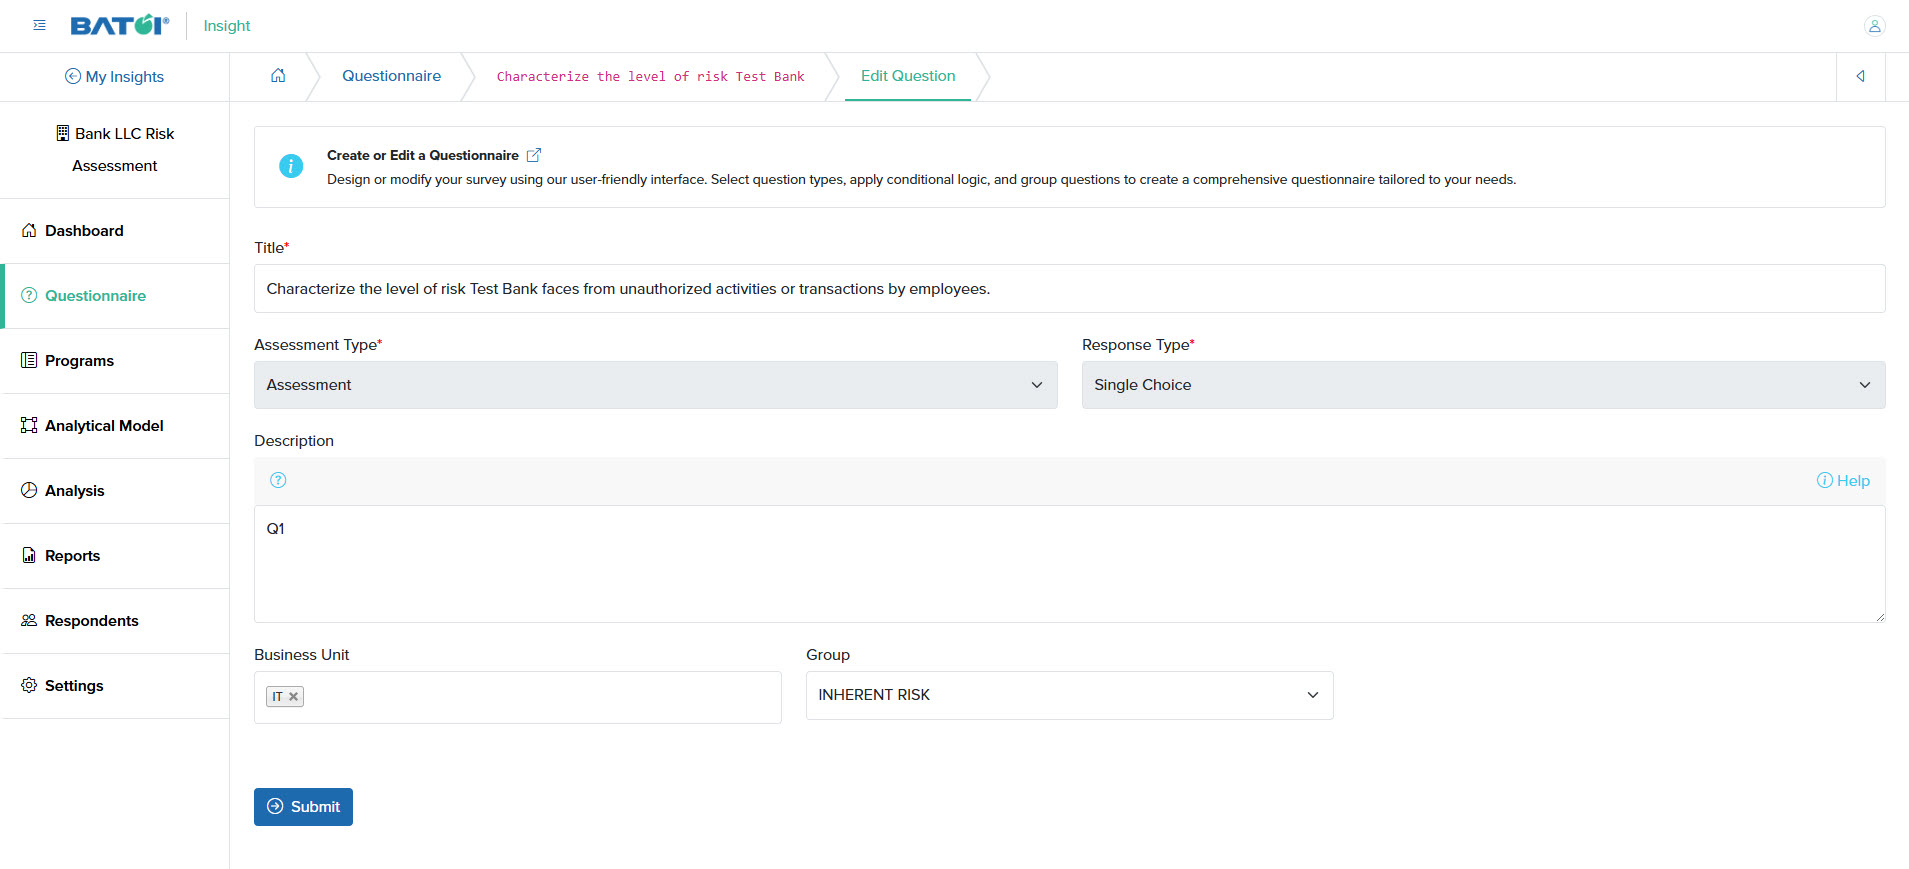
NOTE: For response types ‘Matching Phrase’, ‘Numbers’, and ‘Free Flow Text’, the response options will not be available.
Preview
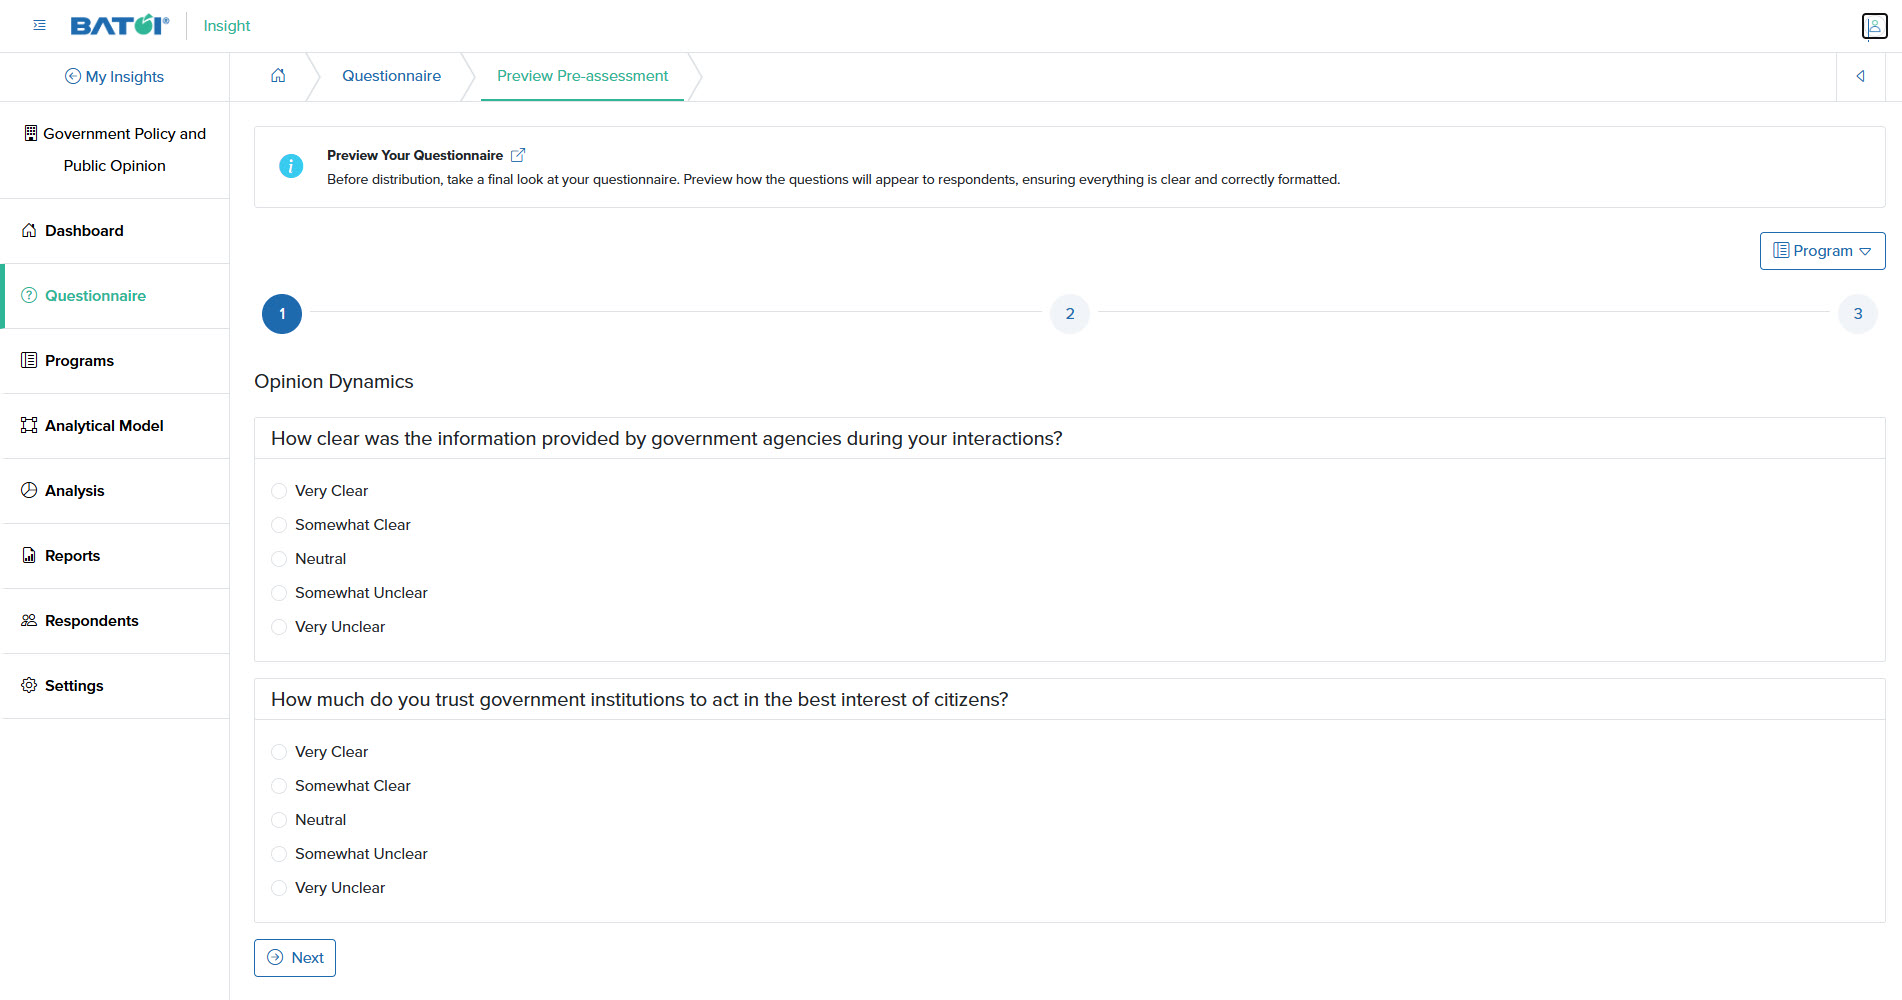
To preview all the questions under a particular group, click the Preview button, as shown in Figure 6 below. A new page opens in preview mode, as shown in Figure 7 below.
Click the Program button, and all the programs are shown in the drop-down menu.
NOTE: On the preview page for the “Groups Mapped” survey type, the questions are displayed in a tabular format. The primary group questions with a Likert Scale response type will appear in this preview.
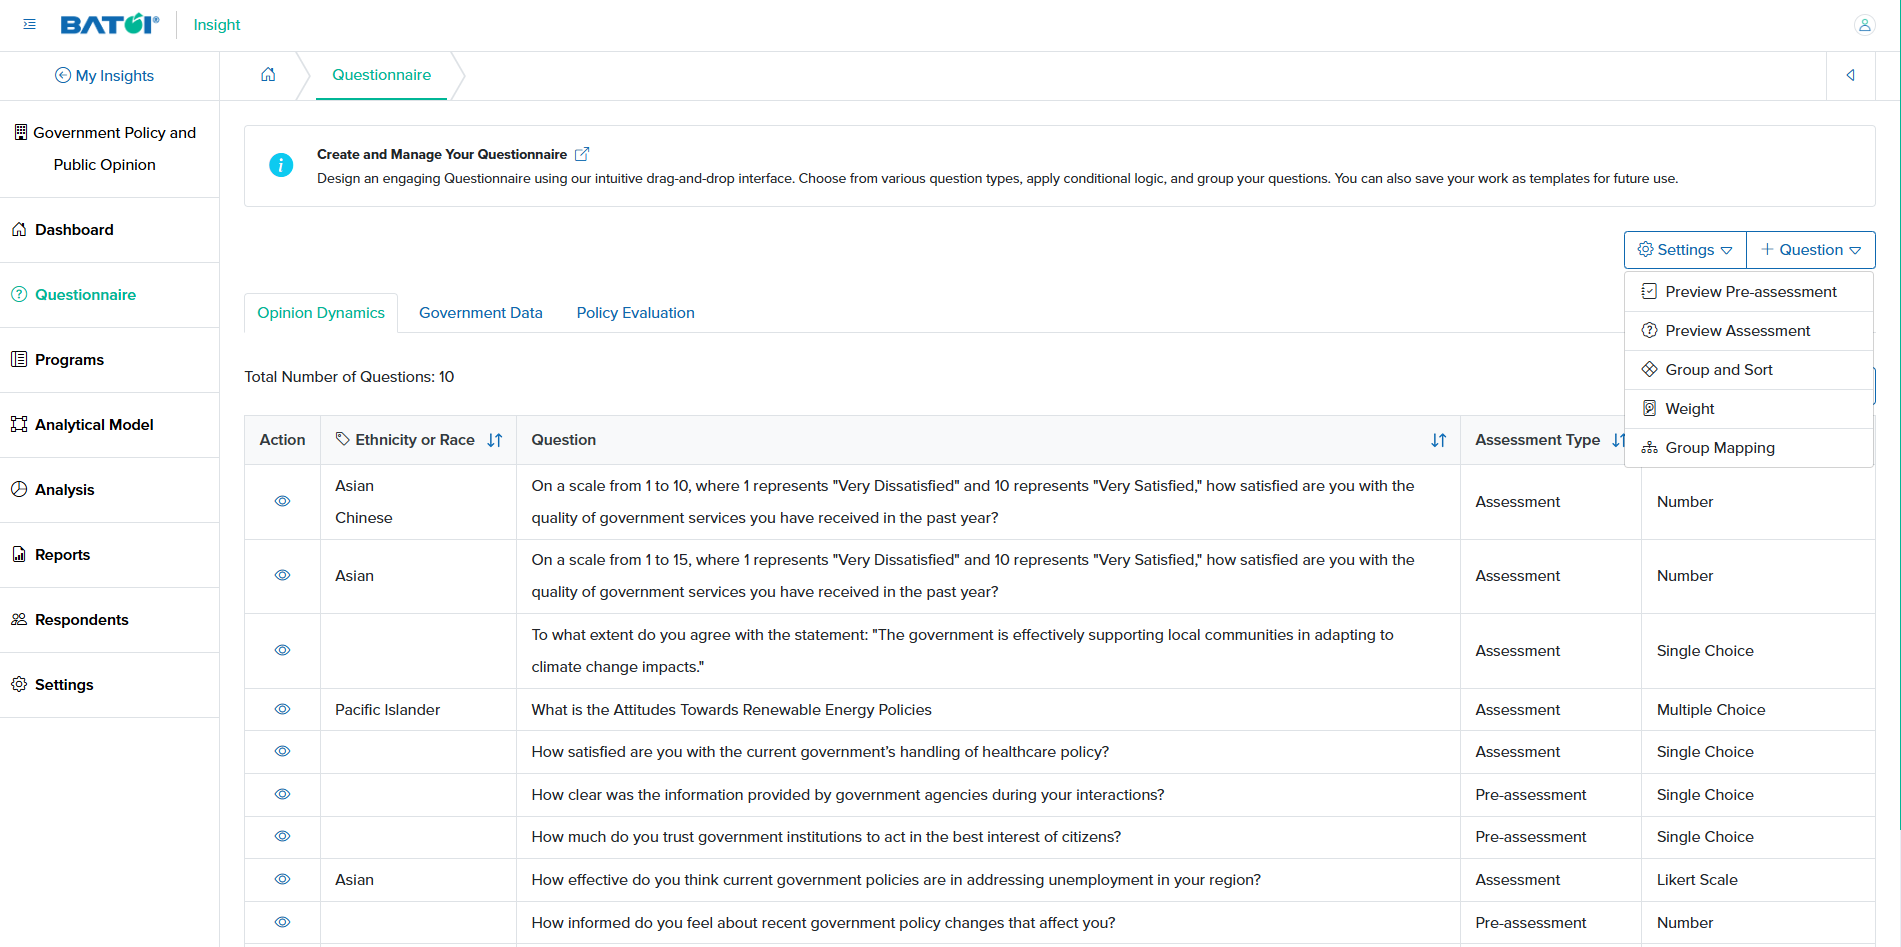
Group and Sort
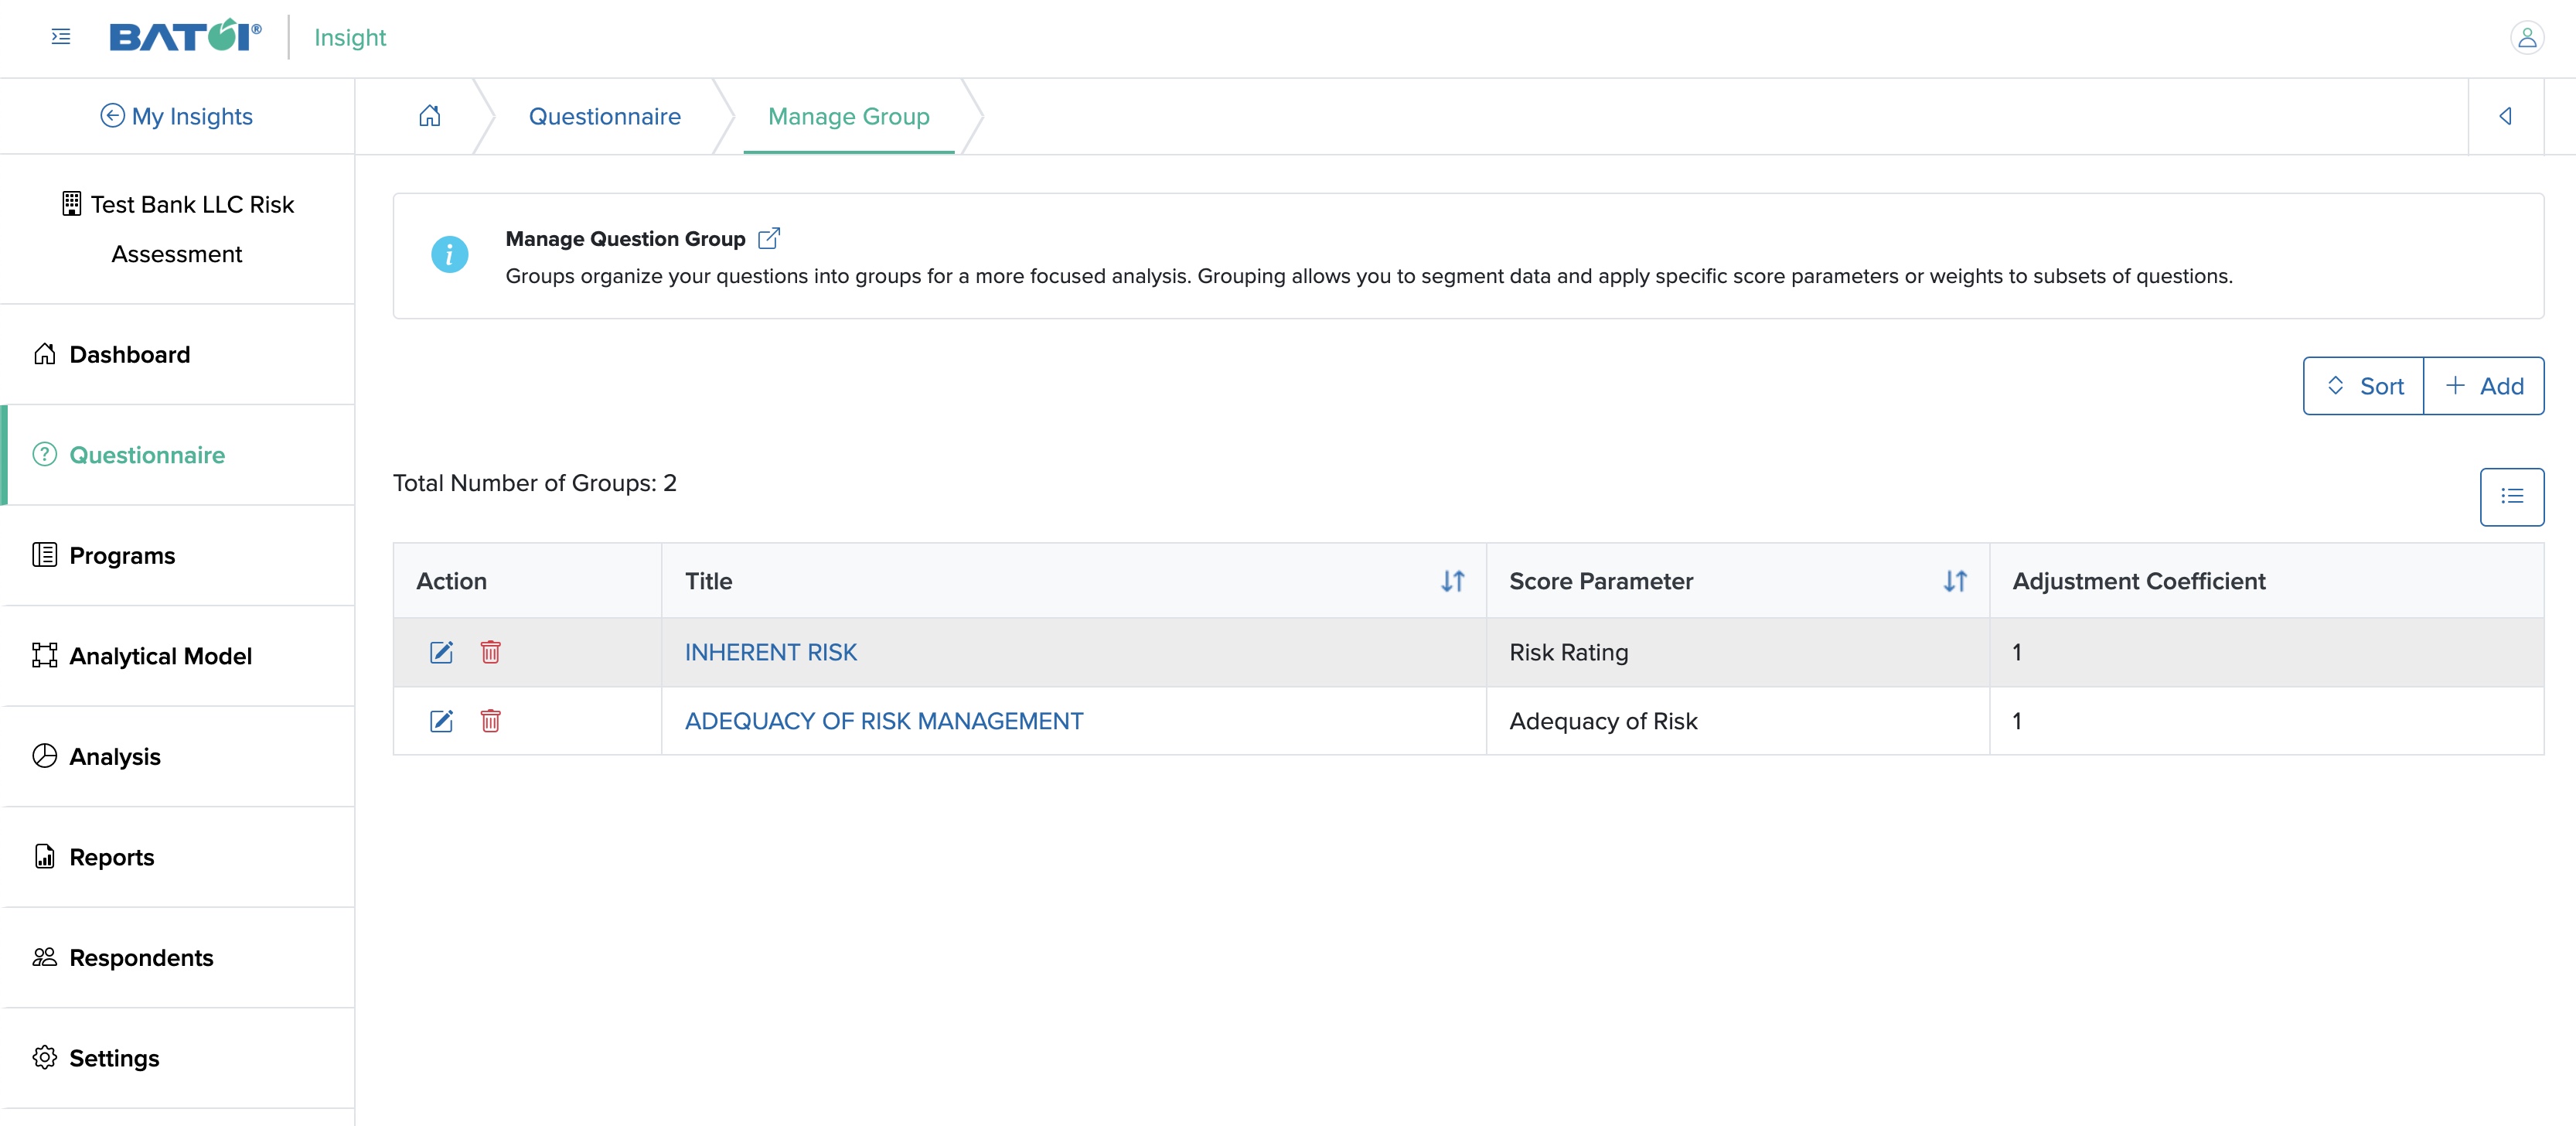
To create a group, click on the Group link from the drop-down menu under Settings, as shown in Figure 6 above. A new page opens, as shown in Figure 8 below.
Add Group
Click the Add button to create a new group, as shown in Figure 8 above. A new page opens, as shown in Figure 9 below.

You can enter the details below and click the Submit button to save the groups, as shown in Figure 9 above. The details that need to be filled in are:
- Title (Textbox - Mandatory): Title of the group
- Description (Text area - Optional): Description of the group
- Score Parameter (Check box - Optional): Multiple Choice
- Adjustment Coefficient (Select - Optional): Value should be greater than 0 and less than or equal to 1
Edit Group
Click the Edit icon associated with an individual group, as shown in Figure 8 above, and a new page opens, as shown in Figure 10 below.
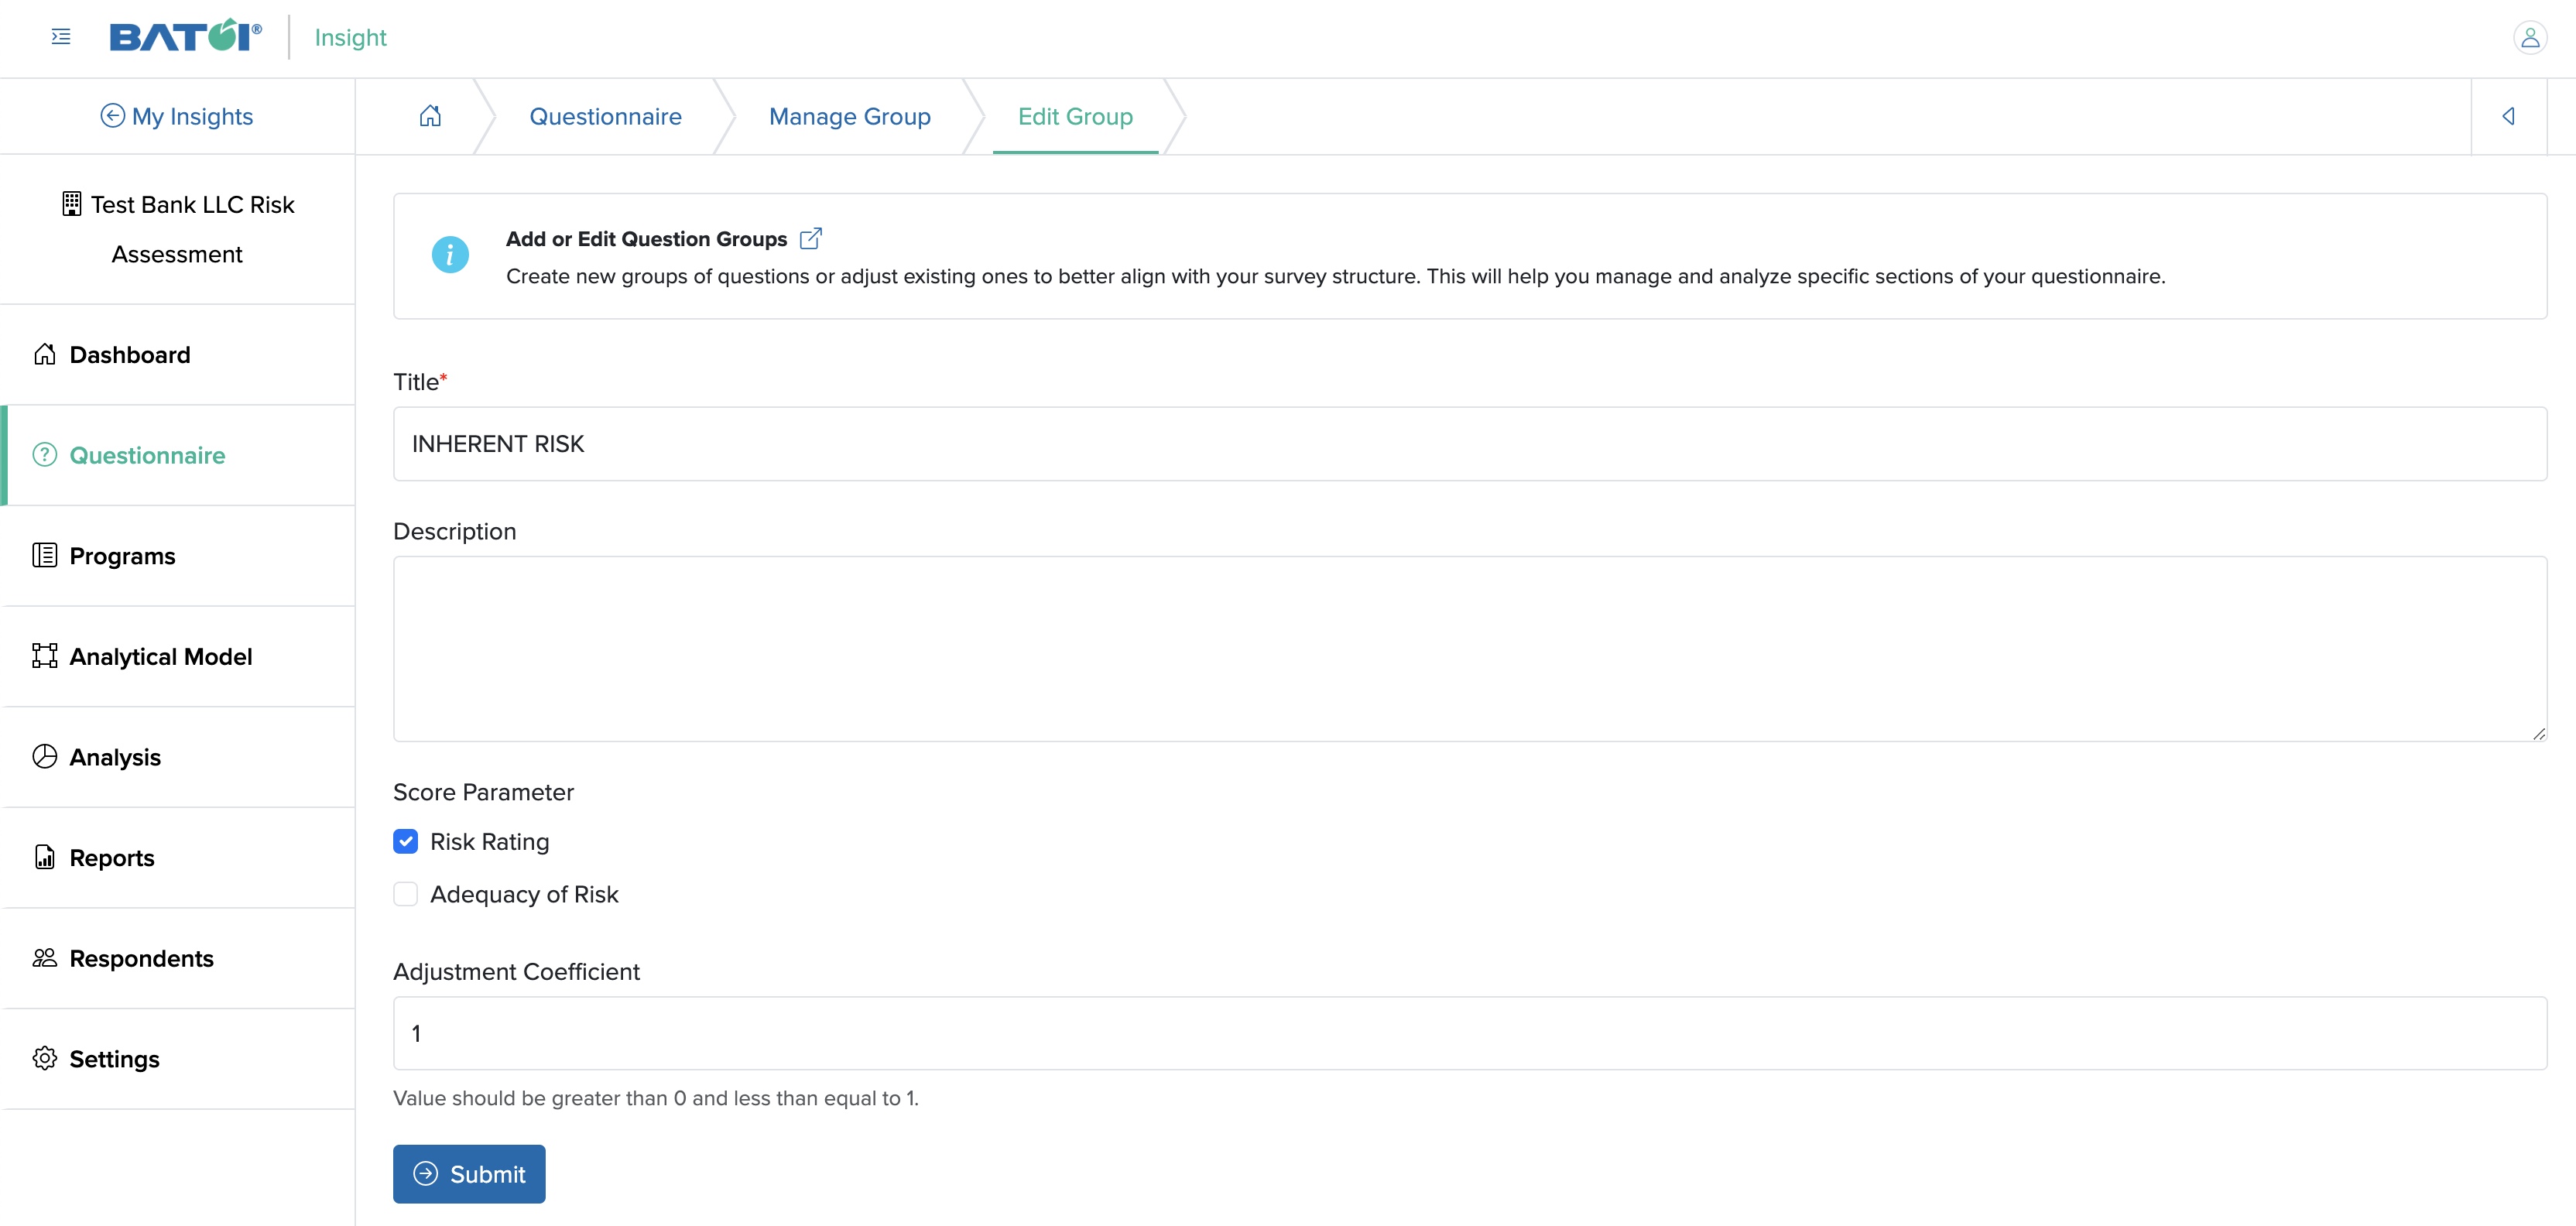
You can enter the details below and click the Submit button to edit the groups, as shown in Figure 10 above. The details that need to be filled in are:
- Title (Textbox - Mandatory): Title of the group
- Description (Text area - Optional): Description of the group
- Score Parameter (Check box - Optional): Multiple Choice
- Adjustment Coefficient (Select - Optional): Value should be greater than 0 and less than or equal to 1
Click the Archive icon associated with an individual group, as shown in Figure 8 above, to archive a particular group.
Sort Group
Click the Sort button to sort groups, as shown in Figure 8 above. A new page opens, as shown in Figure 11 below.
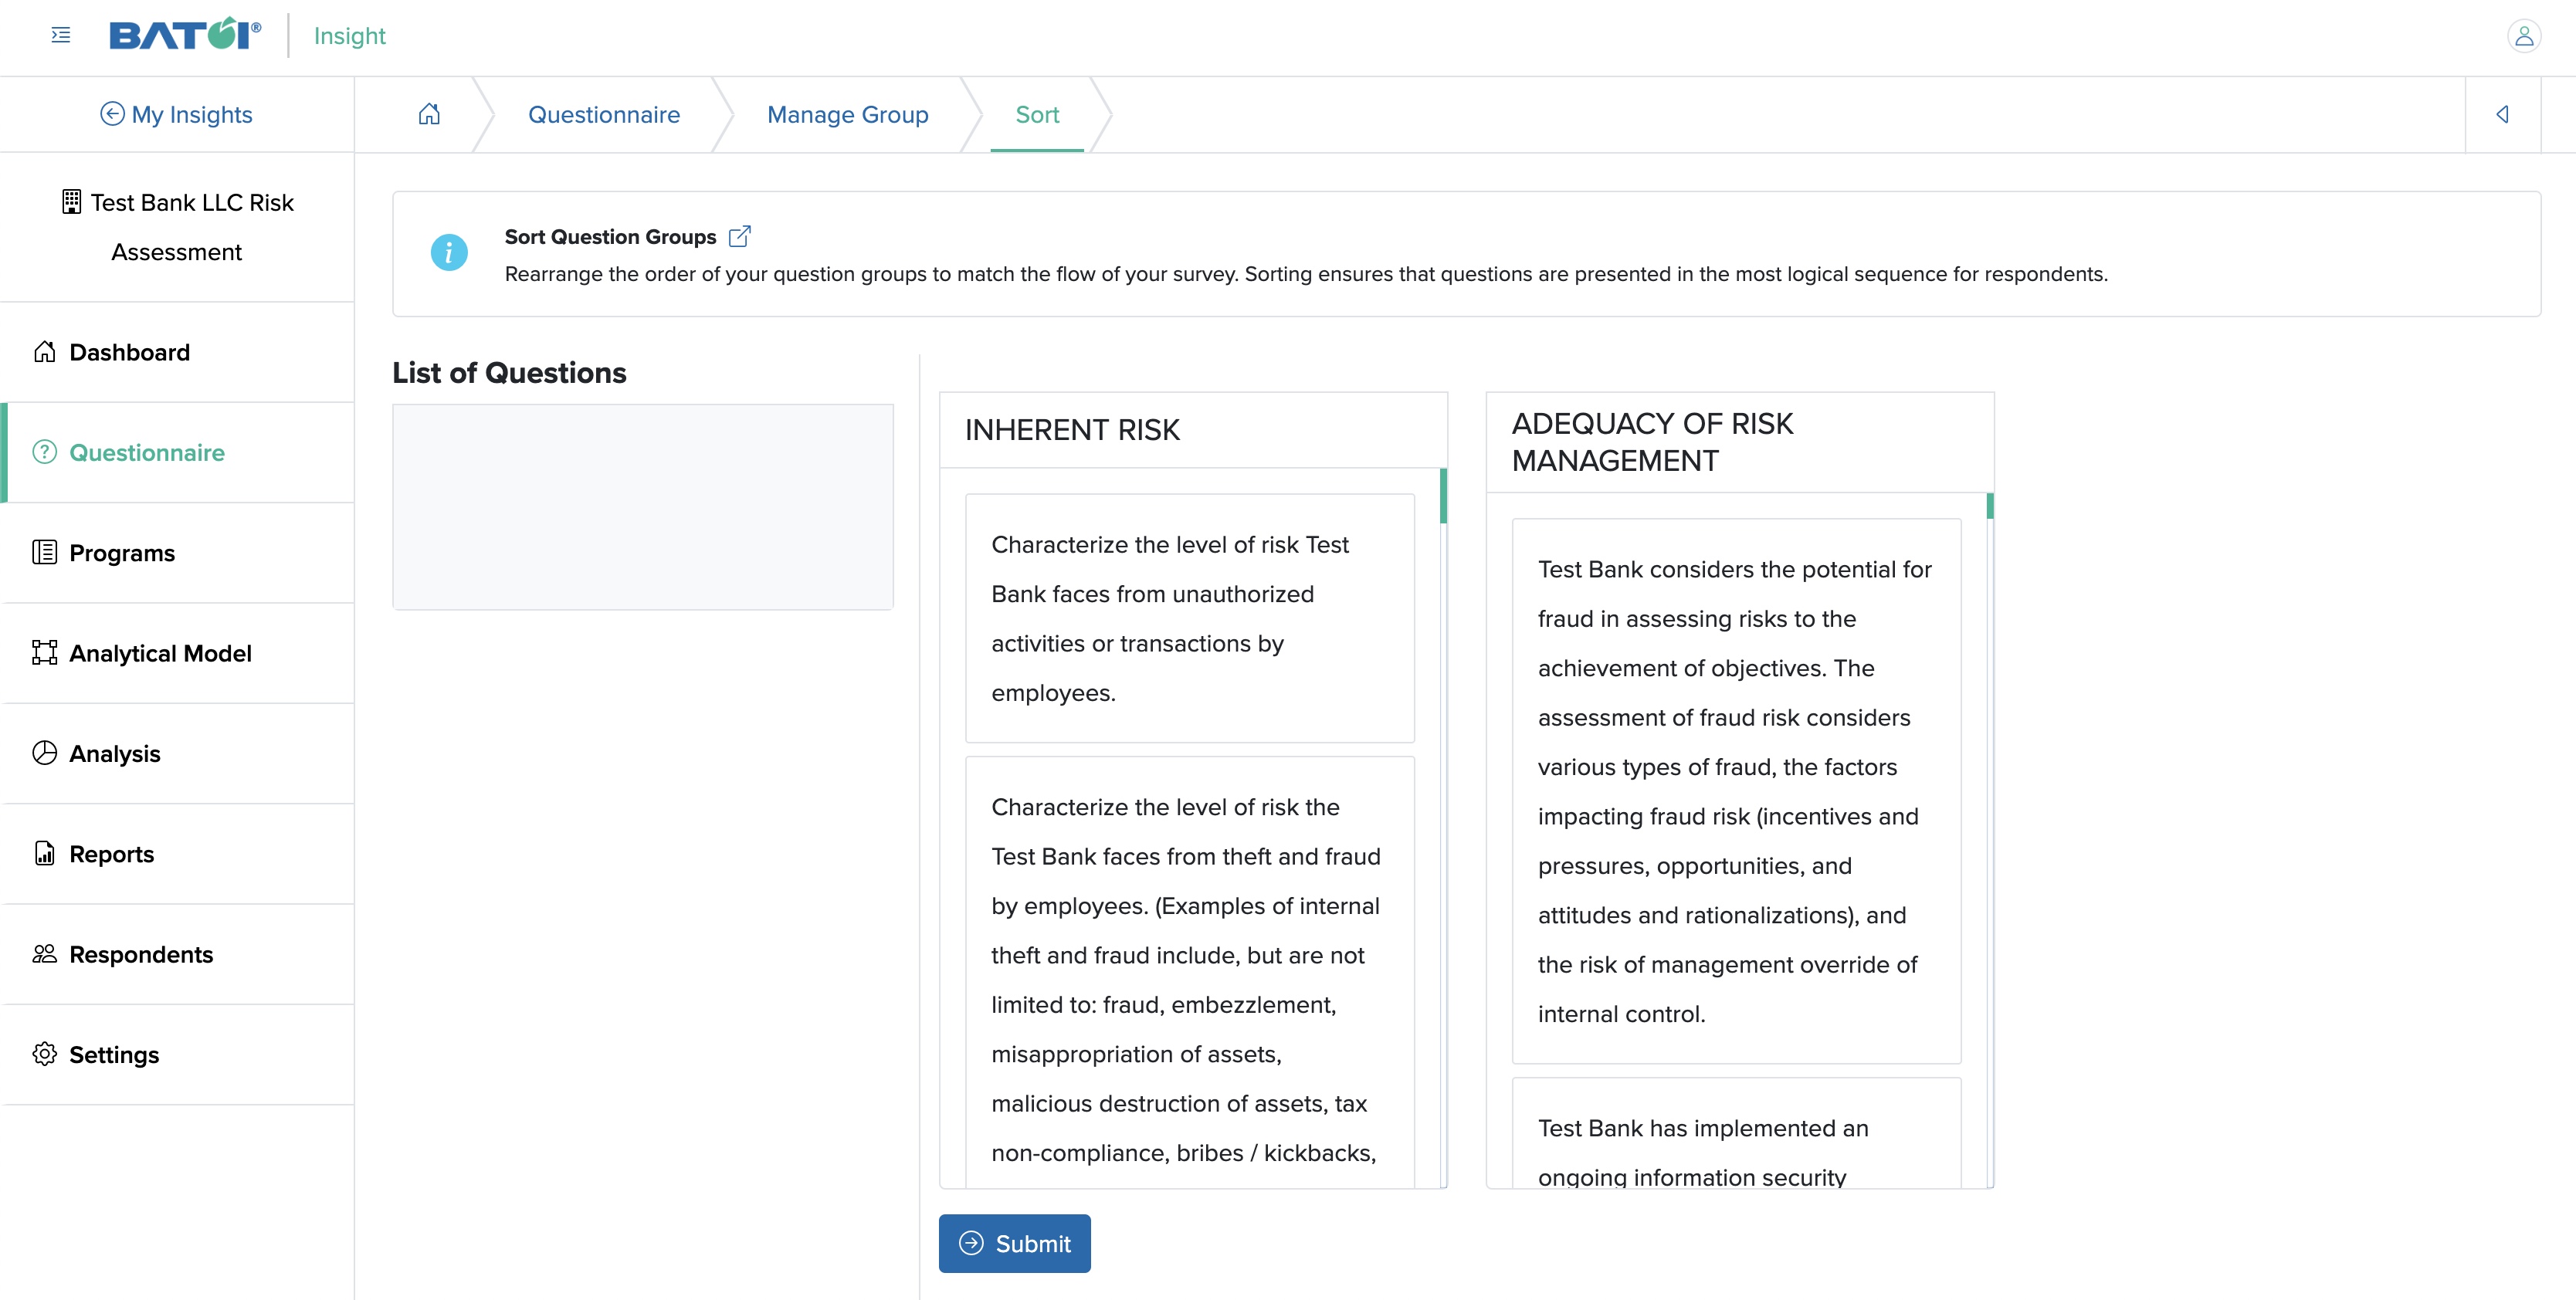
You can sort group-wise and question-wise for a particular group using the sort feature, as shown in Figure 11 above.
Weight
Click the Weight button on the questionnaire screen, as shown in Figure 6 above, and a new page opens, as shown in Figure 12 below.
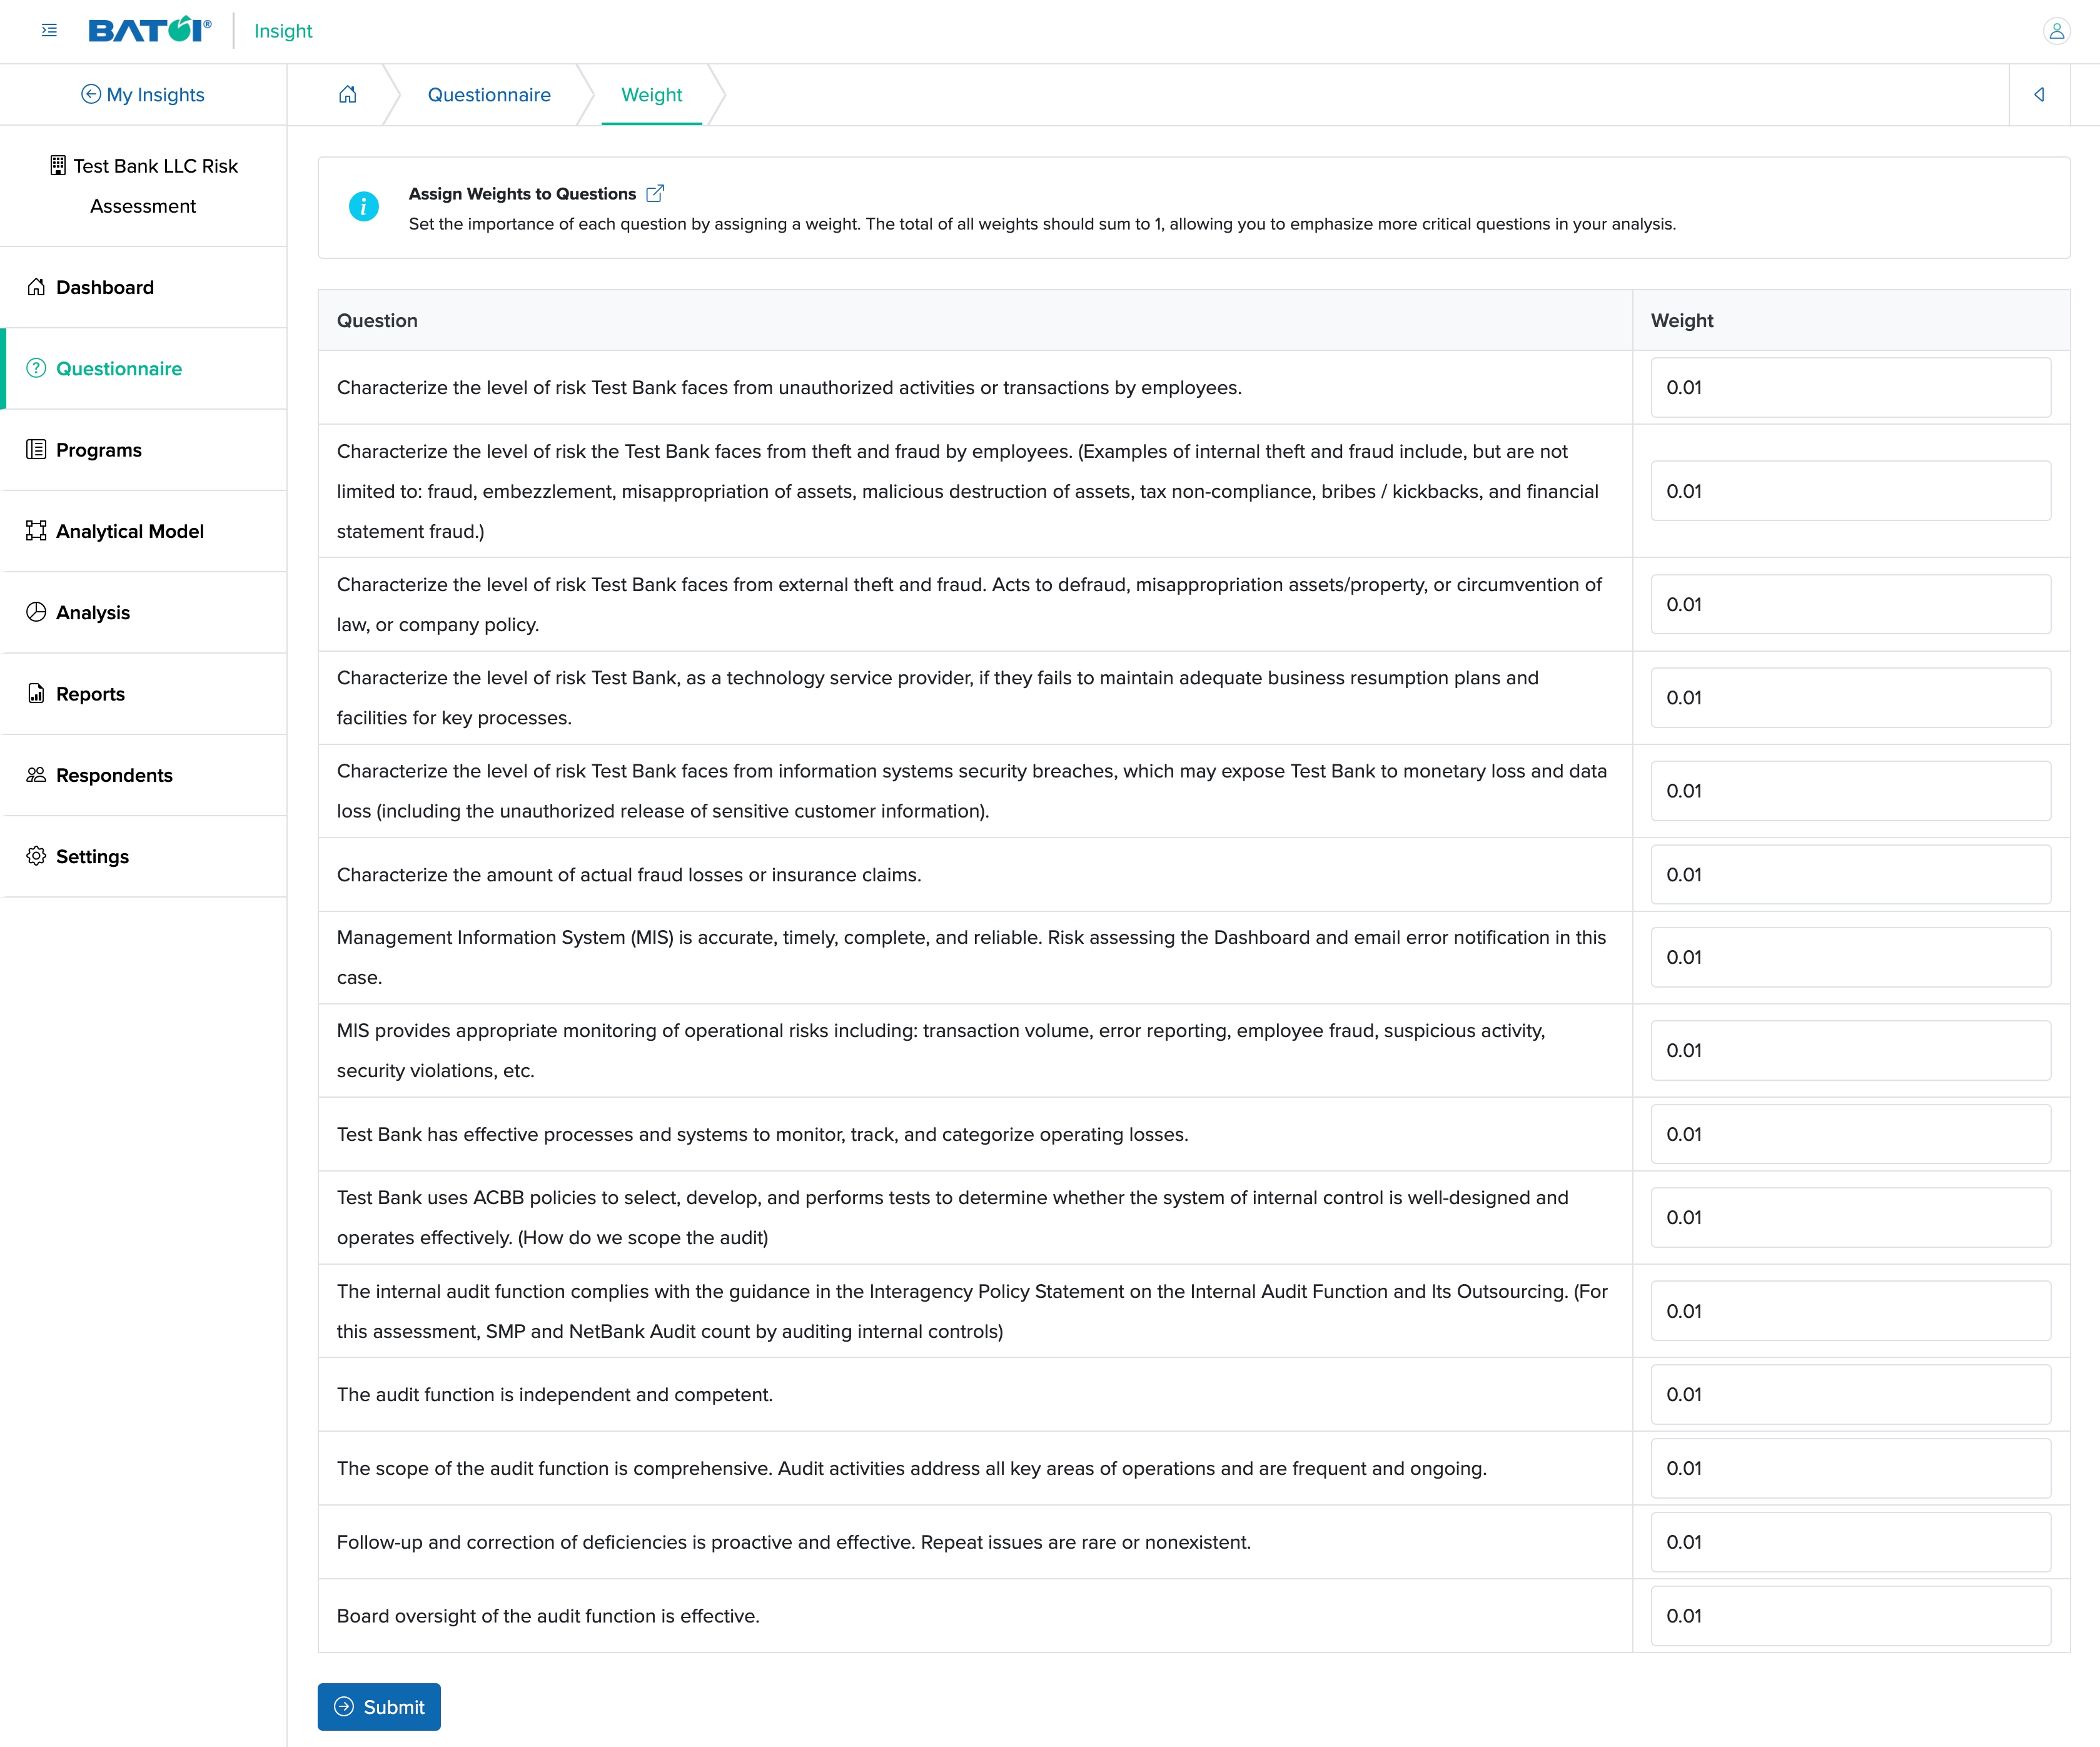
You can change the weight value by clicking on the select drop-down menu, as shown in Figure 12 above.
NOTE: The sum of the weights for all questions must be 1.
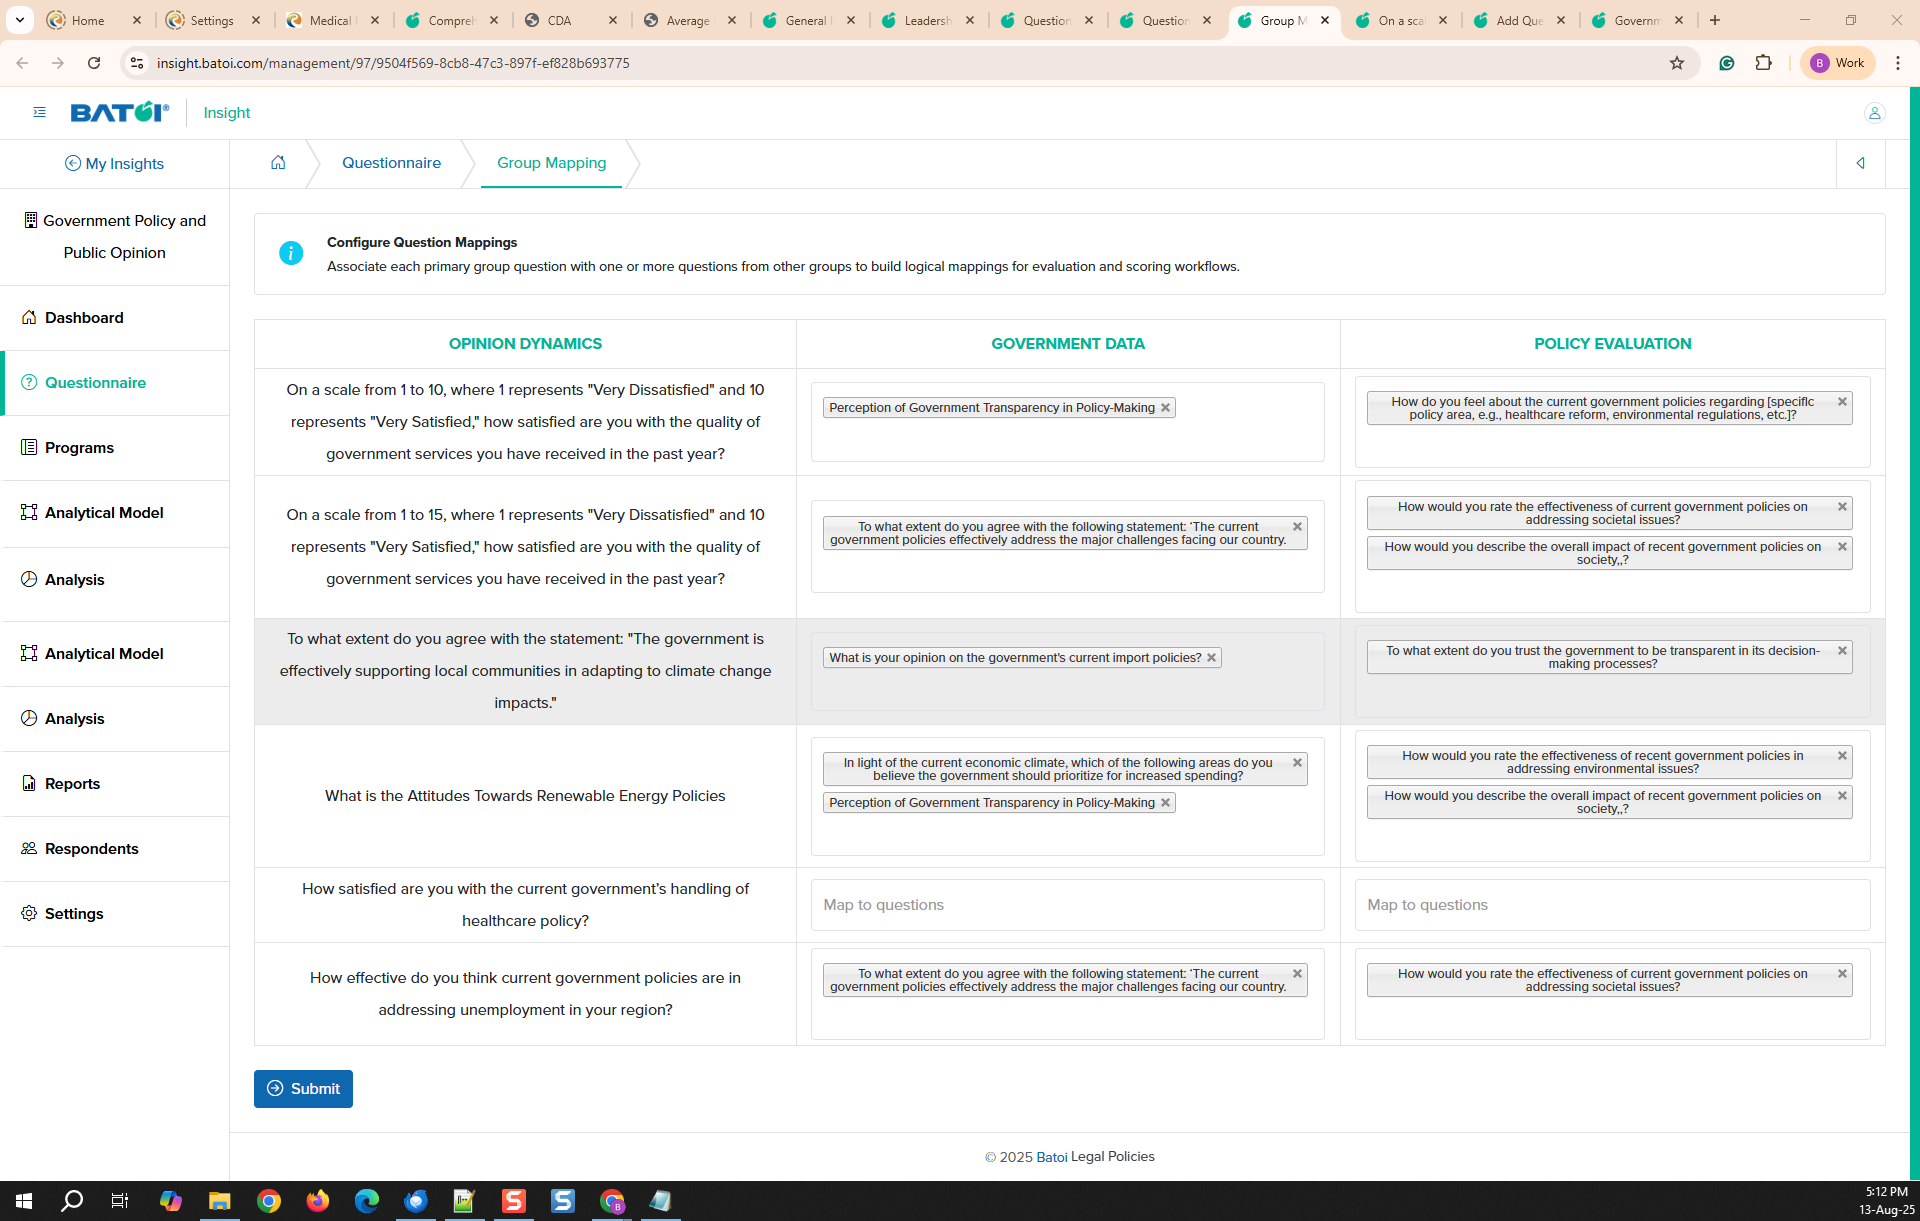
Group Mapping
Click the Group Mapping (appears in the Settings drop-down on the Questionnaire page for the “Groups Mapped” survey type) button on the questionnaire screen, as shown in Figure 13 below.
On the Group Mapping page, to map assessment questions from the primary group (first group) to one or more questions from other groups, select the required question from the Map to Questions field drop-down menu for each group, and click Submit as shown in Figure 14 below.
On the View Question page, a new “Group Mapping” table is visible if the question is linked to questions from other groups.To modify the mappings, click on Edit button as shown in Figure 4 above.
NOTE: Only the questions with the Likert Scale type will appear in the Group Mapping page.