Learn how to create and manage groups within your program, fostering collaborative learning.
Group
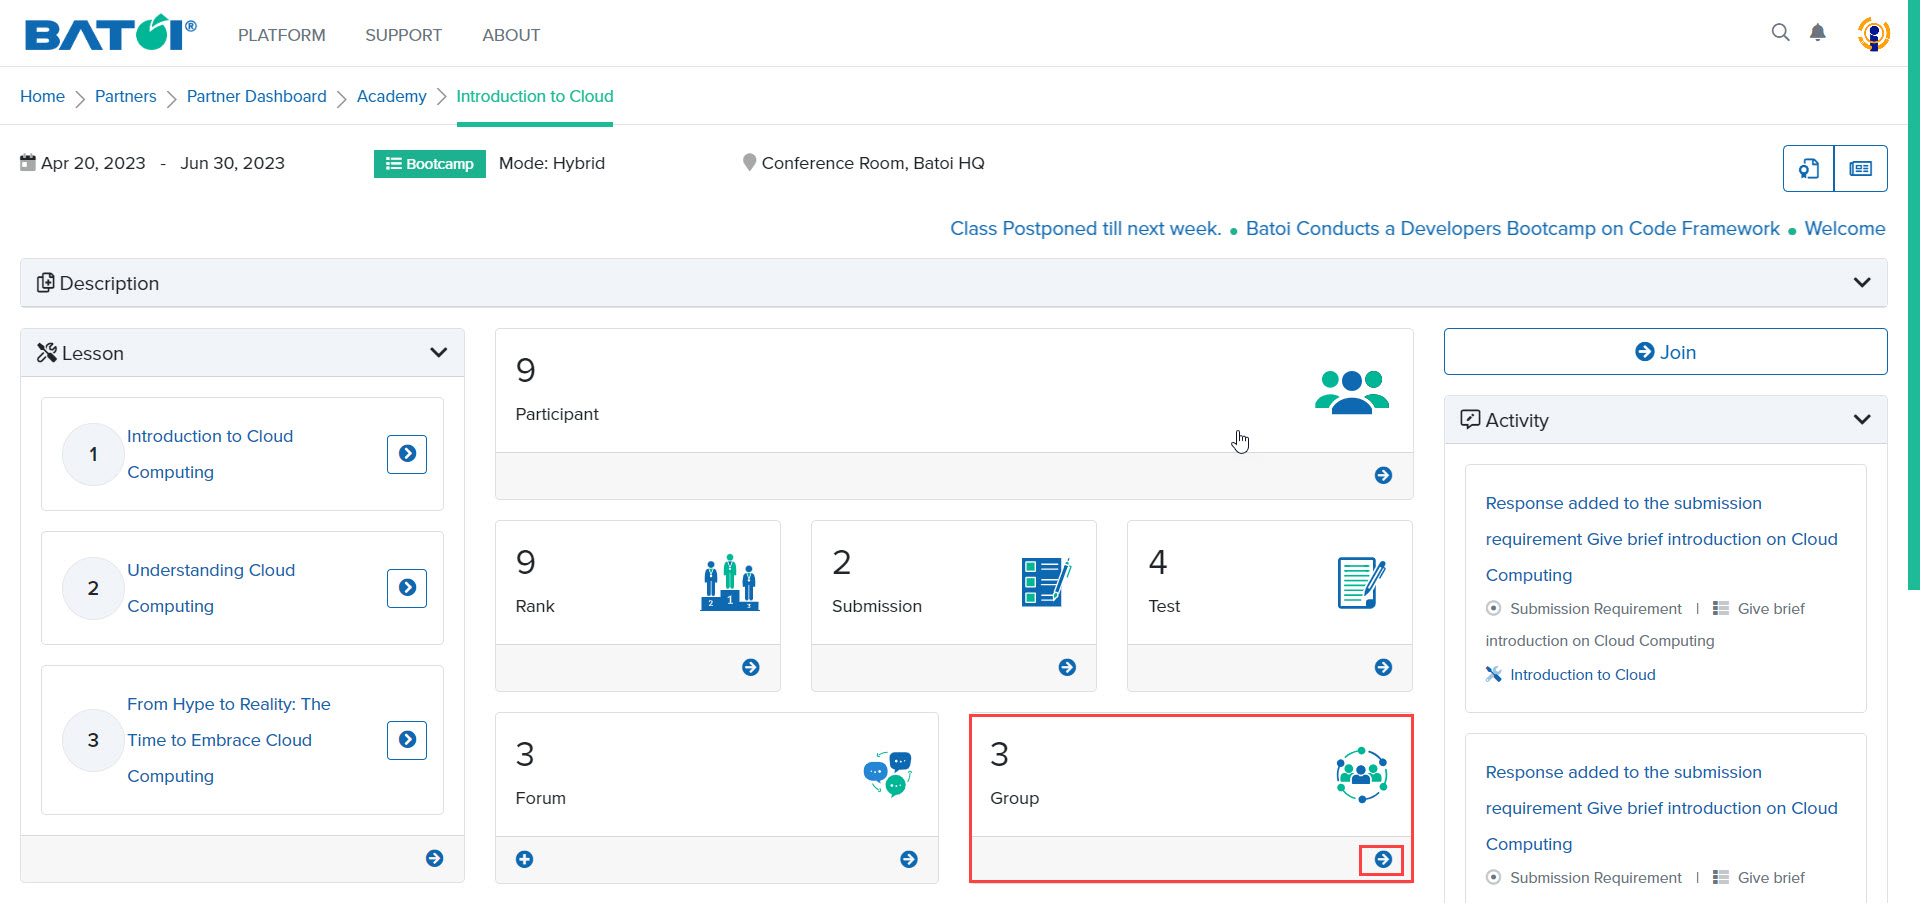
You can create groups in the program for participants to work together. The number 3 represents the number of groups present for the program. To view all the groups click on the View All button in the Group section, as illustrated in Figure 1.
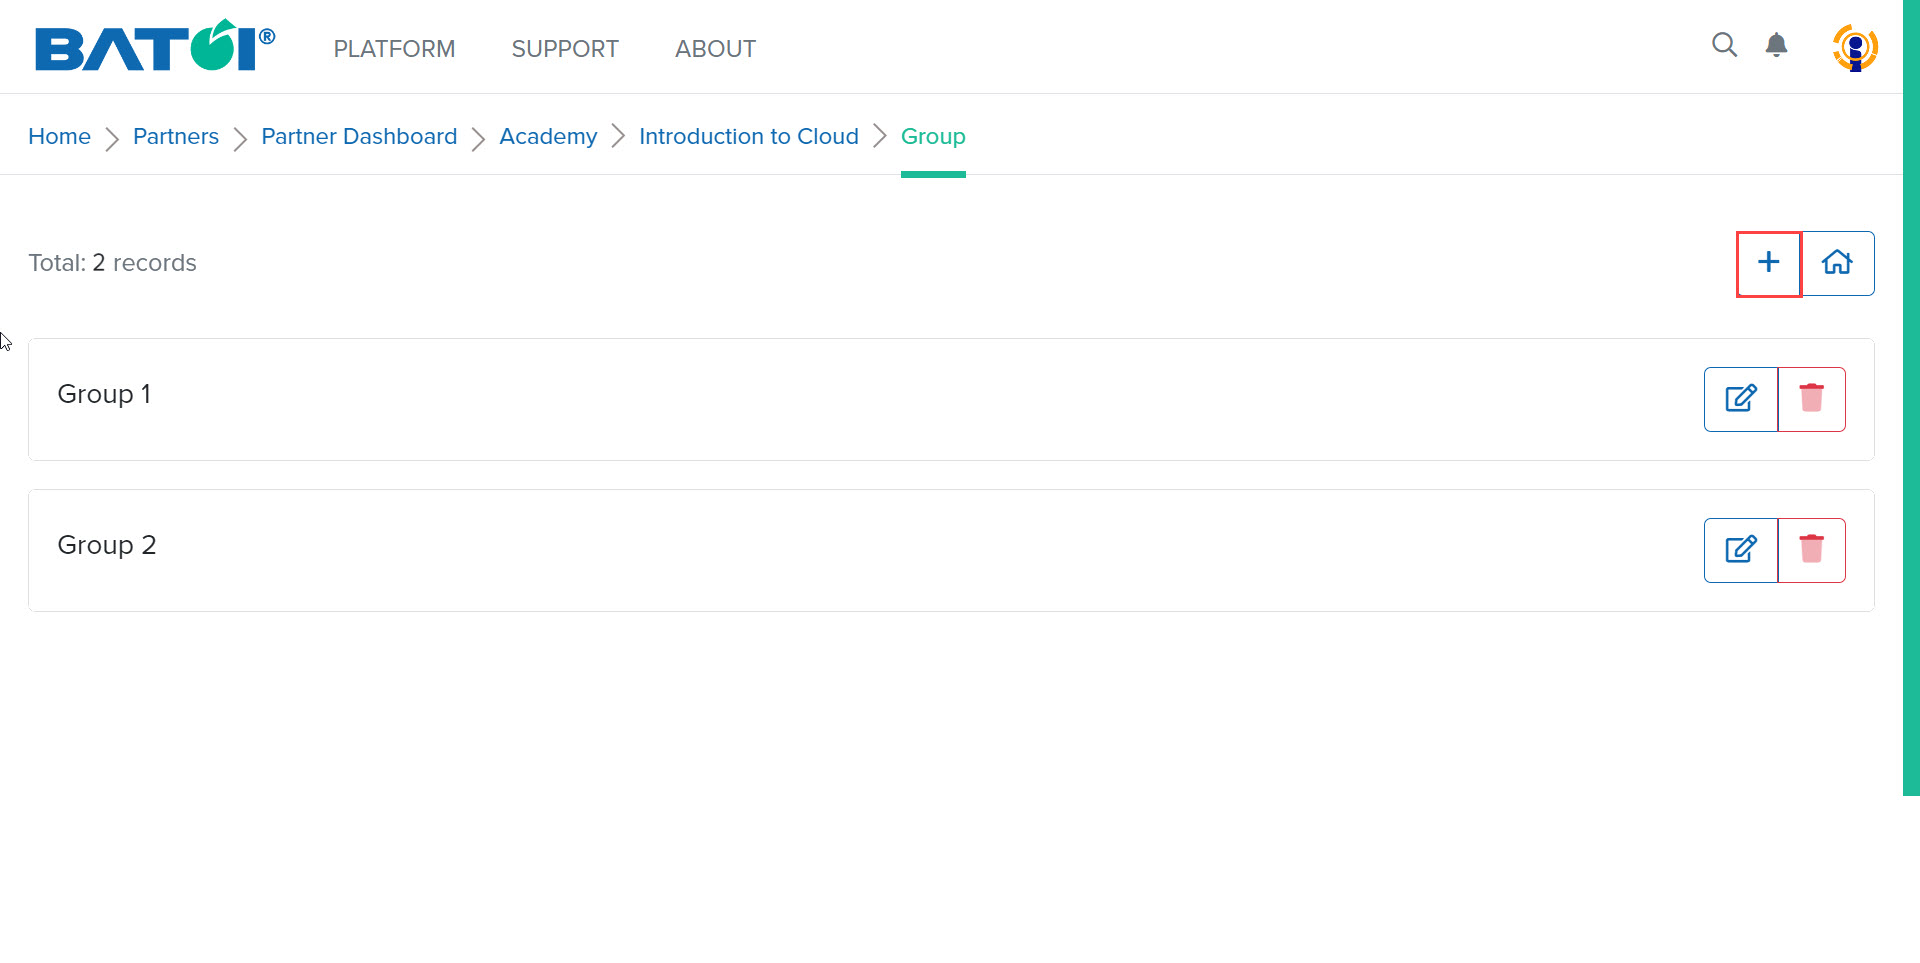
The list of groups will be displayed on the screen. To add a group, click on the Add Group button, as illustrated in Figure 2.
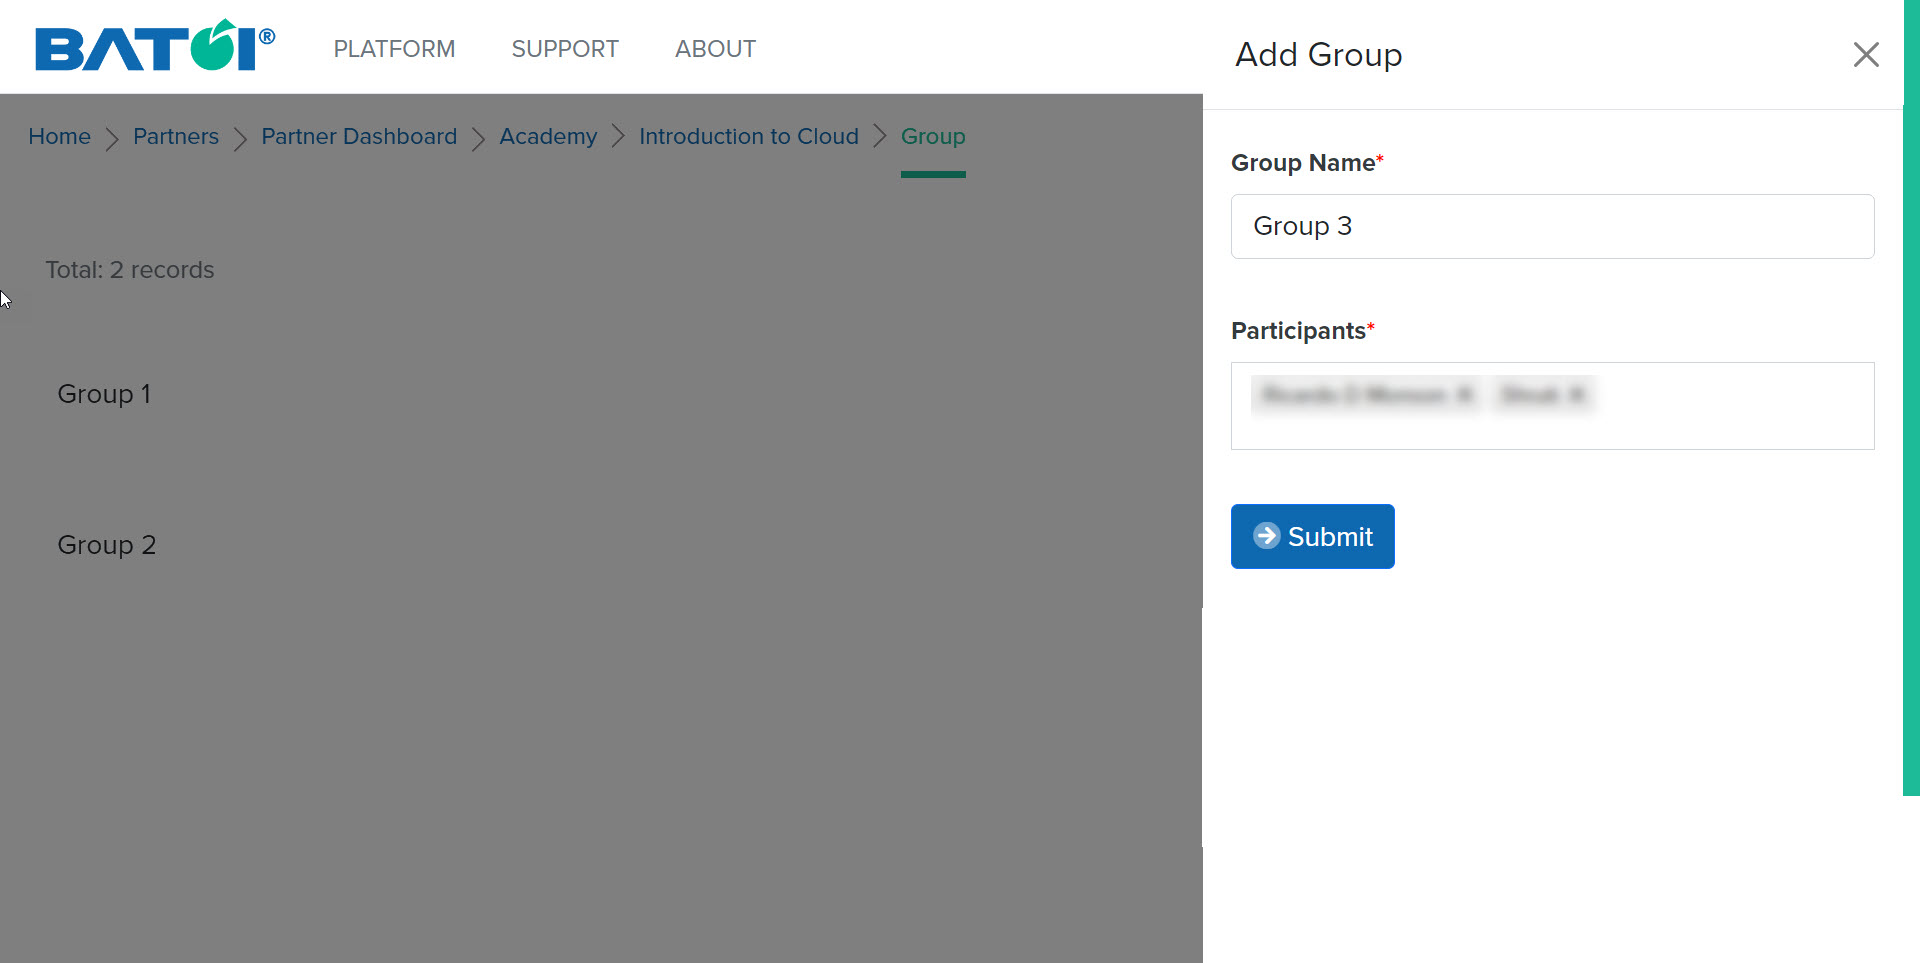
Enter the group name and select the participants of the group. Click on the Submit button to add the group, as illustrated in Figure 3.
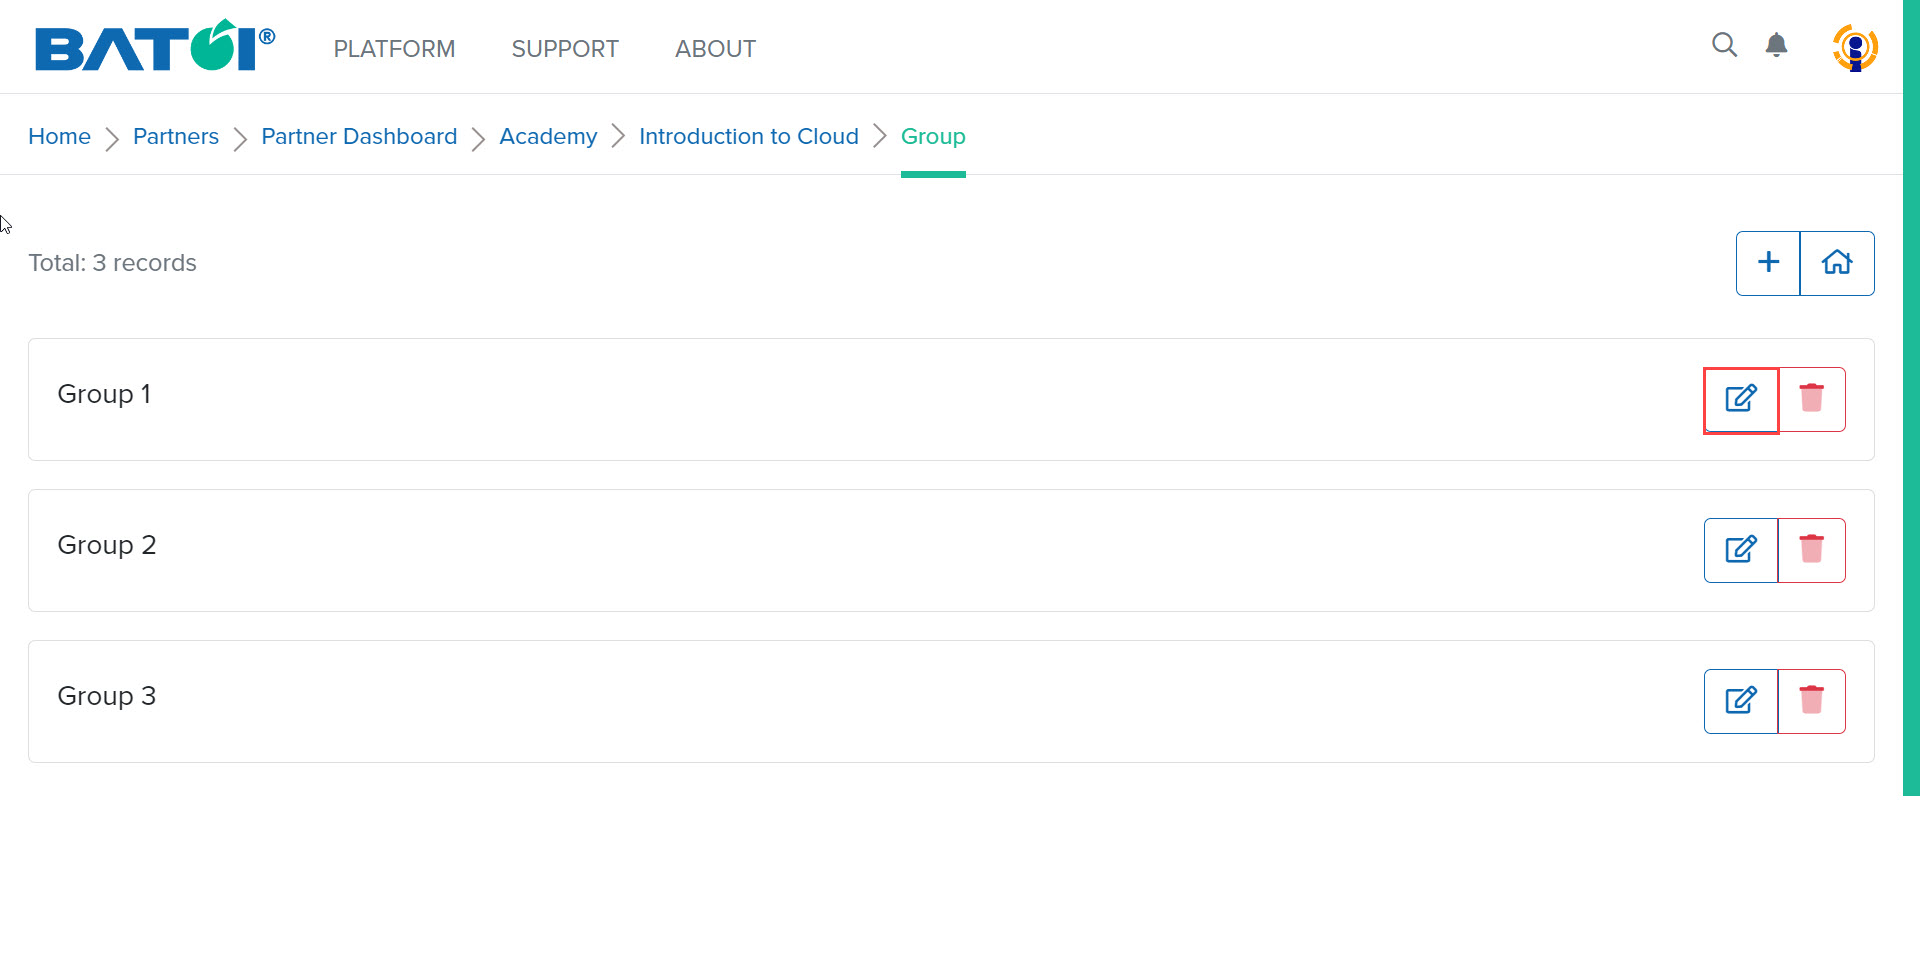
The added group can be seen on the group list page of the program. To edit any group click on the Edit button, as illustrated in Figure 4.
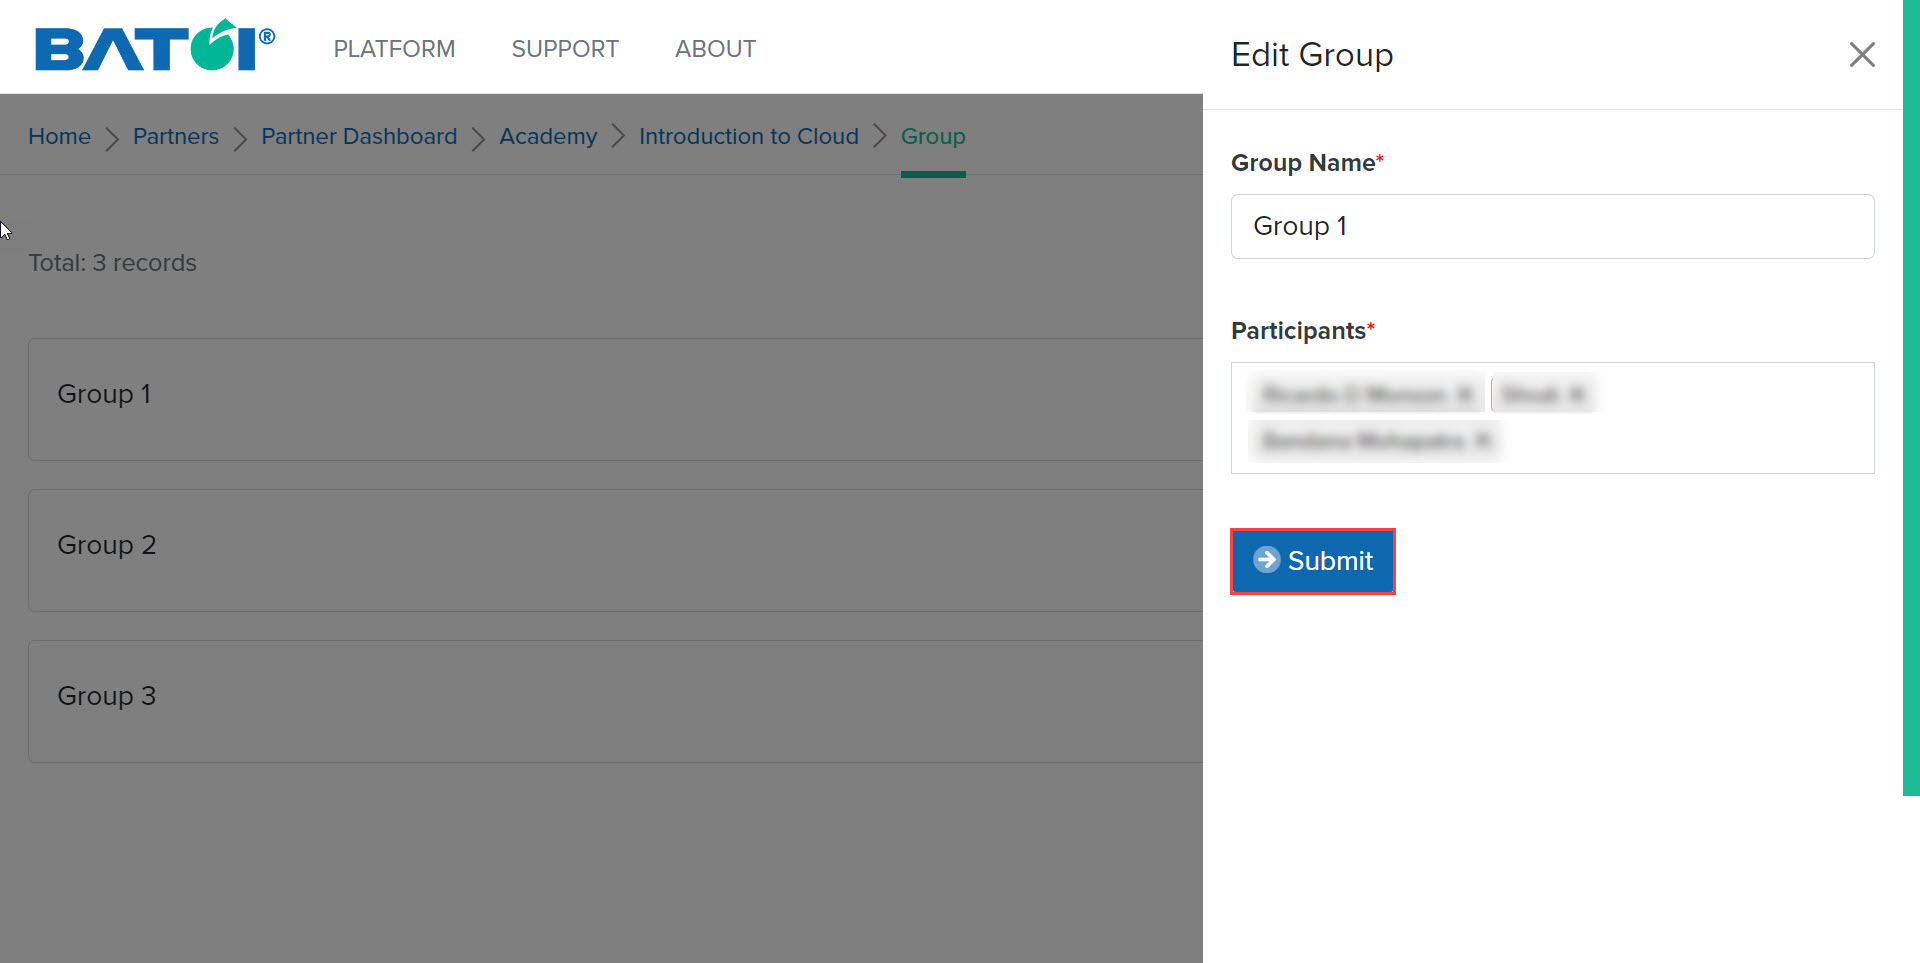
Edit Group
The edit group off-canvas will be displayed. Edit the requisite details and click on the Submit button, as illustrated in Figure 5.
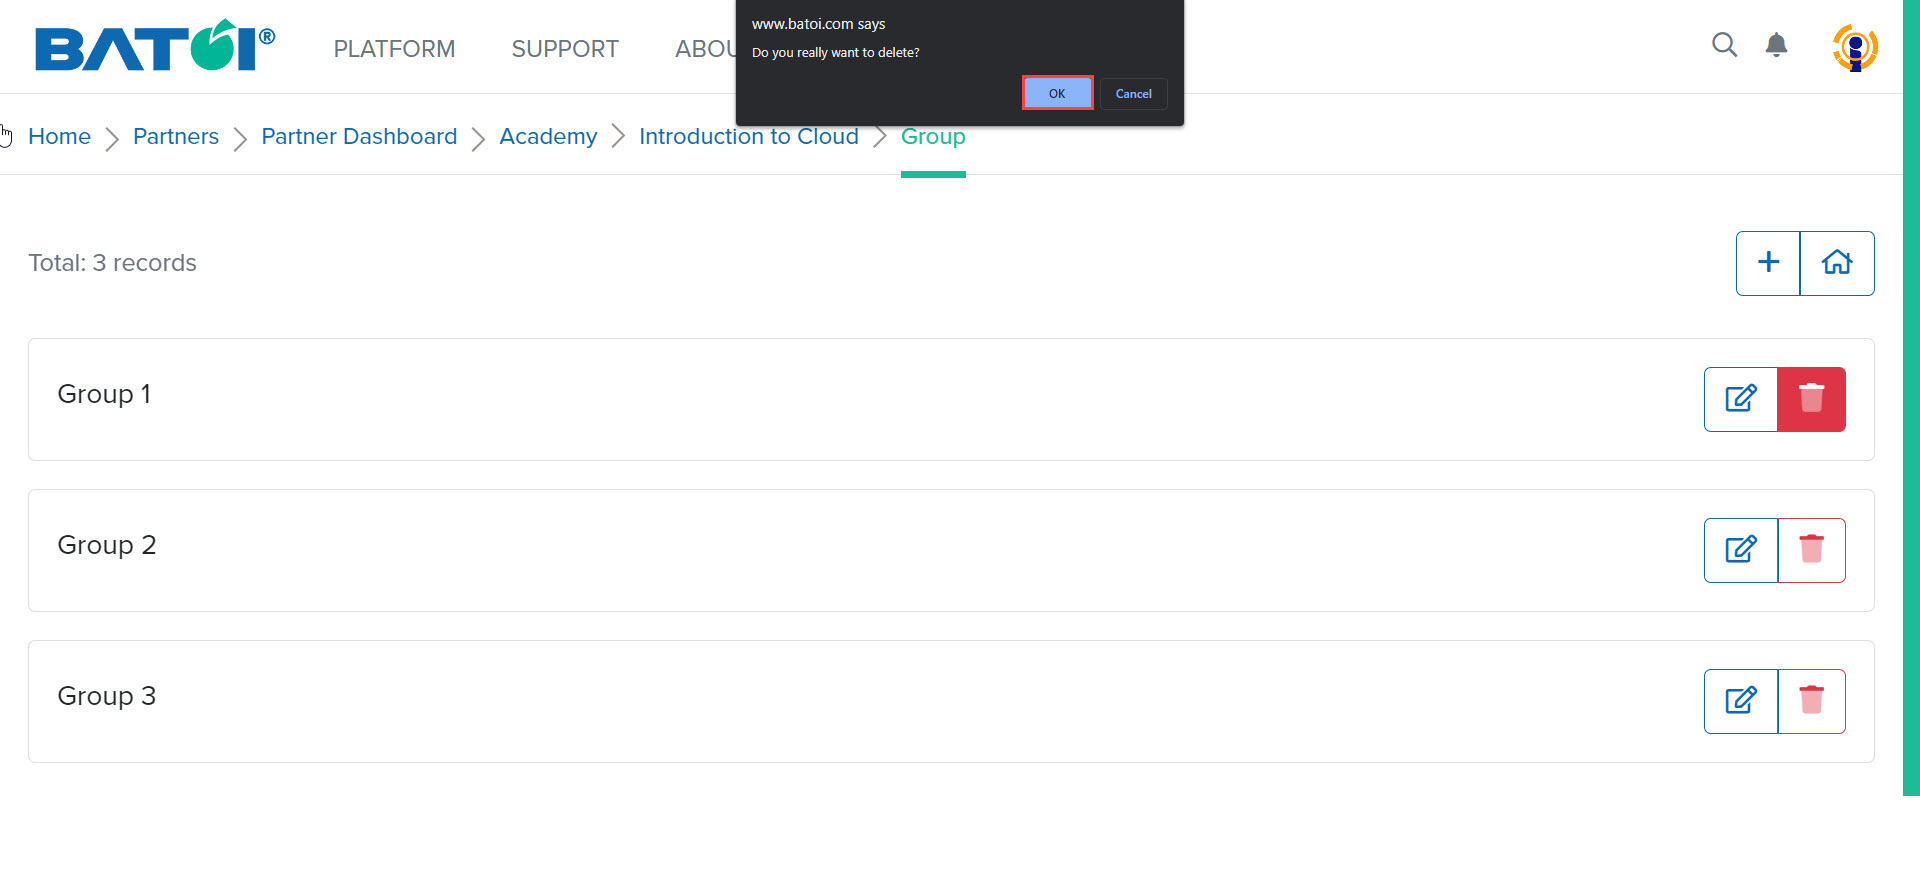
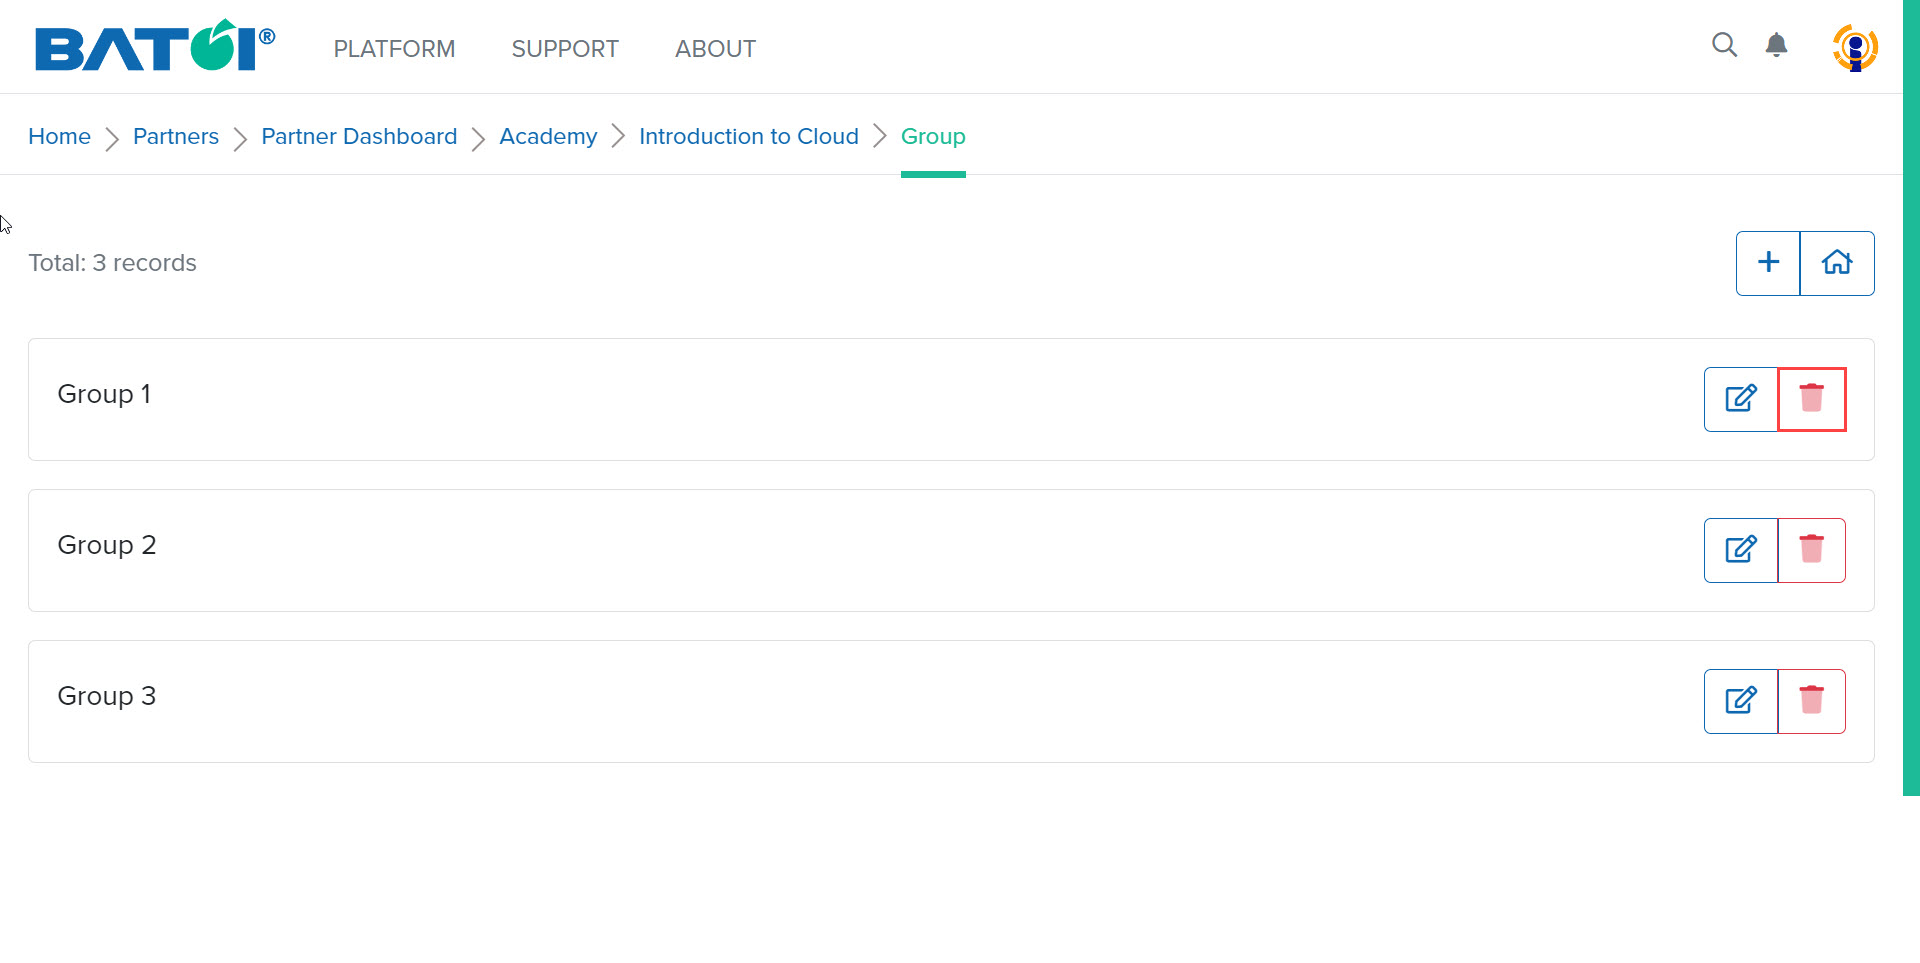
To delete a group click on the Delete Group button, as illustrated in Figure 6.
In the user confirmation pop-up, click on the OK button to delete the group, as illustrated in Figure 7.