 Batoi Support
Requirements
Before diving into the core of the guide, let's ensure that we have the following prerequisites in place:
- Batoi RAD Platform: Ensure you have access to the Batoi RAD platform and are familiar with its user interface.
- Mailgun Account: A registered Mailgun account is essential. If you haven't already, create one at Mailgun's official website. You do not need to download and install Mailgun SDK for this purpose.
- Mailgun Domain: Once your Mailgun account is active, configure a domain. It involves setting up DNS records associating an API key and a domain name, which will be essential for sending emails.
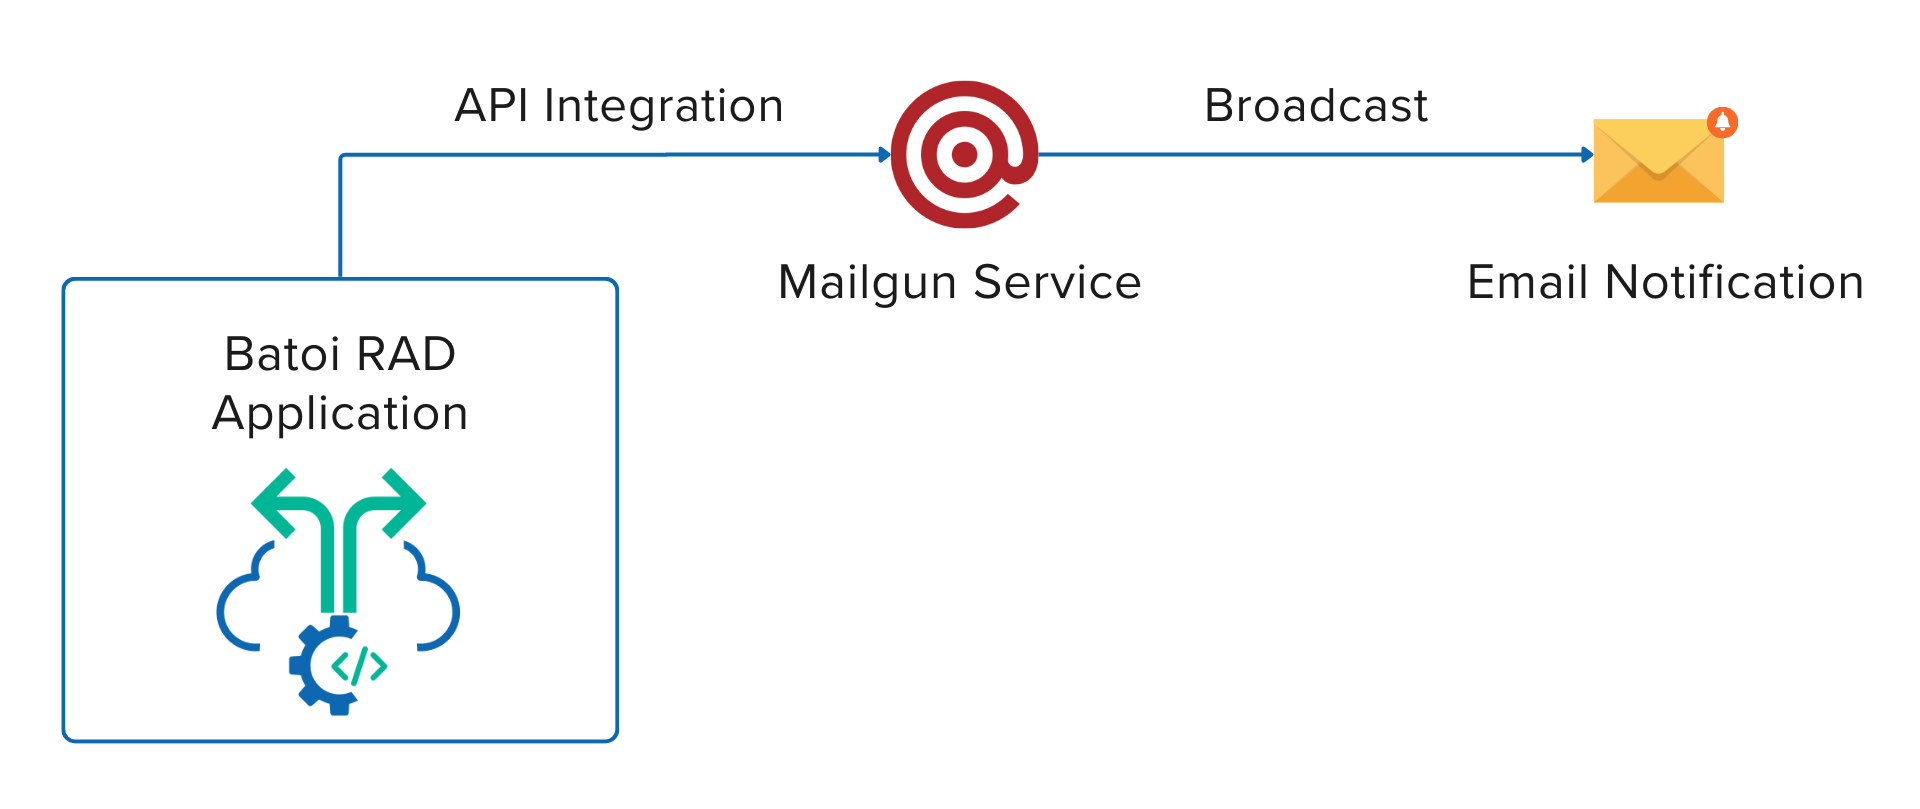
How to Send Emails Using Mailgun API with Batoi RAD
Step 1: Import Required Libraries
Start your script by importing the libraries essential for interacting with the Mailgun API. It can be done as follows:
use Mailgun\Mailgun;
Step 2: Initialize the Mailgun Client
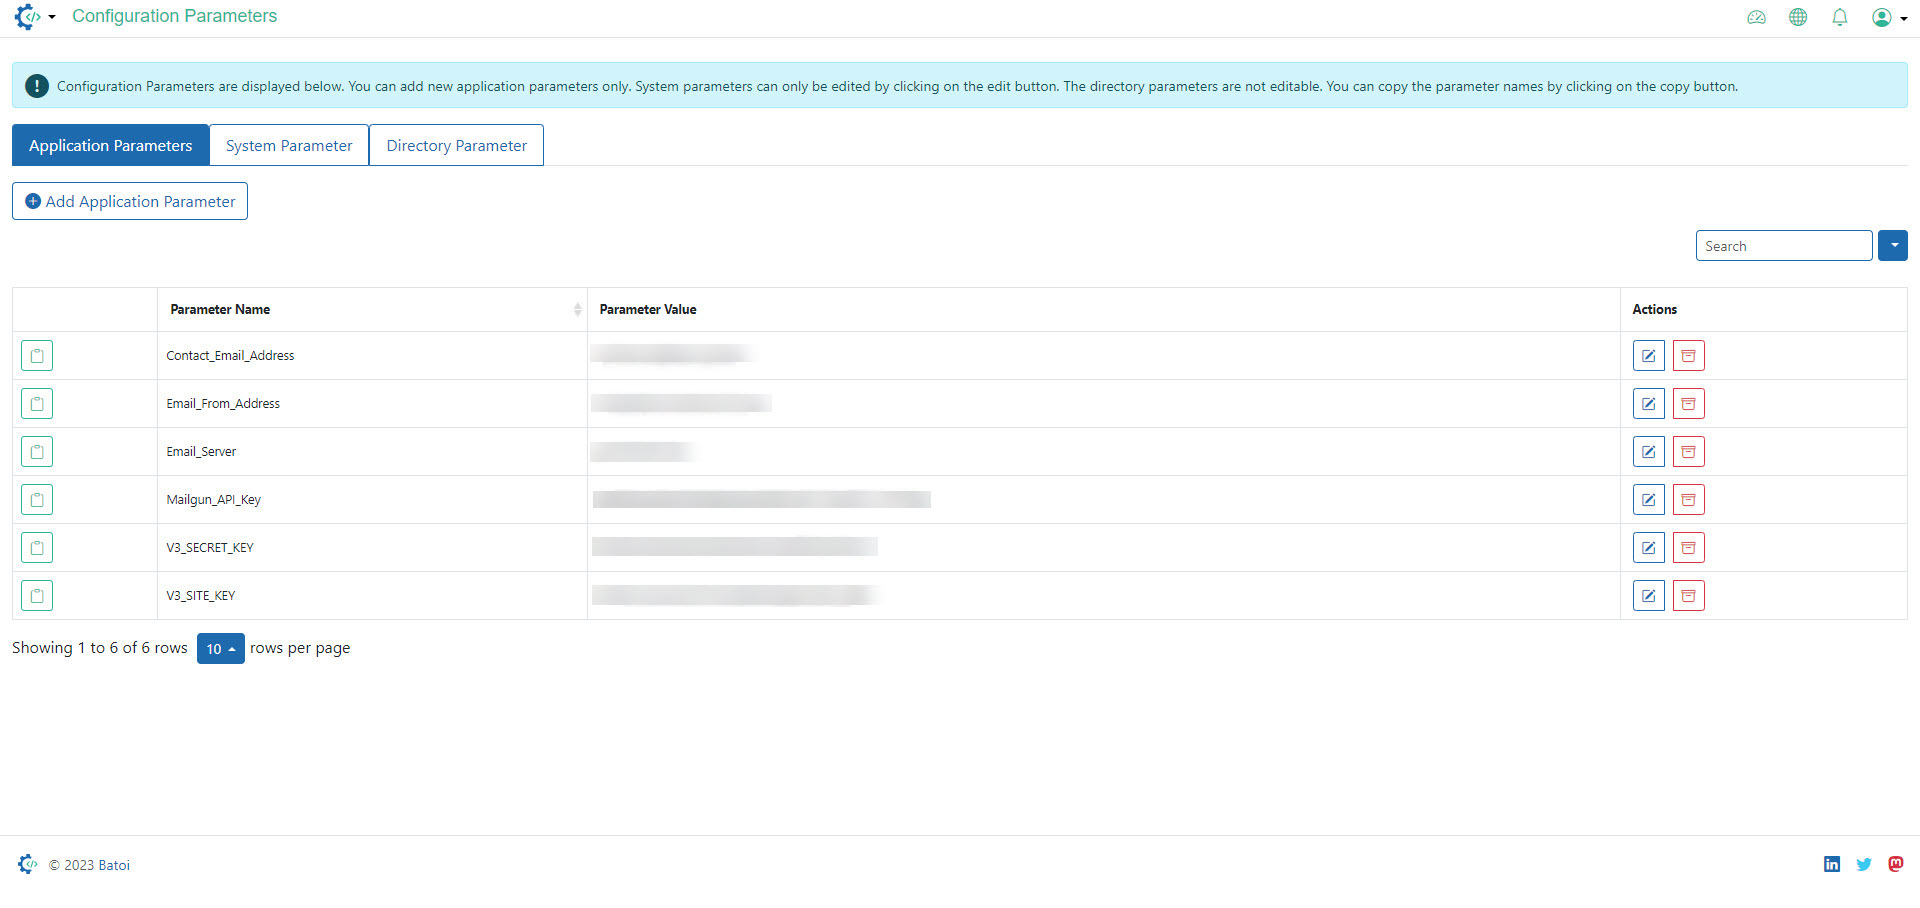
Initialize the Mailgun client using the API key and domain name stored as application parameters in the Batoi RAD platform. These parameters can be accessed globally, providing a centralized configuration. Here's an example:
$mgClient = Mailgun::create($this->runData['config']['app']['YOUR_API_KEY']);
$sDomainName = $this->runData['config']['app']['YOUR_DOMAIN_NAME'];
Replace the application parameters’ values YOUR_API_KEY and YOUR_DOMAIN_NAME with your actual API key and domain name.
Step 3: Define Email Parameters
Structure an array to contain the email parameters, such as sender details, recipient address, subject, and message content.
$sEmailParams = [
'from' => 'Your Name <your@email.com>',
 'to' => 'recipient@email.com',
 'subject' => 'Your Subject Here',
 'text' => strip_tags($emailBody),
 'html' => $emailBody
];
Step 4: Execute Email Sending
Utilize the messages()->send() method to dispatch the email.
$mgClient->messages()->send($sDomainName, $sEmailParams);
Step 5: Handle Responses
After sending the email, checking the returned response for success or errors is crucial. Batoi RAD allows you to set custom alert messages as shown below:
$aResponse = $mgClient->messages()->send($sDomainName, $sEmailParams);
if ($aResponse->http_response_code == 200) {

$this->runData['route']['alert'] = 'success';

$this->runData['route']['alert_message'] = 'Email sent successfully';

} else {

$this->runData['route']['alert'] = 'danger';

$this->runData['route']['alert_message'] = 'Email could not be sent';

}
$this->runData['request']->setAlert($this->runData['route']['alert_message'], $this->runData['route']['alert']);
Step 6: Display Custom Alerts
Post-execution, present the custom response to the user. For example:
<?php

if (isset($this->runData['route']['alert']) && !empty($this->runData['route']['alert_message'])){ ?>

    <div class="alert alert-<?php echo $this->runData['route']['alert']; ?>">

        <?php echo $this->runData['route']['alert_message']; ?>

    </div>

<?php } ?>
Conclusion
Congratulations! You've successfully set up Mailgun API for email services within your Batoi RAD application. It will streamline your development process and offer a reliable, scalable, and secure way to manage your email services.