Introduction
This comprehensive guide walks you through the step-by-step procedure to add the Grammarly extension to Google Chrome.
Open the Chrome browser and type chrome://extensions/ in the address bar, as illustrated in Figure 1 below.
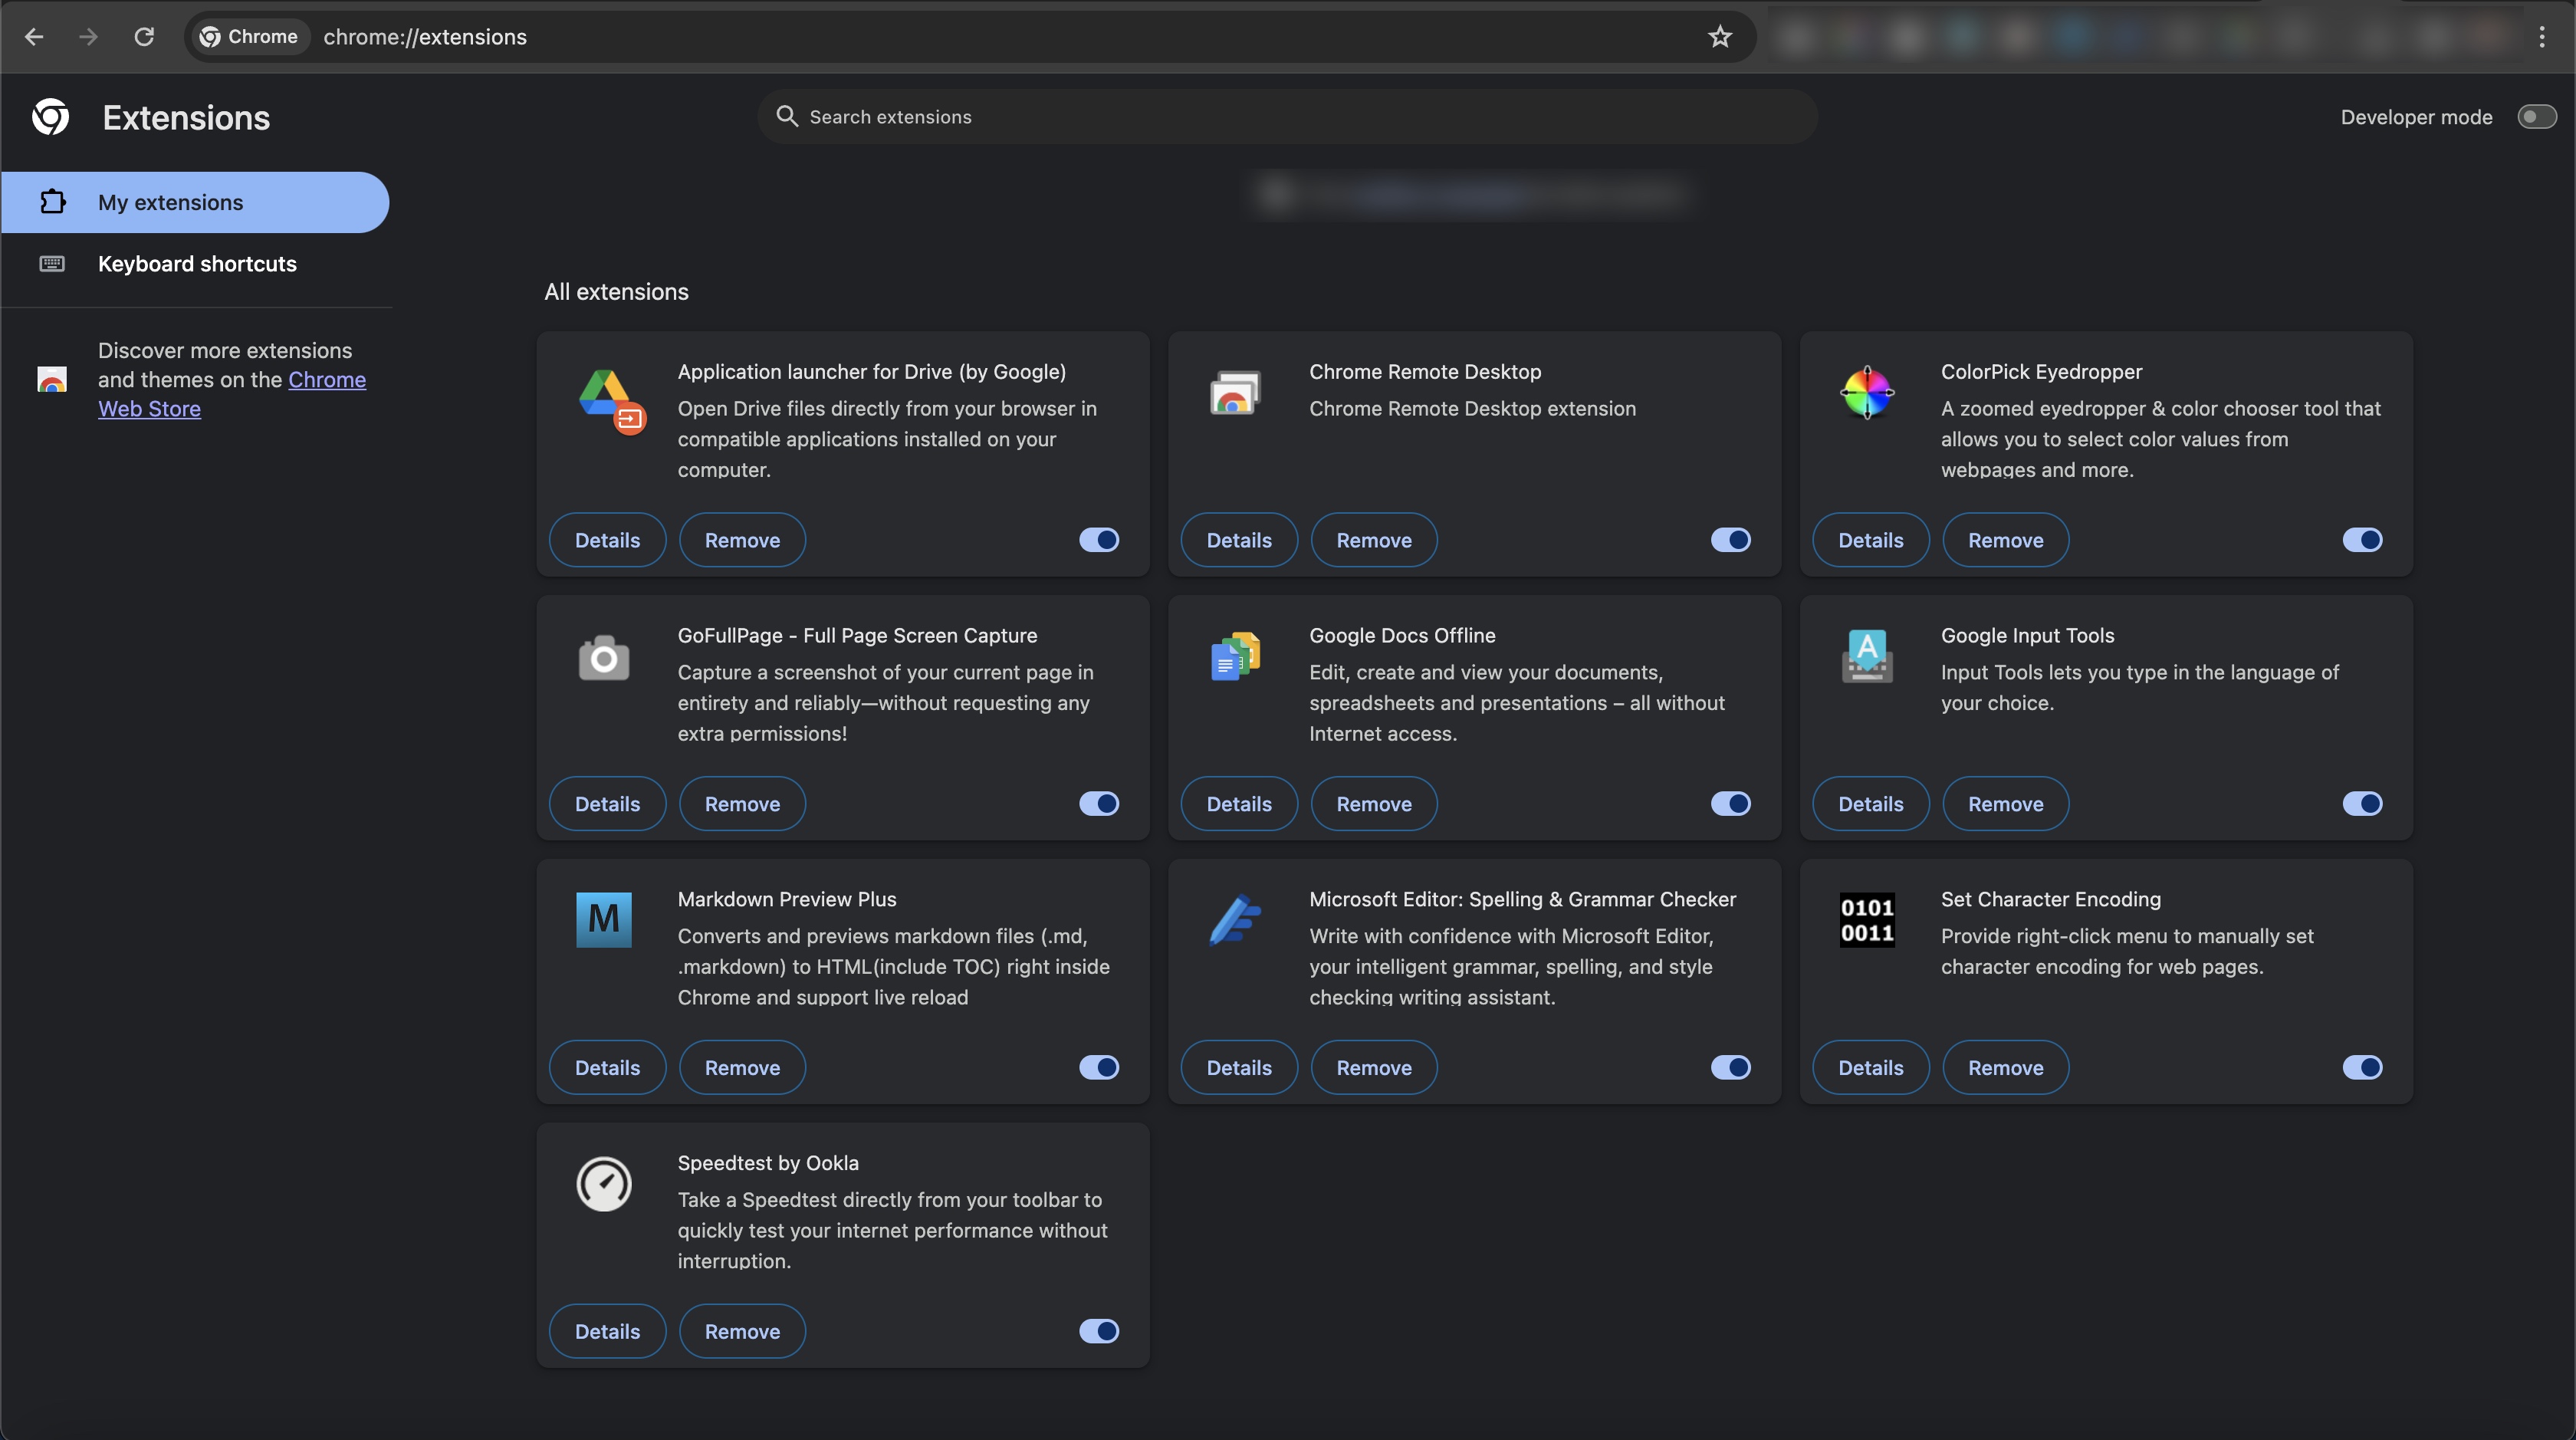
You will see all the extensions installed in your Chrome browser, as illustrated in Figure 1 above.
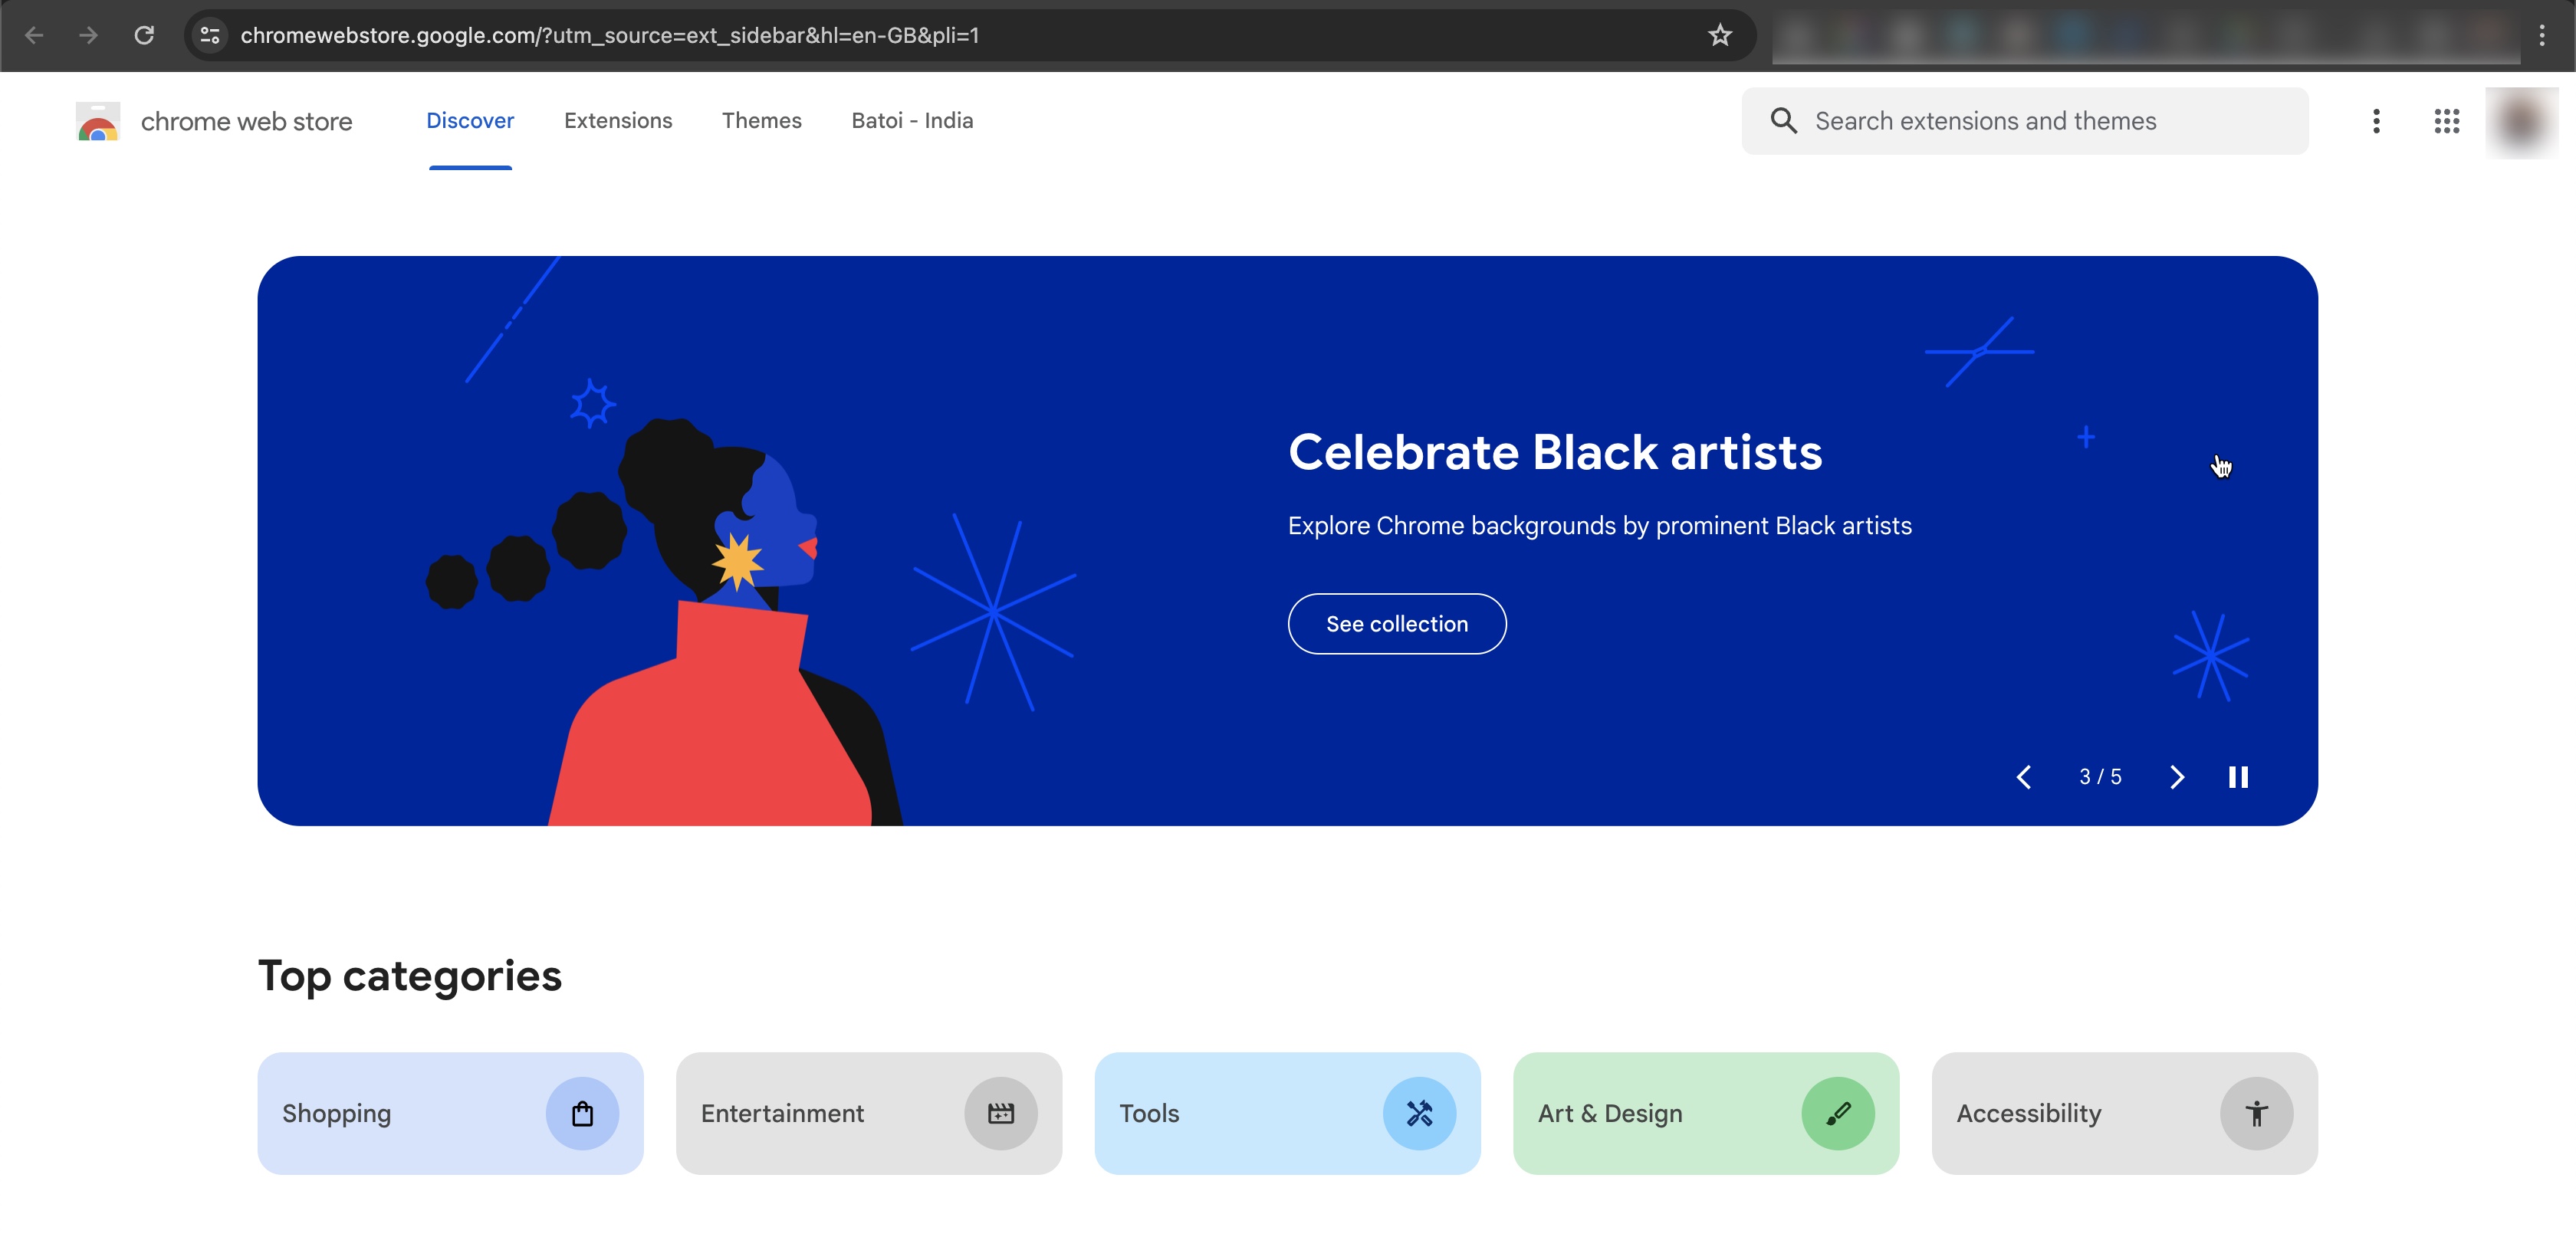
To add a new extension, click the Chrome Web Store link, as illustrated in Figure 1 above. You will be redirected to the web store page by clicking the link, as shown in Figure 2 below.
Click the search icon and type ‘Grammarly’; you will find the extension in the dropdown list, as illustrated in Figure 3 below.
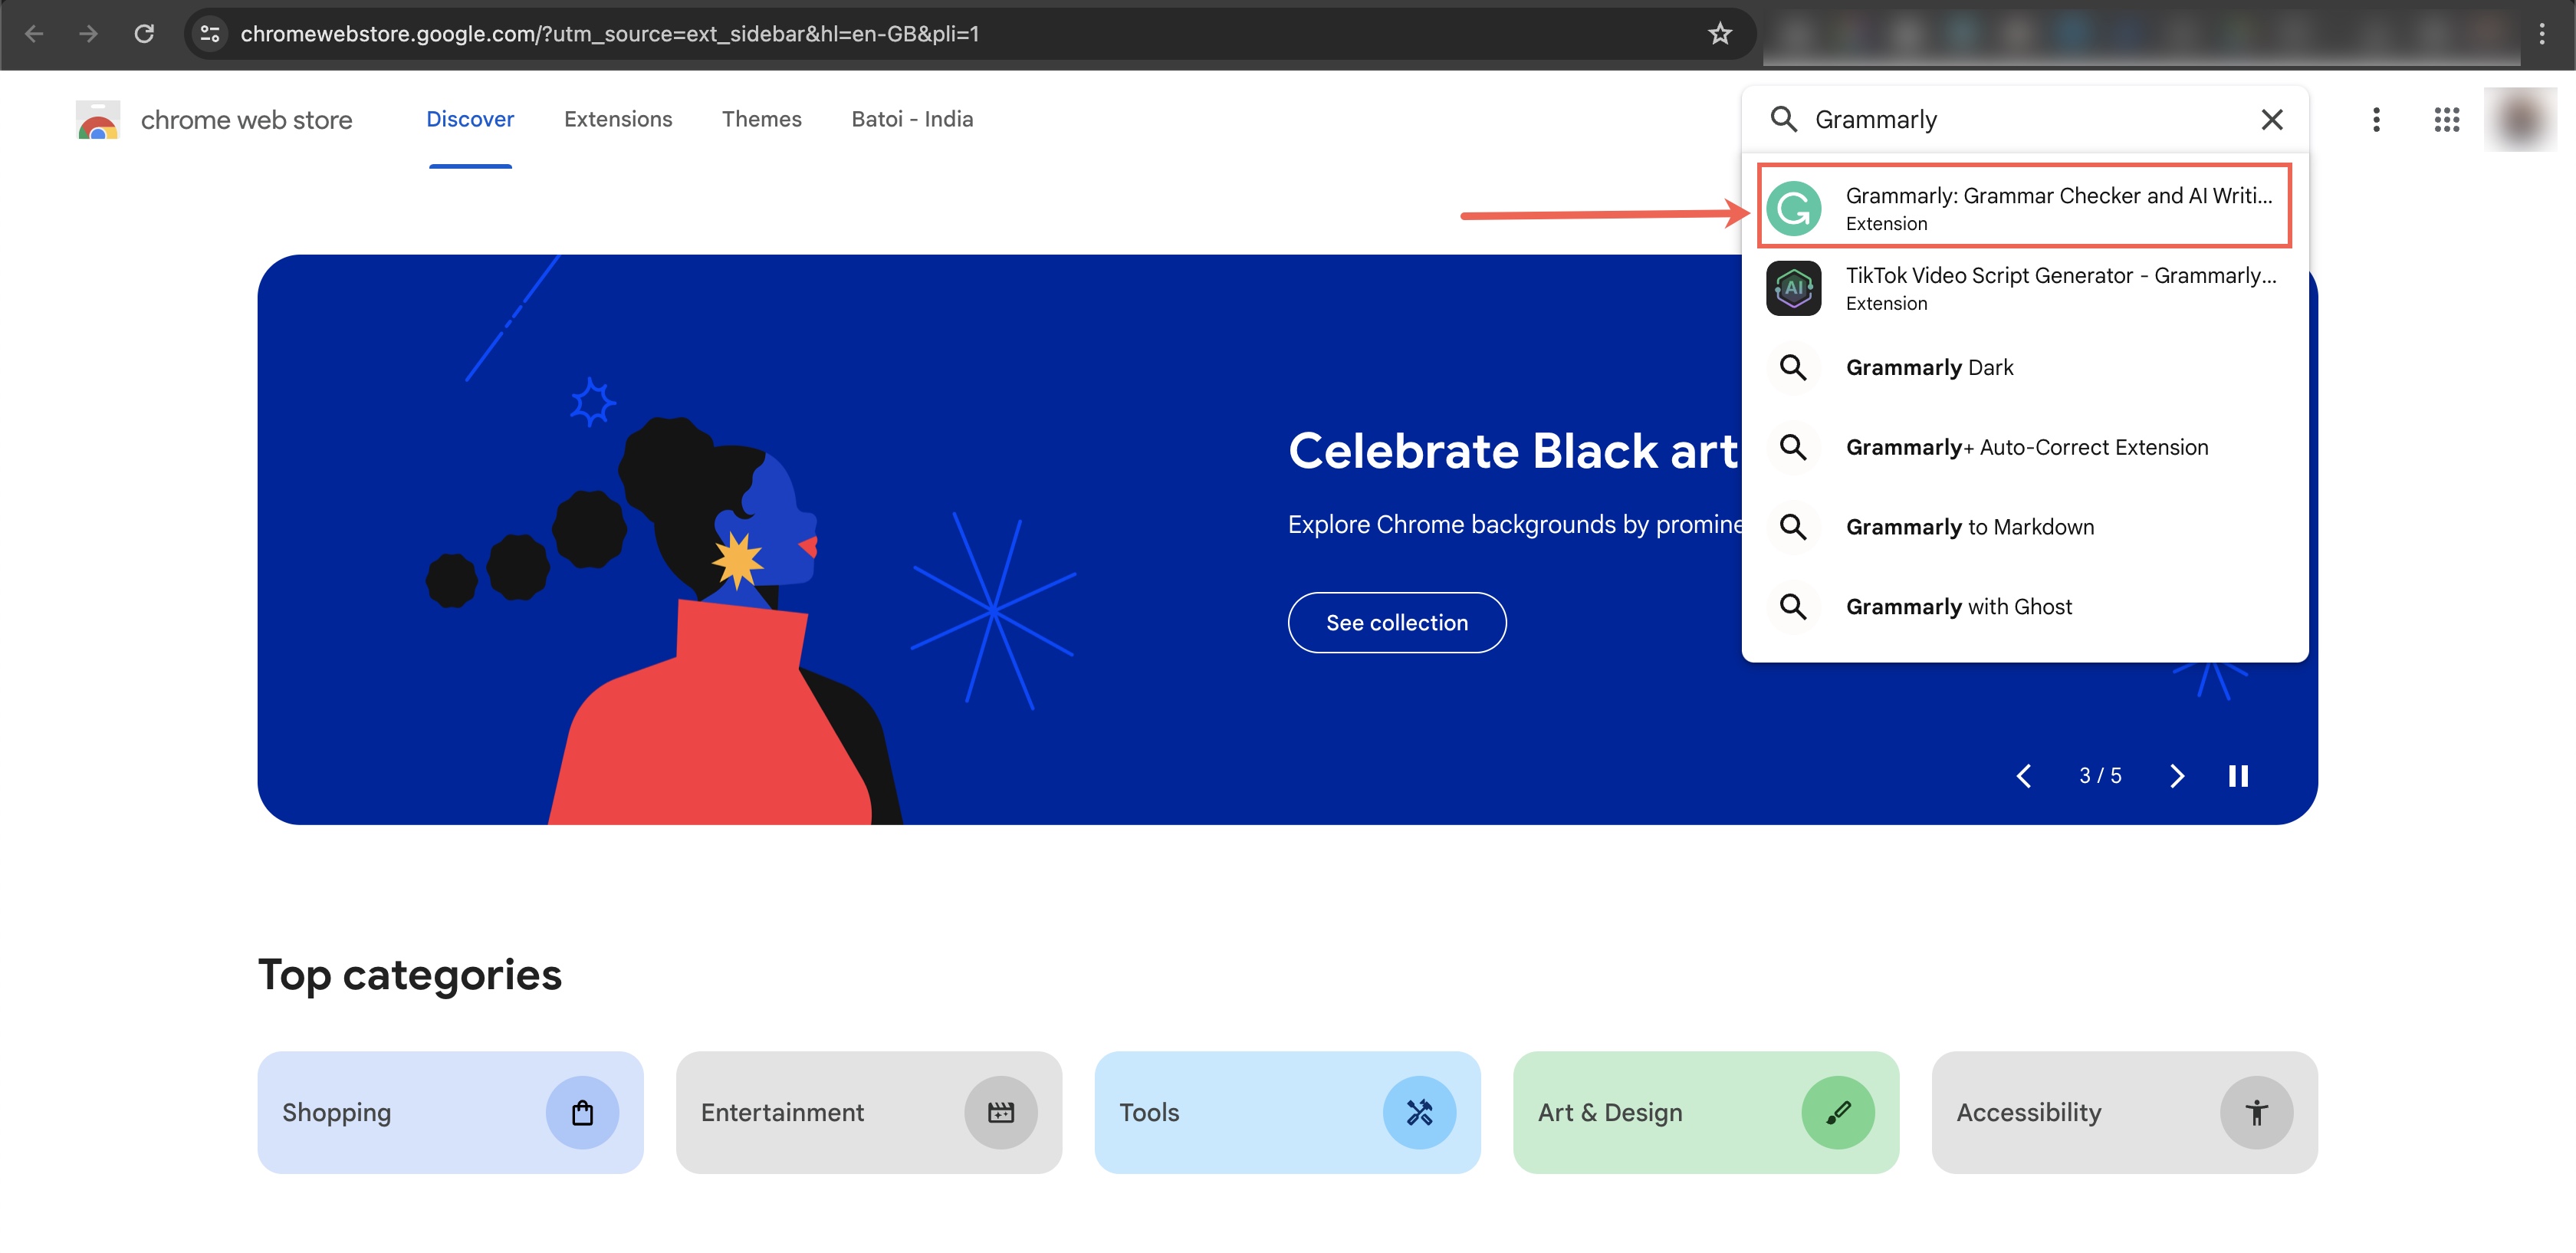
Click the first link, ‘Grammarly: Grammar Checker and AI Writing App’, as illustrated in Figure 3 above. You will be redirected to the ‘Grammarly’ extension dashboard page, as shown in Figure 4 below.
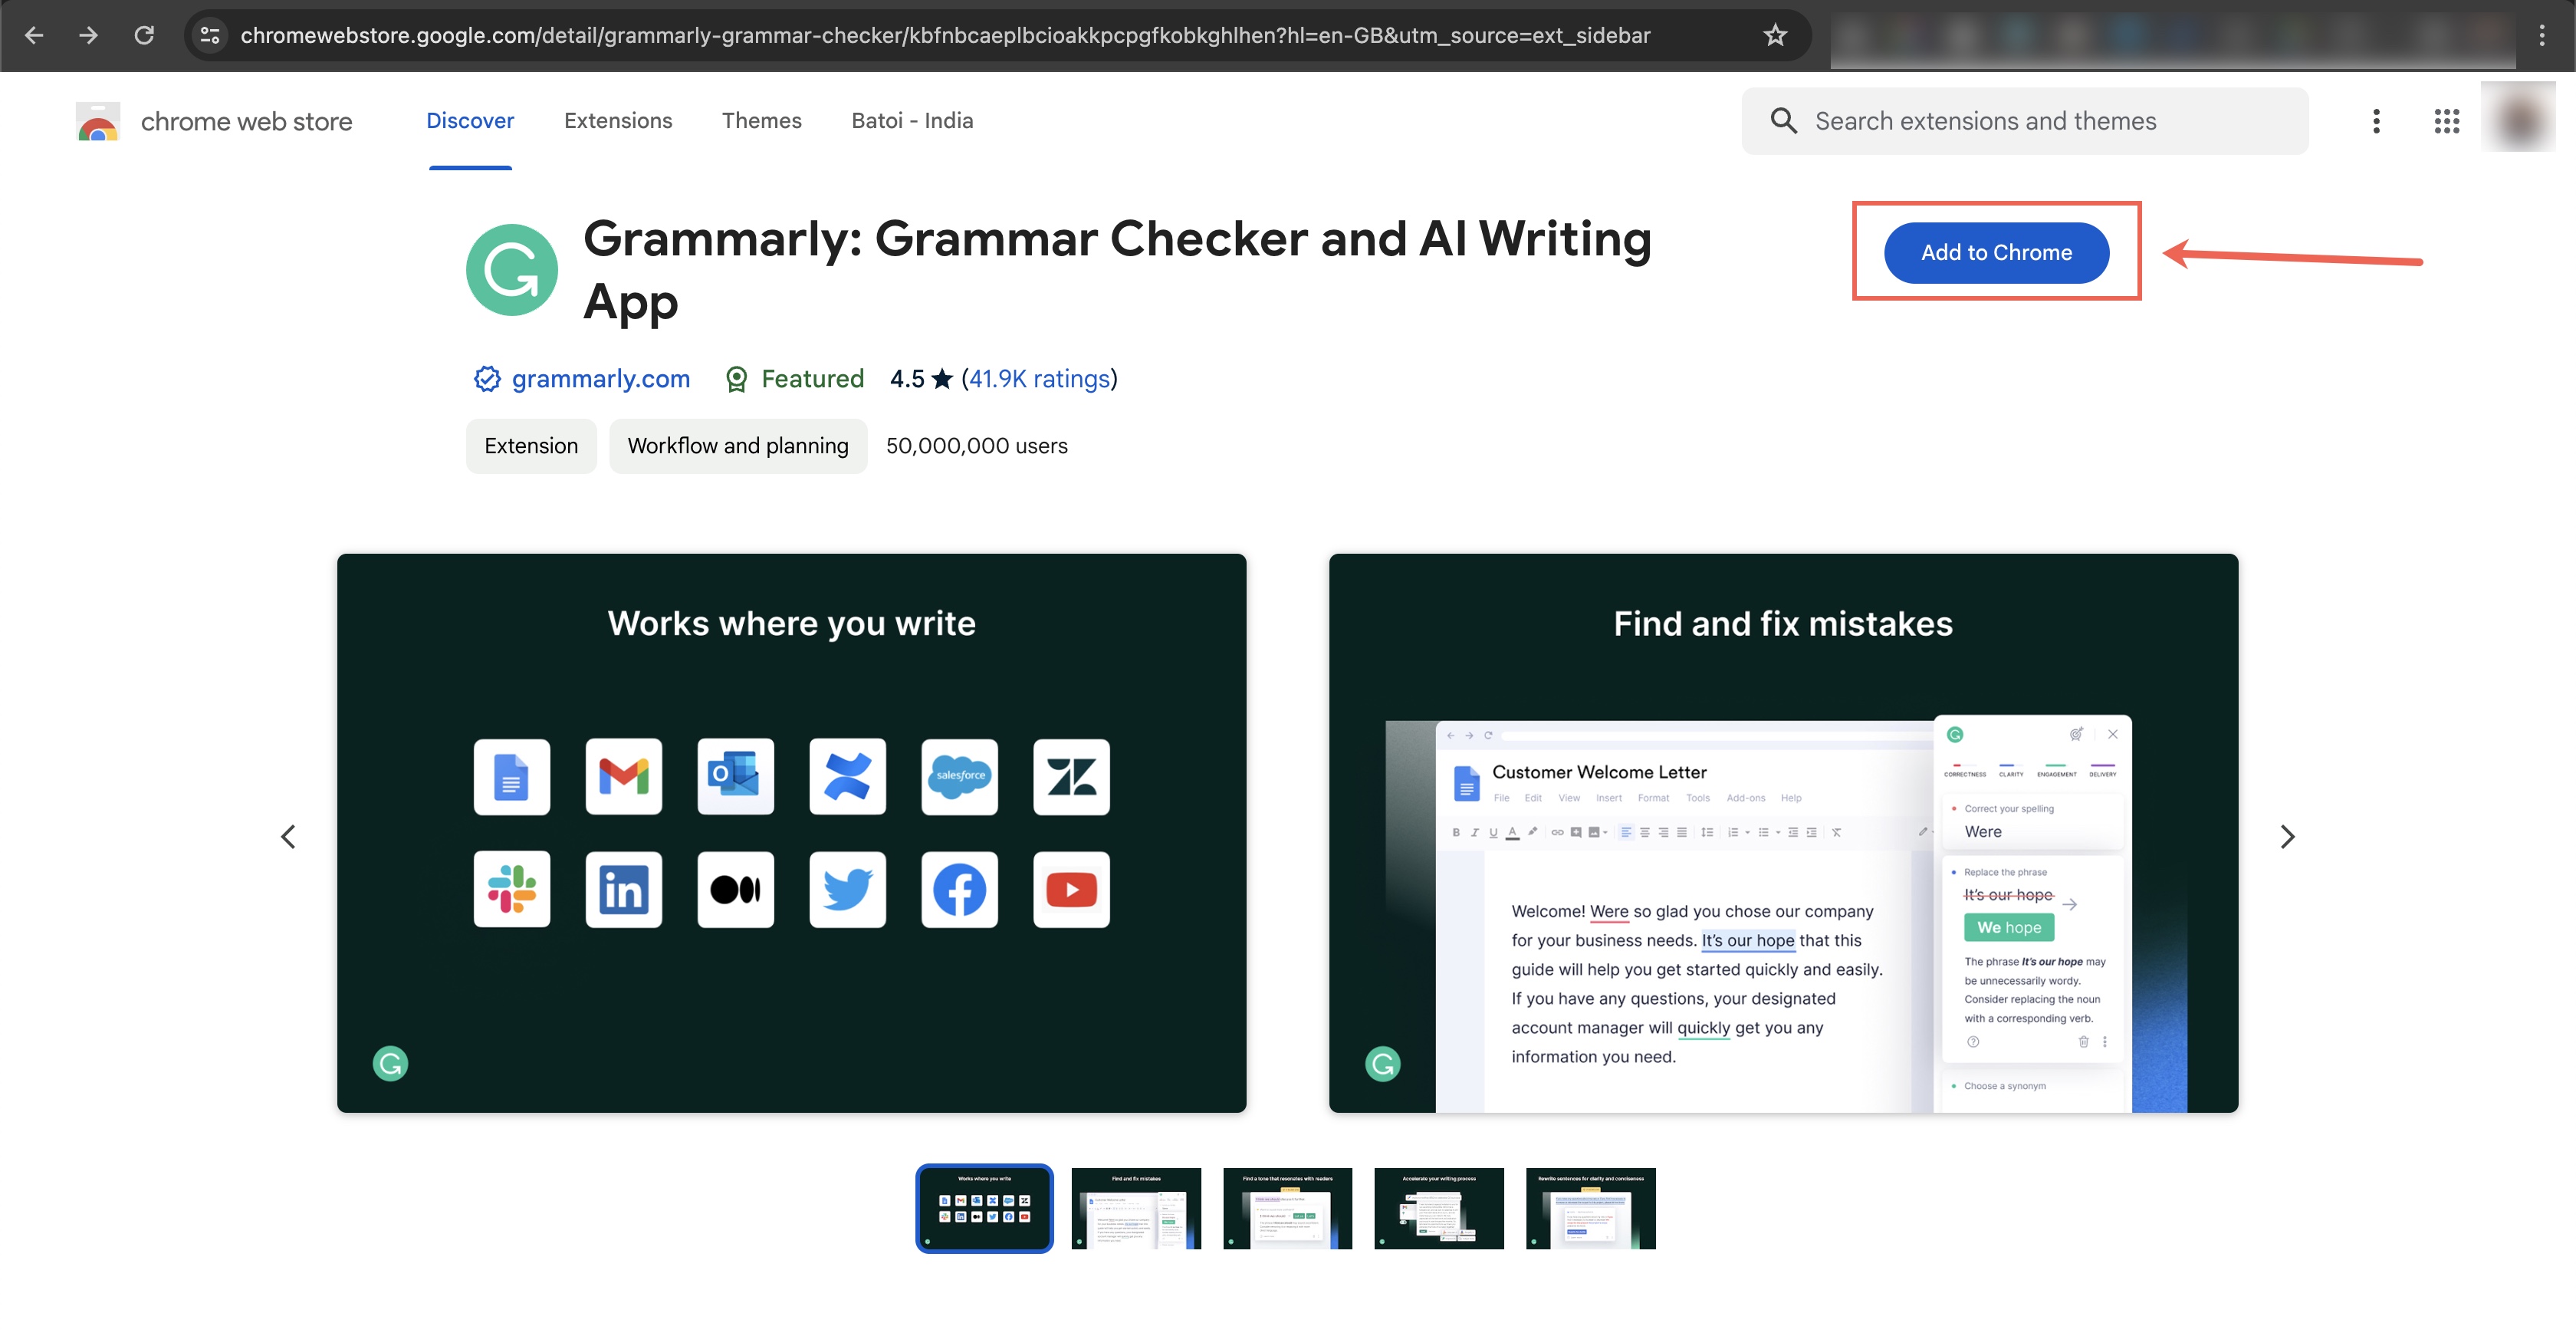
Click the Add to Chrome button, as illustrated in Figure 4 above, and a pop-up window will appear to grant the permission, as shown in Figure 5 below.
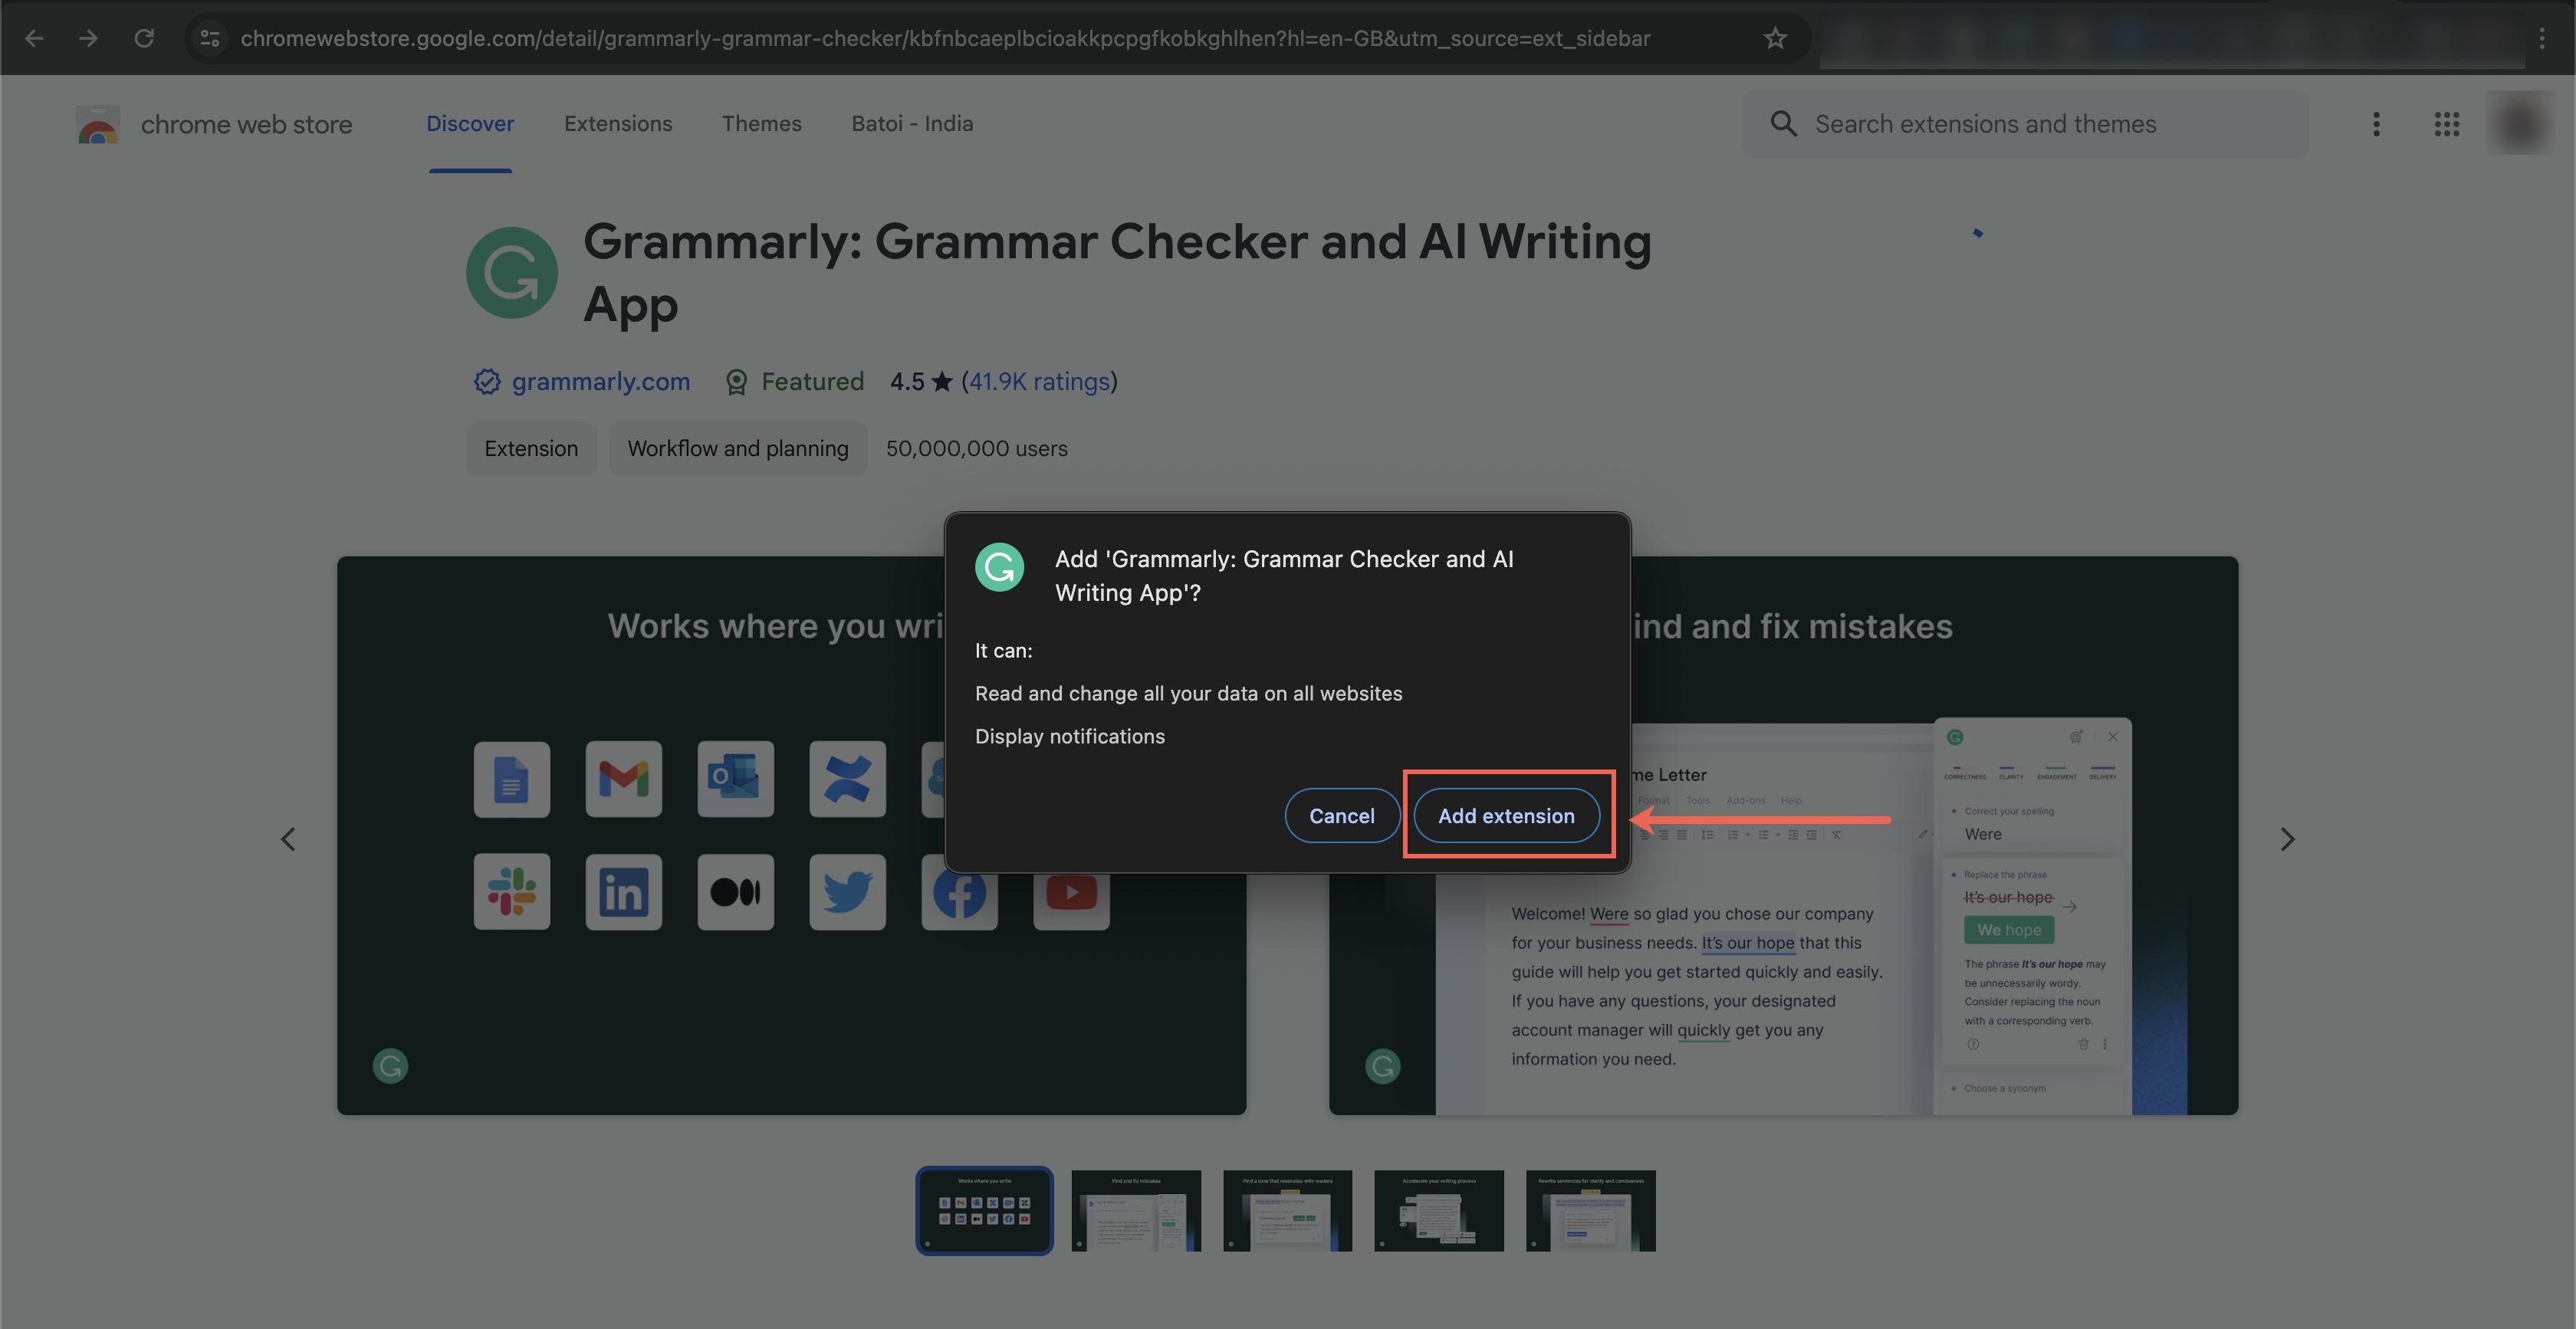
Click the Add extension button, as illustrated in Figure 5 above, and Chrome will install the extension for you. Once installed, you will be redirected to the activation success page, as shown in Figure 6 below.

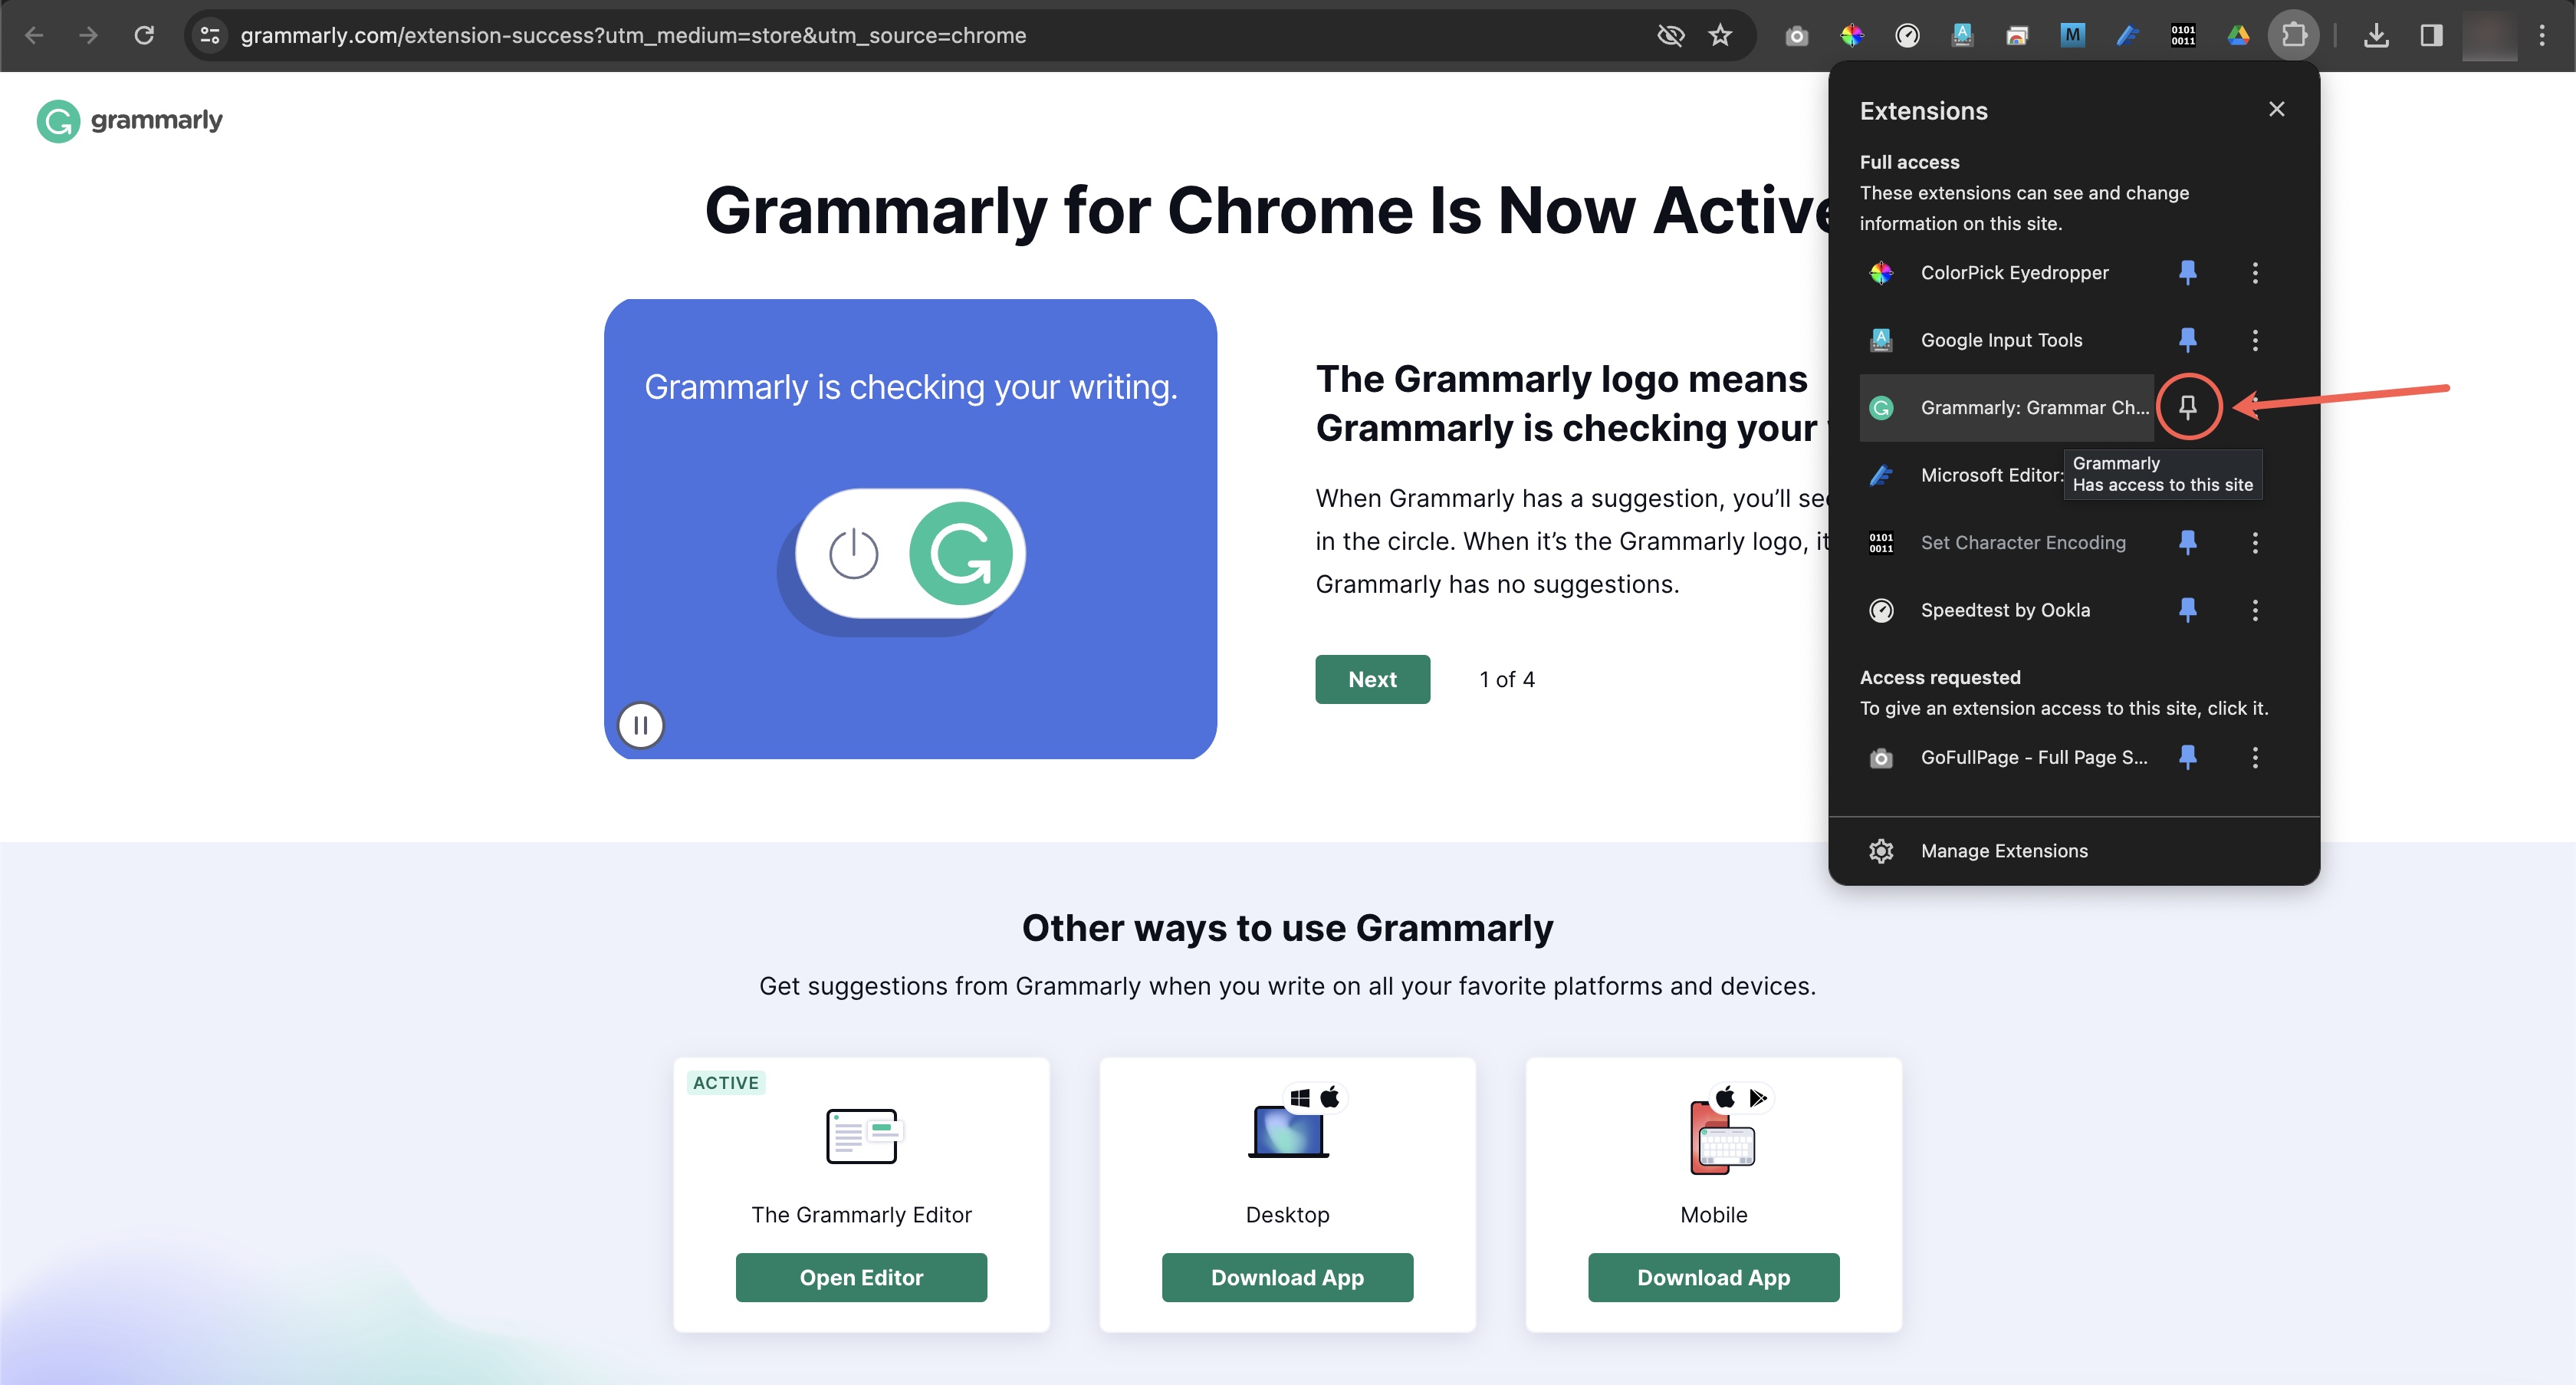
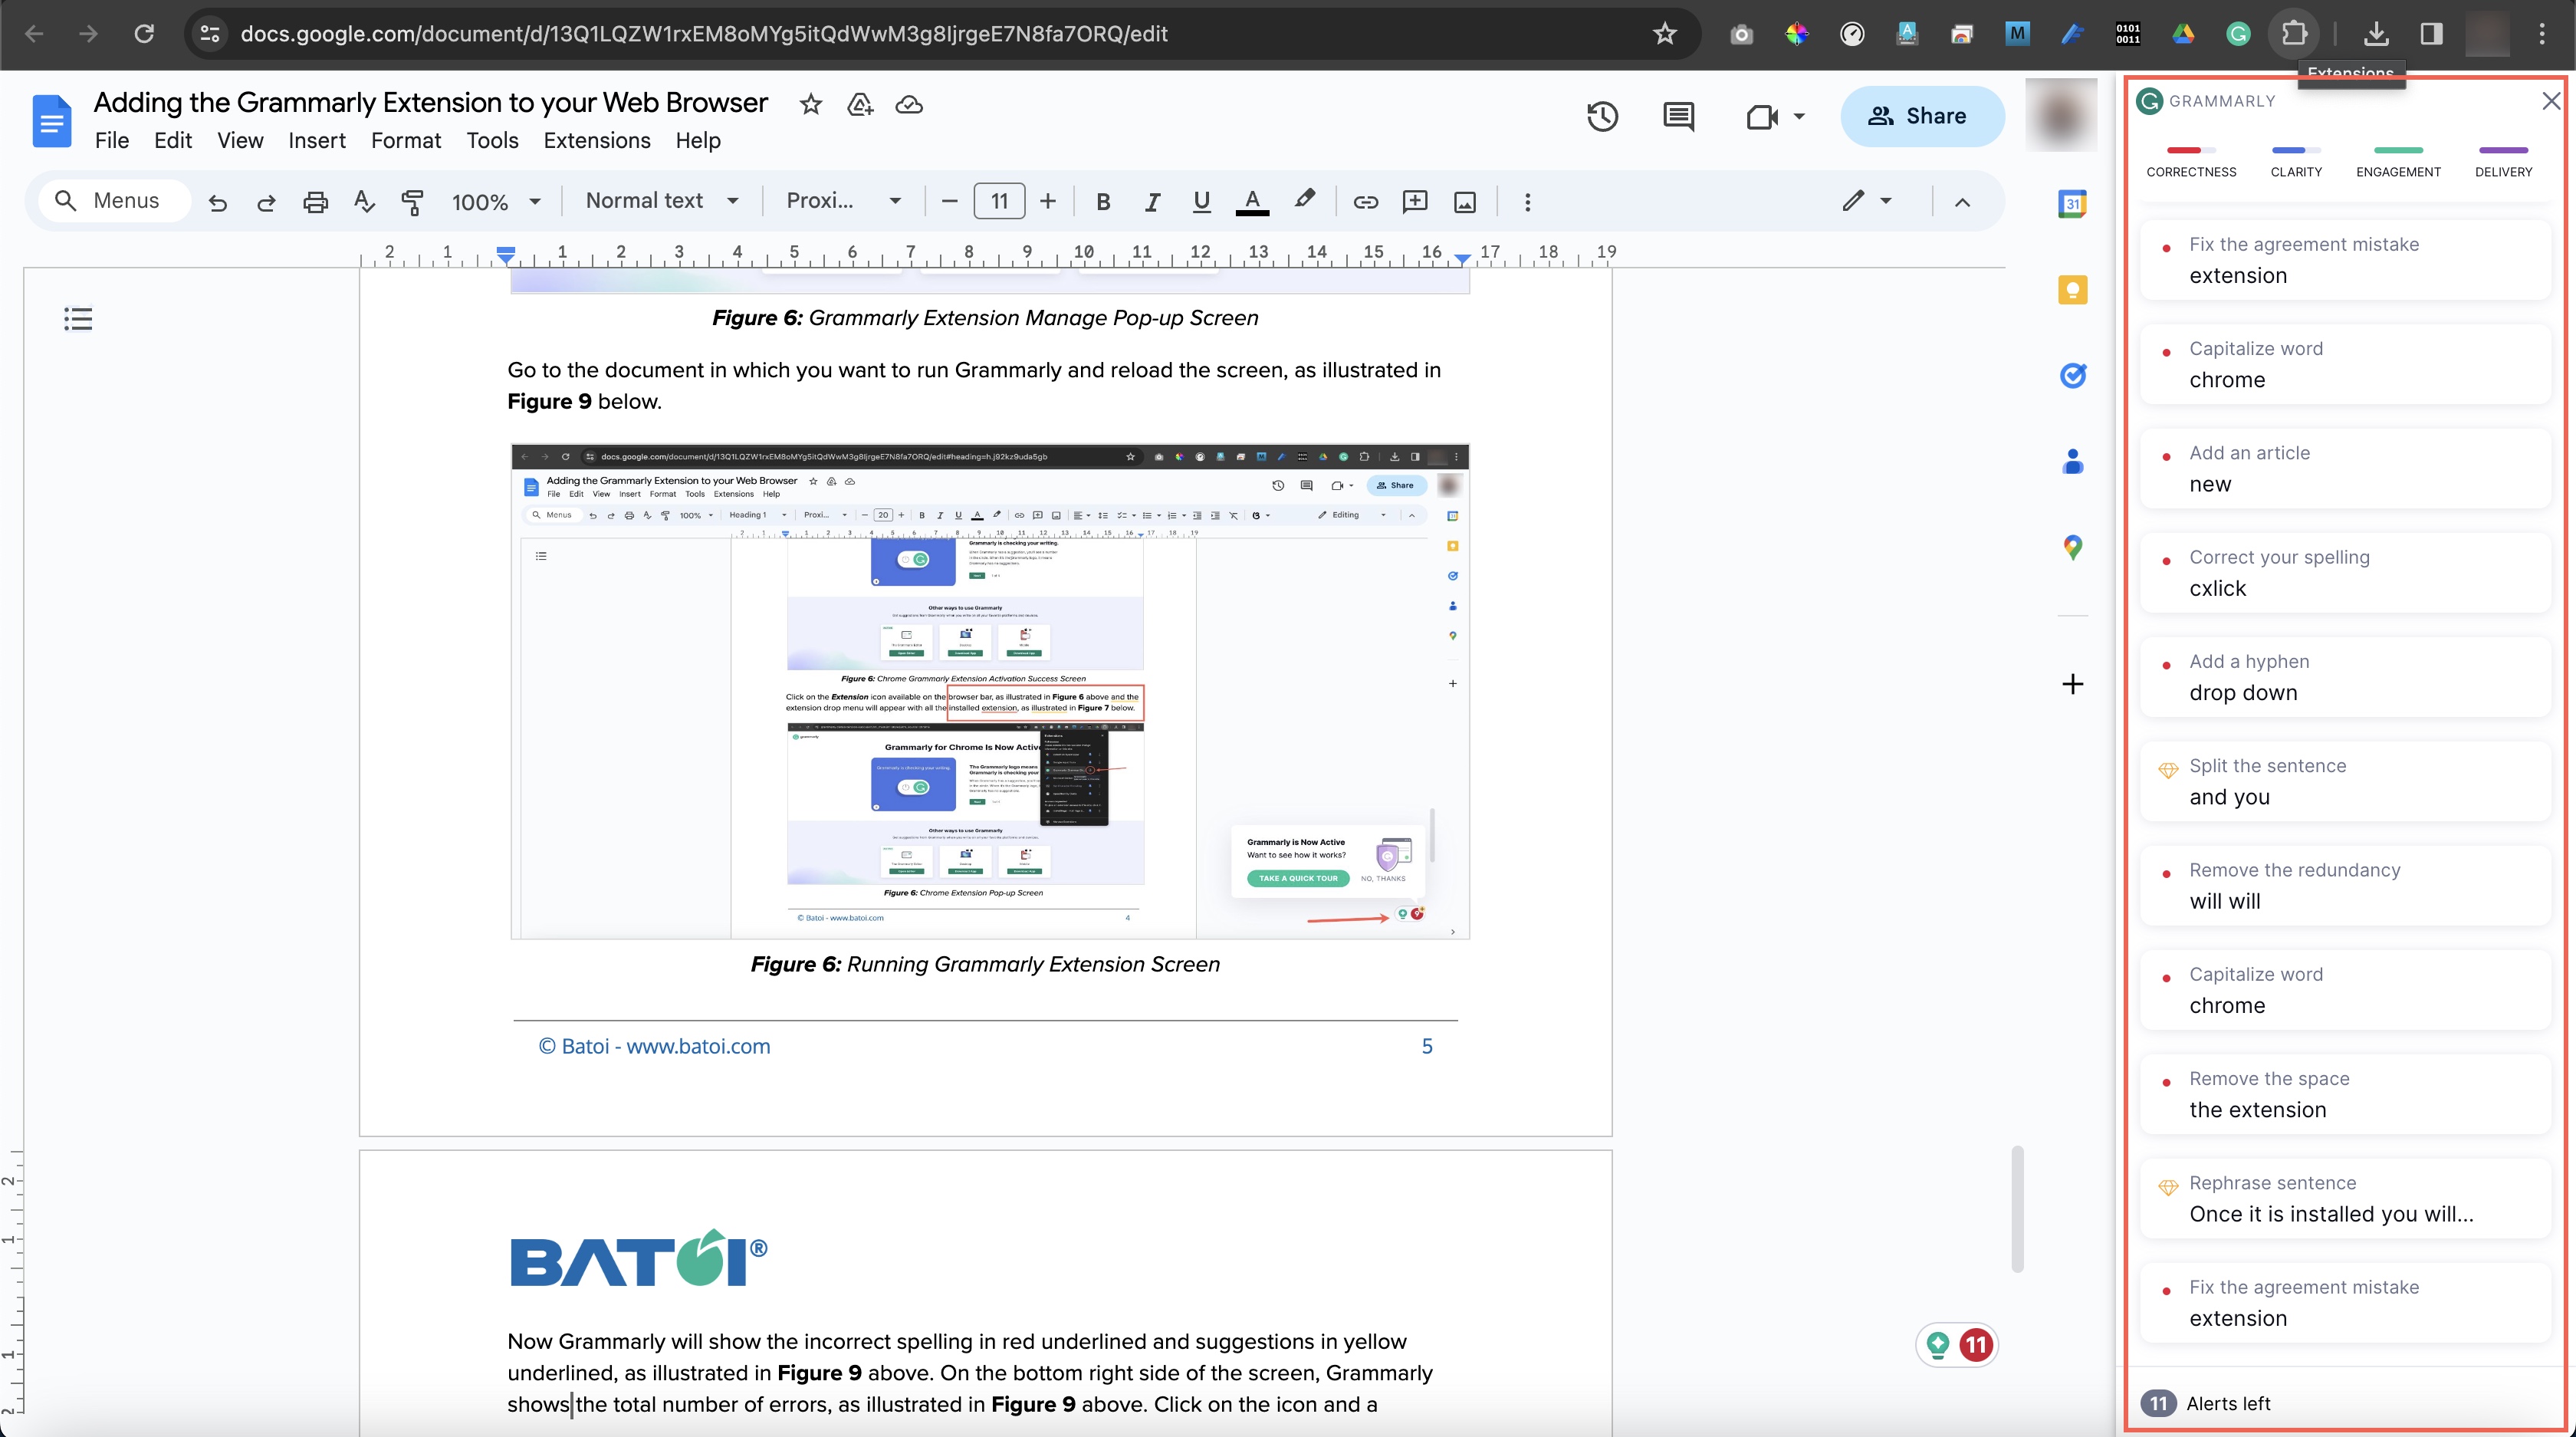
Click the Extension icon available on the browser bar, as illustrated in Figure 6 above, and the extensions dropdown menu will appear with all the installed extensions, as shown in Figure 7 below.
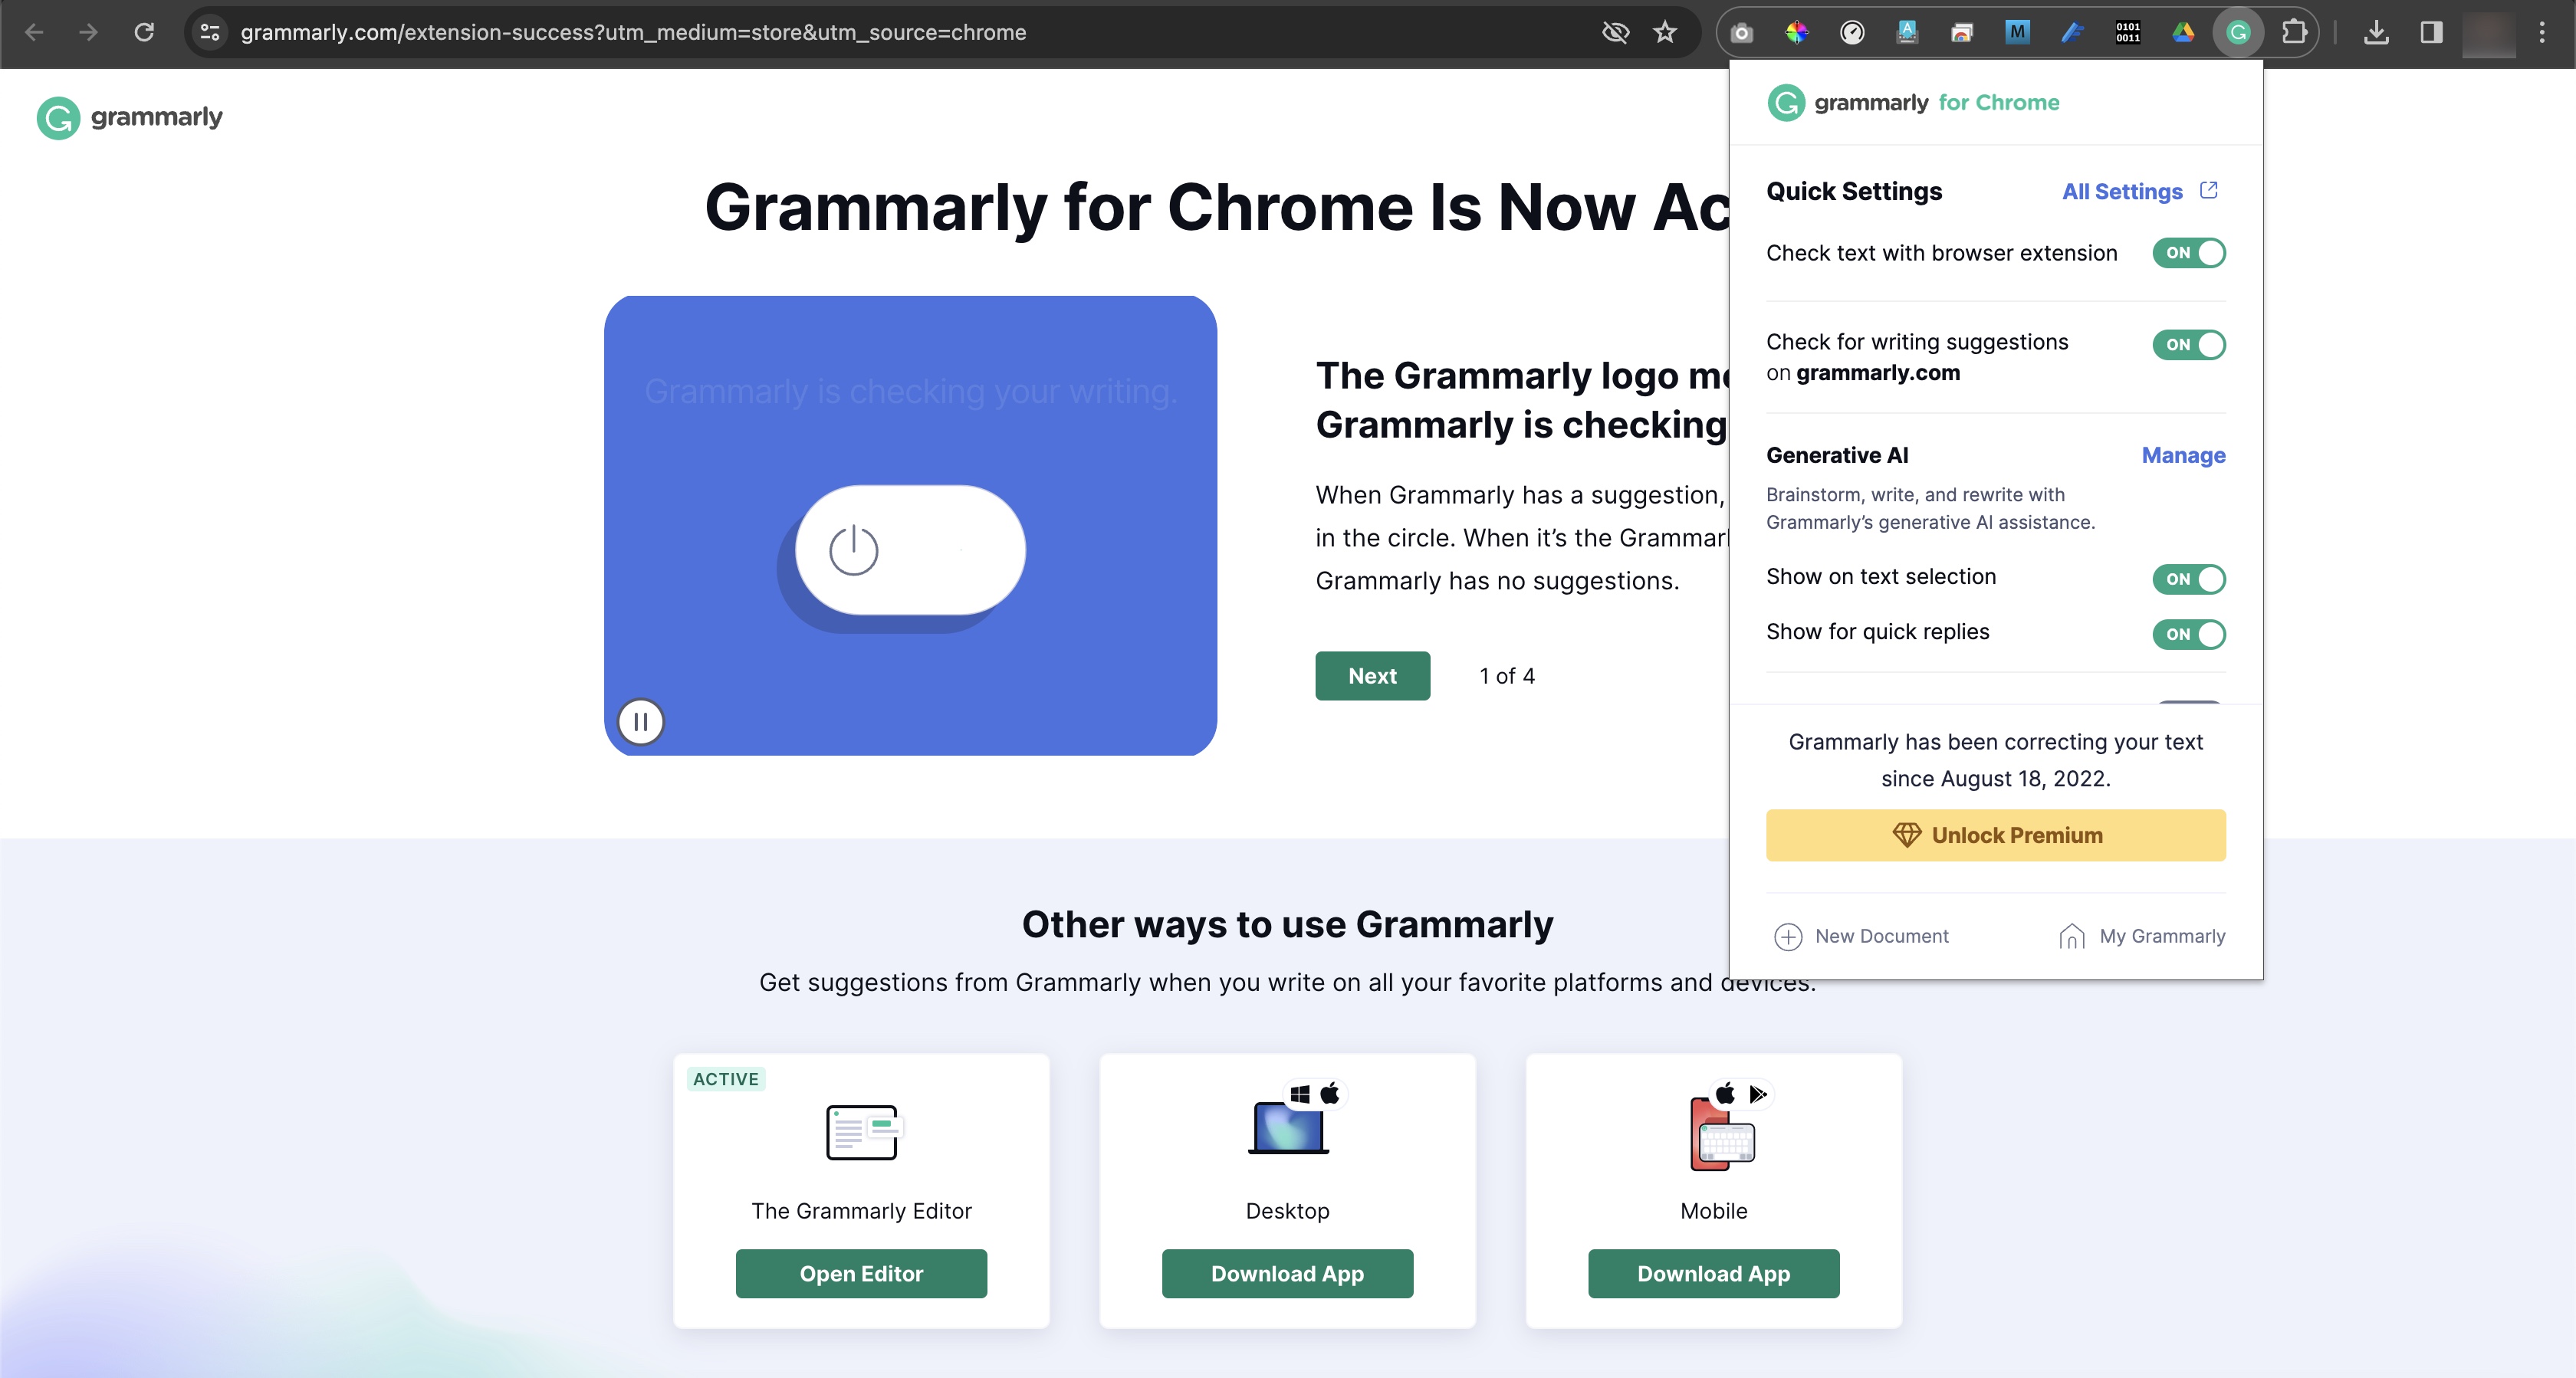
Click the Pin icon from the pop-up dropdown to pin the extension to the Chrome bar. Once the extension is pinned to the browser, click the extension icon, as illustrated in Figure 8 below.
Go to the document where you want to run Grammarly and reload the screen, as illustrated in Figure 9 below.
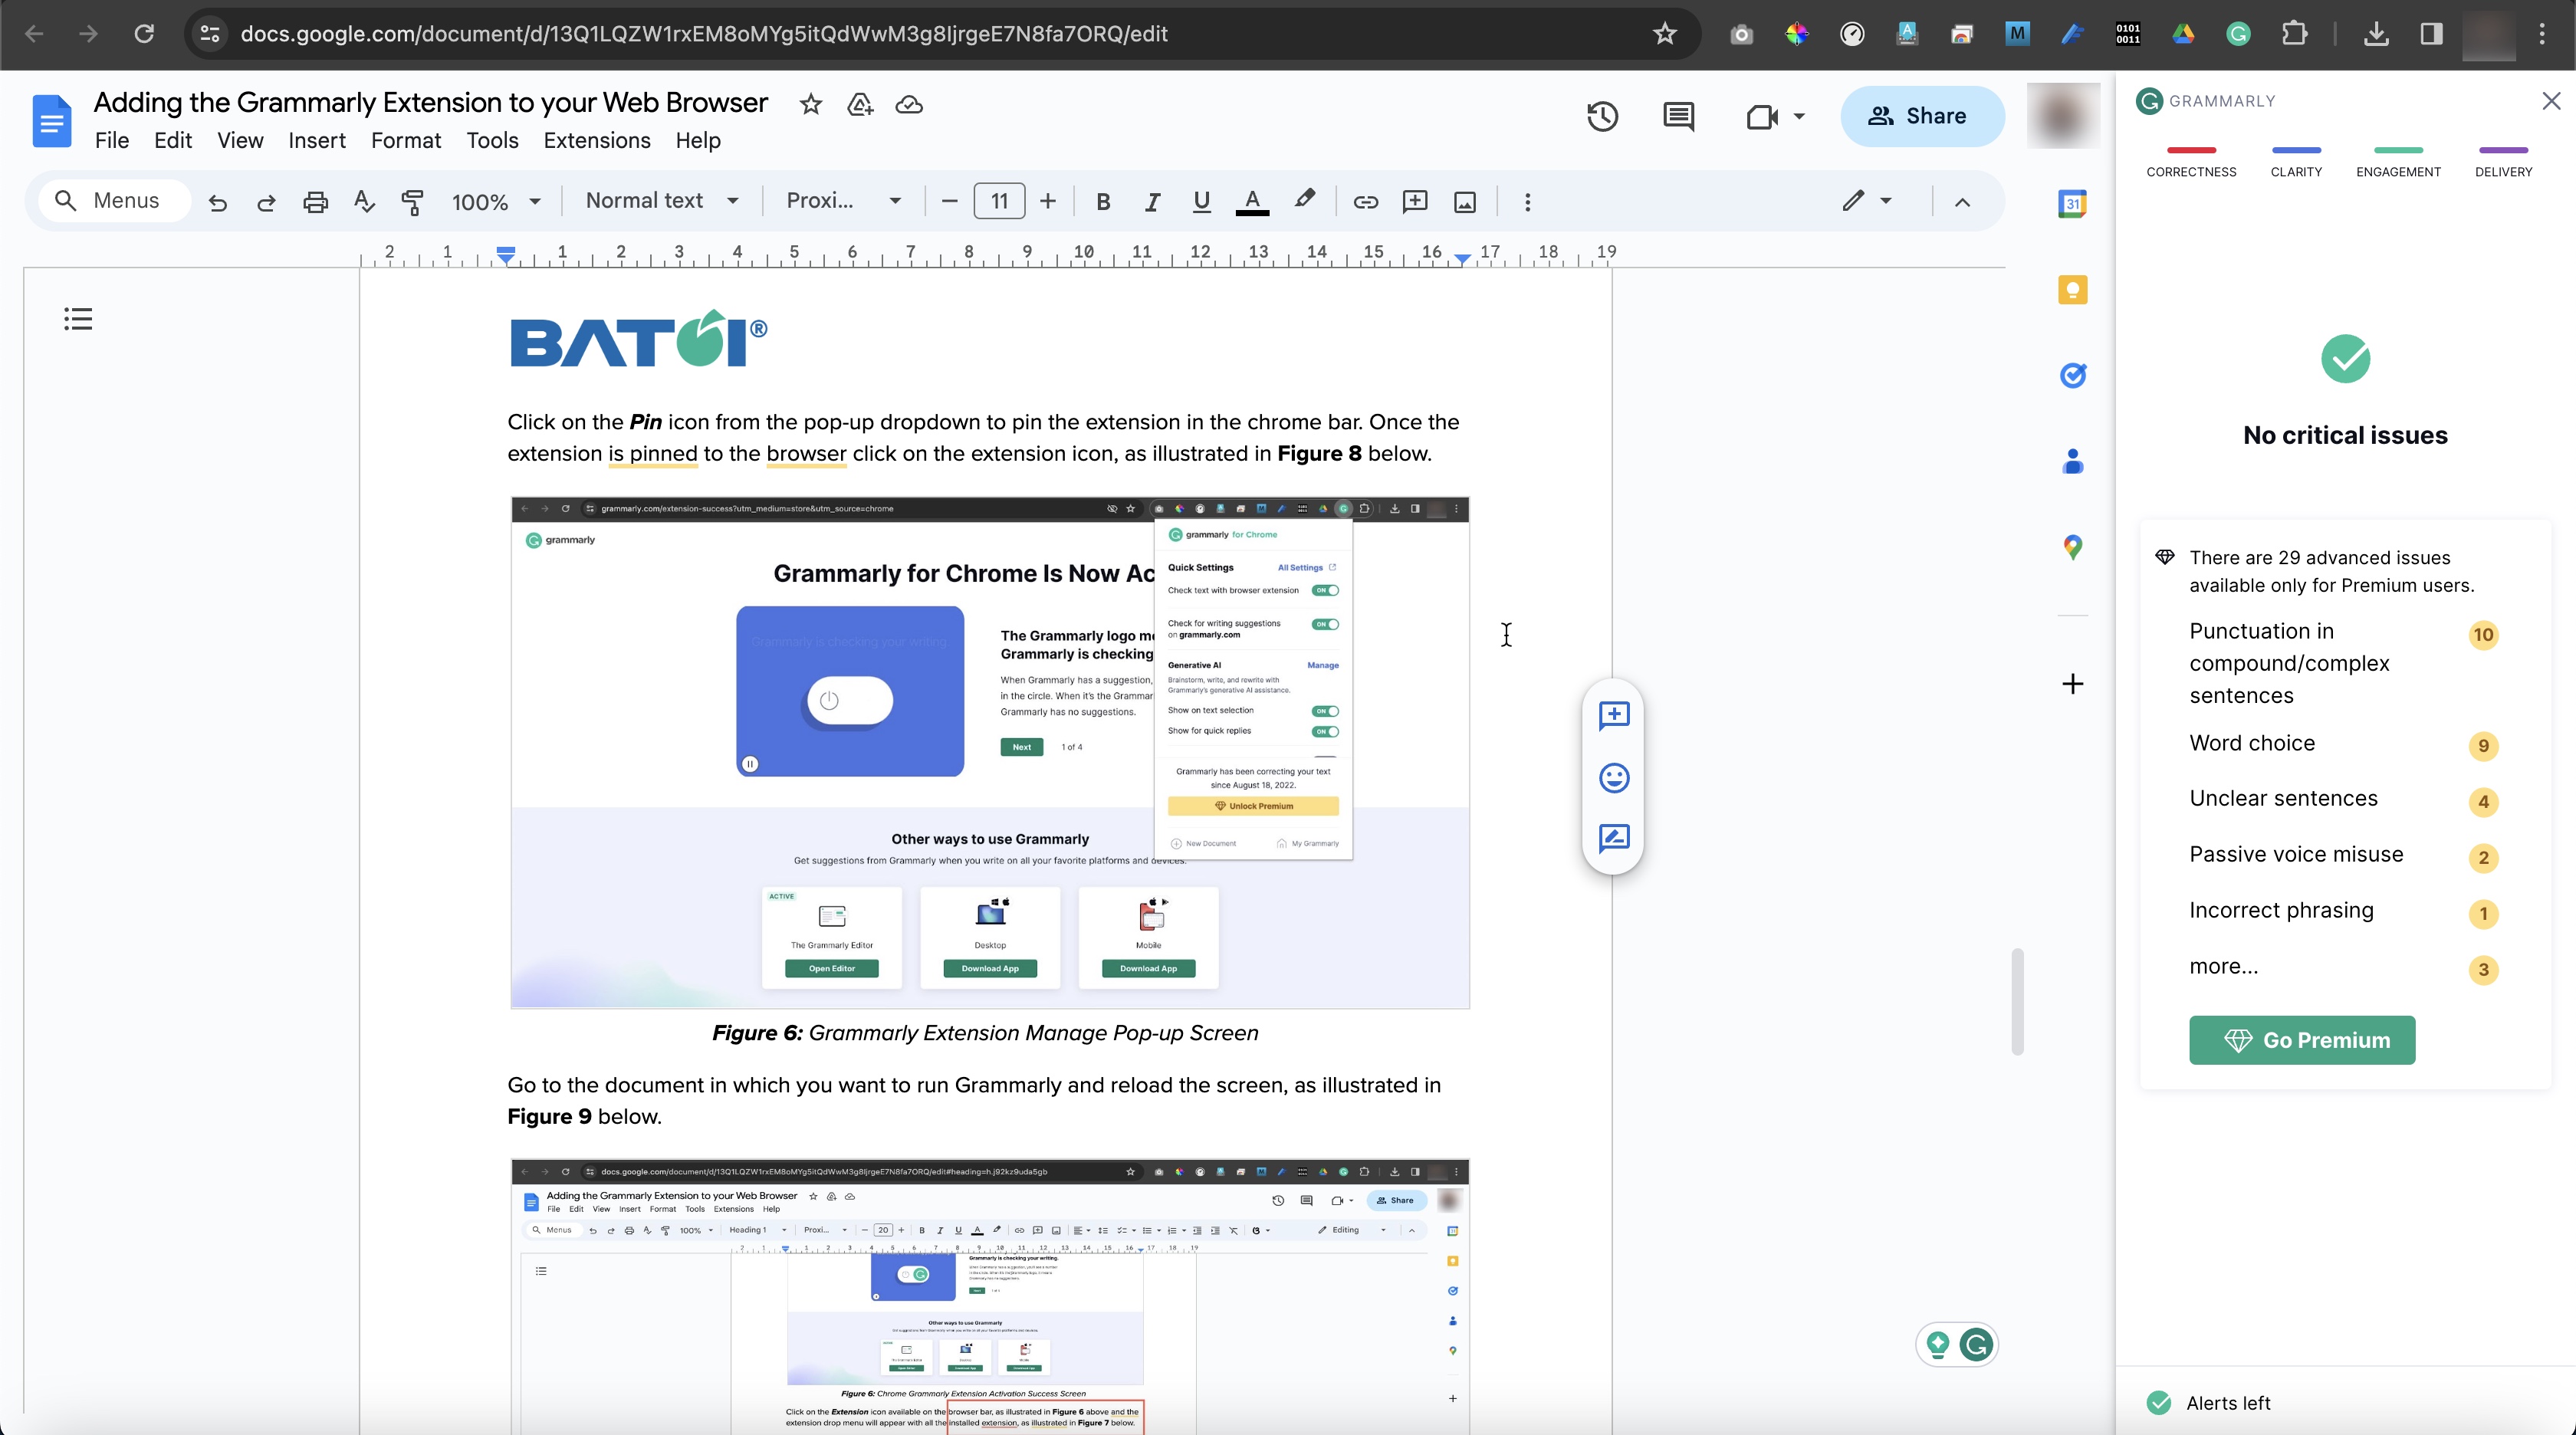
Now, Grammarly will show the words with incorrect spellings, if any, with red squiggly lines under them and the suggestions with yellow squiggly lines, as illustrated in Figure 9 above. Grammarly shows the total number of errors, as illustrated in Figure 9 above. Click on the icon, and the suggestion screen will appear on the right side of the screen, as shown in Figure 10 below.
Once you correct all the critical errors, Grammarly will show No critical issues on the suggestion screen, as illustrated in Figure 11 below.
Conclusion
As you can see, installing the Grammarly browser extension to Google Chrome is incredibly simple and only takes a few clicks. You can also install this free Grammarly browser extension to Firefox, Edge, or Safari, the steps are nearly identical. This will help your writing be more grammatically correct.