Admin Control Panel
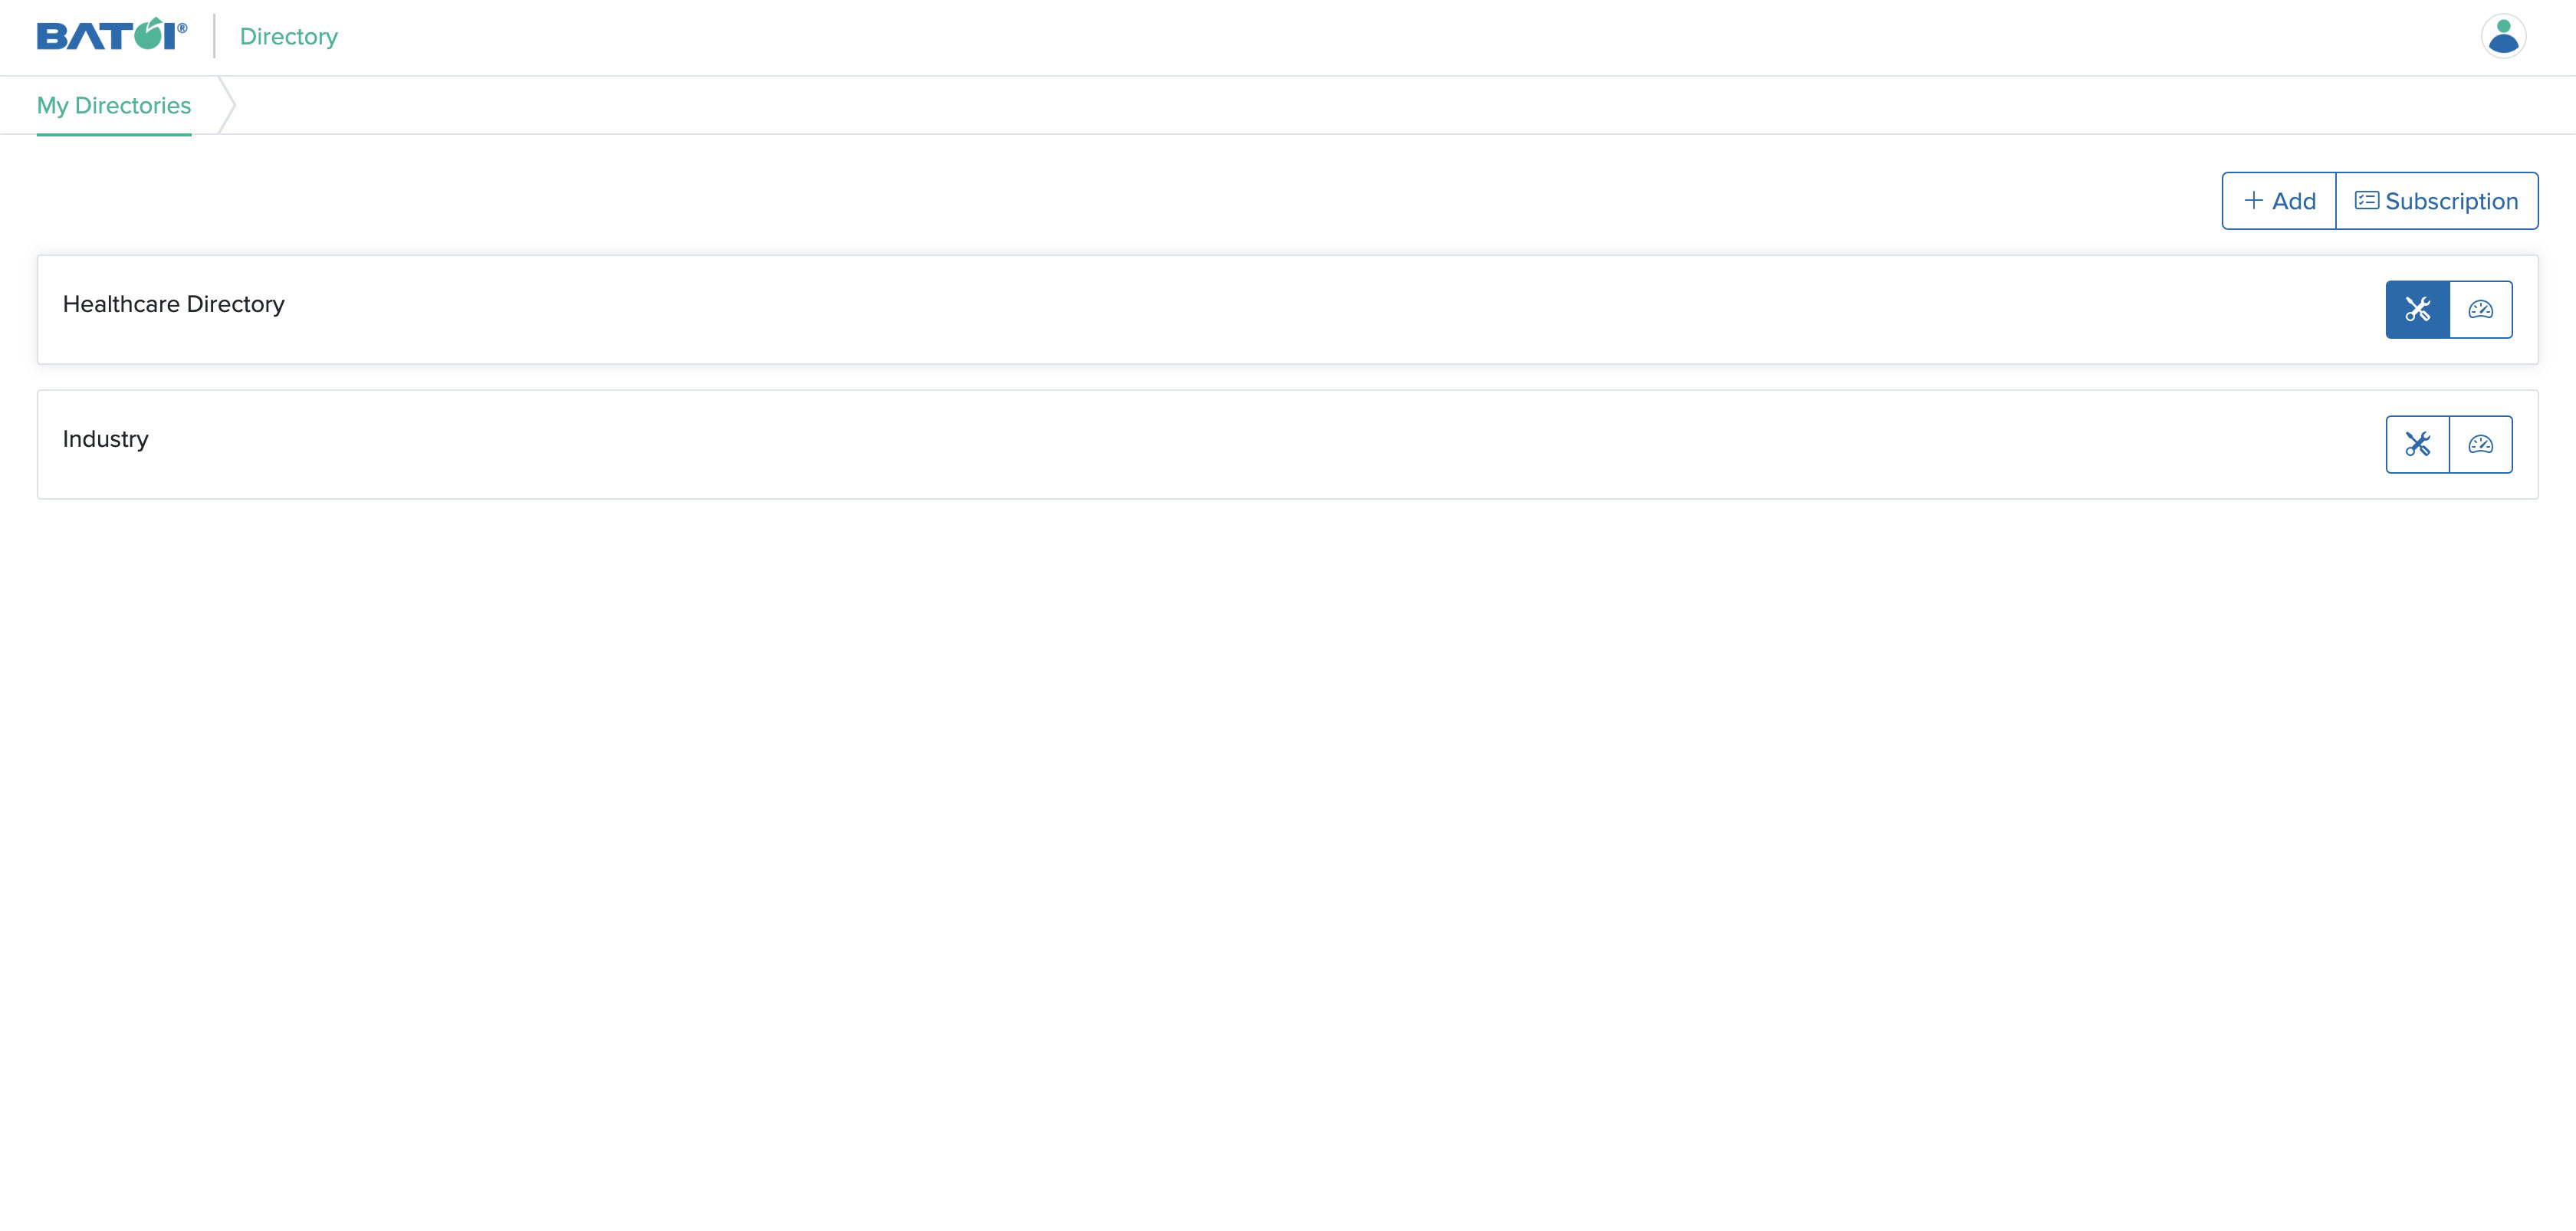
Click the Admin Control Panel button available on the right side of the individual directory from the directory dashboard, as shown in Figure 1 below.
Dashboard
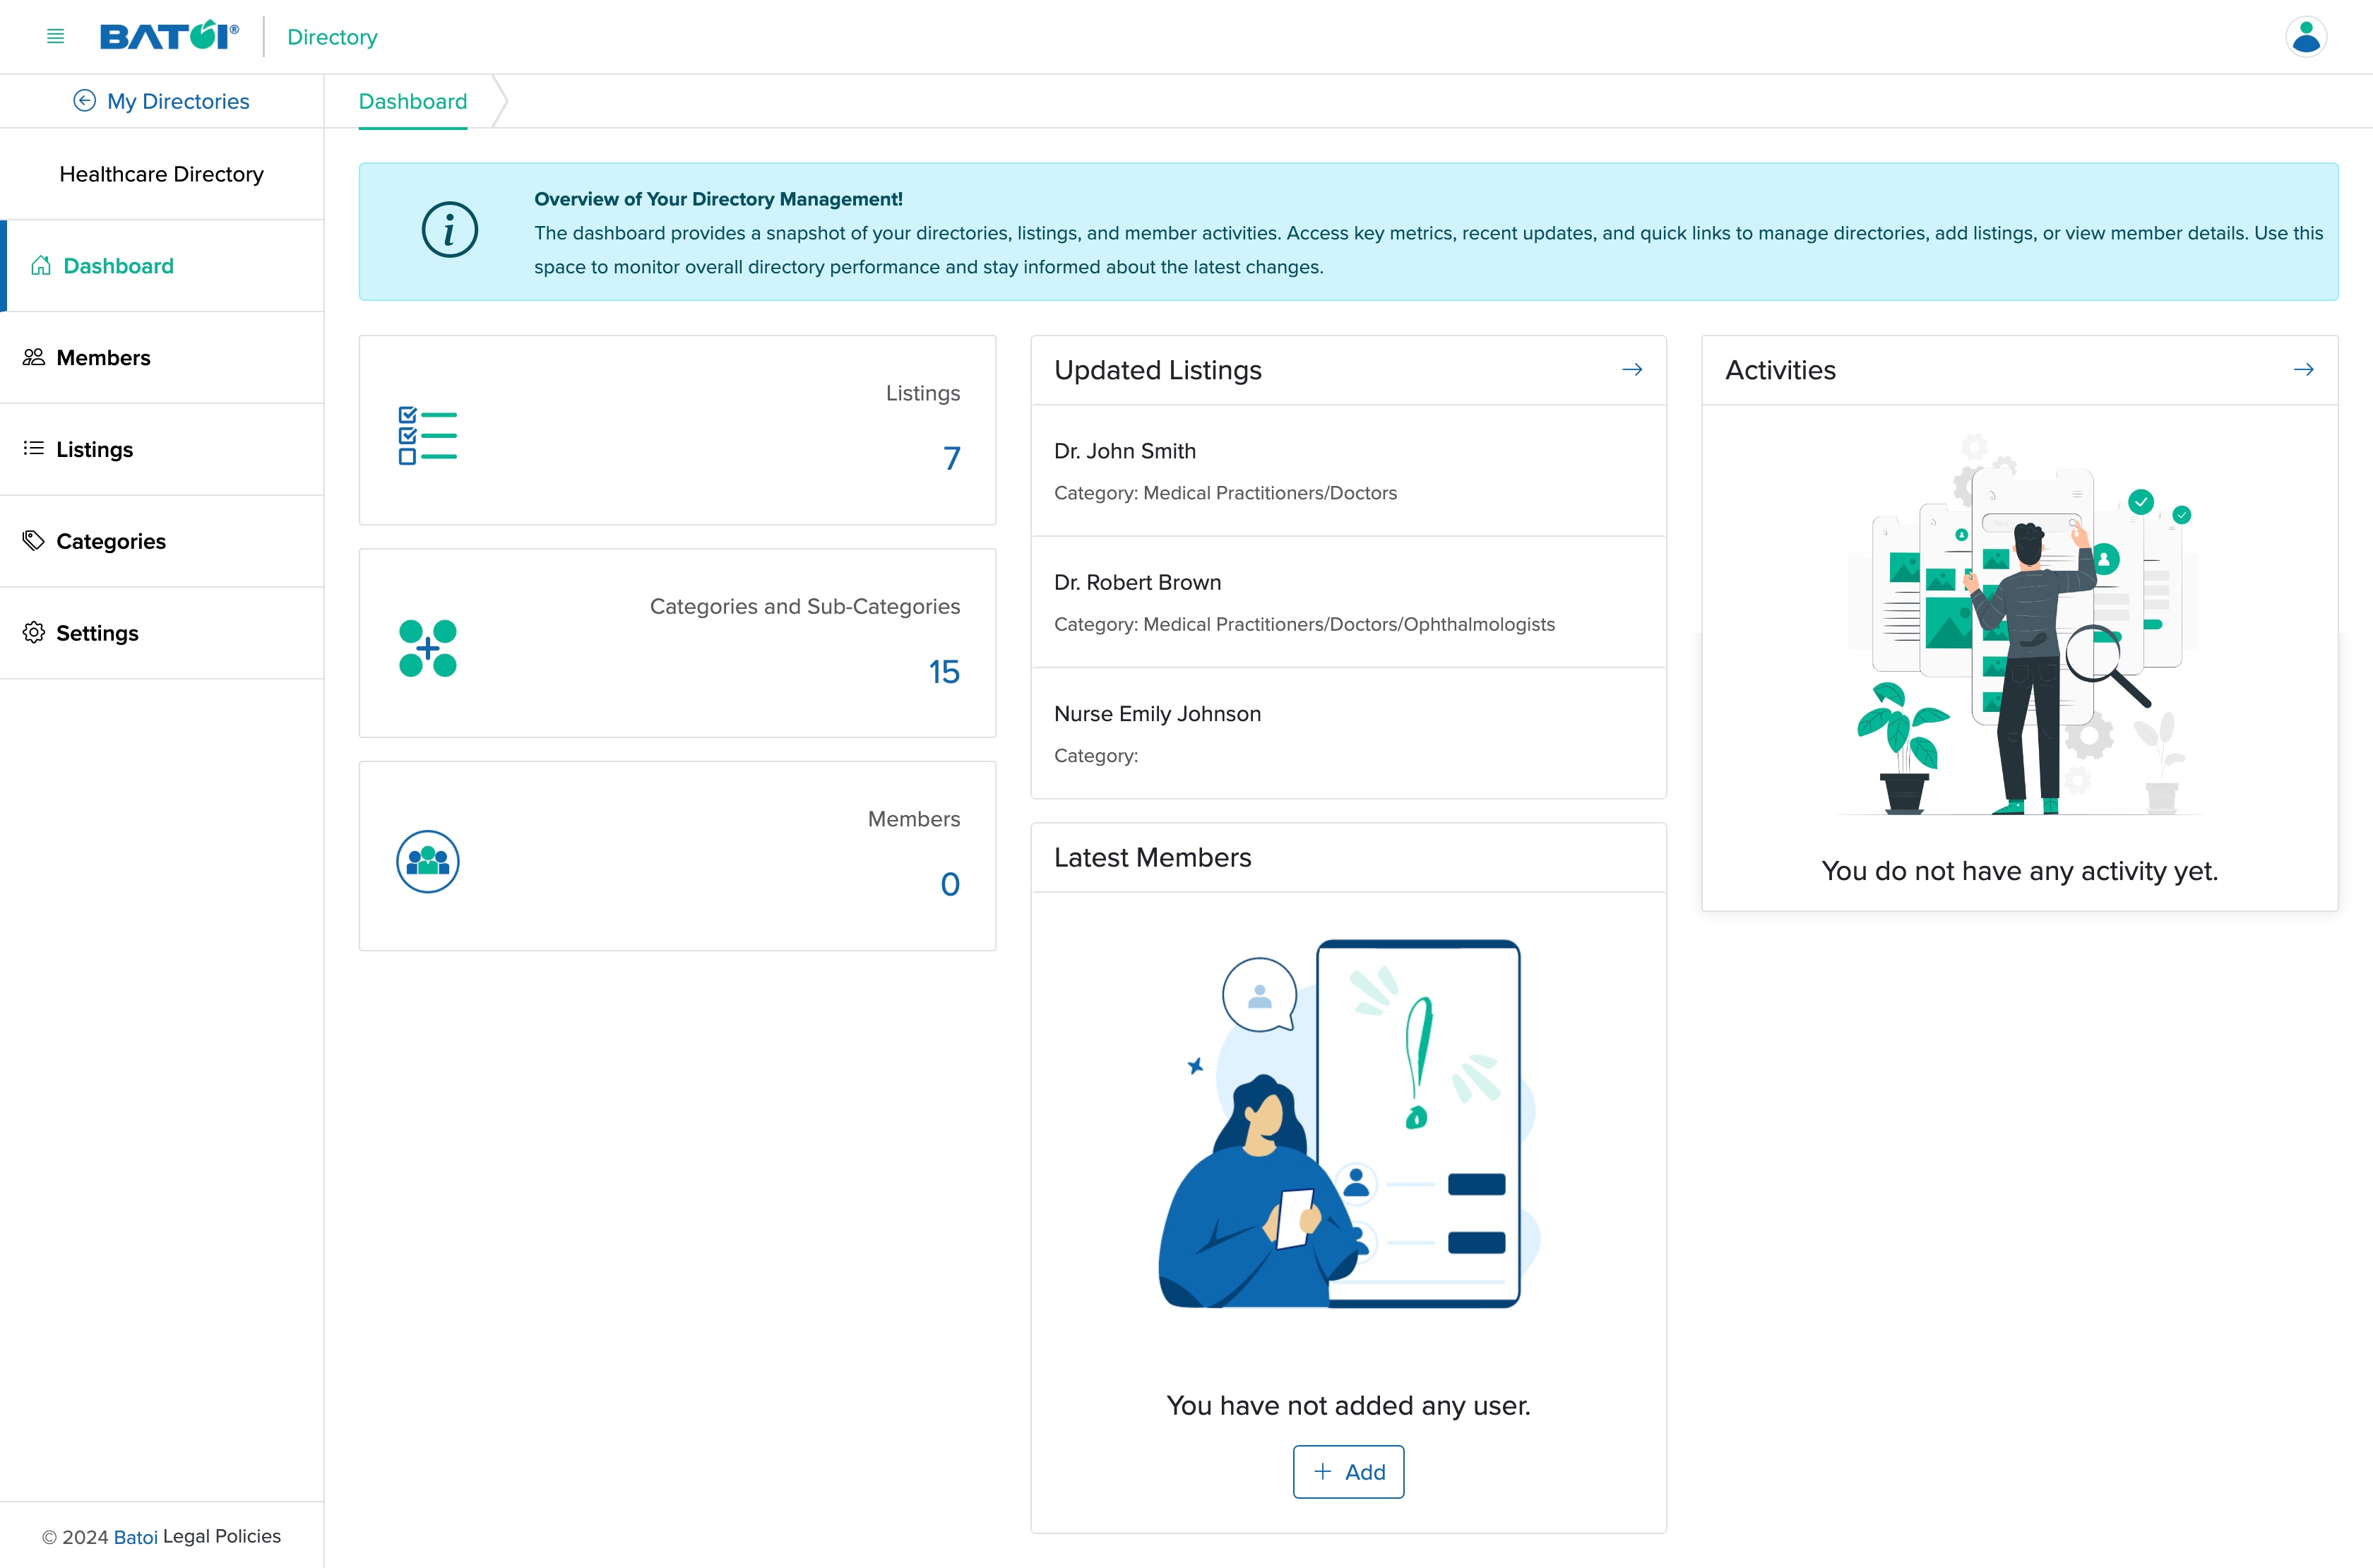
After clicking the Admin Control Panel button, you will be redirected to the dashboard page, as shown in Figure 2.
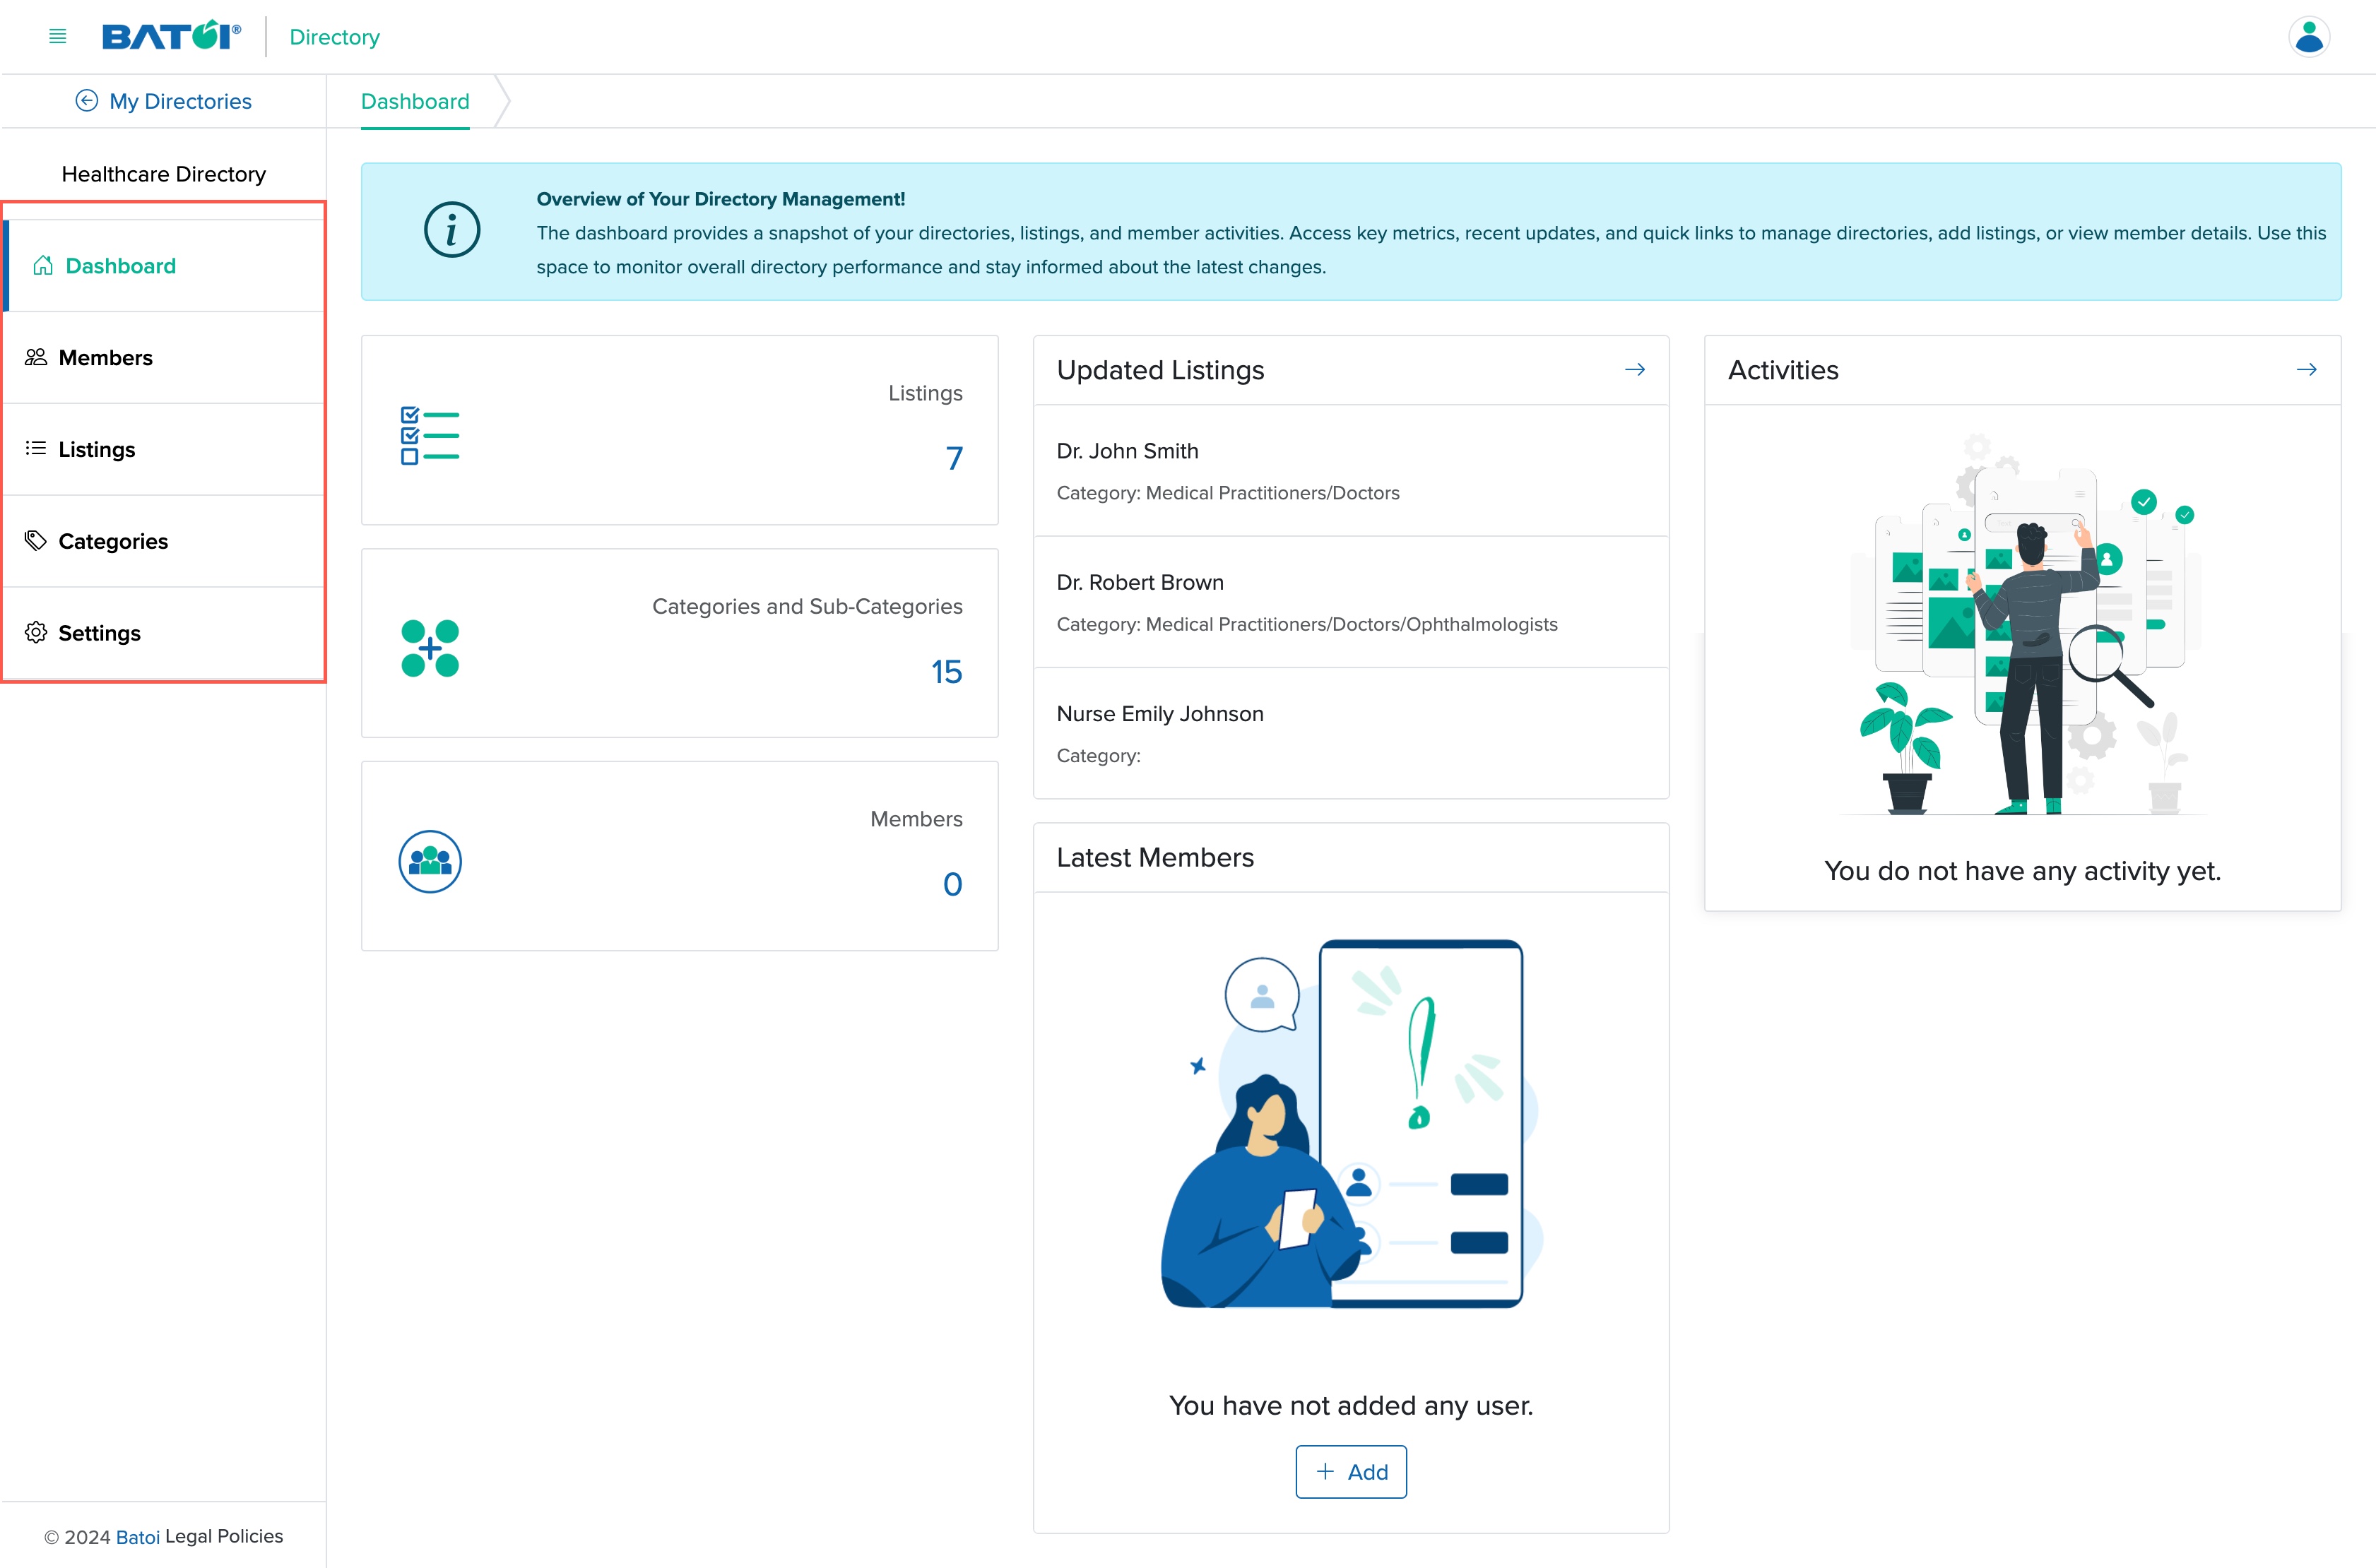
On the individual directory admin dashboard, you will find the primary menu as listed below, as shown in Figure 3.
- Dashboard
- Members
- Listings
- Categories
- Settings
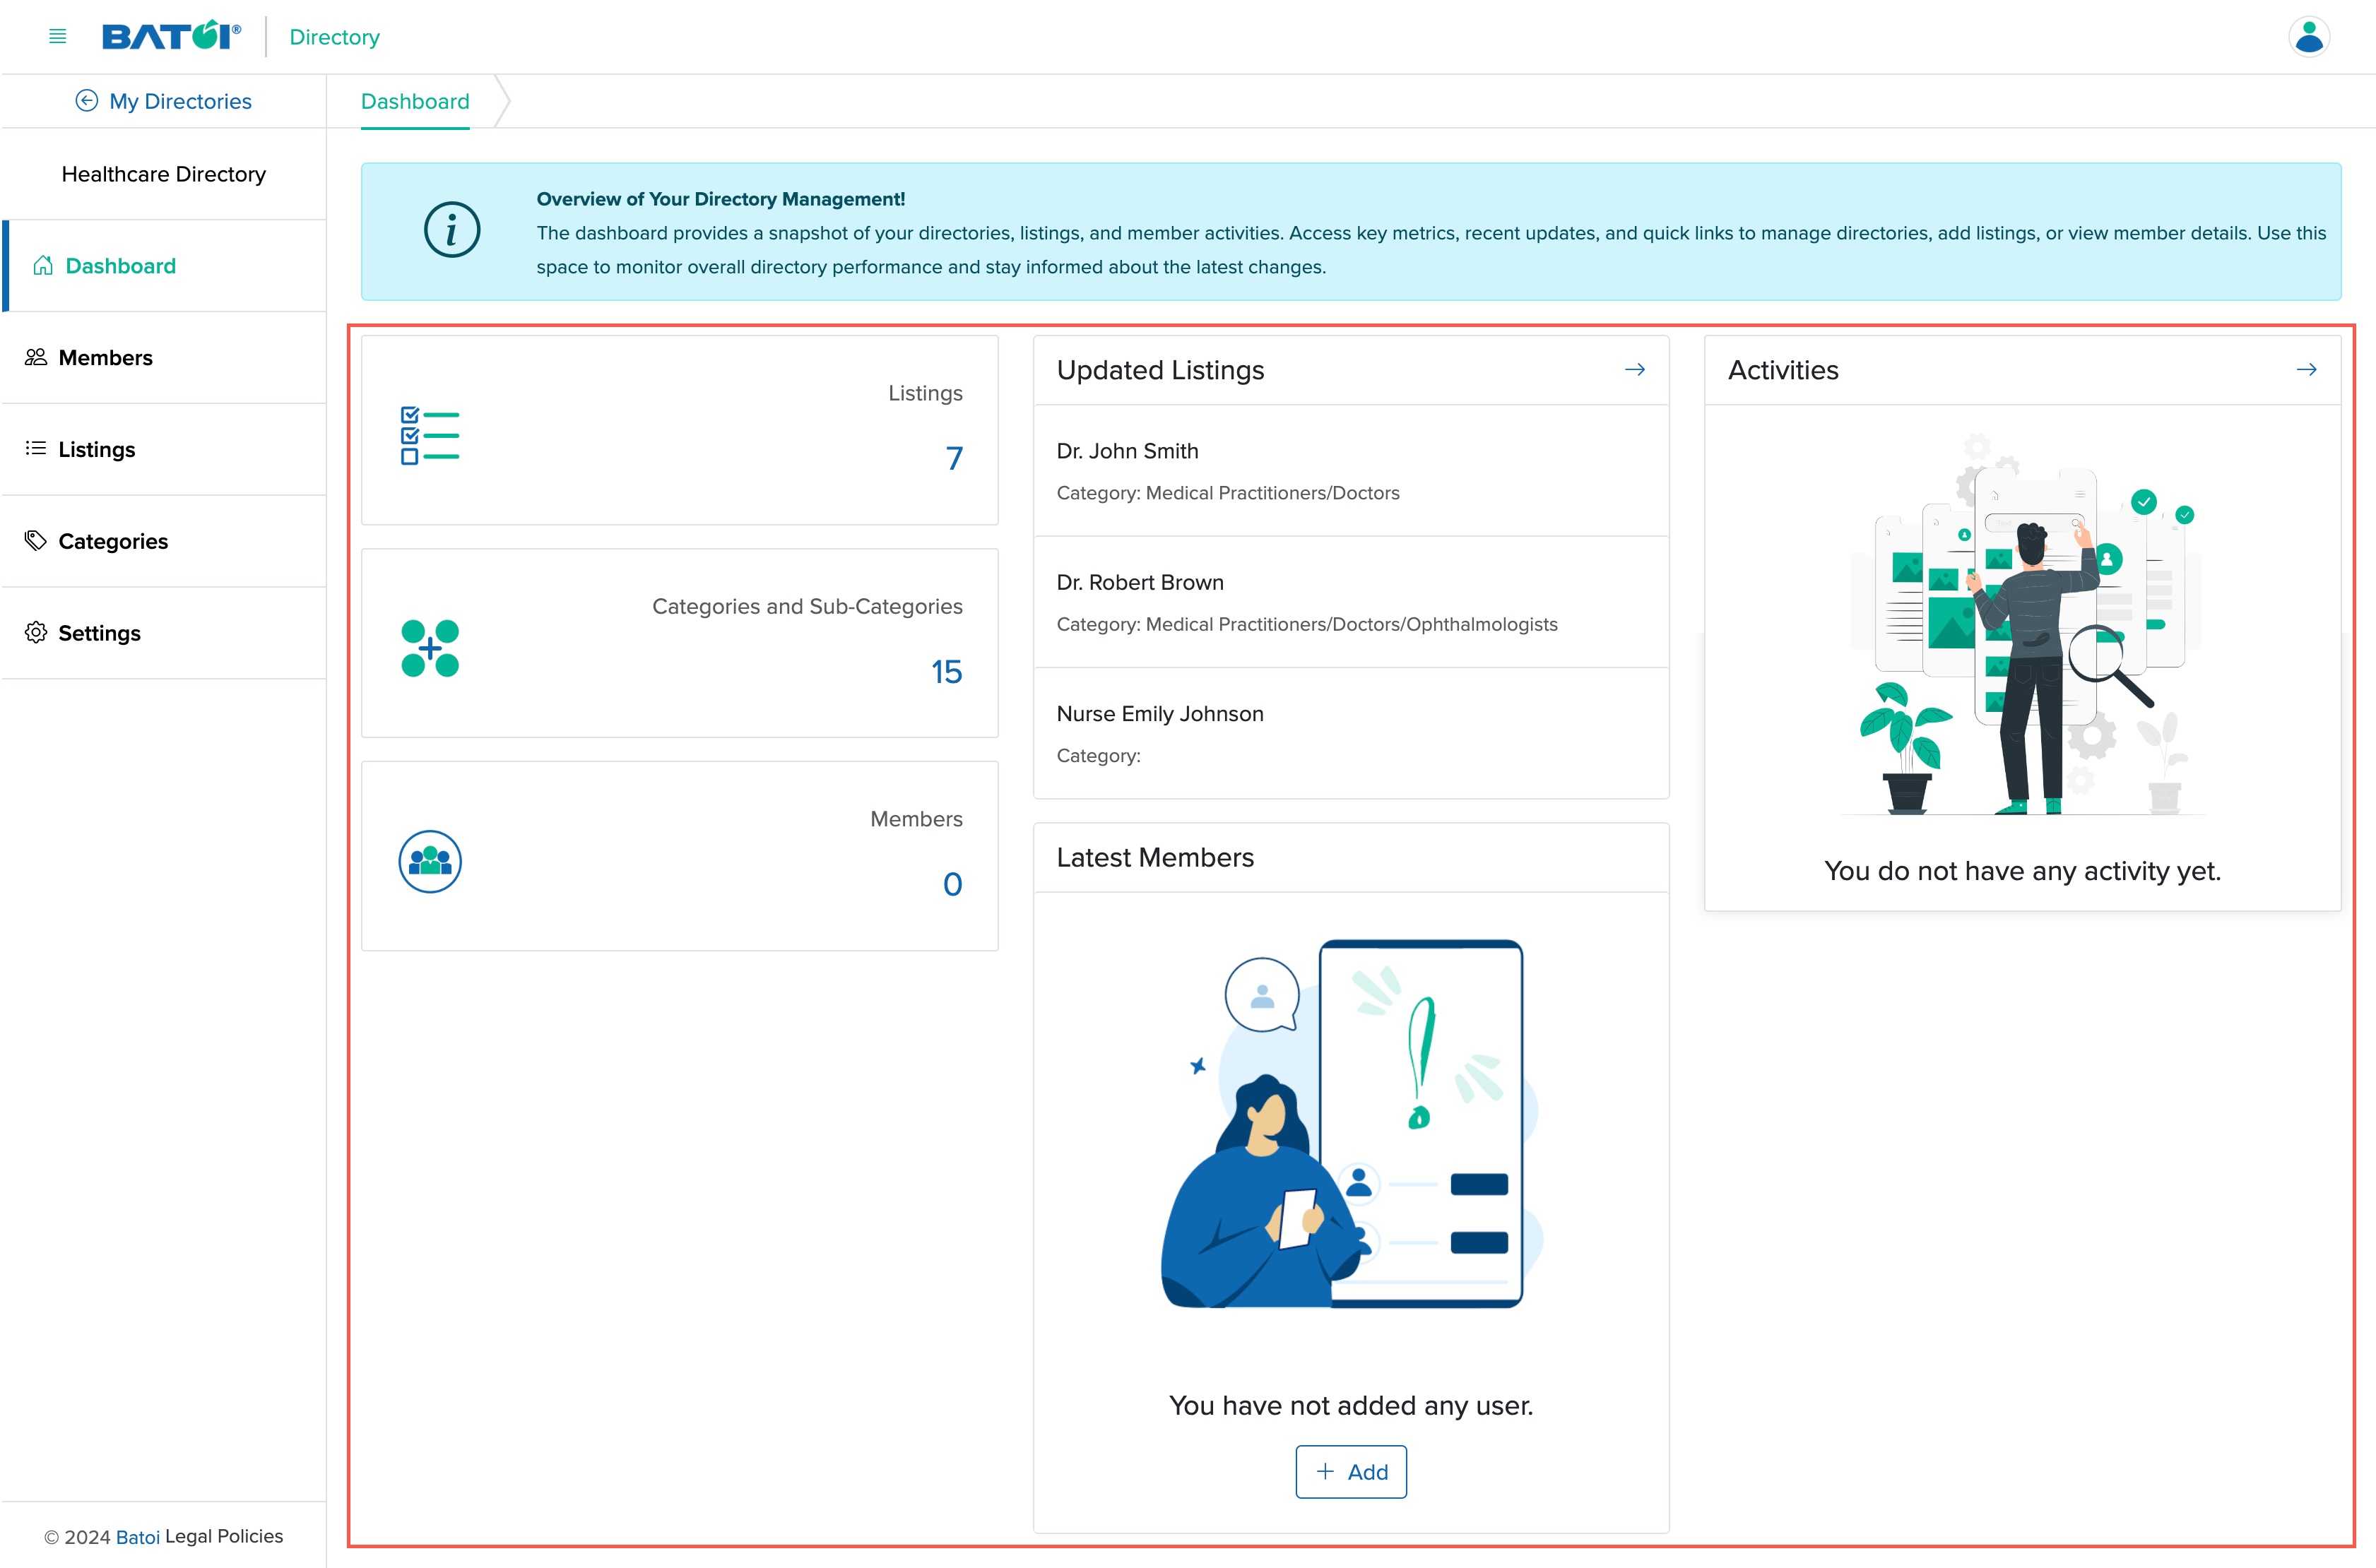
You will find the basic information about the directory in the cards listed below, as shown in Figure 4 below:
- The number of listings added
- The number of categories and subcategories created
- The number of members added
- Recently updated listing (3 nos)
- Recent activities (3 nos)
- Recently added members (3 nos)
Members
Click on the Members menu on the Admin Control Panel to be redirected to the member list page, as shown in Figure 5 below:
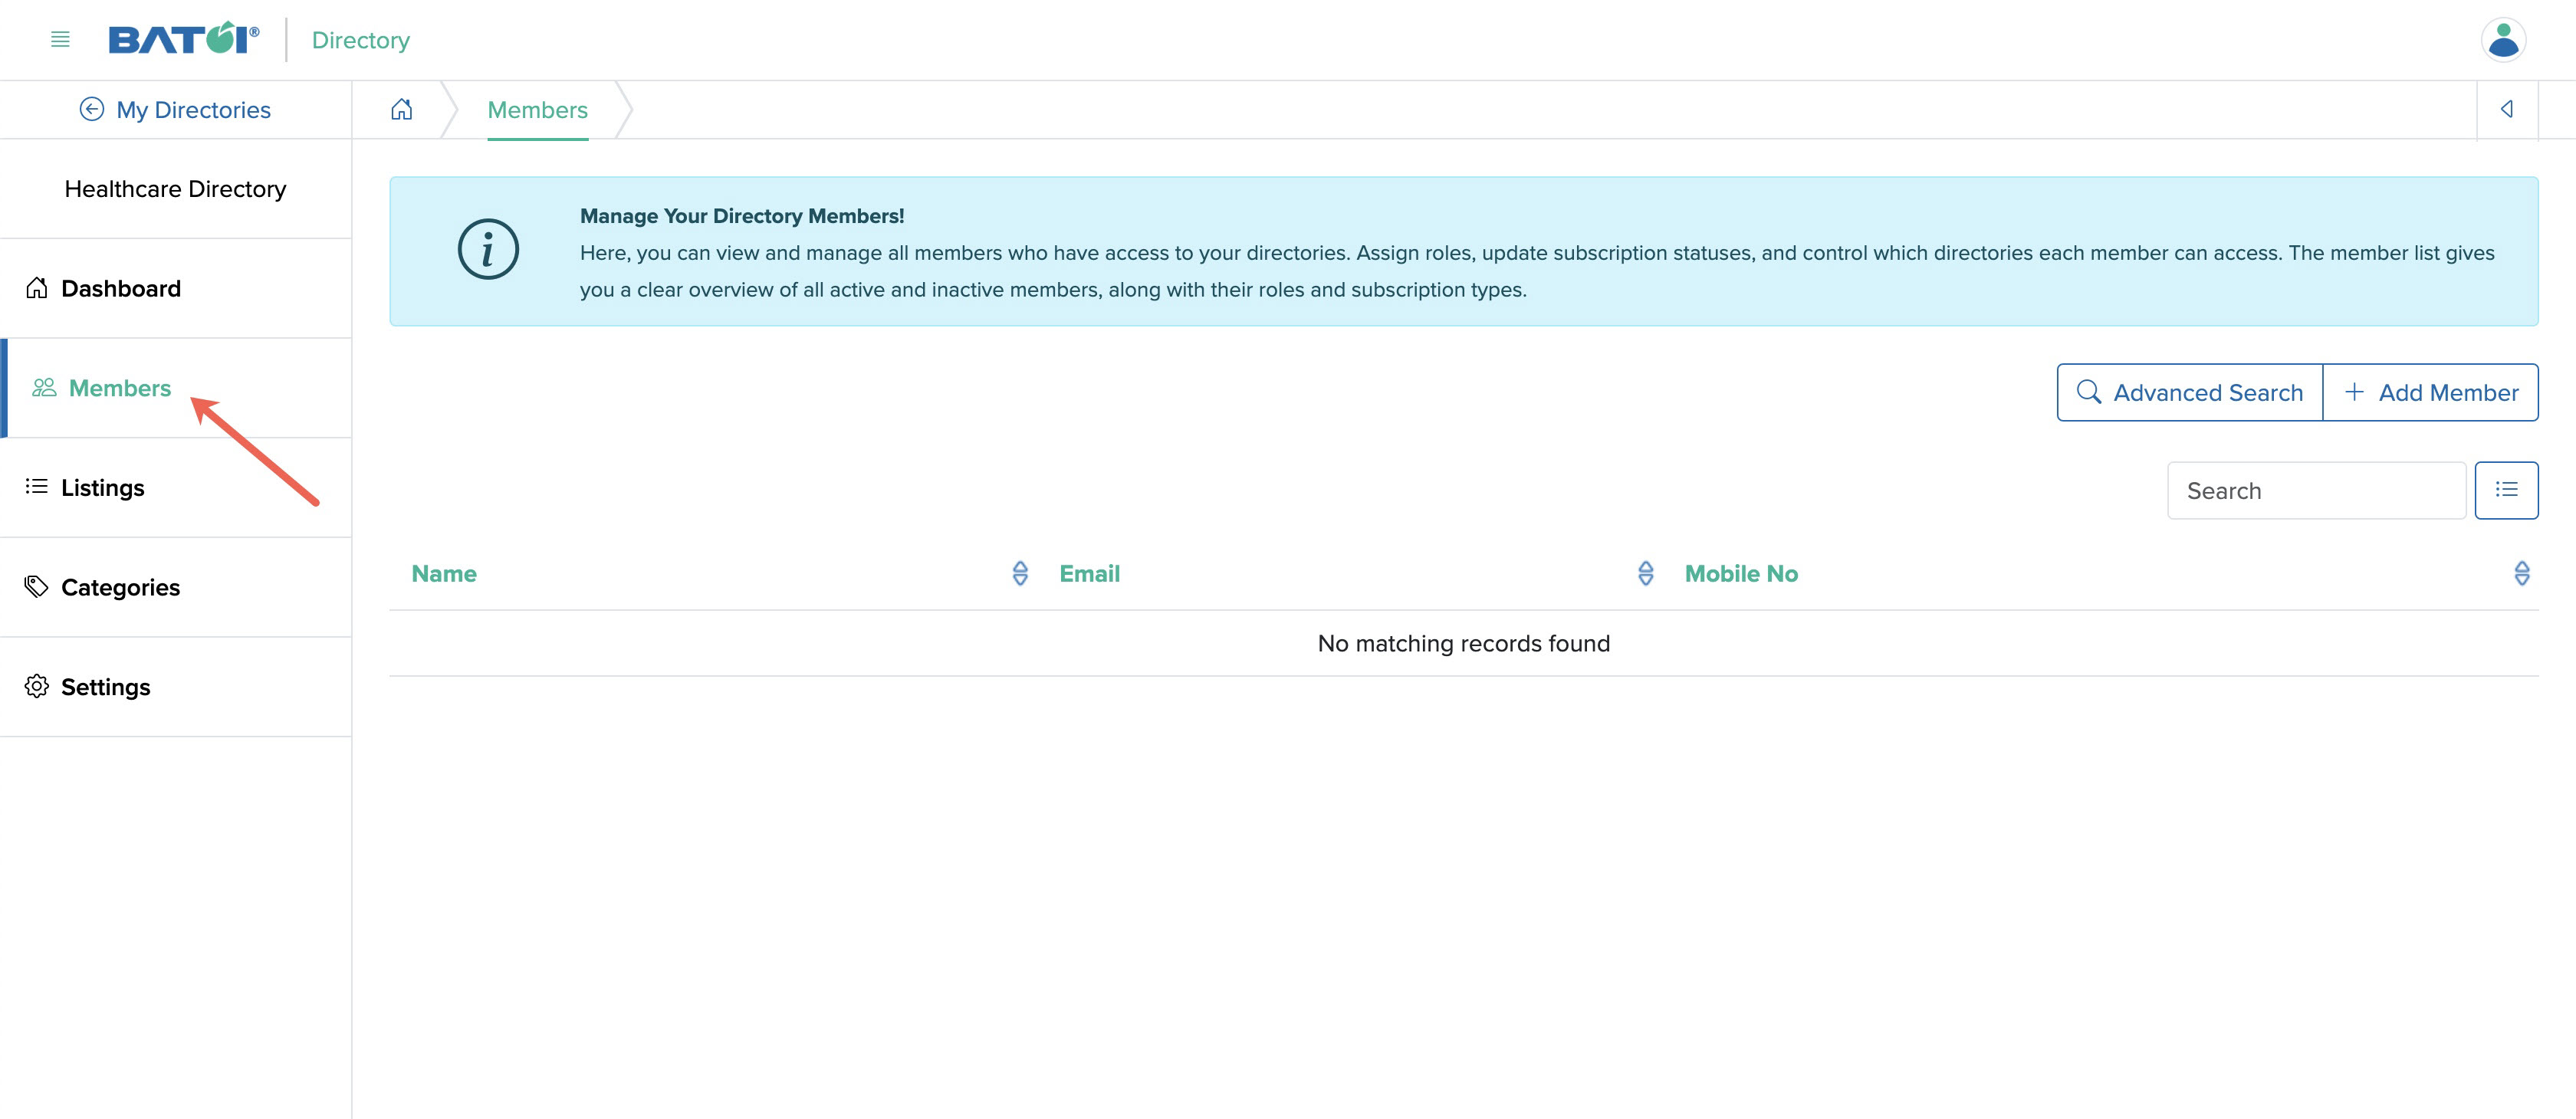
All the list page, members added to the directory will be listed in a tabular format. All the visible members per page will be sorted by ‘Name’, ’Email’, and ‘Mobile No’ by clicking the sort icon on the table header.
Advanced Search
To search the entire list of members, click on the Advanced Search button at the top right of the screen, as shown in Figure 6 below.
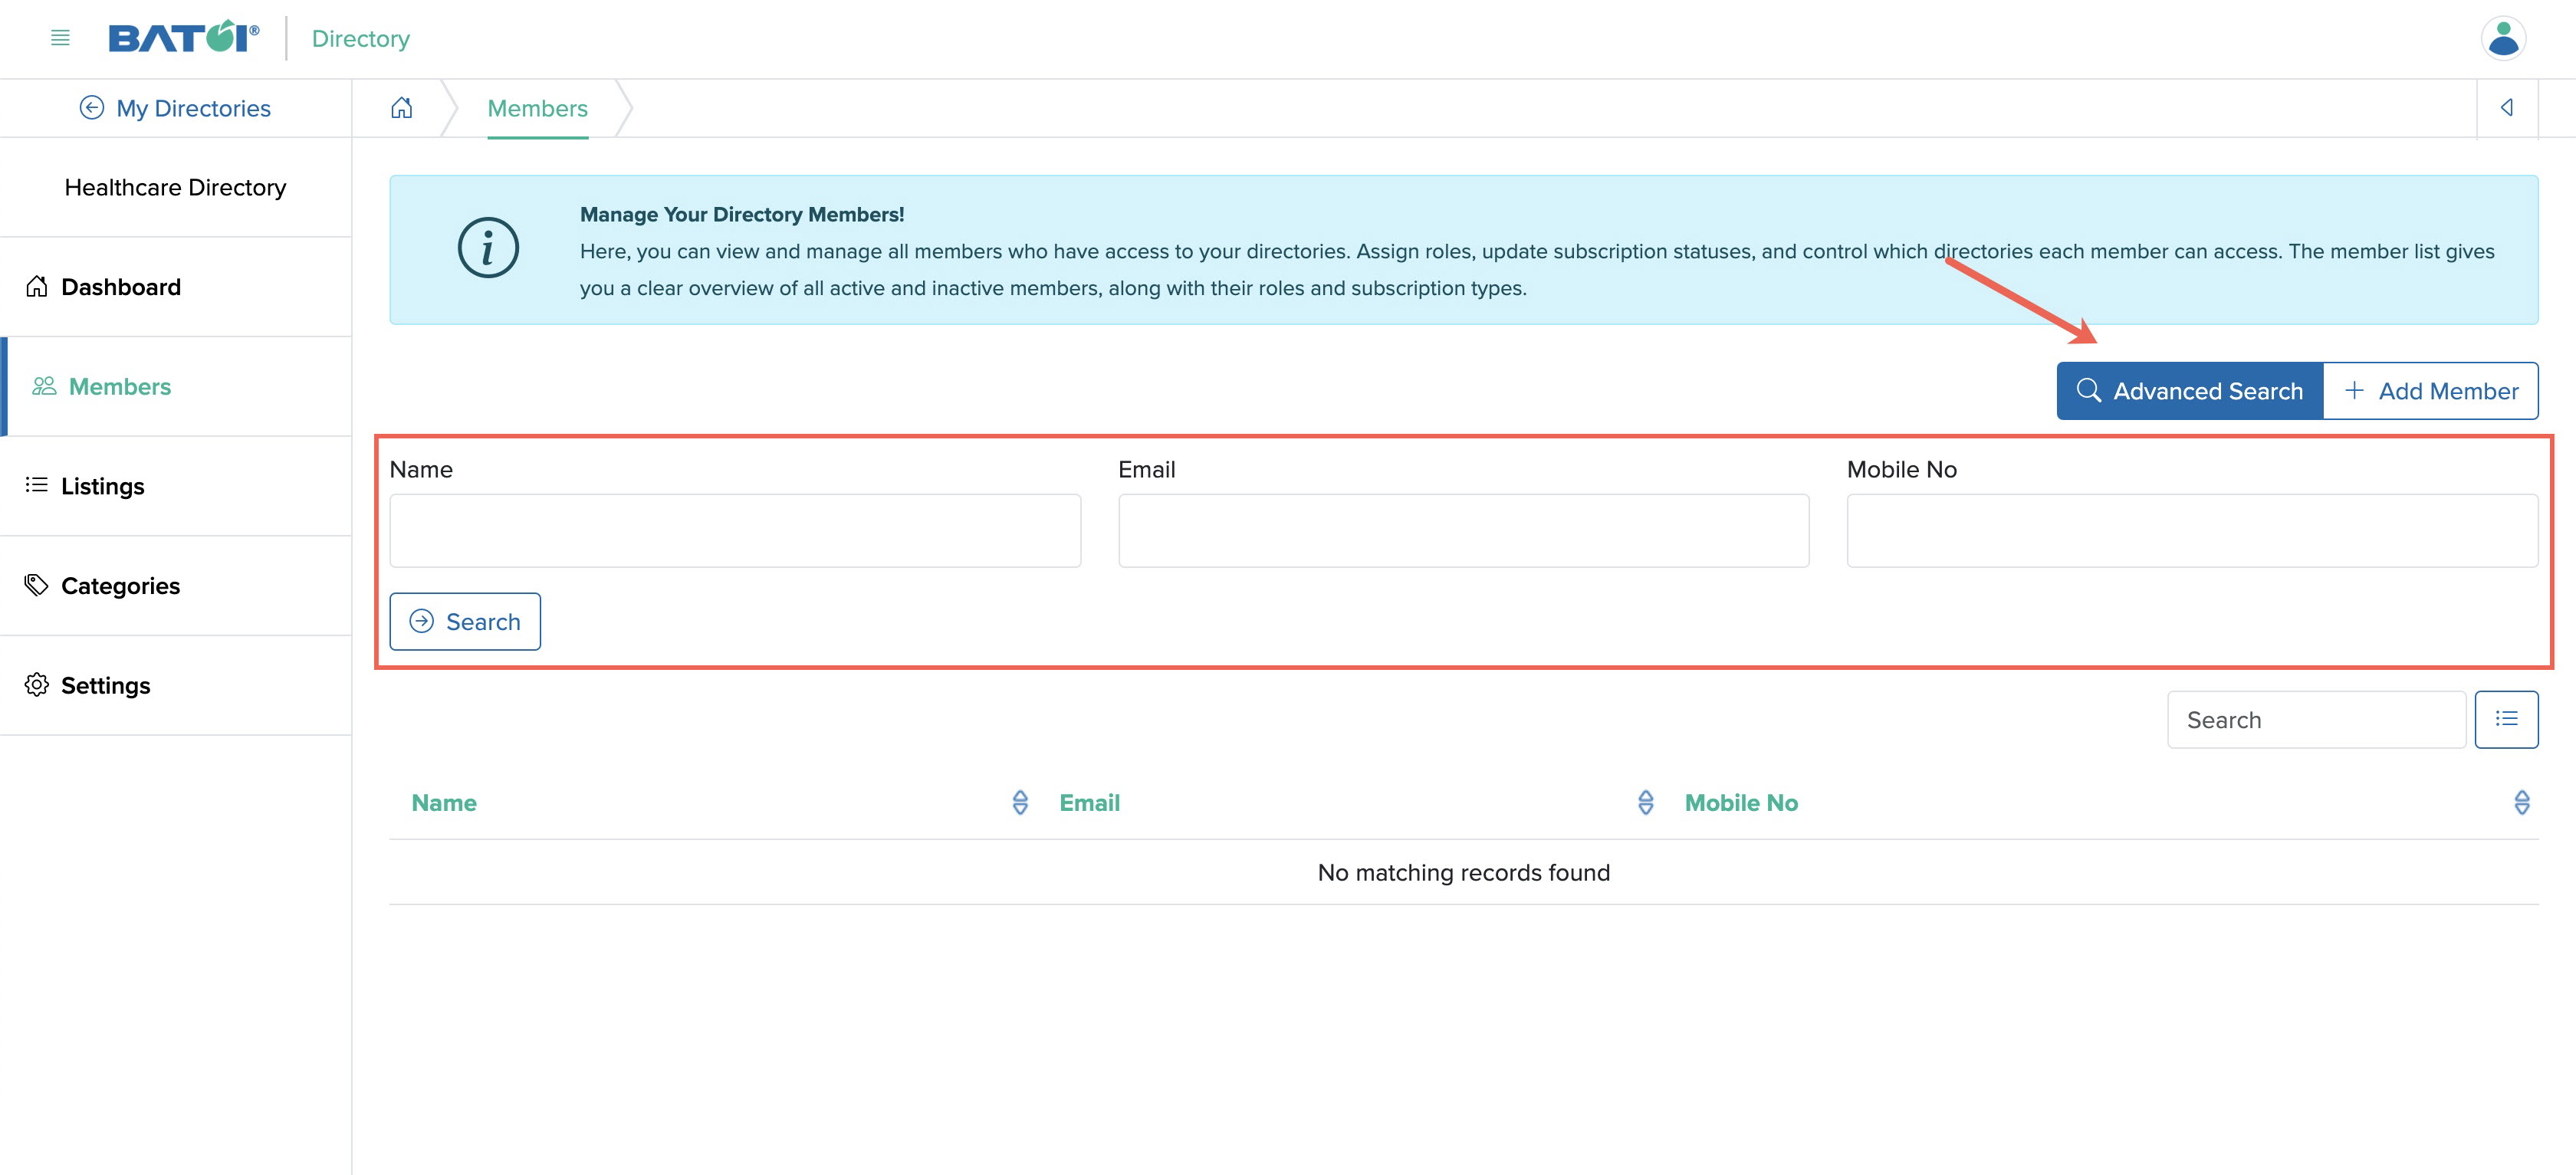
By clicking the Advanced Search button, a search box will open with ‘Name’, ’Email’, and ‘Mobile No’ as text fields. You can enter the desired name, which is a smart search box, and click the Search button, and the search result will be displayed below. Similarly, you can search for email ID and mobile no field.
Add Member
Click on the Add Member button, which is just right of the Advanced Search button at the top right side of the screen, as shown in Figure 7 below.
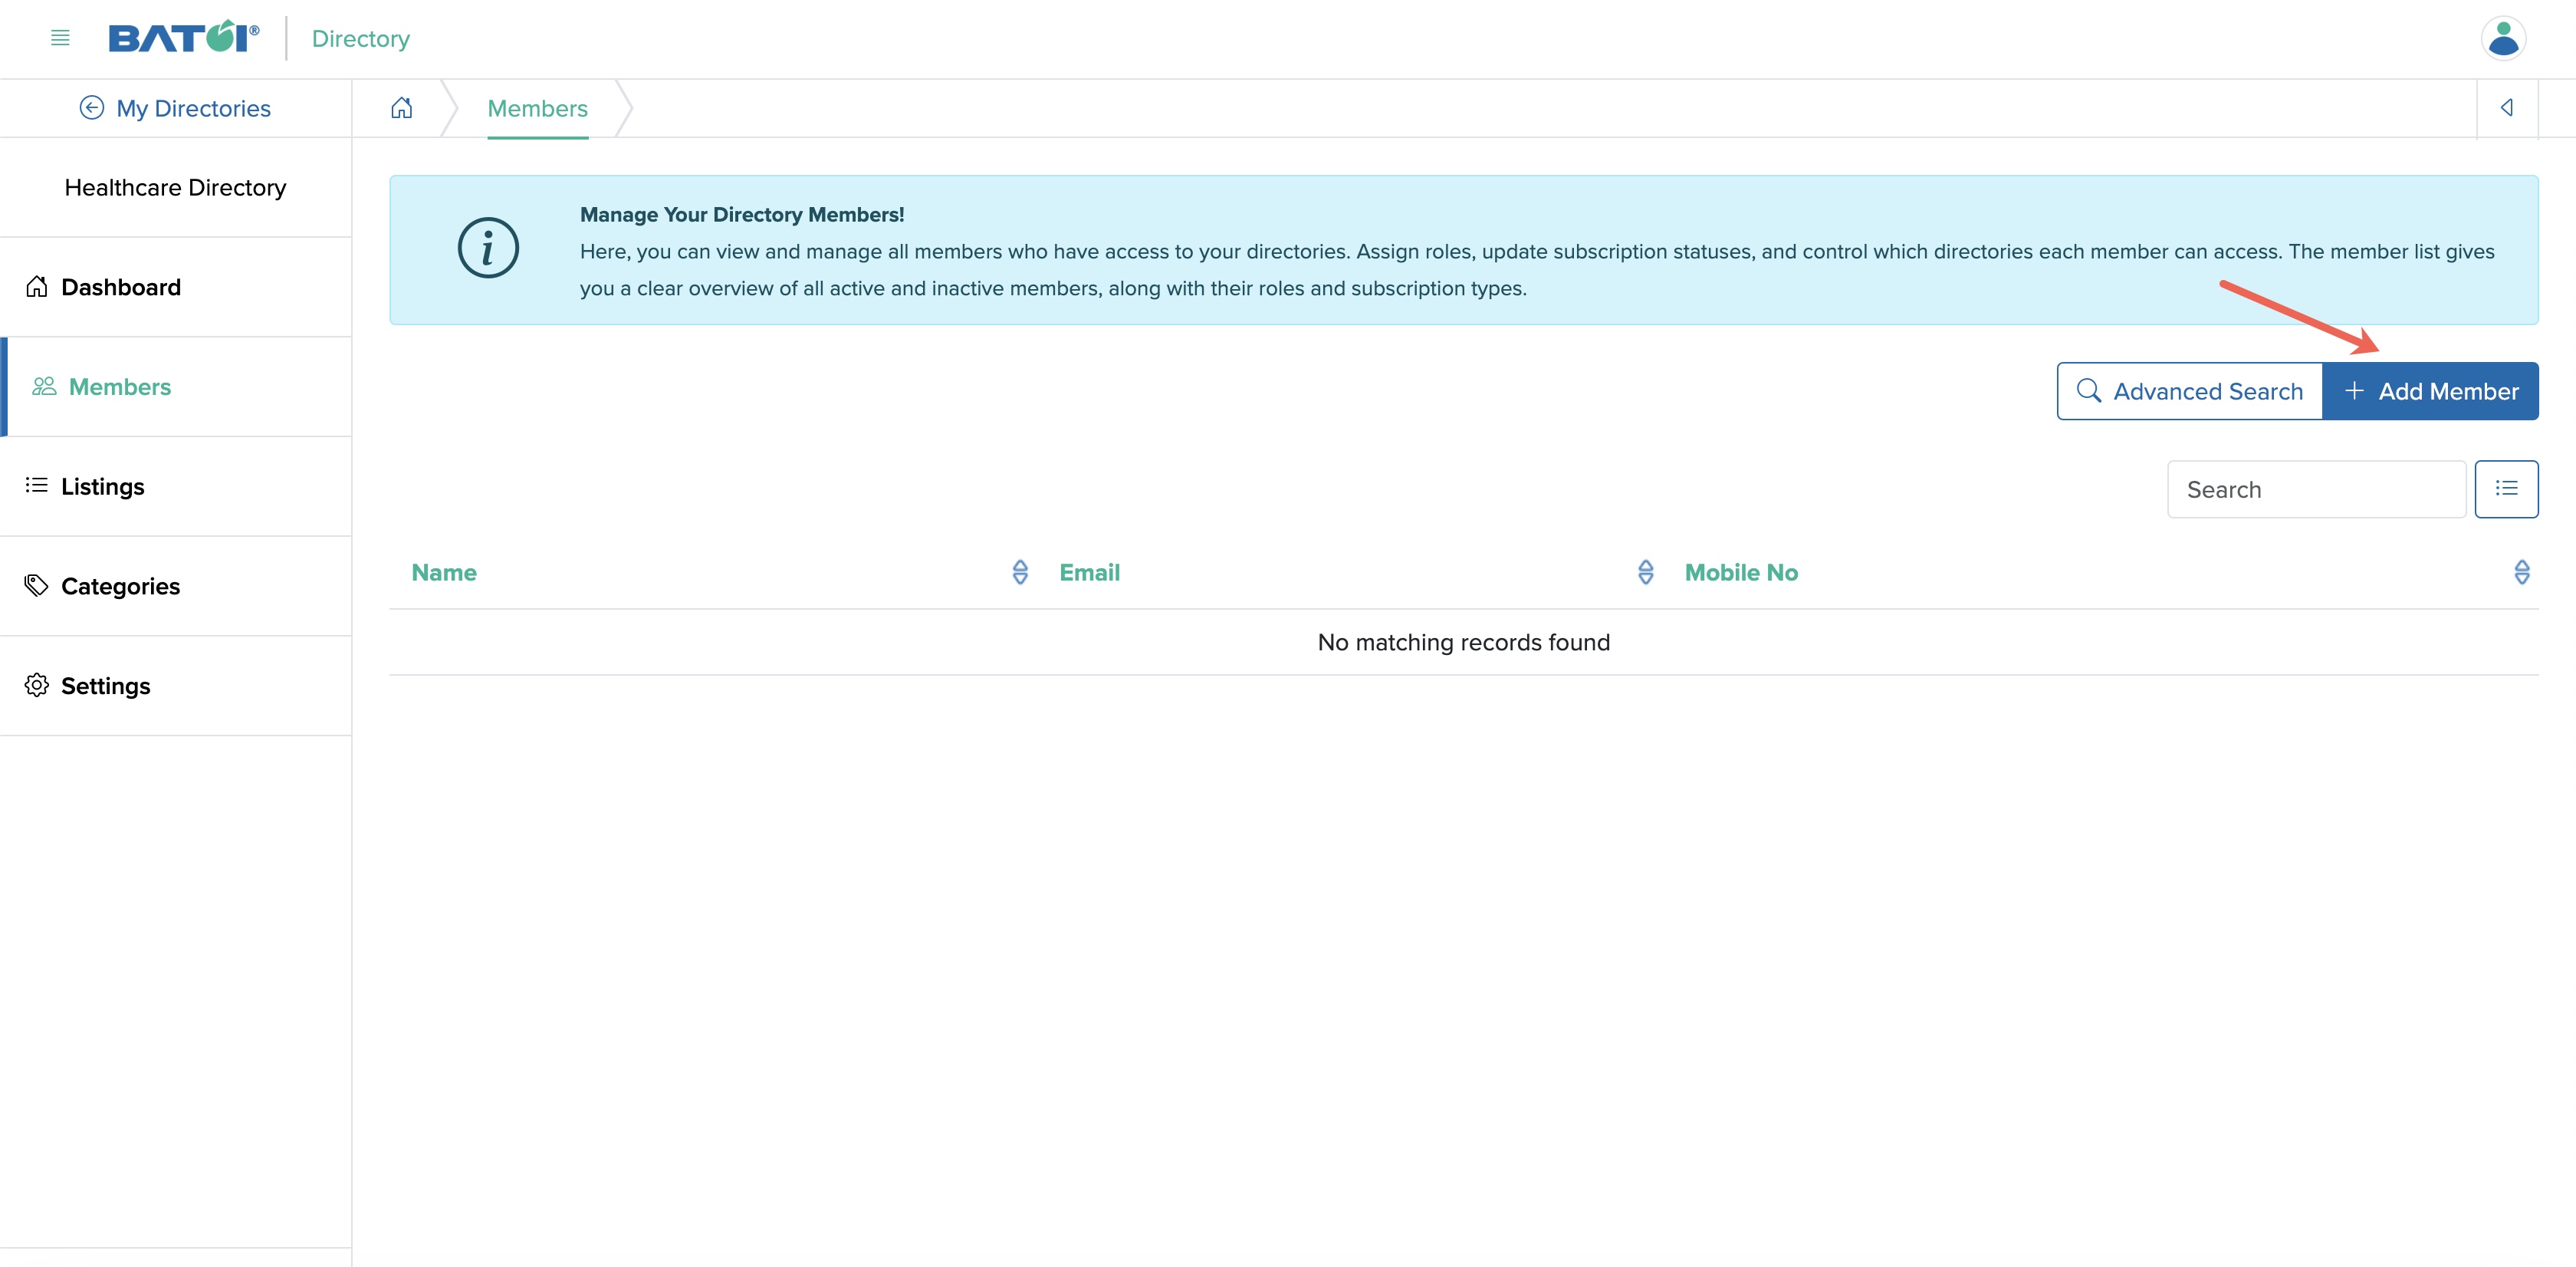
By clicking the Add Member button, the Add Member page will open, as shown in Figure 8 below.
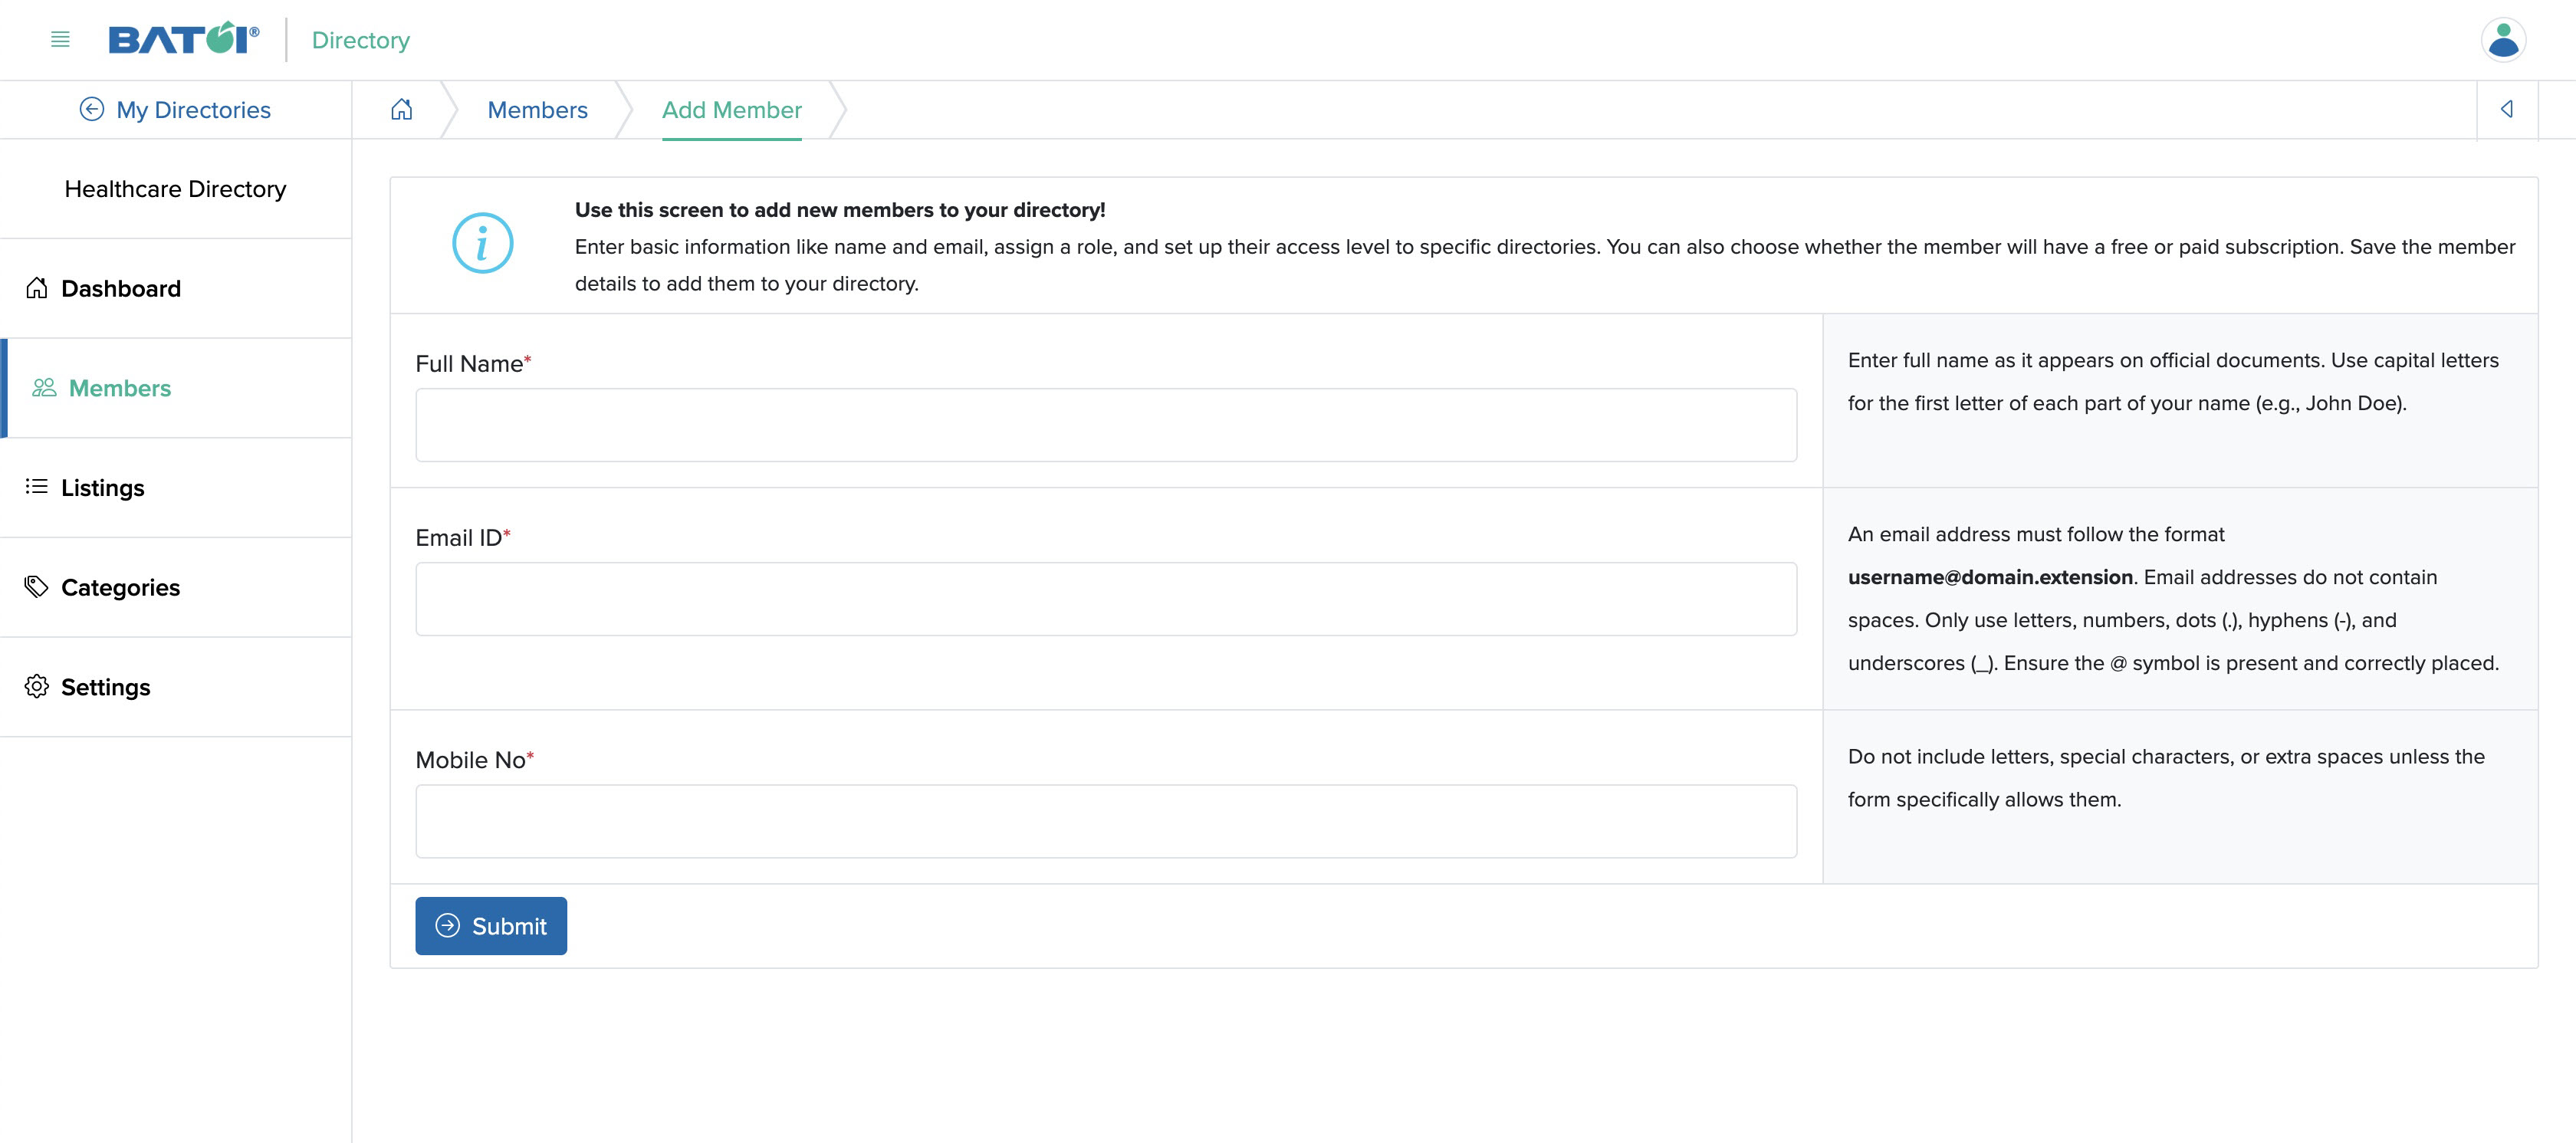
On the add member screen, enter the below detail and click the Submit button to add a new member to the particular directory, as shown in Figure 8 above.
- Full Name (textbox - Mandatory): Full name of the member
- Email ID (email box - Mandatory): Enter the email ID of the member
- Mobile No (number box - Mandatory): Enter the mobile number of the member
Listings
Click on the Listing menu on the Admin Control Panel and you will be redirected to the listing list page, as shown in Figure 9 below.
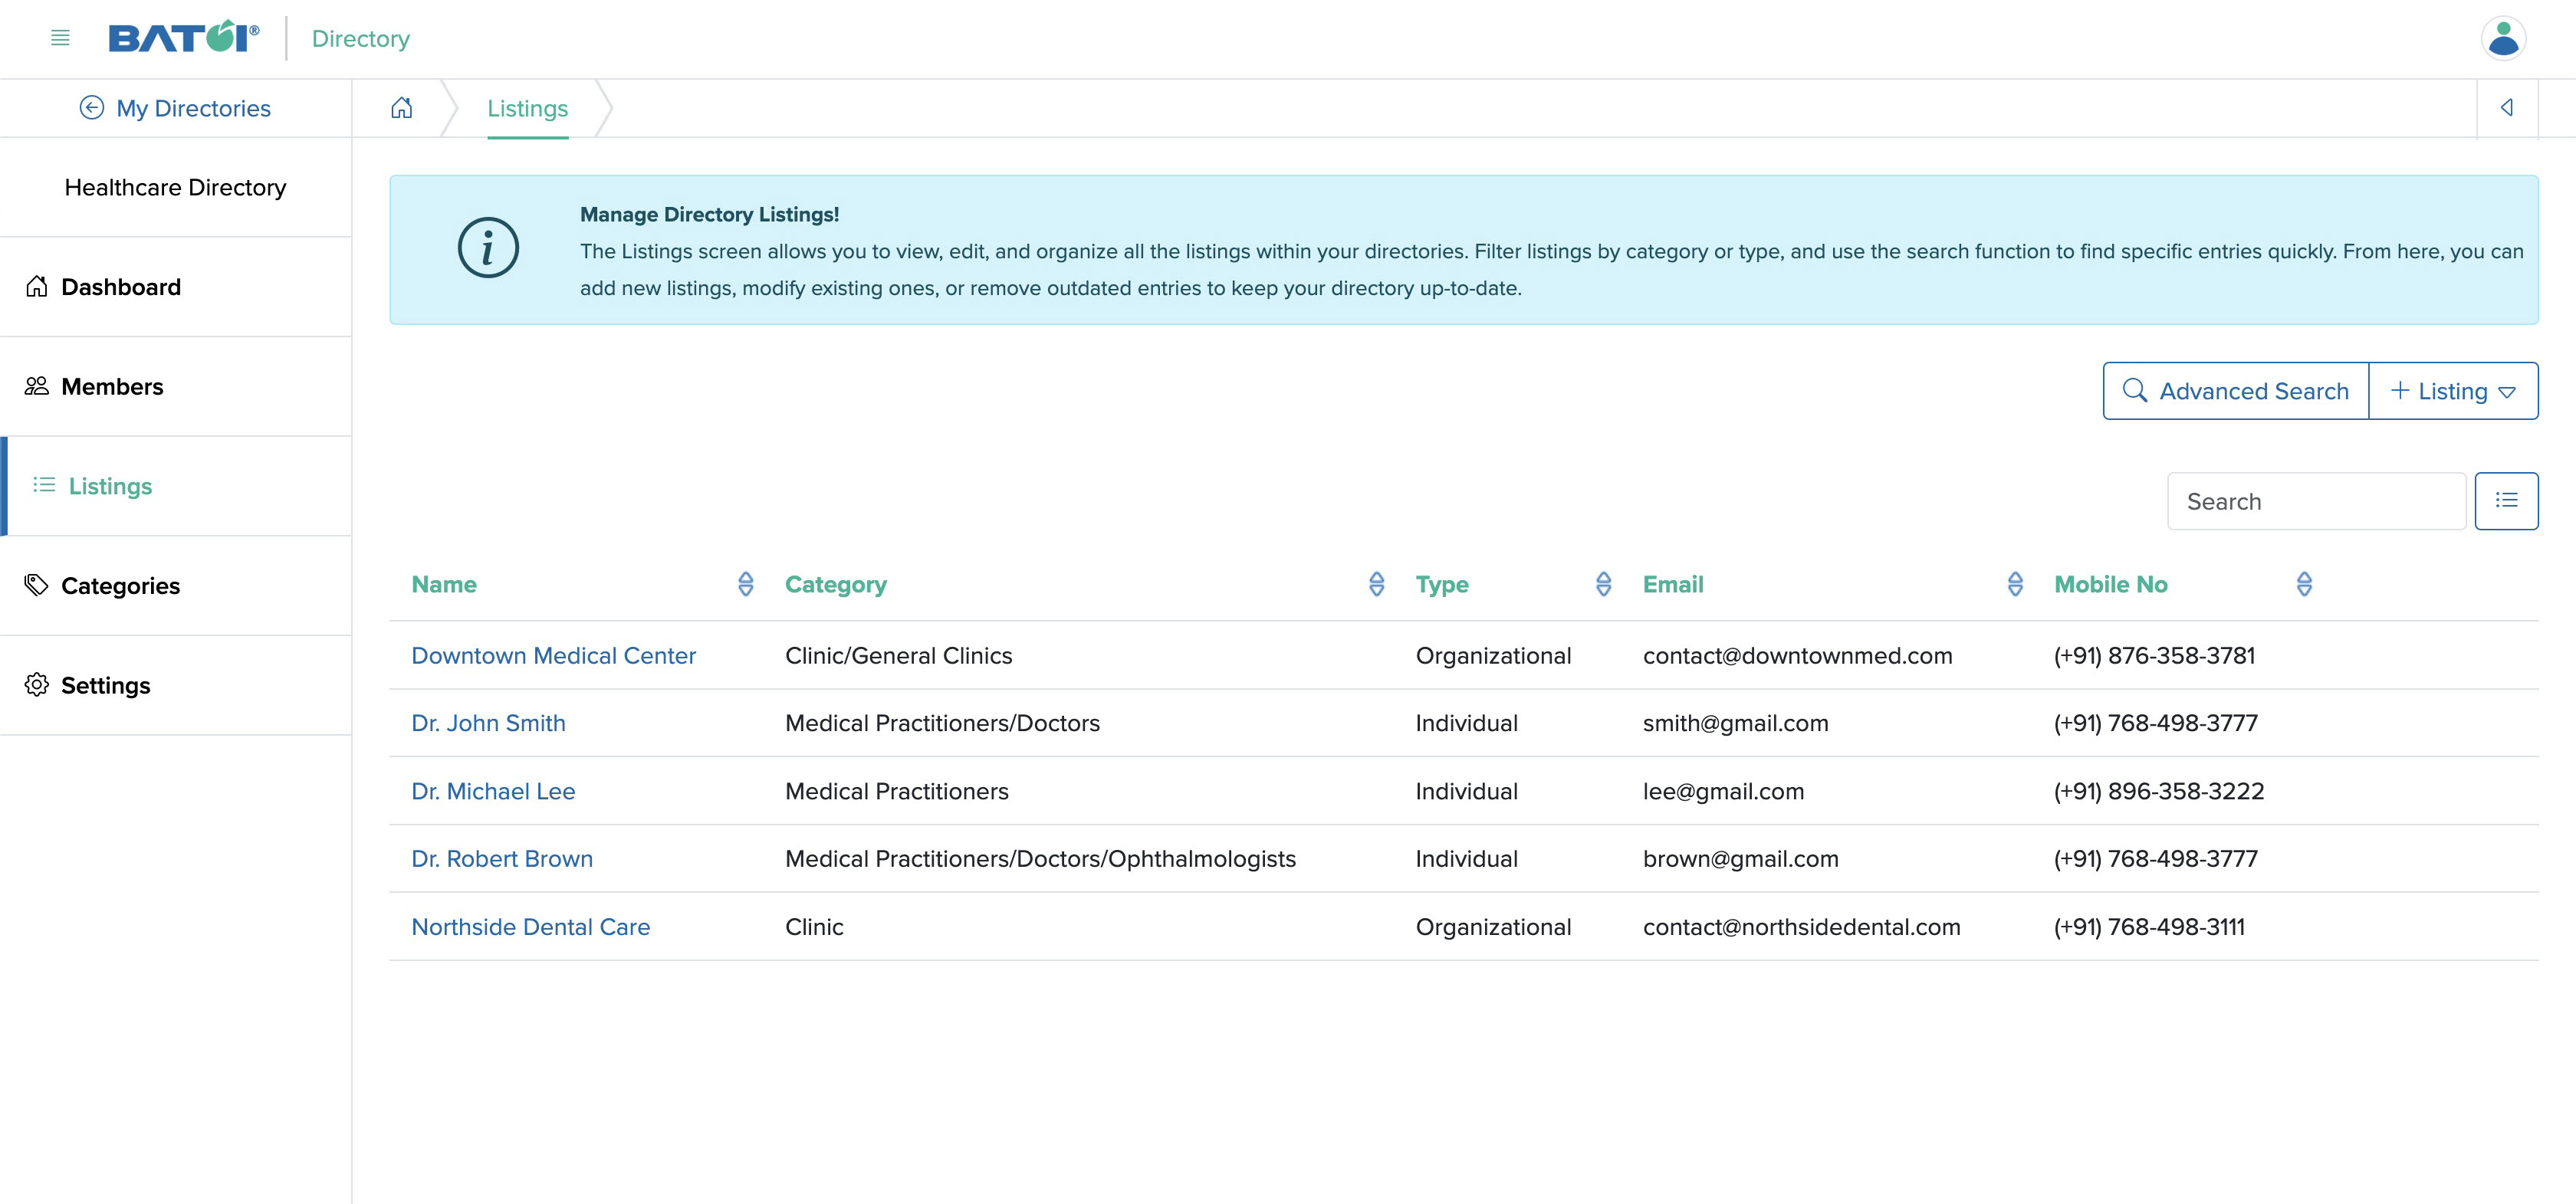
On the listing list page, all the visible listings per page will be sorted by ‘Name’, ‘Category’, ‘Type’, ‘Email’, and ‘Mobile No’ by clicking the sort icon in the table header. The list page will have pagination functionality to load faster, and ten lists per page will be shown by default.
Advanced Search
To search the entire listing, click on the Advanced Search button at the top right of the screen, as shown in Figure 10 below.
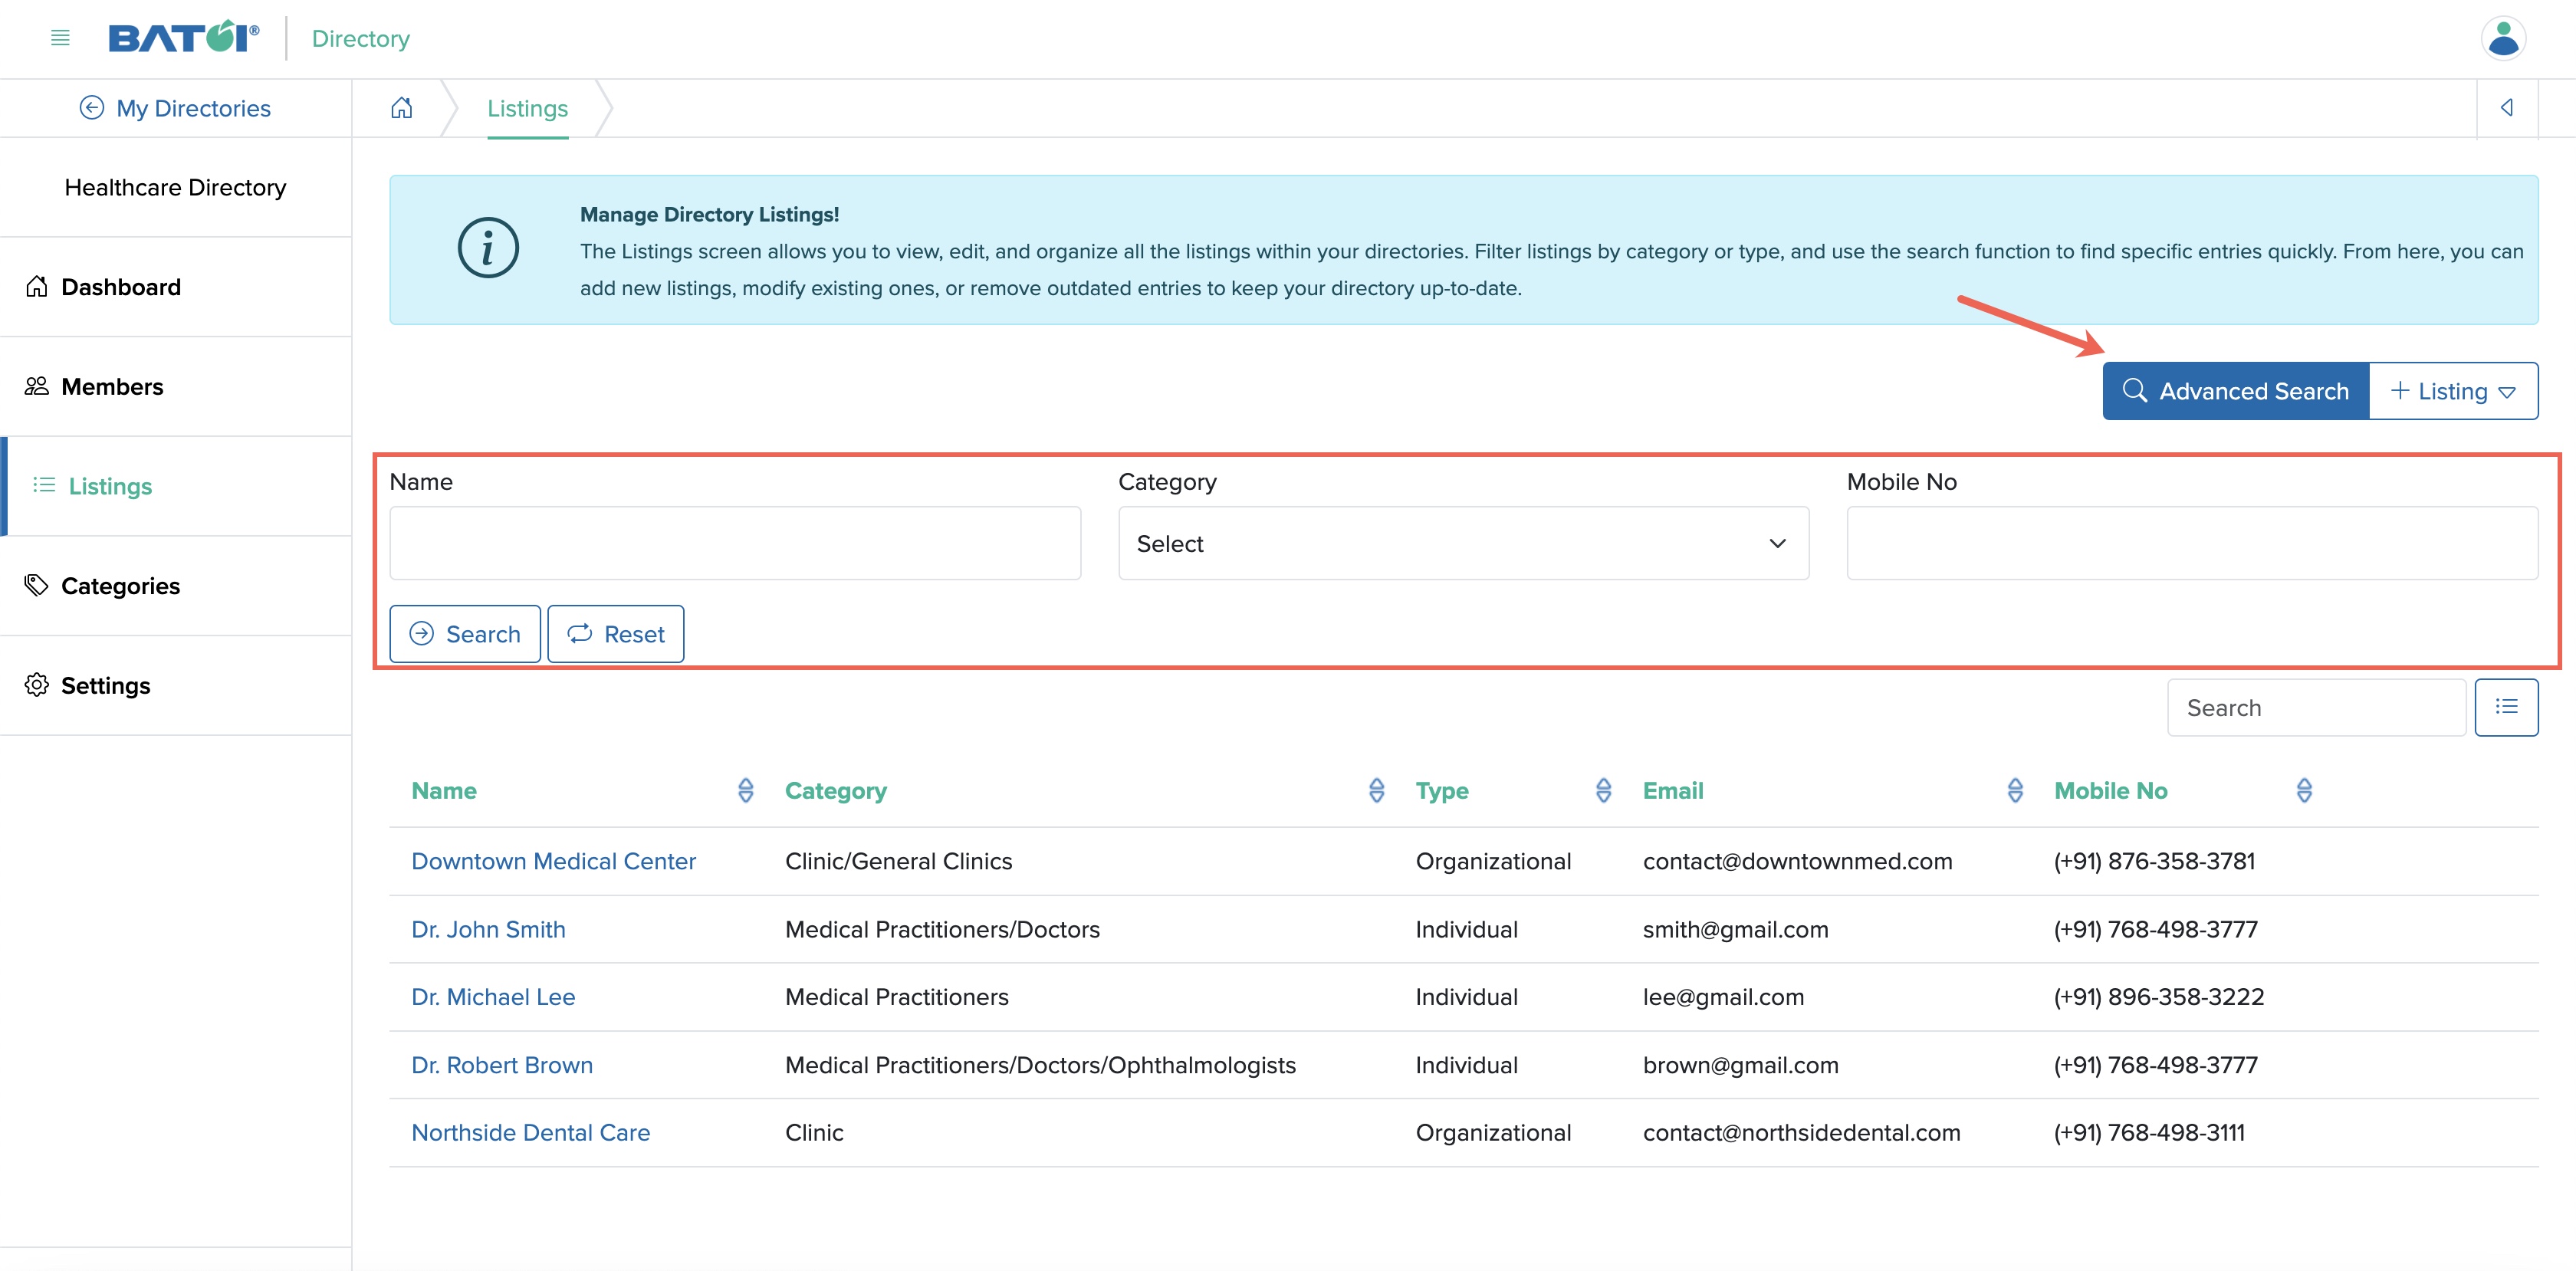
By clicking the Advanced Search button, a search box will open with ‘Name’, ‘Mobile No’ as a text field, and ‘Category’ as a drop-down list. You can enter the desired name, which is a smart search box, and click the Search button; the search result will be displayed below. Similarly, you can select the category from the drop-down list and click the Search button; the search result will be displayed below.
To reset the search, click the Reset button, as shown in Figure 10 above.
Add Listing
There are two ways you can add a new listing.
- Add Individual Listing
- Add Multiple Listing by Import
Click on the Add Listing button just right of the advanced search button at the top right of the screen, and a drop-down menu will open with the options ‘Add Listing’ and ‘Import Listing’, as shown in Figure 11 below.
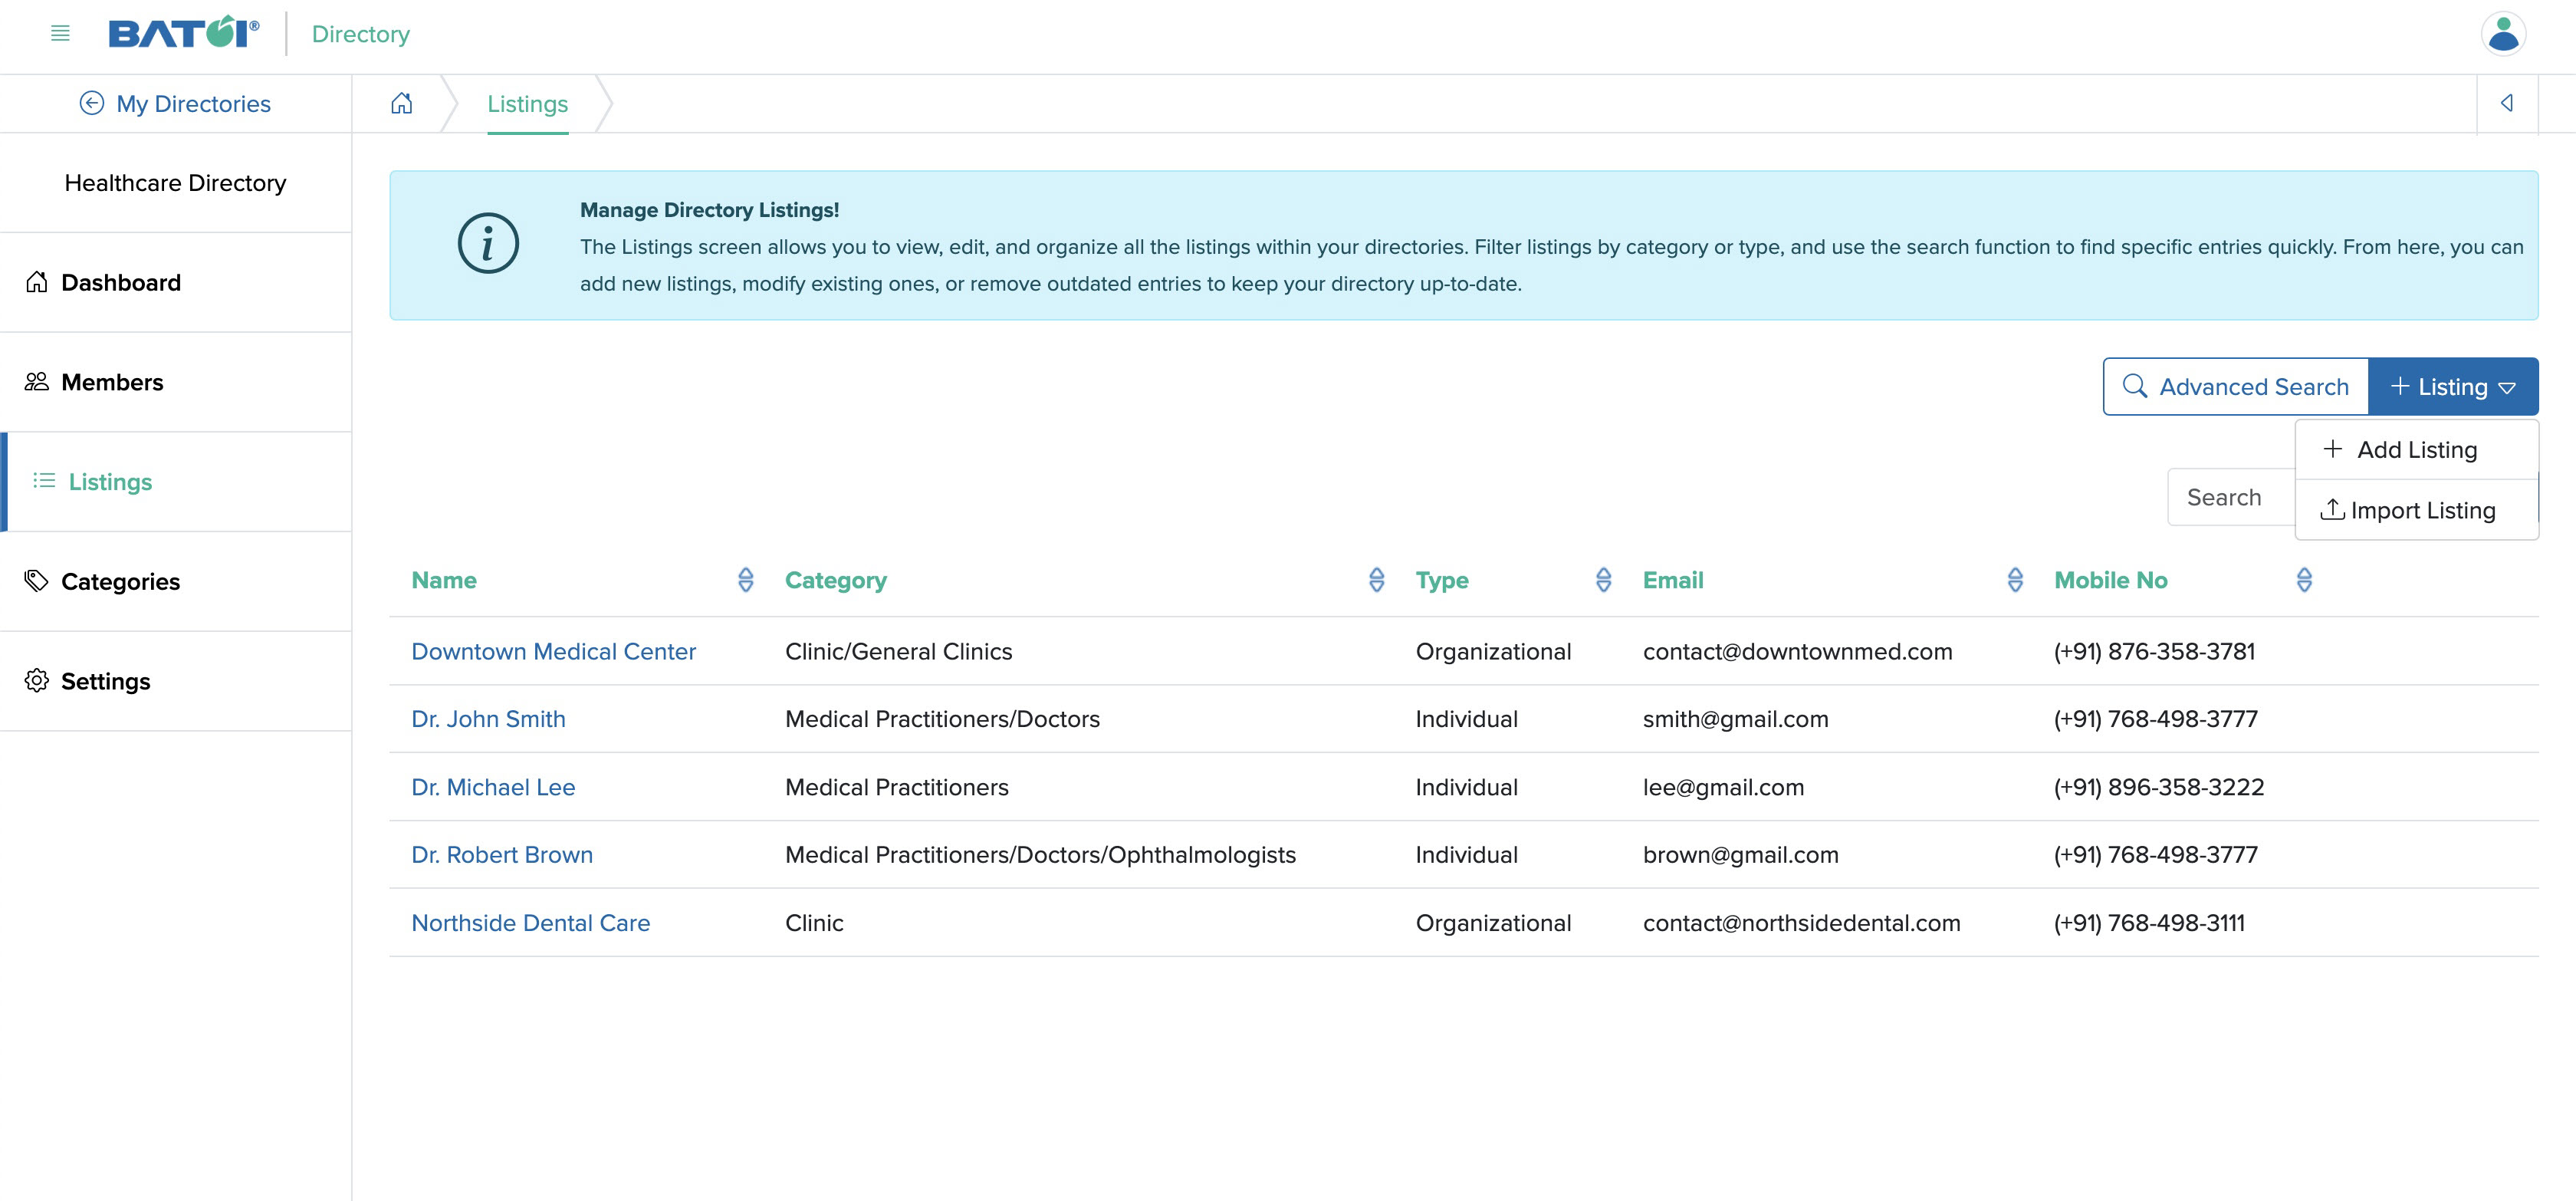
Click the Add Listing option from the drop menu, as shown in Figure 11 above, and Add individual listing page will open, as shown in Figure 12 below.

The system offers two types of listing: ‘Add Individual Listing’ and ‘Add Organizational Listing’.
To add an individual listing, click the Add Individual Listing option, as shown in Figure 12 above. The Add Individual Listing page will open, as shown in Figure 13 below.
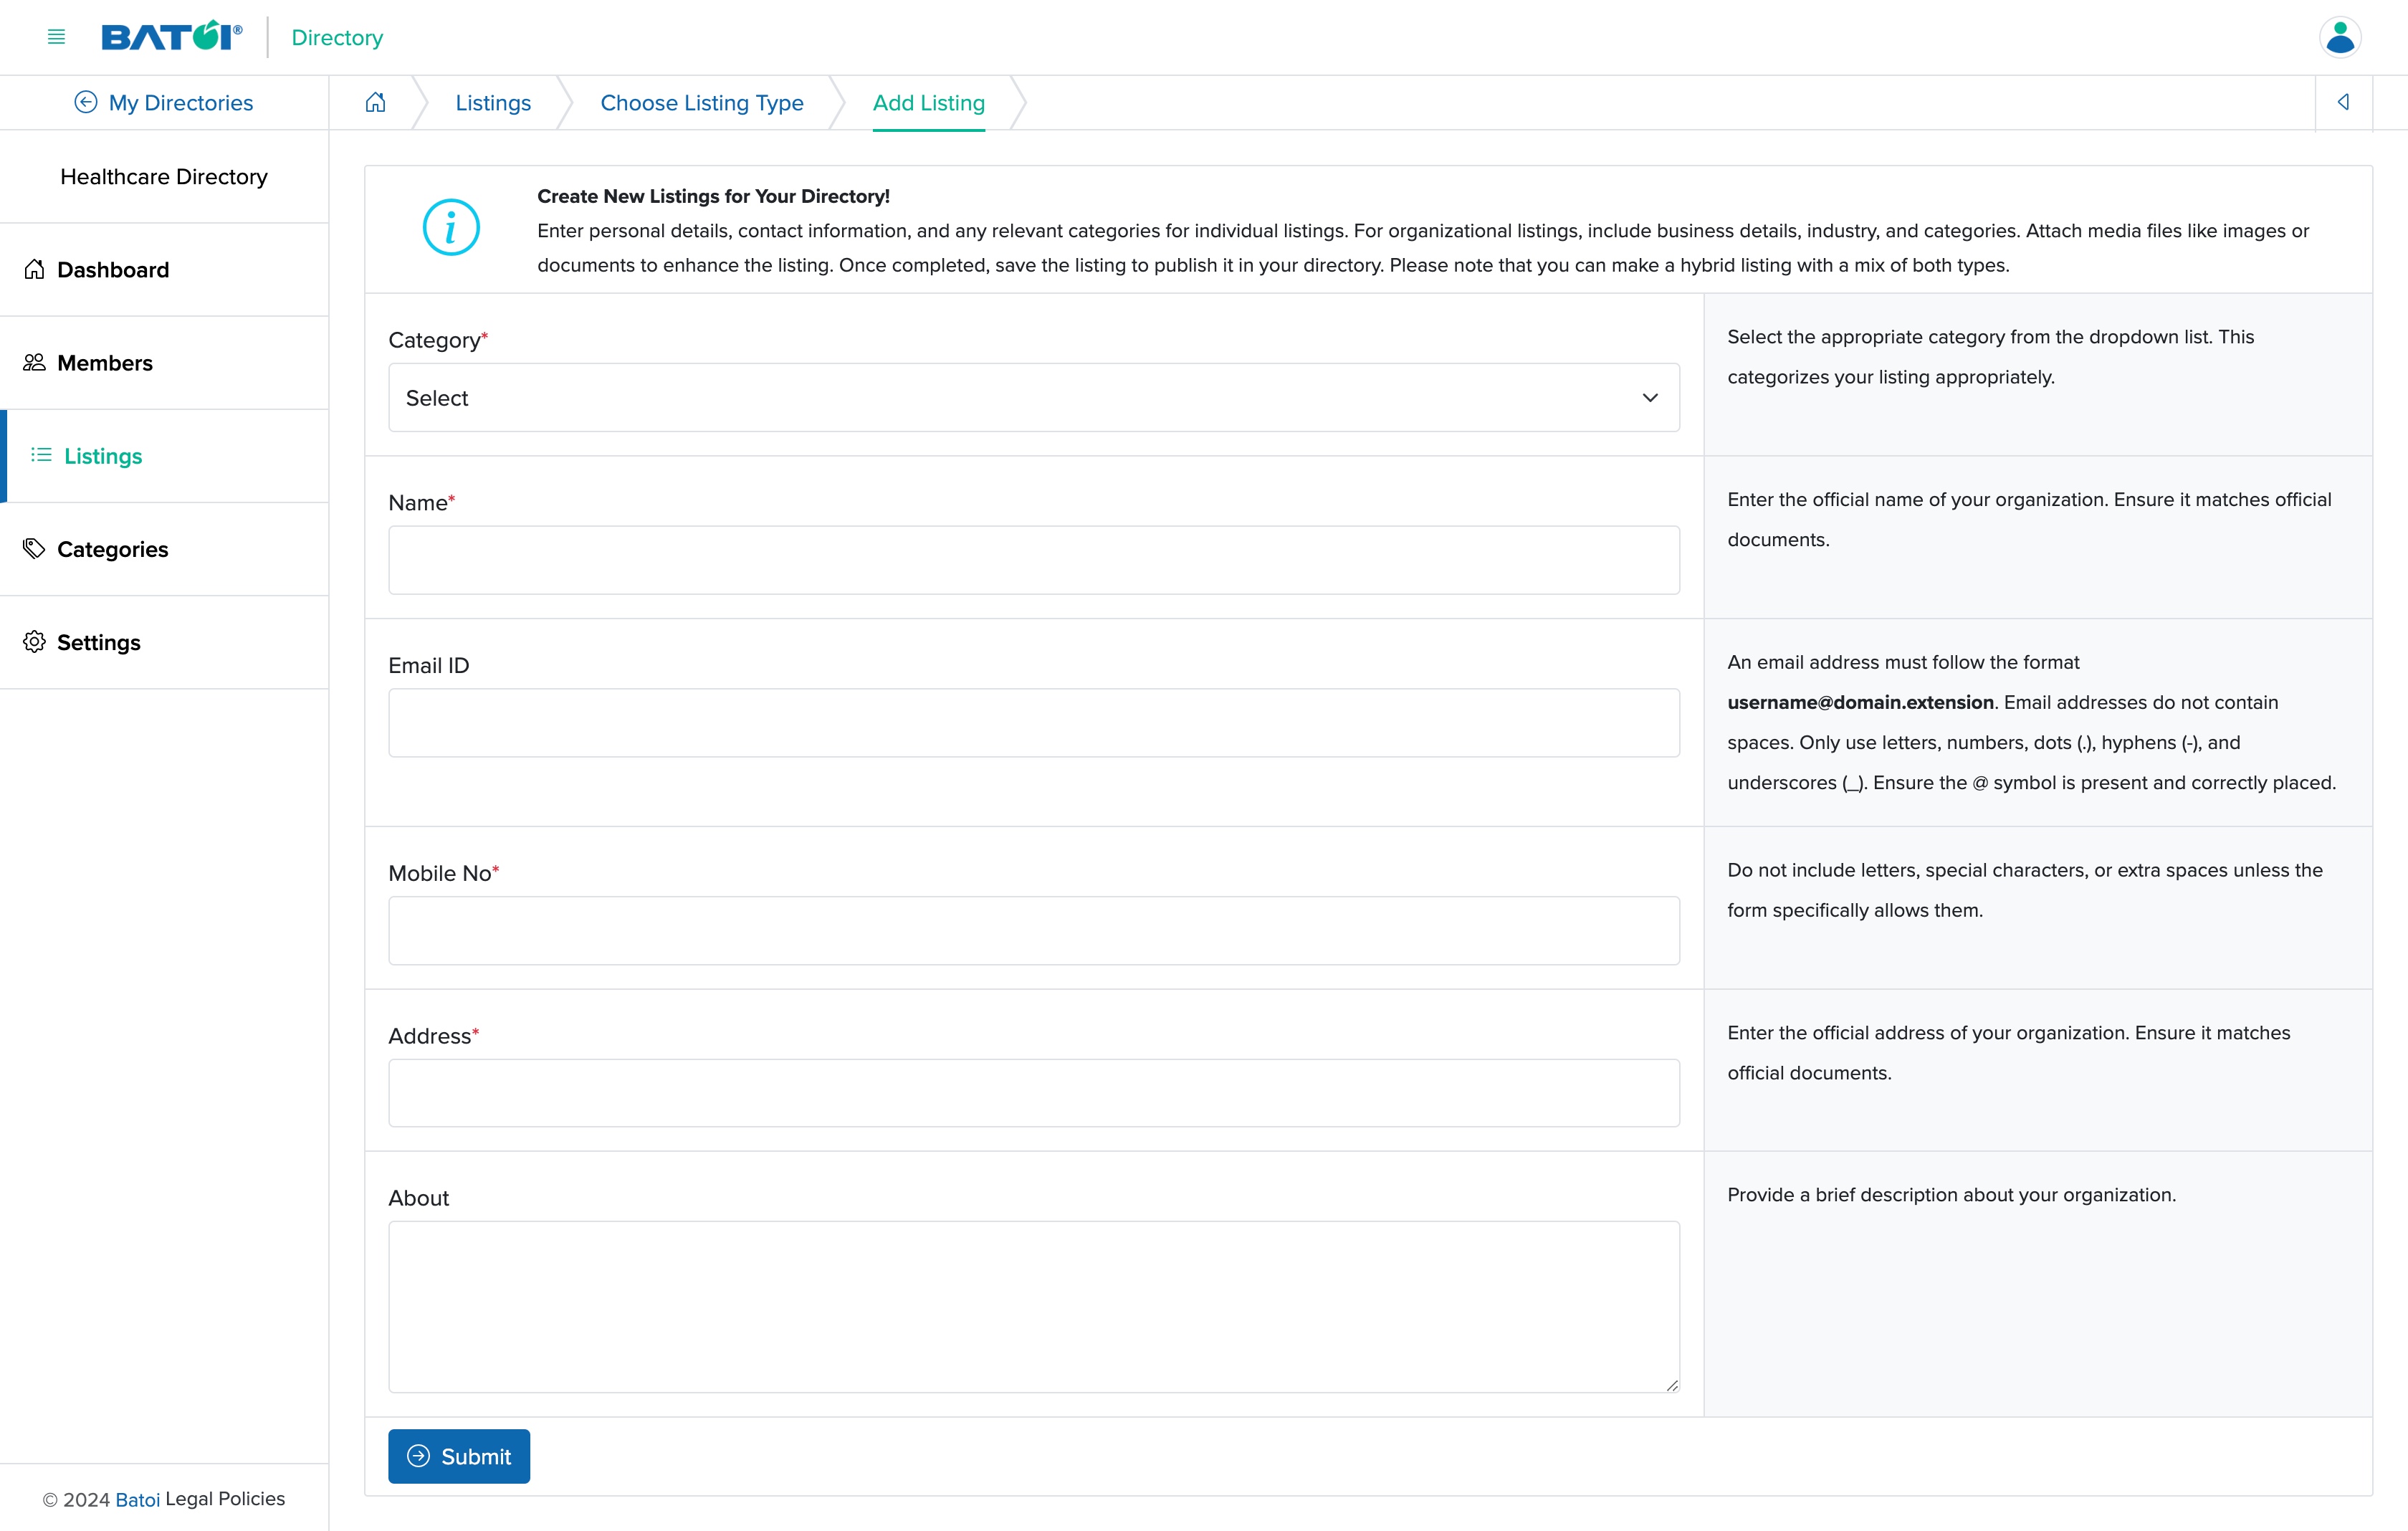
On the add individual listing screen, enter the below detail and click the Submit button to add a new listing to the particular directory, as shown in Figure 13 above.
- Category (drop menu - Mandatory): Select one category from the list
- Name (textbox - Mandatory): Full name of the individual
- Email ID (email box - Mandatory): Enter the email ID of the individual
- Mobile No (number box - Mandatory): Enter the mobile number of the individual
- Address (textbox - Mandatory): Enter the address of the individual
- About (textarea - Option): Enter the individual entry Description
To add an organizational listing, click the Add Organizational Listing option, as shown in Figure 12 above, and the Add Organizational Listing page will open, as shown in Figure 14 below.
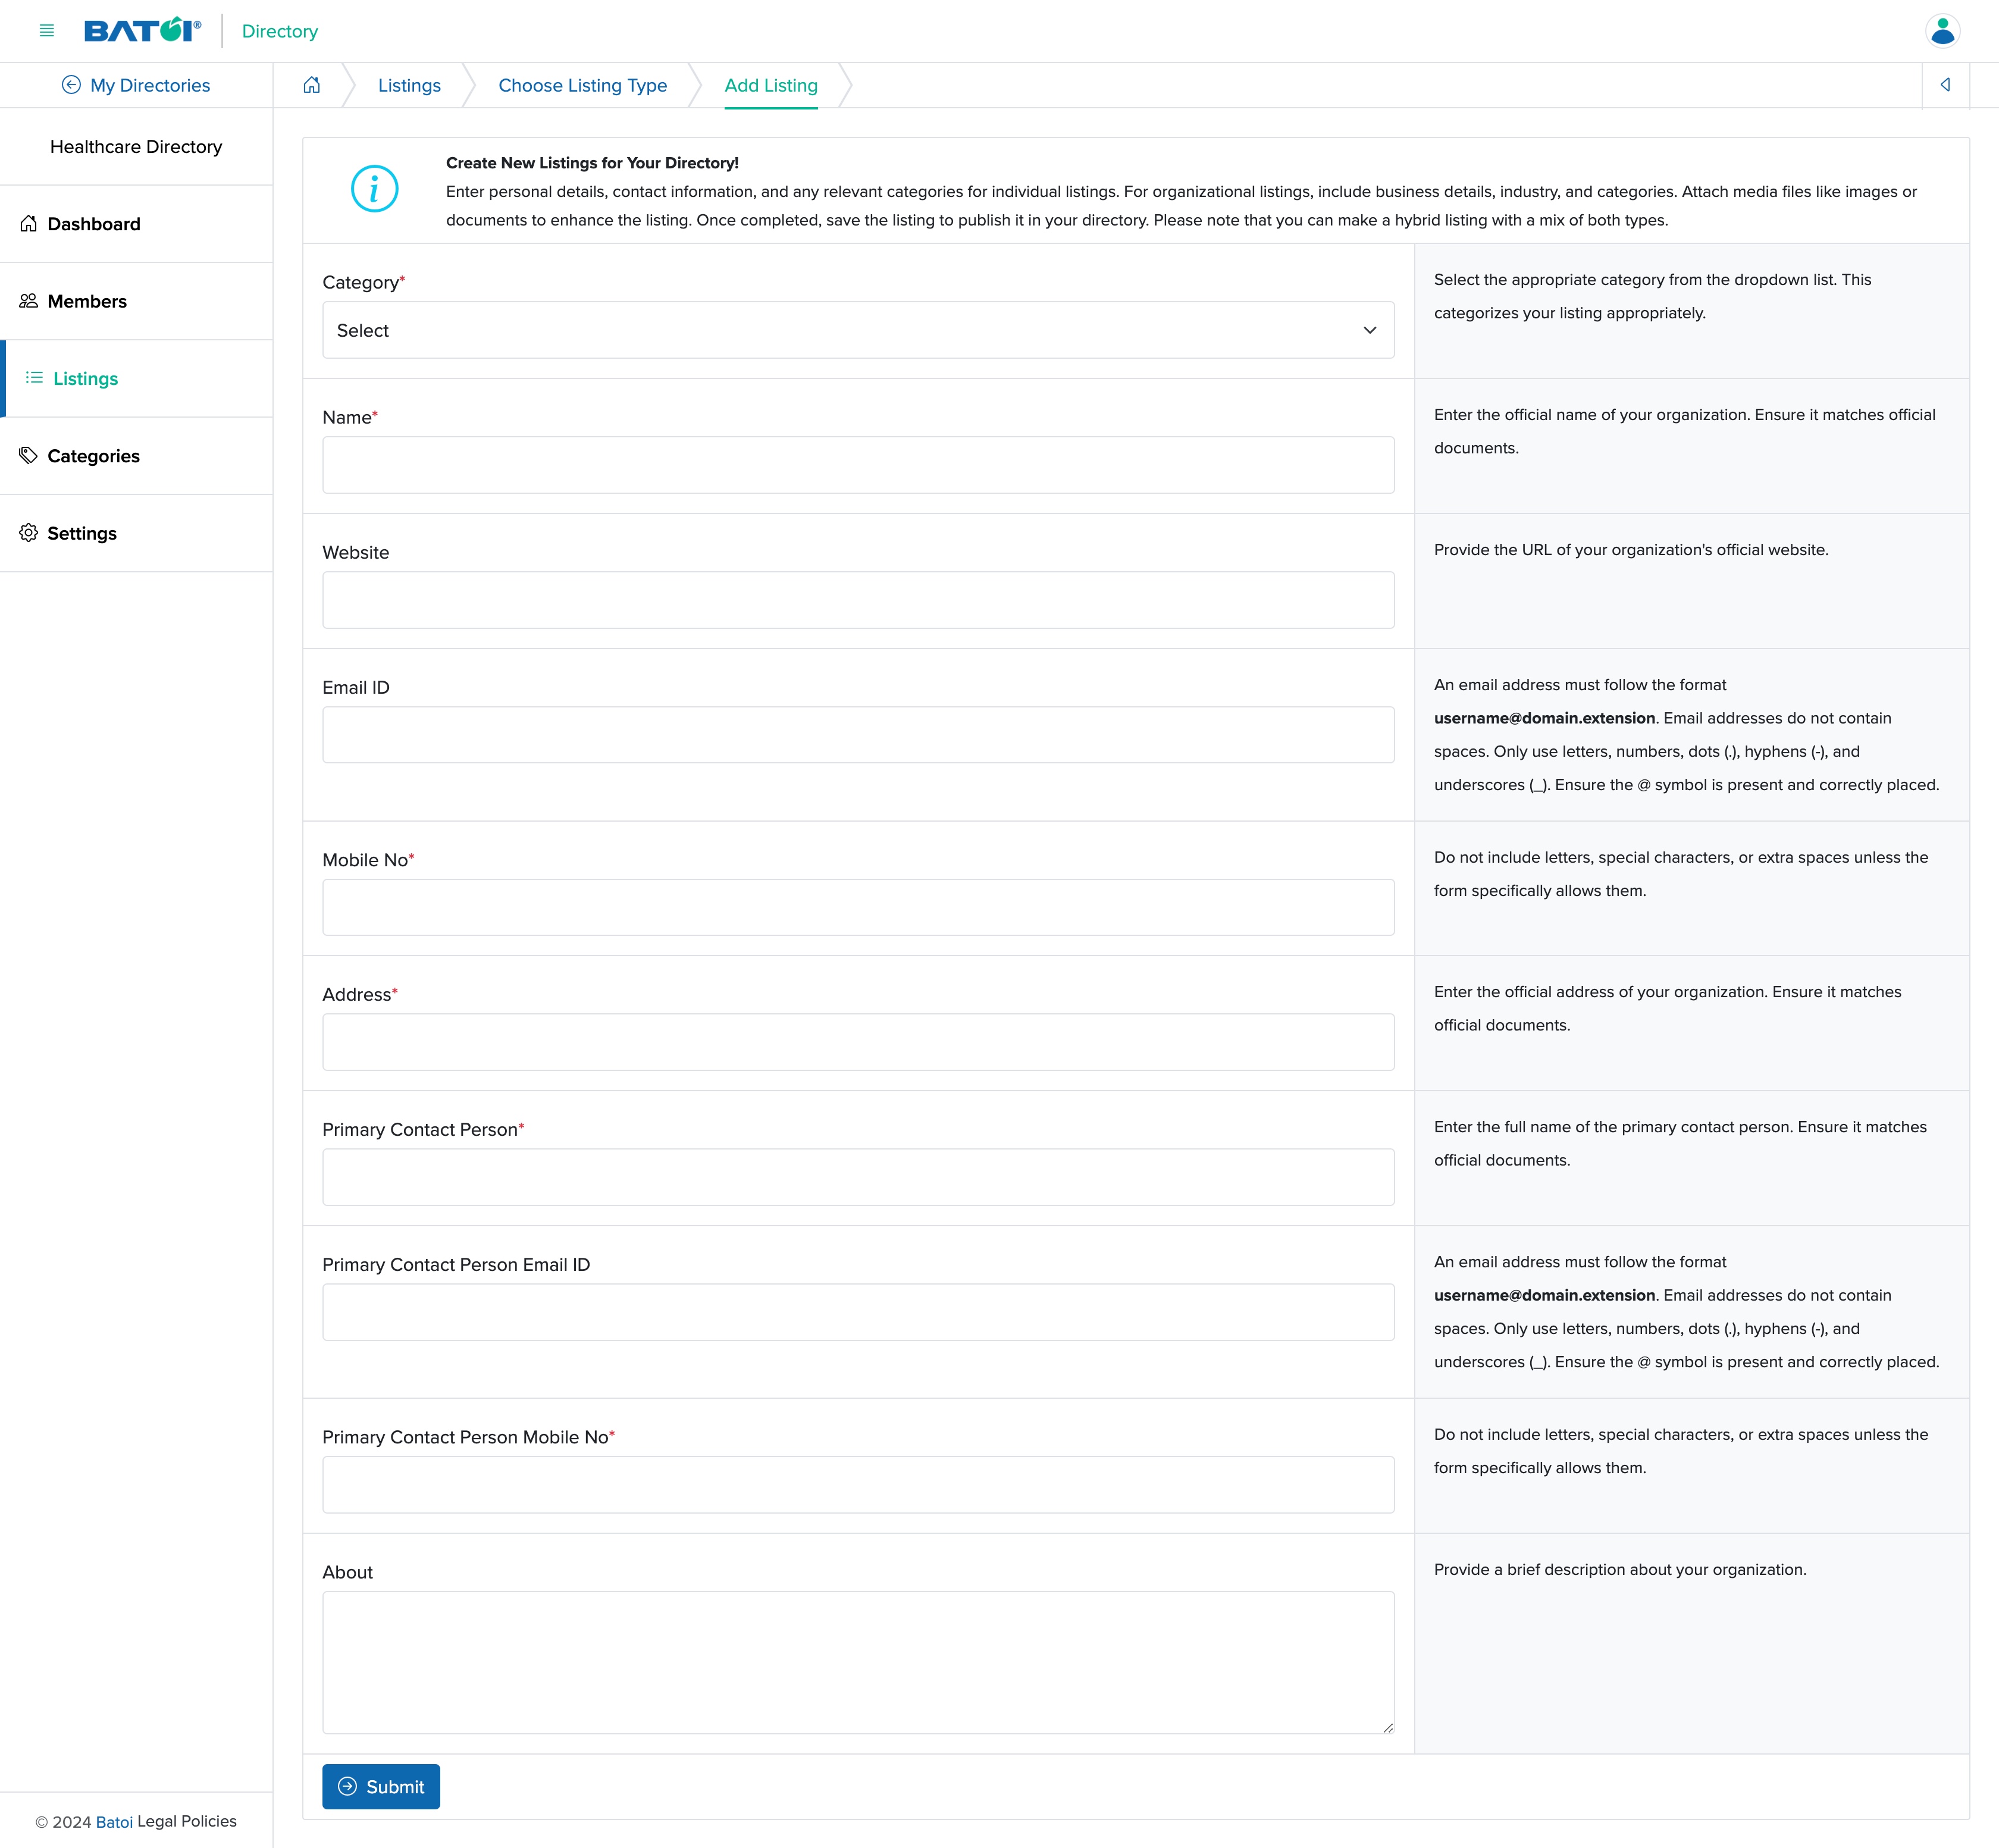
On the add organizational listing screen, enter the details below and click the Submit button to add a new listing to the particular directory, as shown in Figure 14 above.
- Category (drop menu - Mandatory): Select one category from the list
- Name (textbox - Mandatory): Full name of the Organization
- Website (textbox - Optional): Website address of the Organization
- Email ID (email box - Optional): Enter the email ID of the Organization
- Mobile No (number box - Mandatory): Enter the mobile number of the Organization
- Address (textbox - Mandatory): Enter the address of the Organization
- Primary Contact Person (textbox - Mandatory): Full name of the primary contact person of the Organization
- Primary Contact Person Email ID (email box - Optional): Email ID of the primary contact person of the Organization
- Primary Contact Person Mobile No (number box - Mandatory): Mobile no of the primary contact person of the Organization
- About (textarea - Option): Enter the Organizational description
View Listing
To view a listing, click on the specific Name or view icon on the right side of each row, as shown in Figure 15 below.
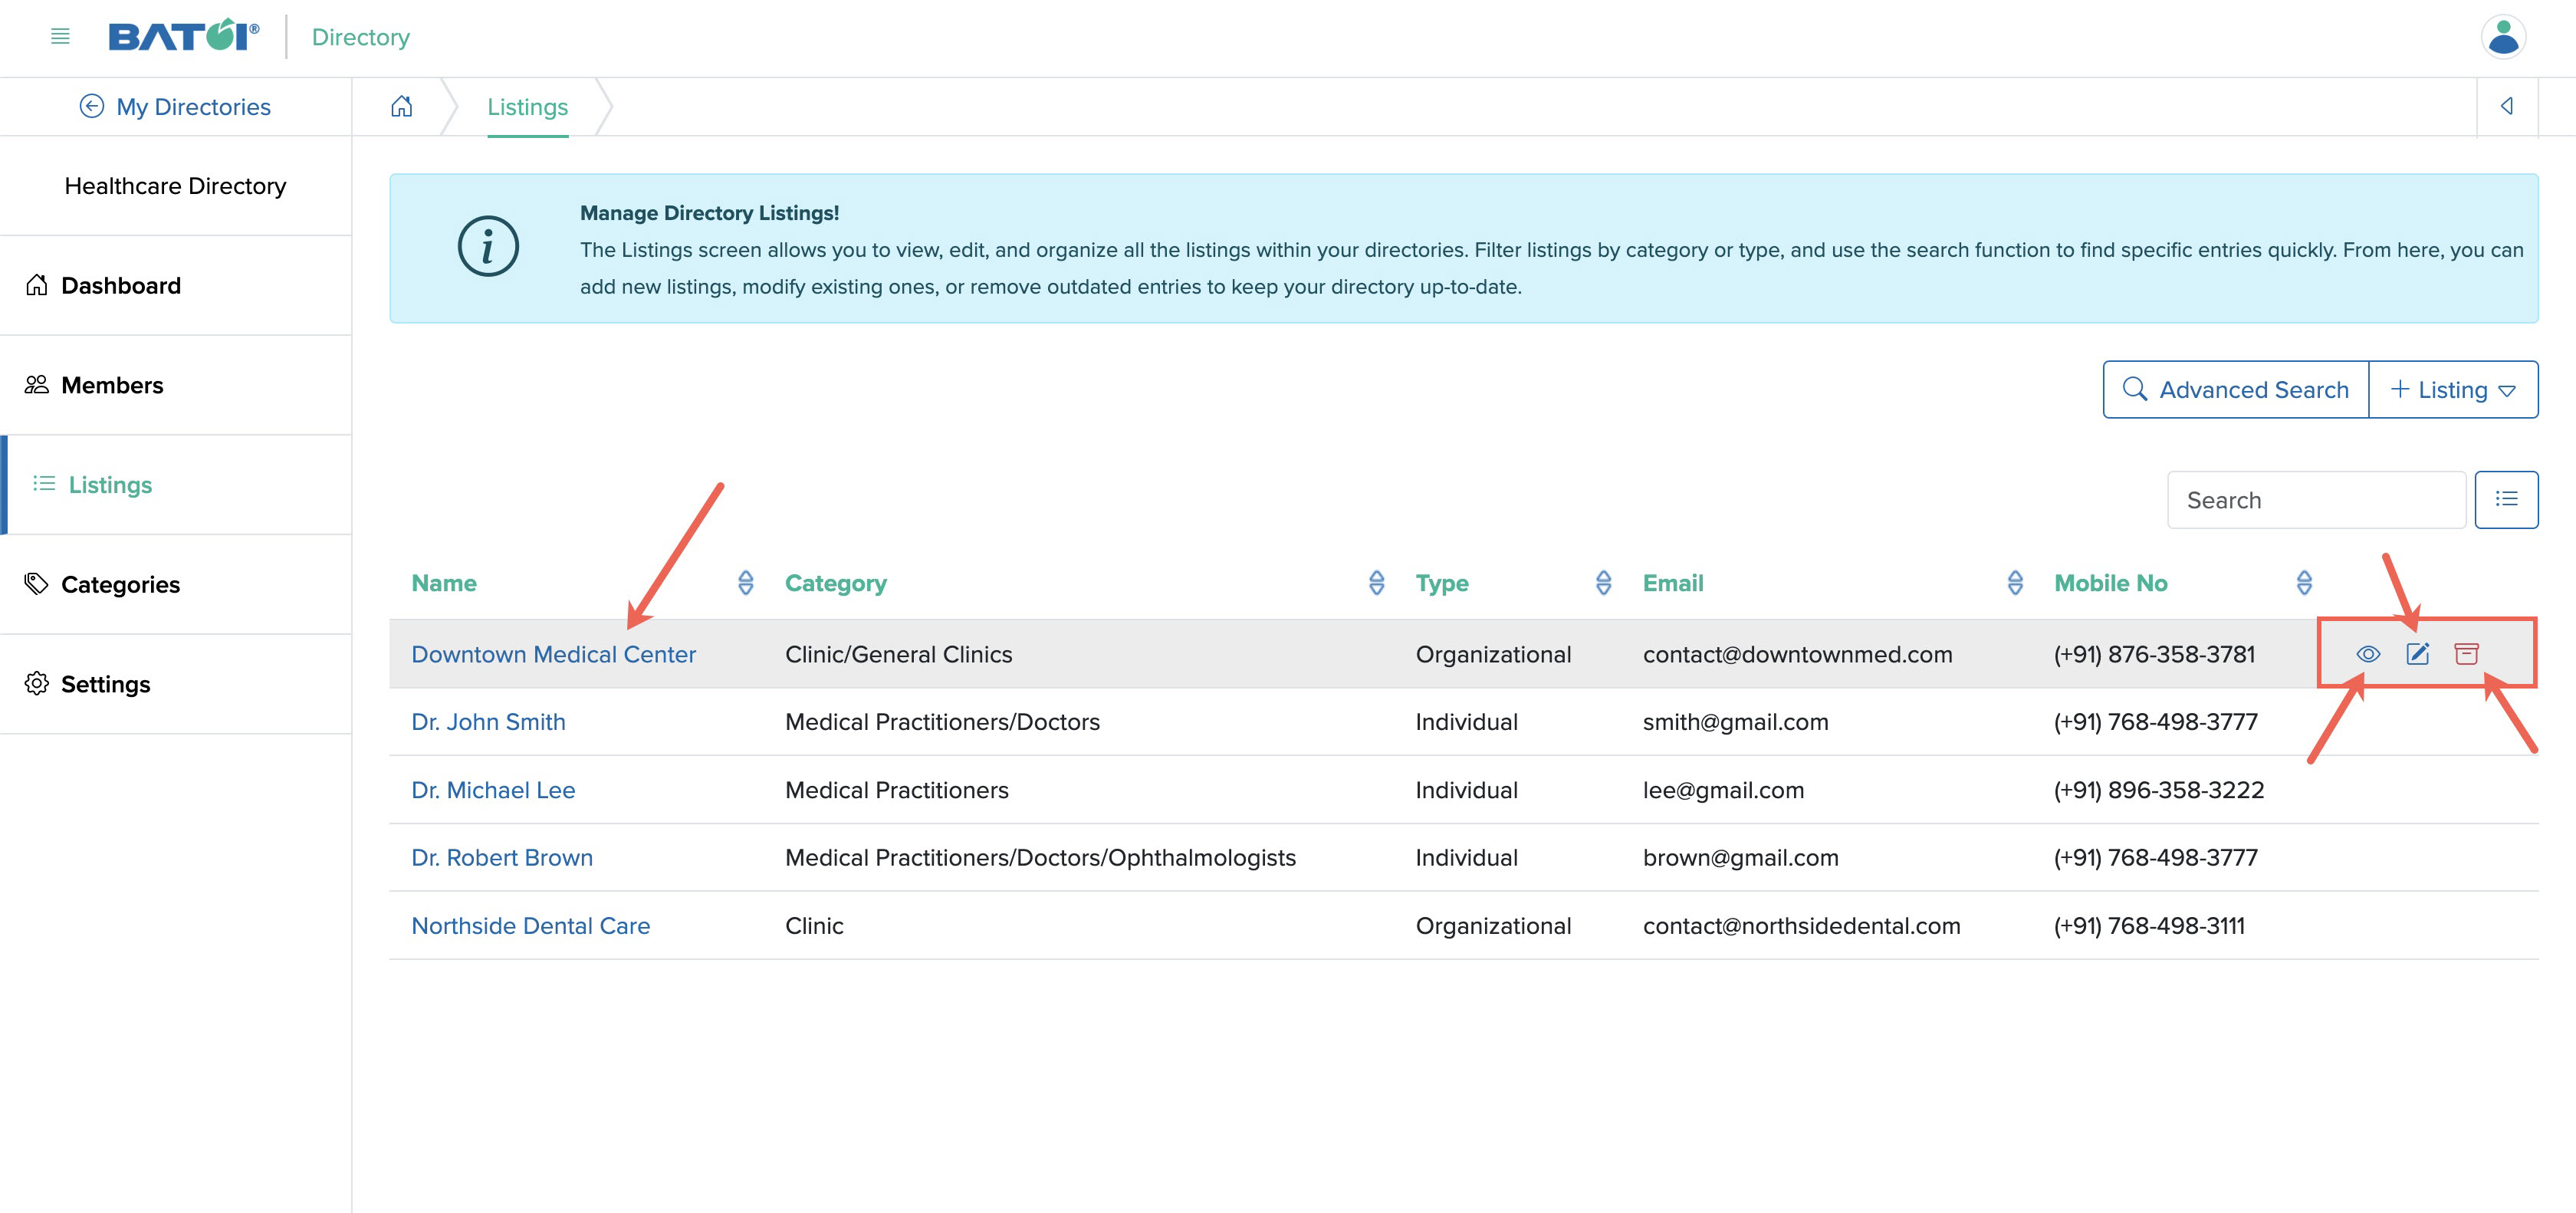
Upon clicking the name or view icon, as shown in Figure 15 above, the particular listing entry view page will open, as shown in Figure 16 below.
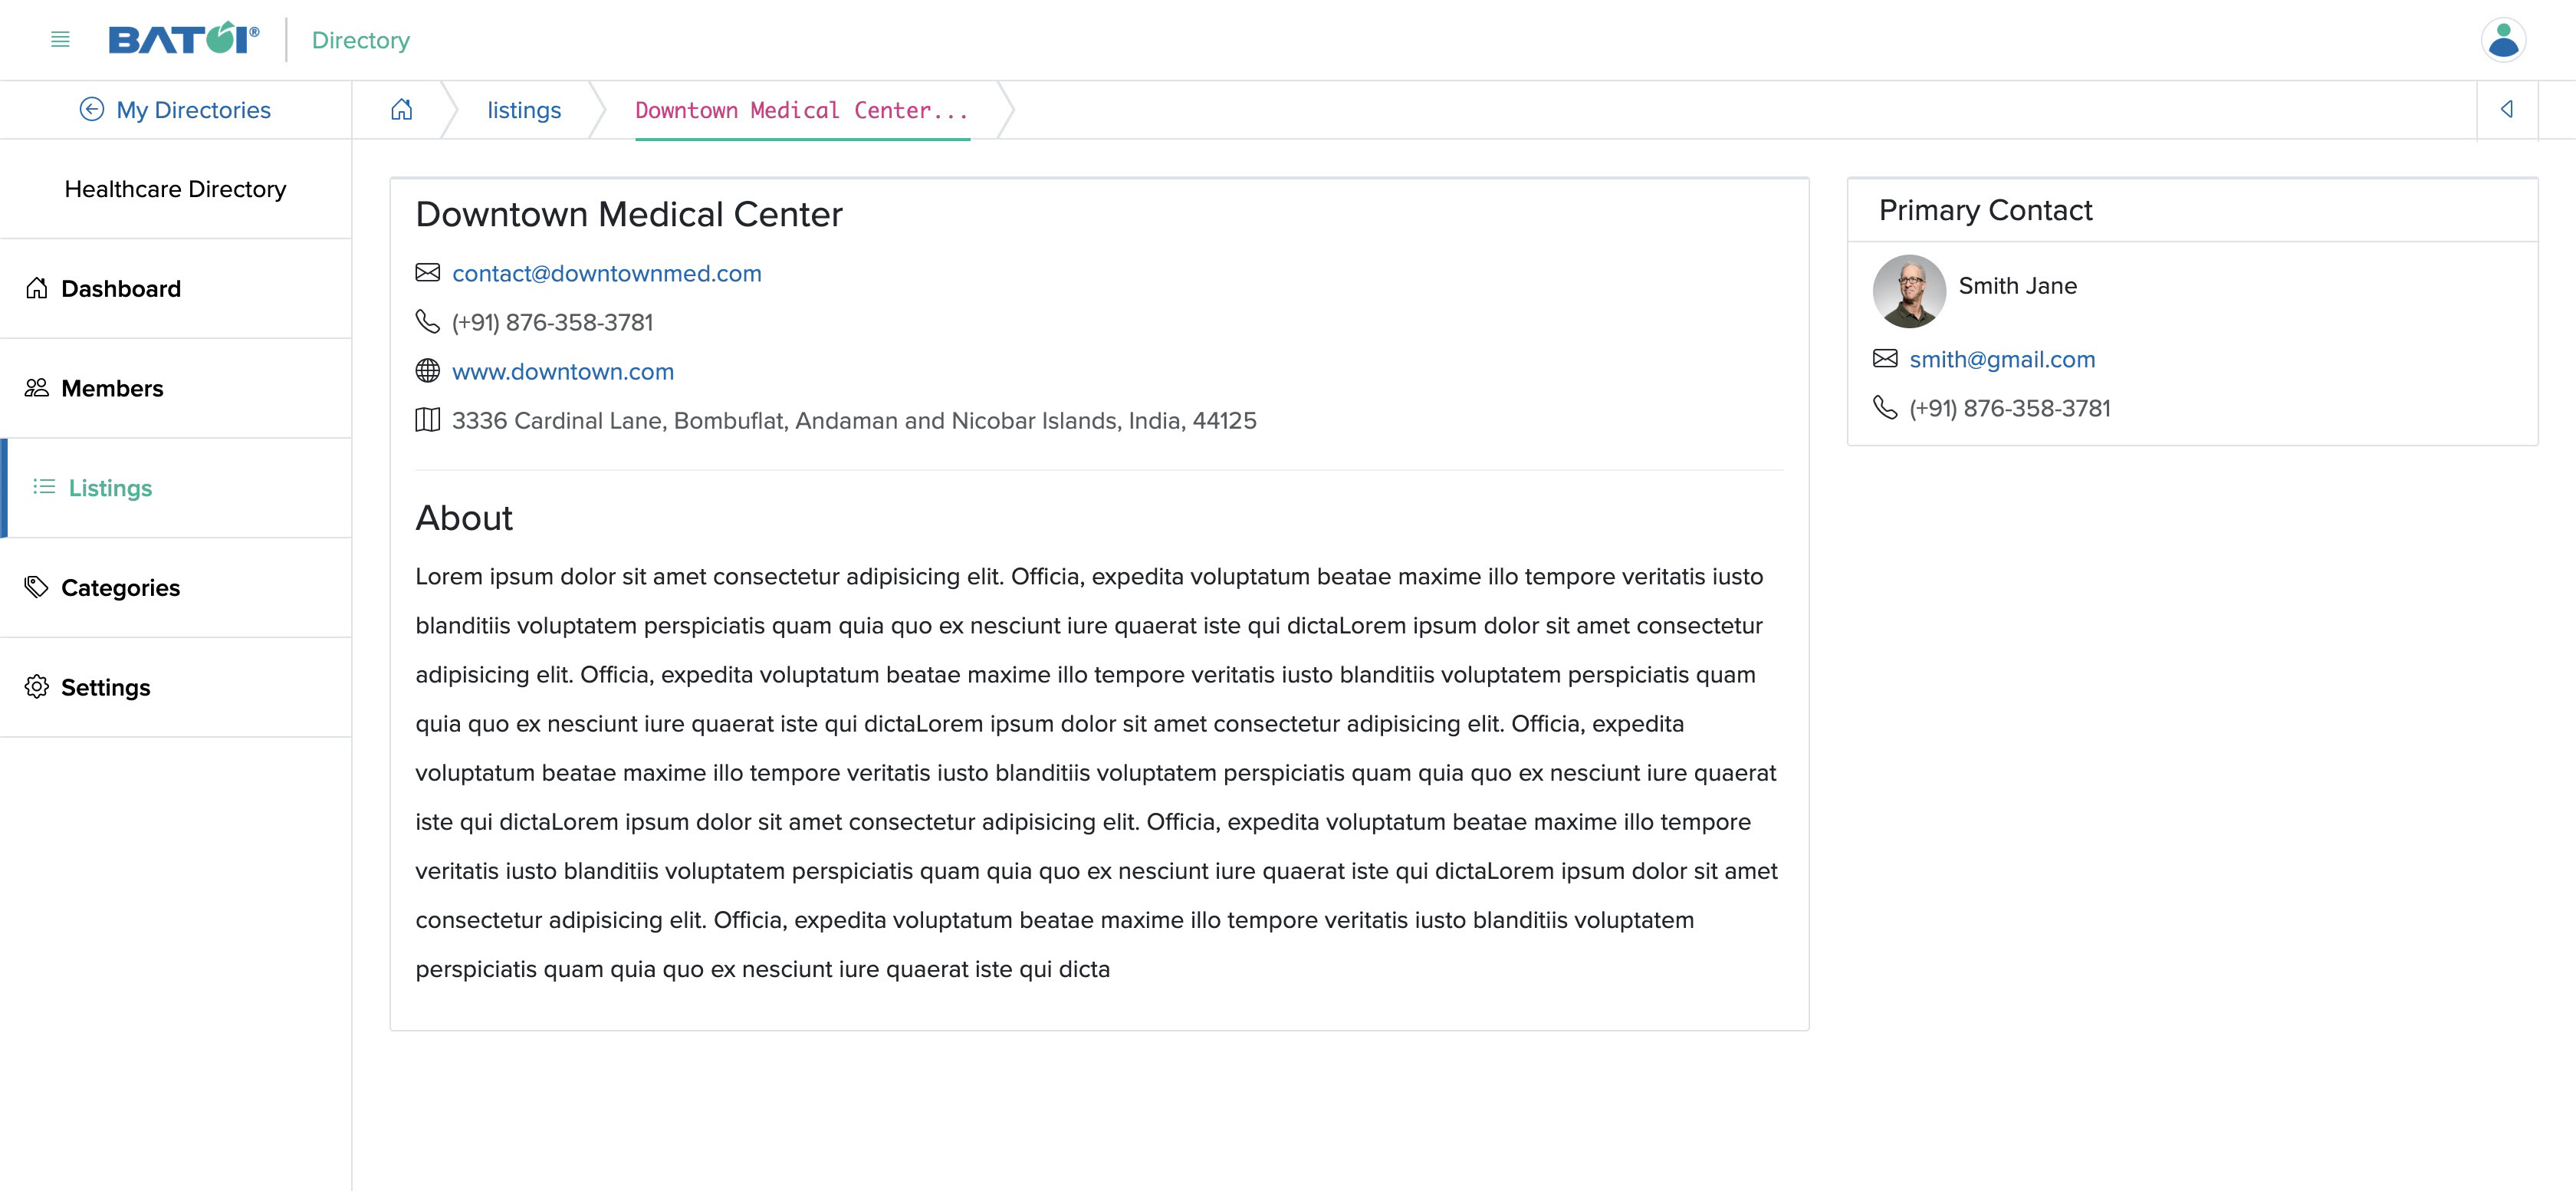
To return to the listing list page, click on the back icon at the top right of the screen.
Edit Listing
To edit a listing, click on the edit icon on the right side of each row, as shown in Figure 15 above. The particular listing entry edit page will open, as shown in Figure 17 below.
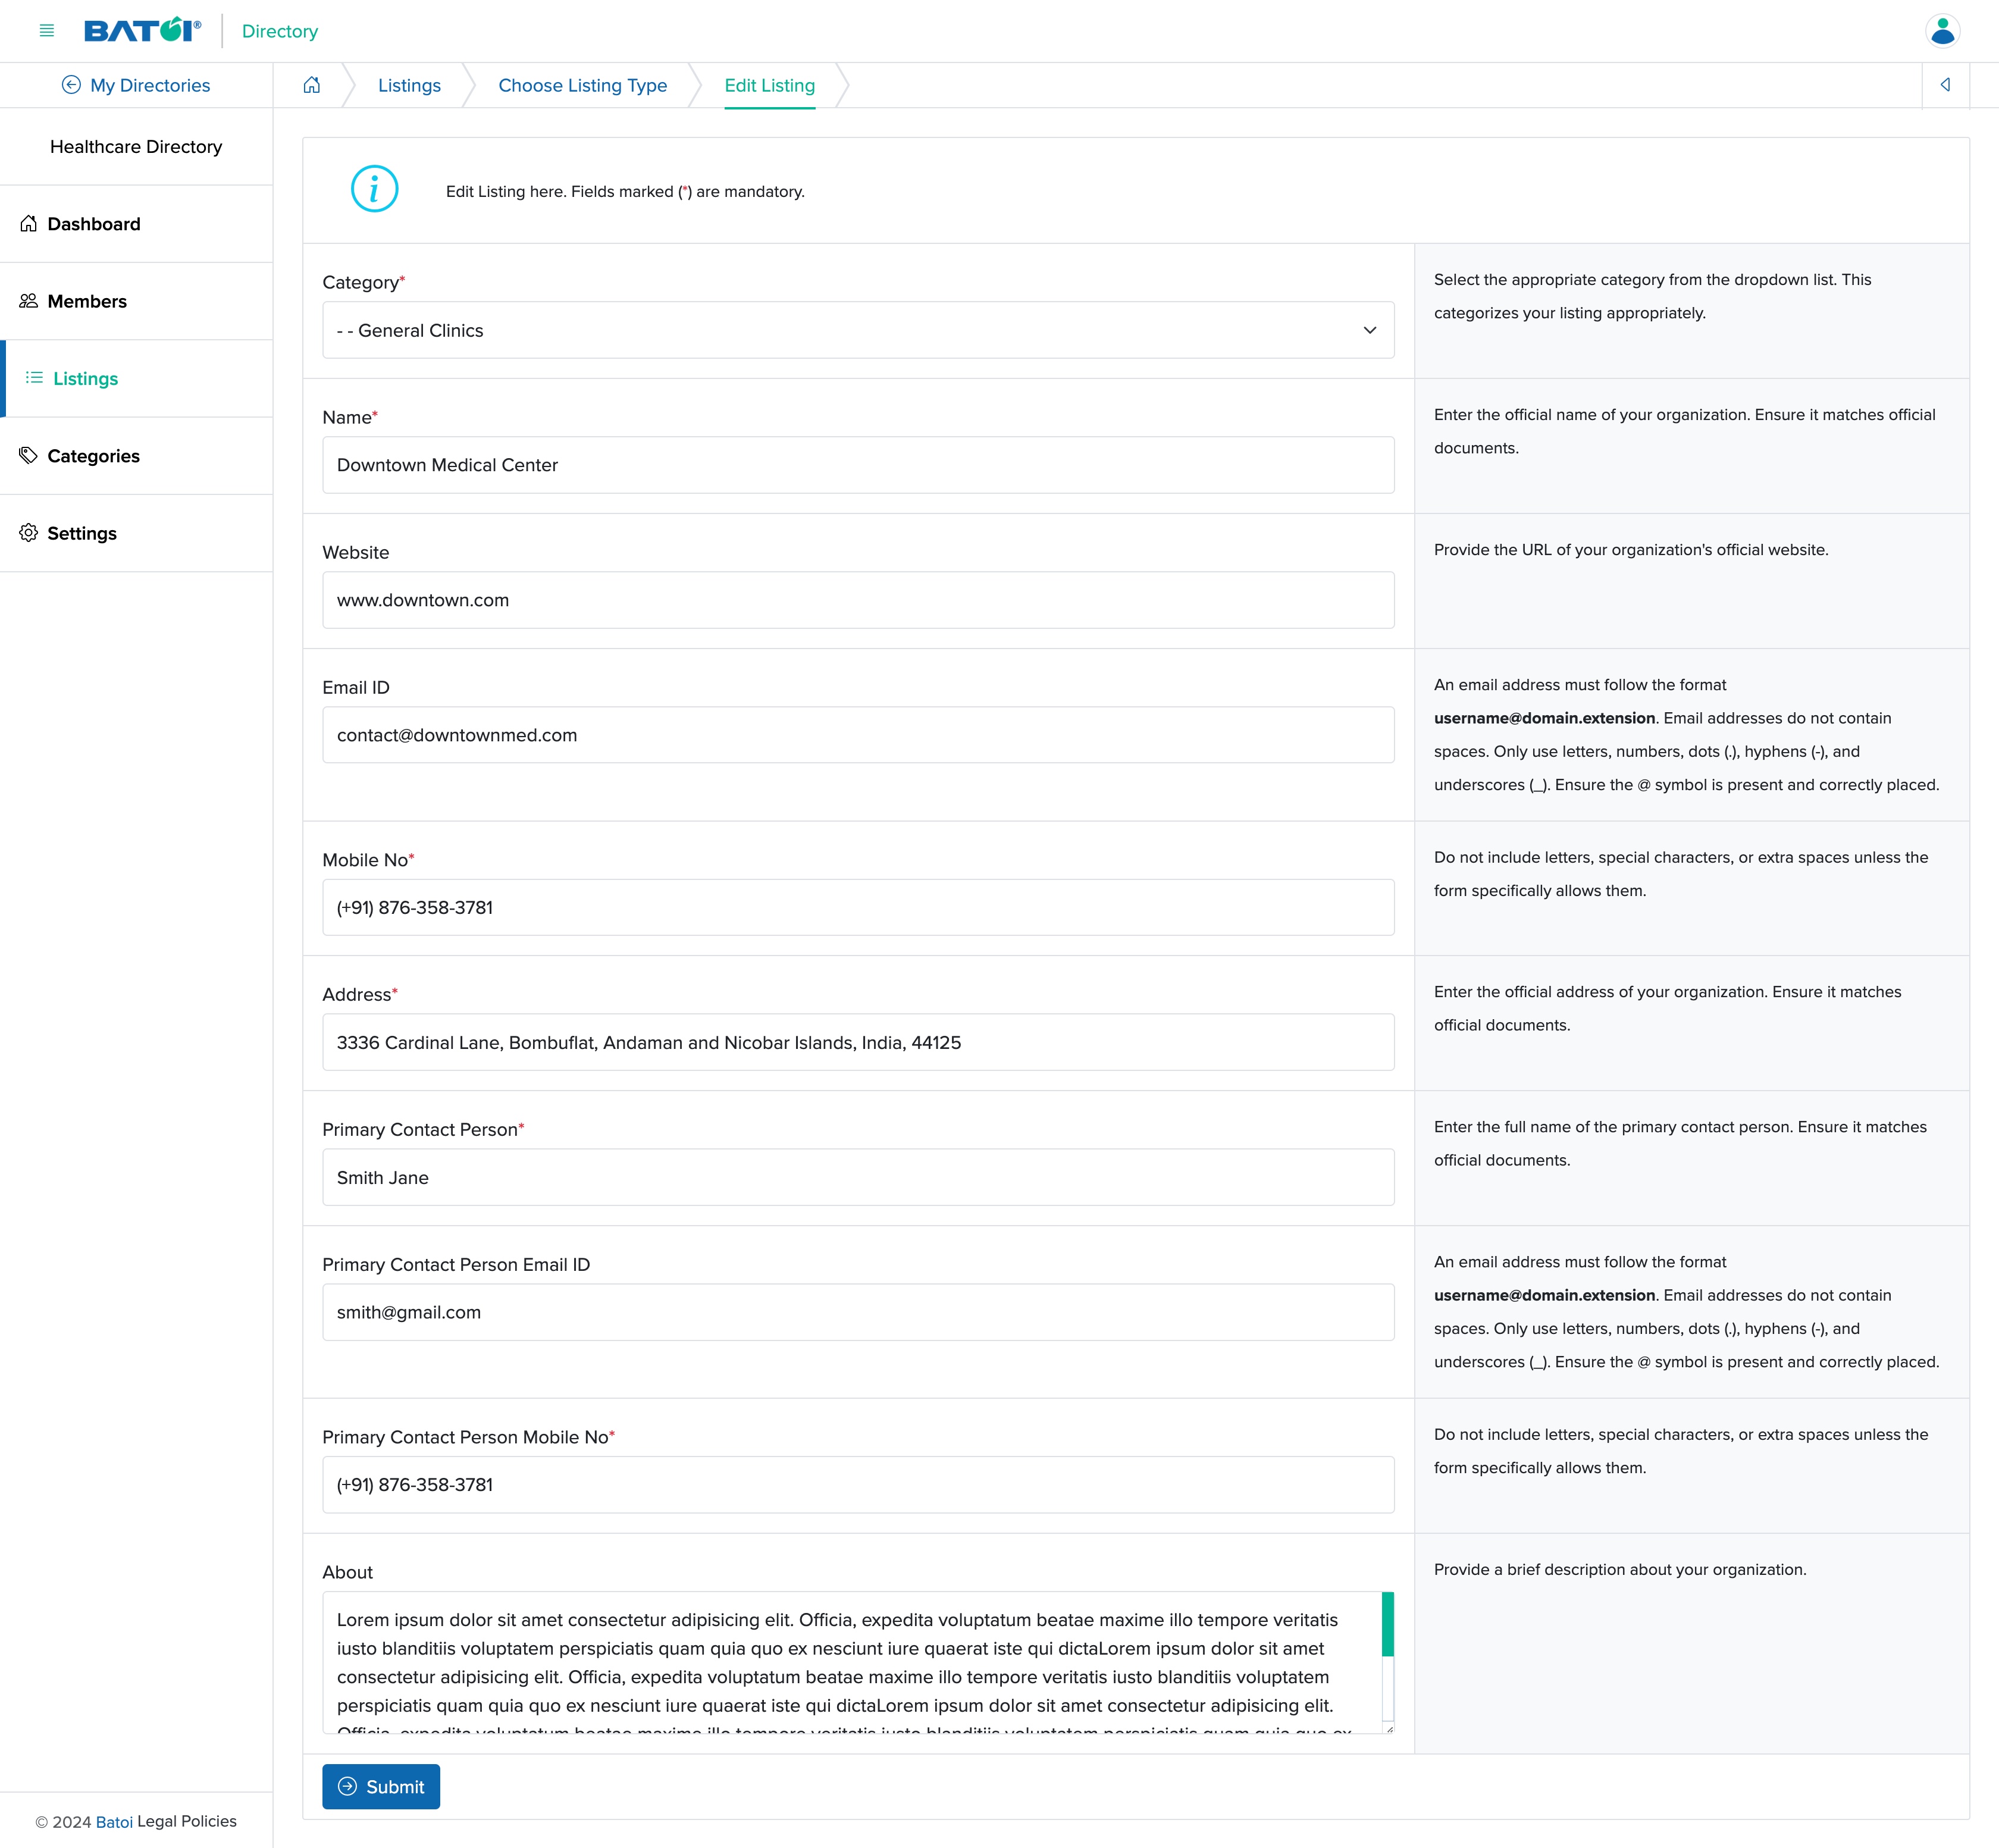
Edit the desired values and click the Submit button to save the changes, as shown in Figure 17 above.
Delete Listing
To delete a listing, click on the delete icon on the right side of each row, as shown in Figure 15 above; click Ok from the pop-up box, and the particular listing will be achieved.
Categories
Click on the Categories menu on the Admin Control Panel, and you will be redirected to the listing list page, as shown in Figure 18 below.
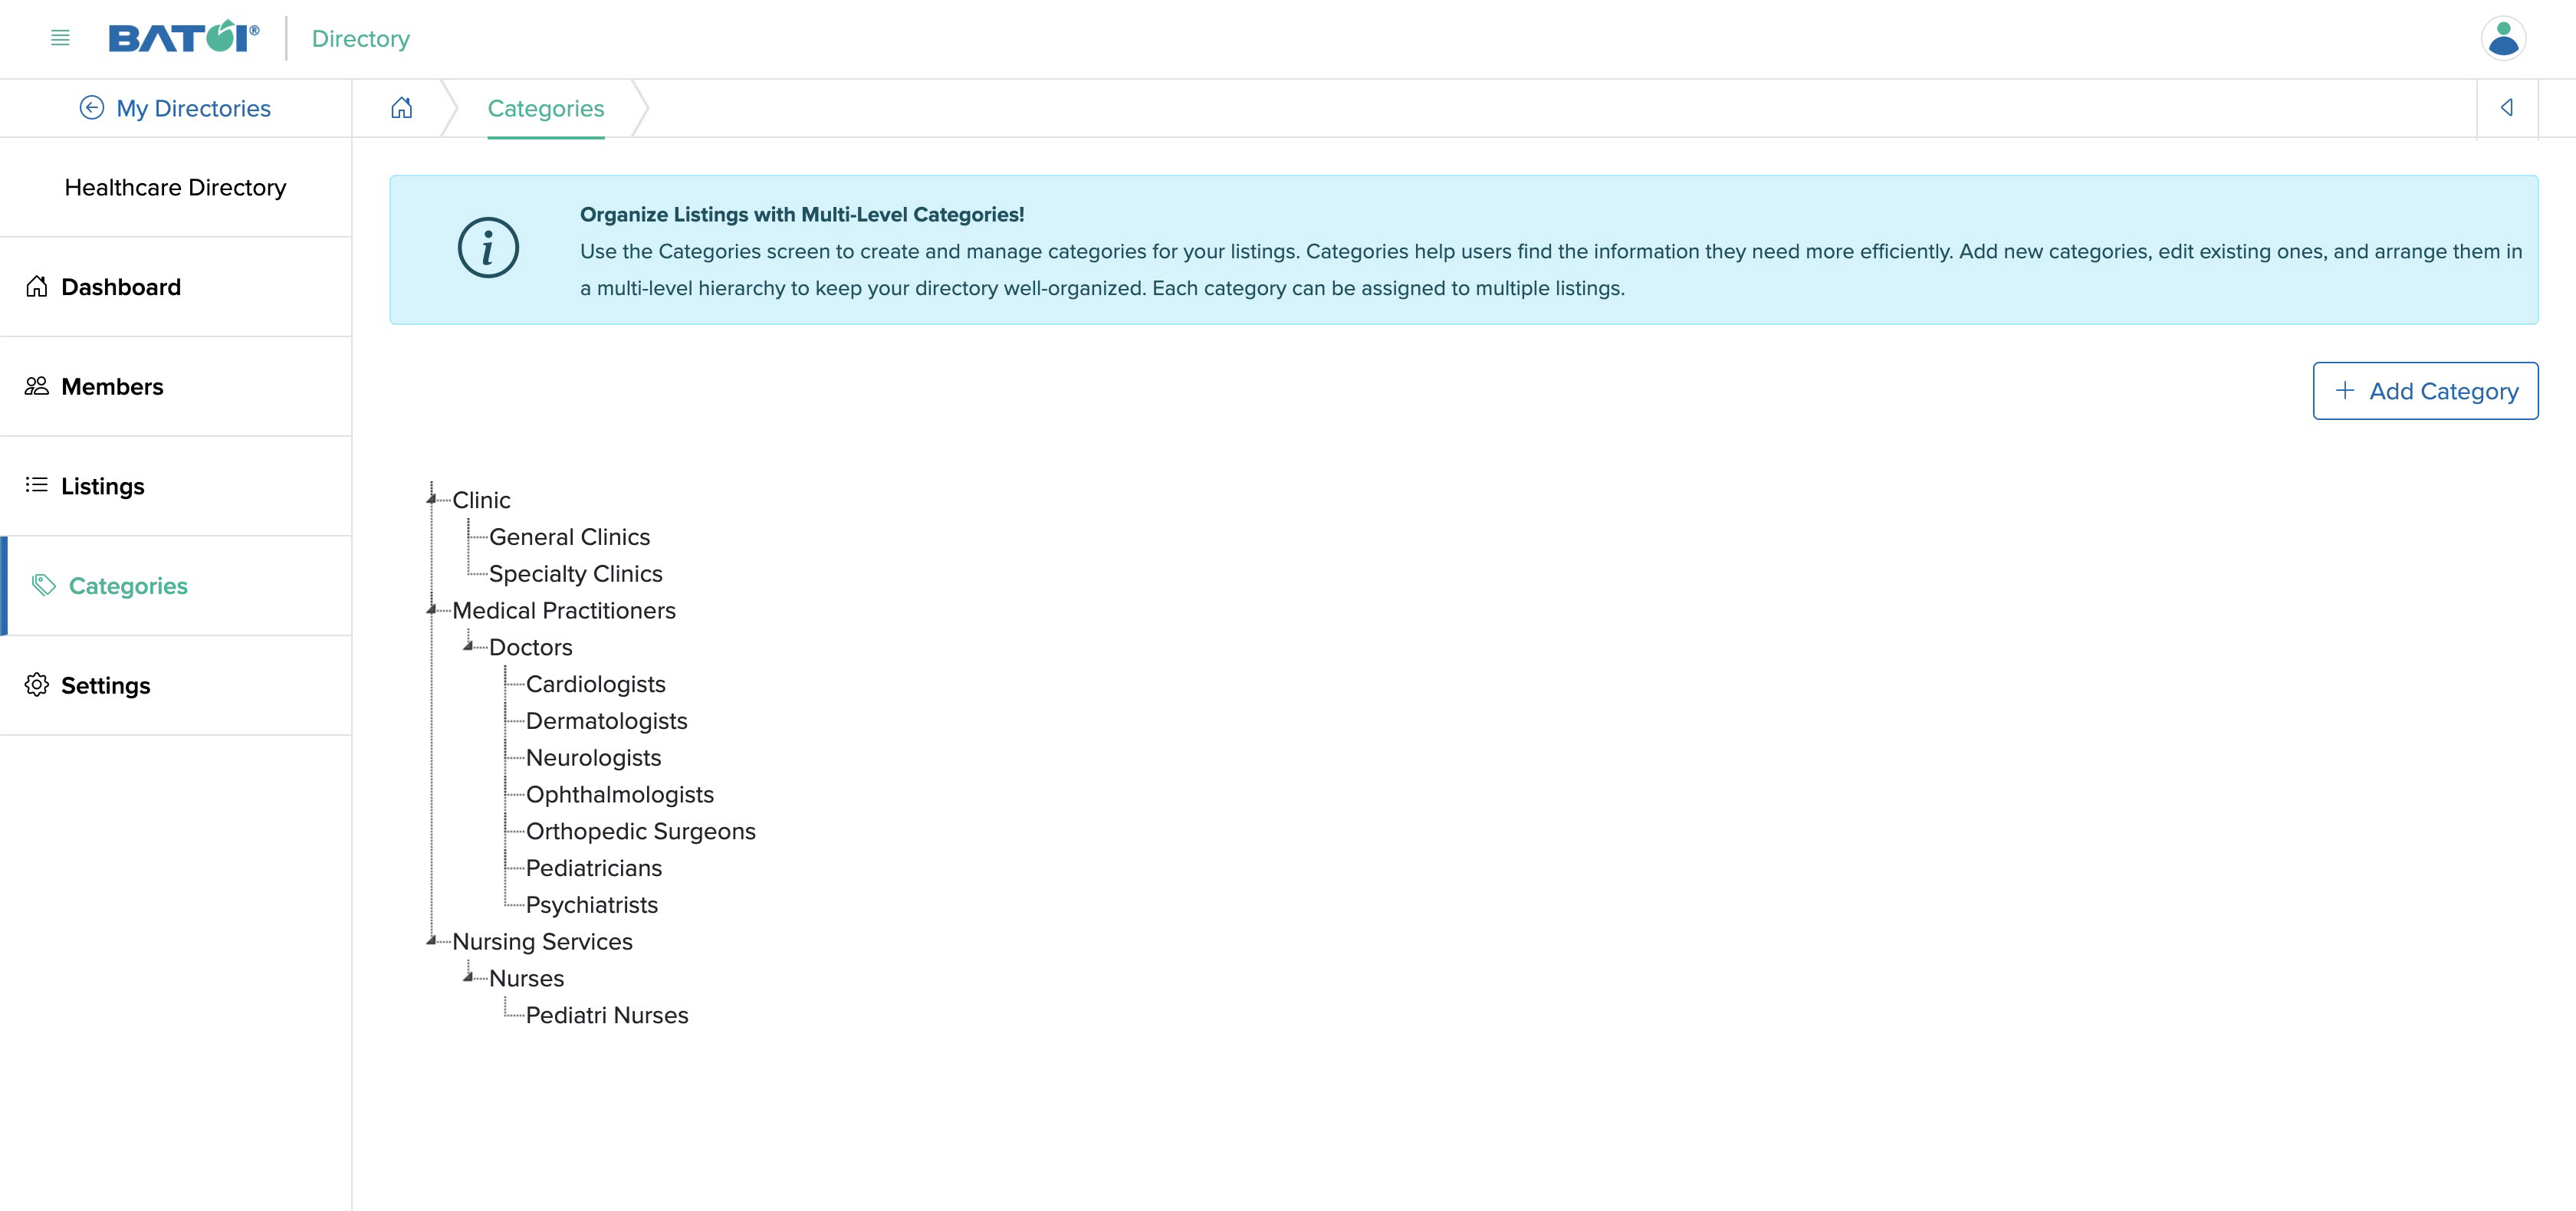
The listing list page will list all the categories and subcategories available for the directory in a tree fashion, as shown in Figure 18 above.
Add Category
To add a new category, click the Add Category button at the top right of the screen, as shown in Figure 19 below.
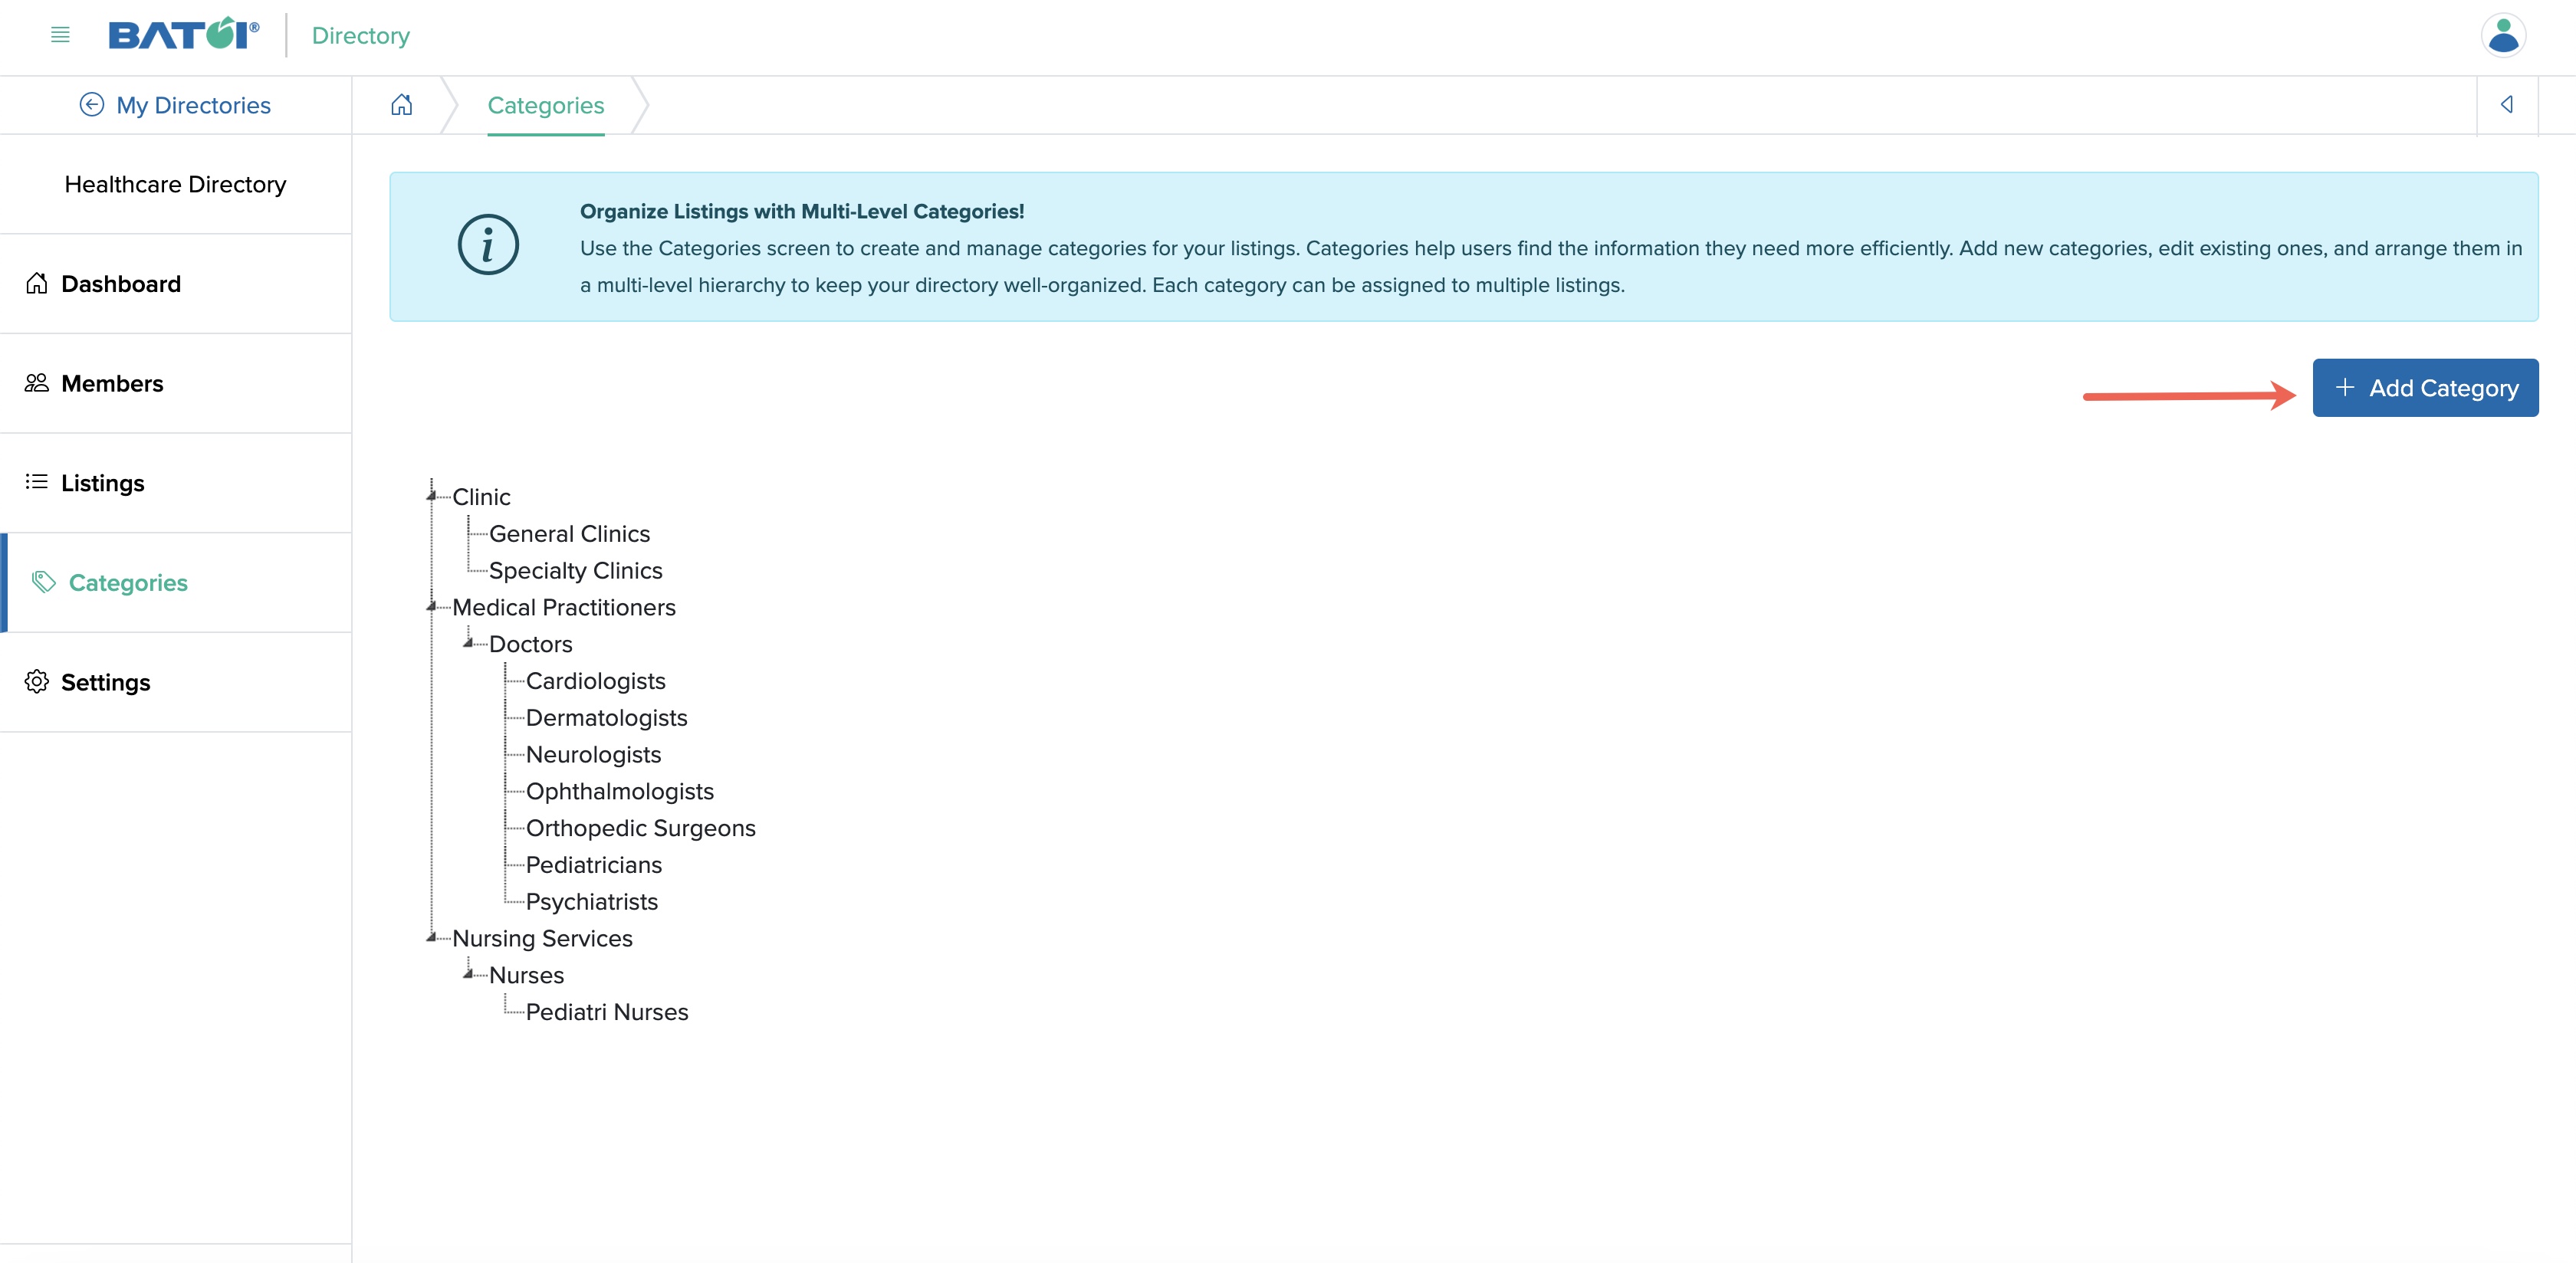
Upon clicking the button, as shown in Figure 19 above, the add category page will open, as shown in Figure 20 below.
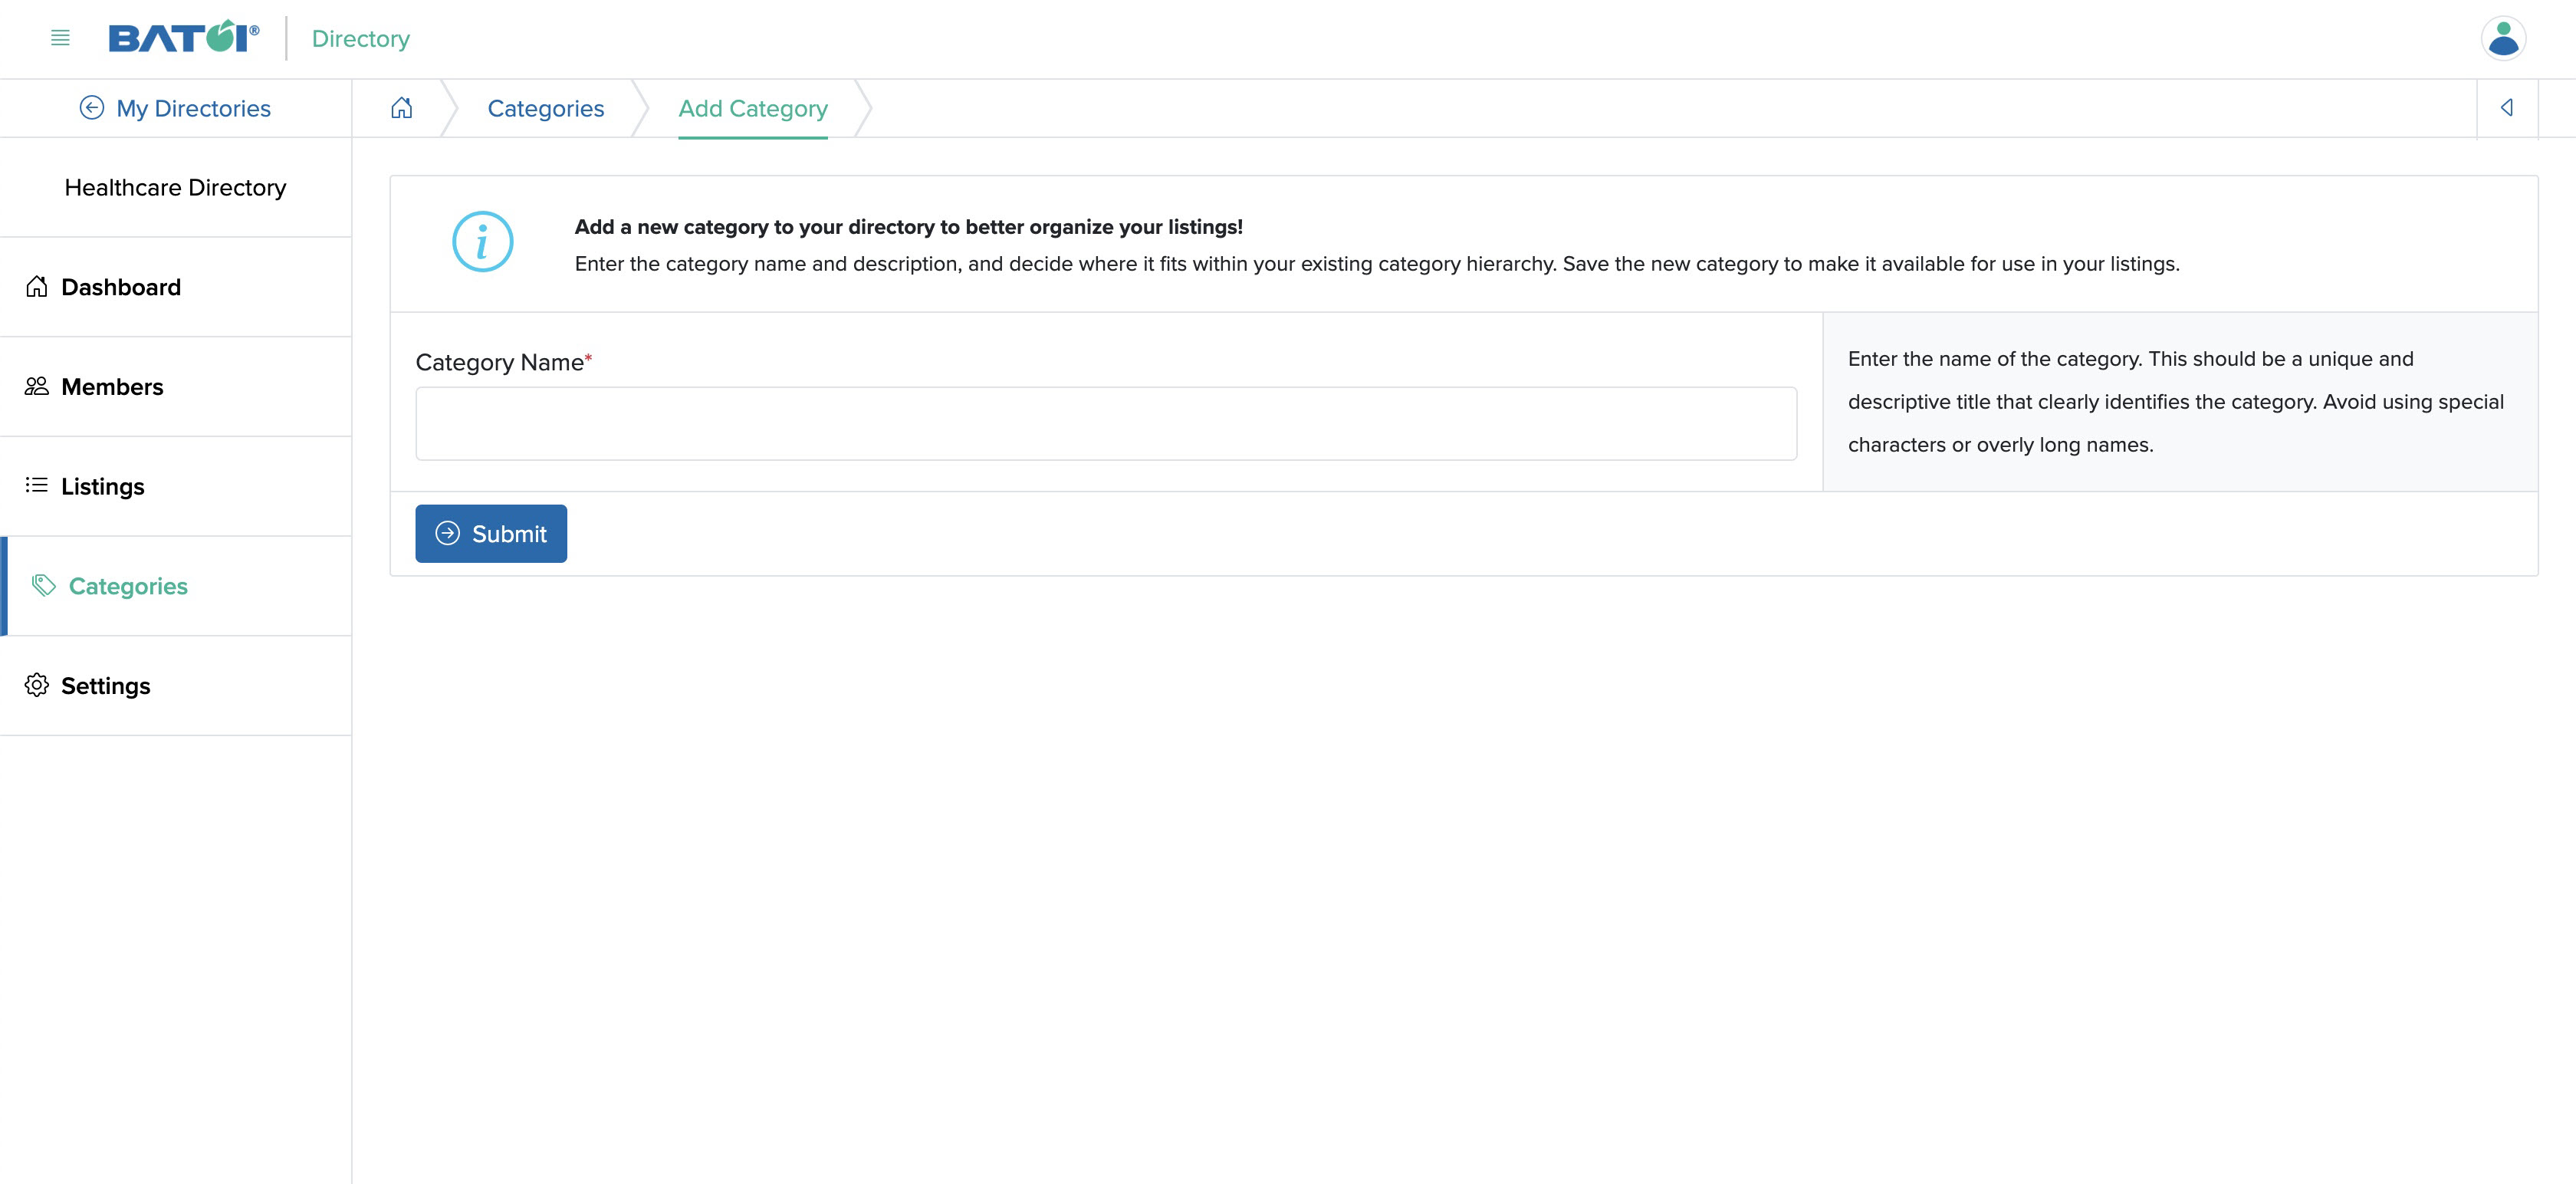
On the add category screen, enter the Category Name and click the Submit button to add a new category, as shown in Figure 20 above.
Add Subcategory
To add a subcategory to a particular category, go to the category list page, hover over the specific category under which you want to add further subcategories, and click on the ‘+’ icon, as shown in Figure 21 below.
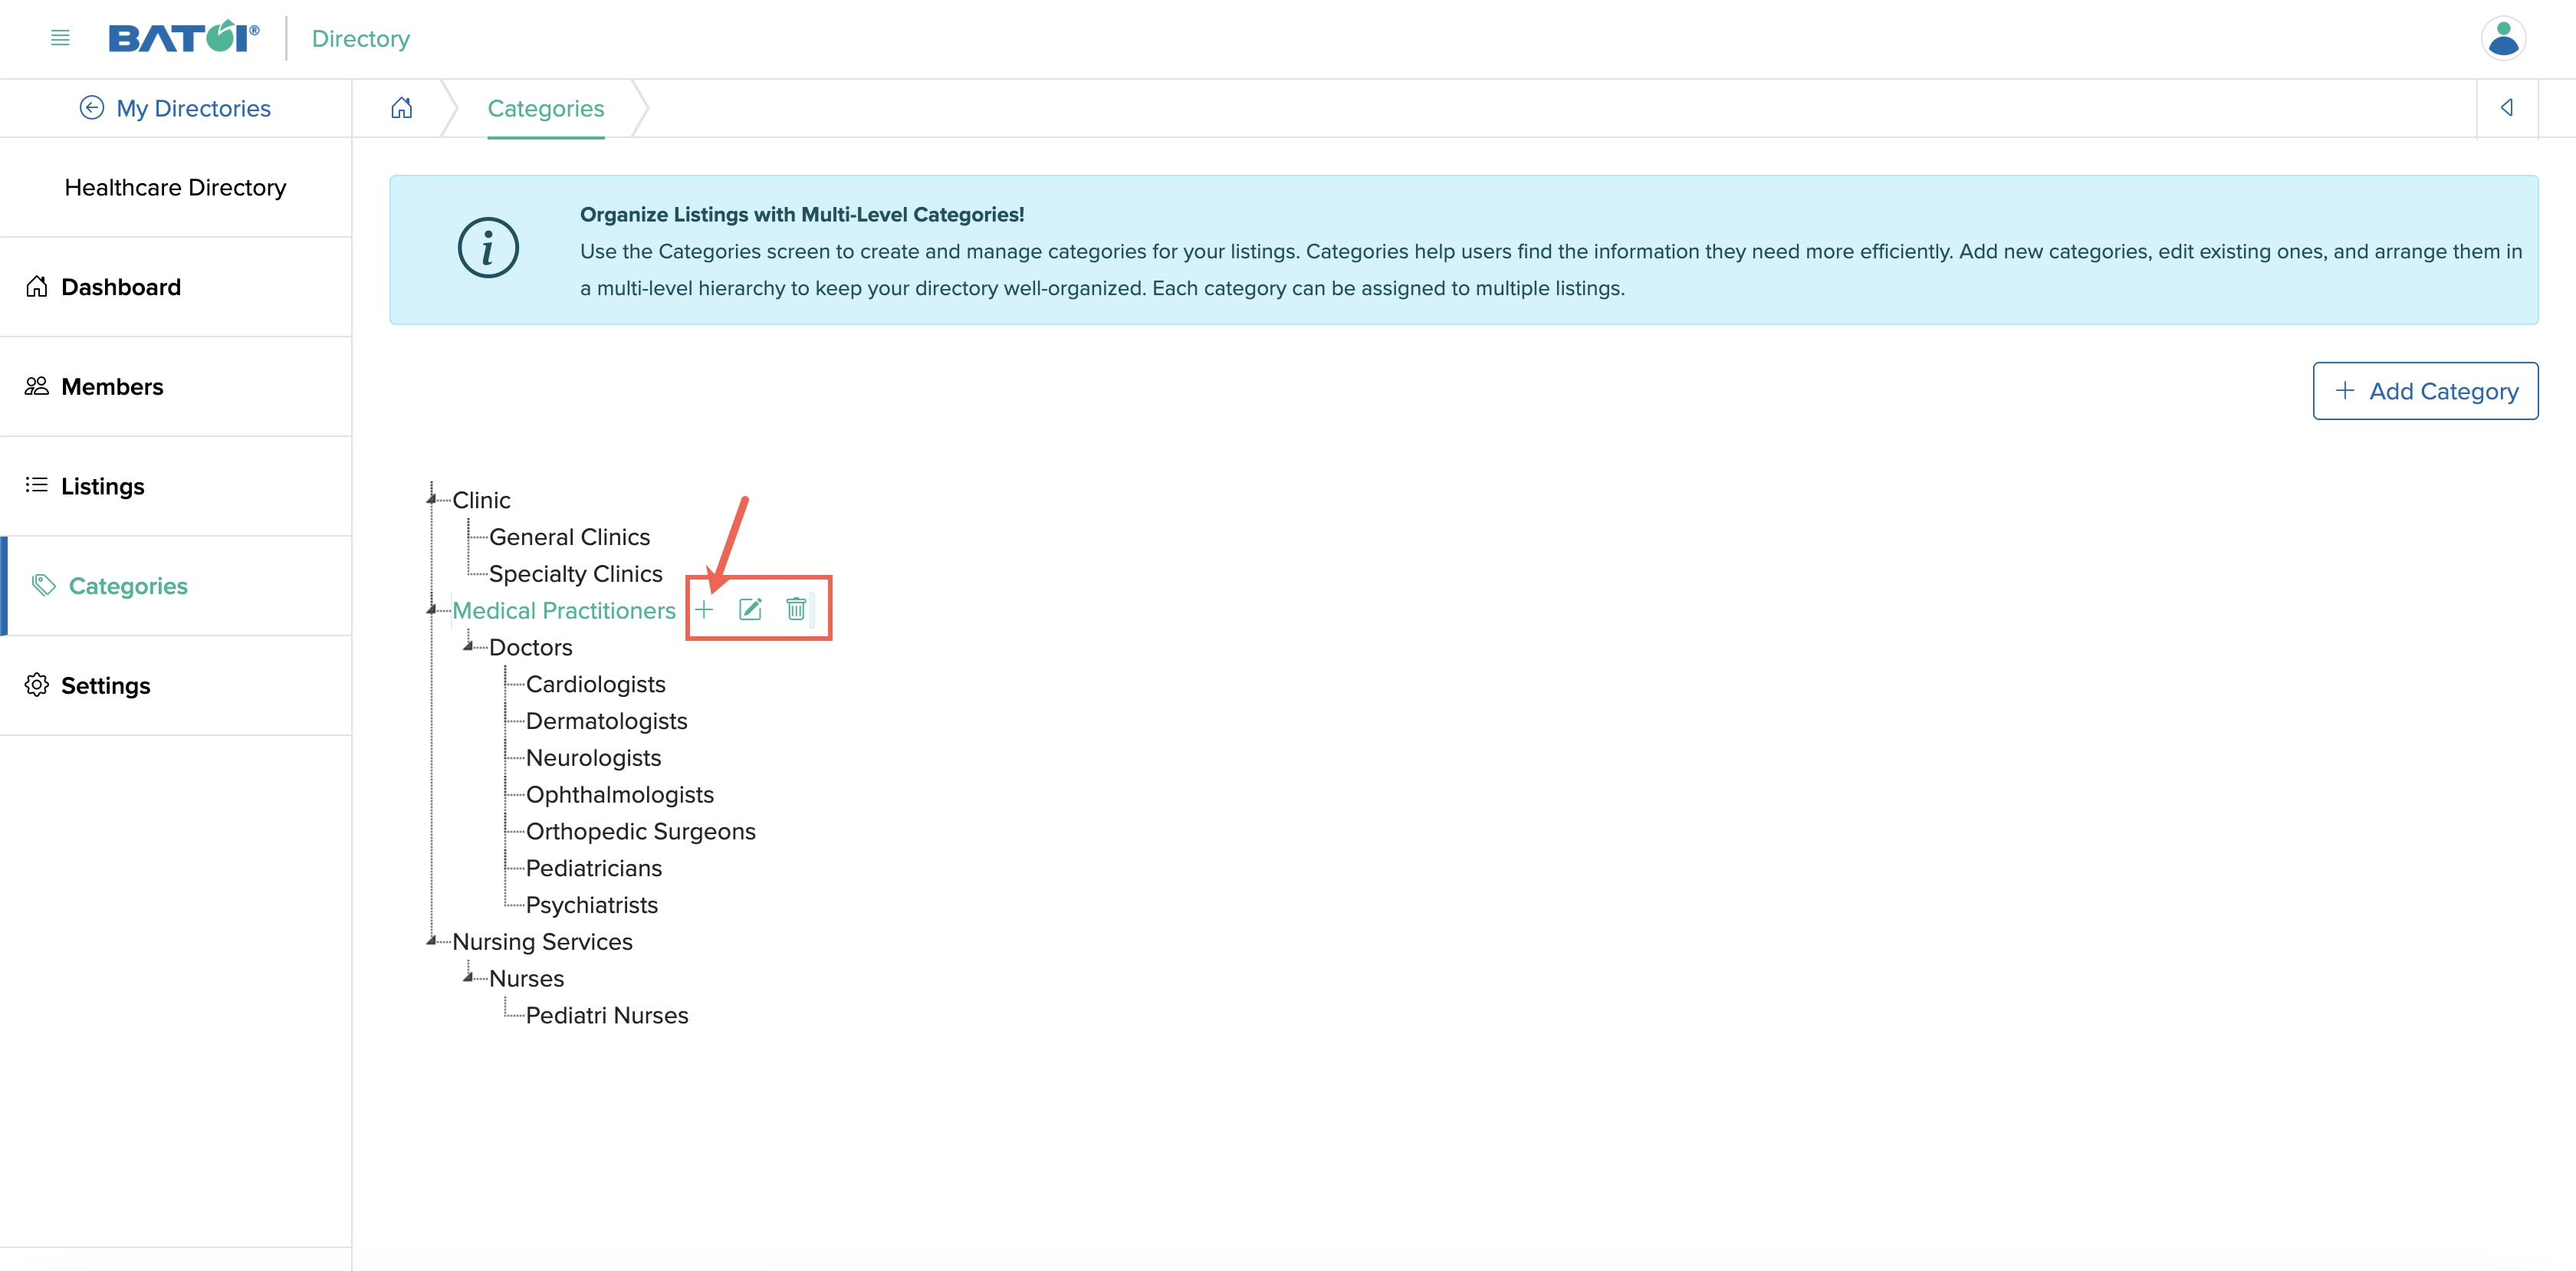
Upon doing so, a pop-up screen will open where you can add subcategories, as shown in Figure 22 below.
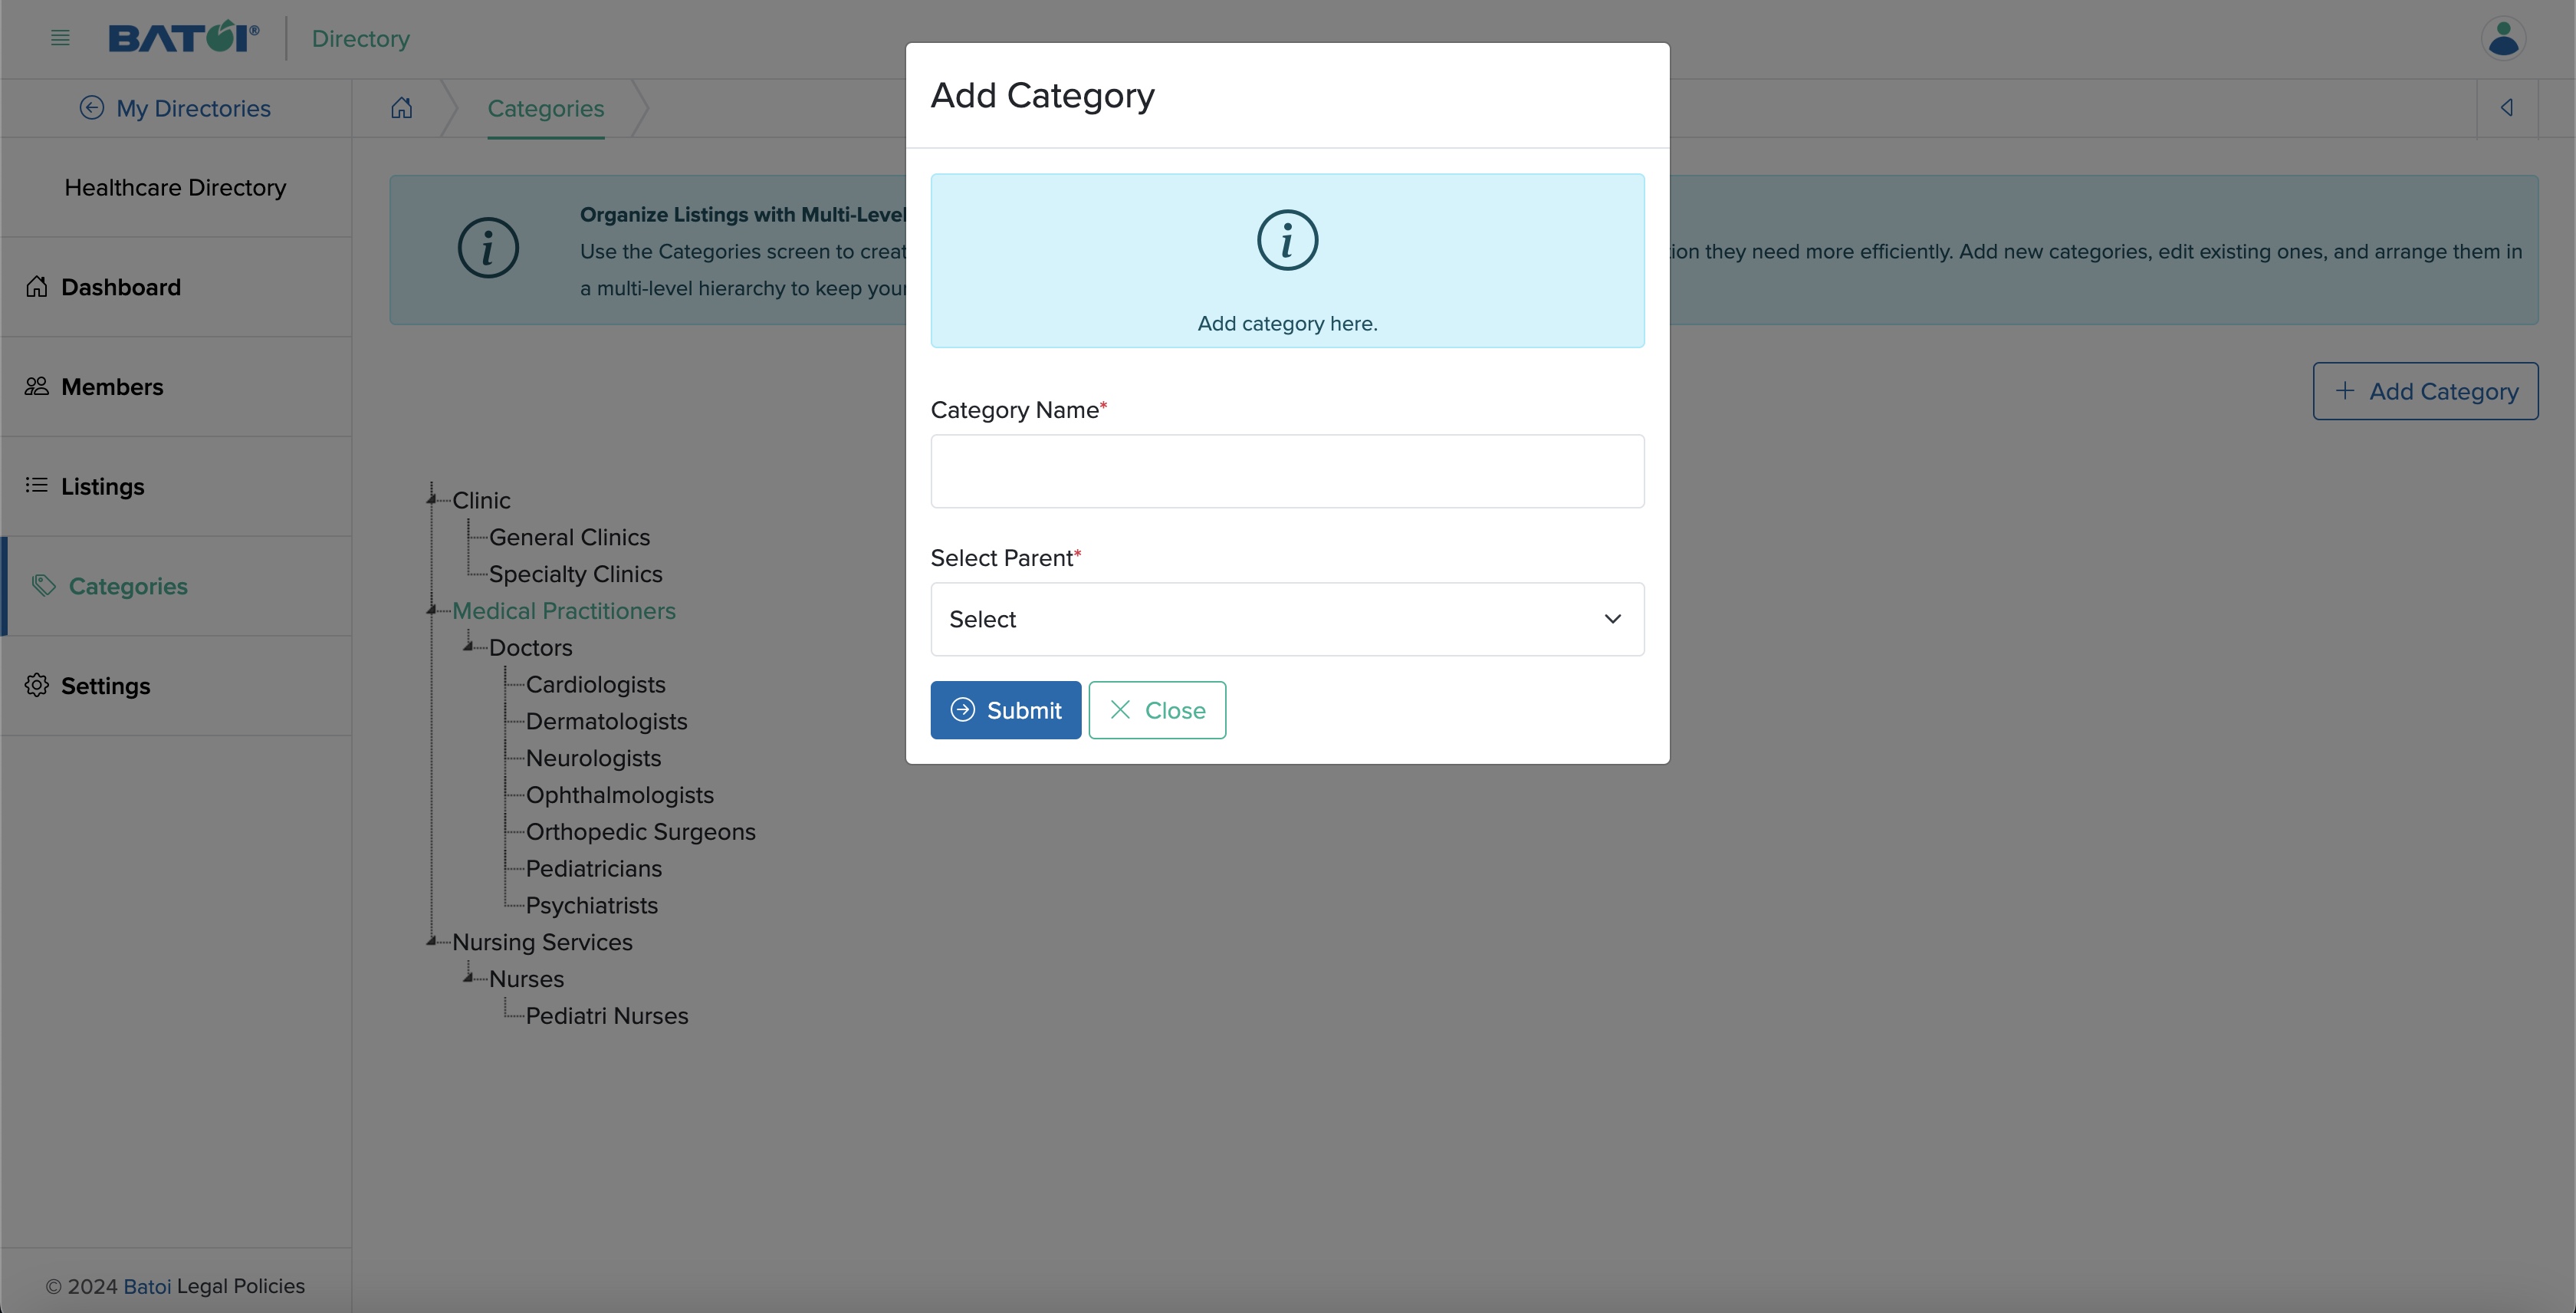
Enter the Category Name and select the Parent Category from the dropdown menu, and click the Submit button to add a subcategory, as shown in Figure 22 above.
Follow the same stem to add further subcategories under a particular category.
Edit Category
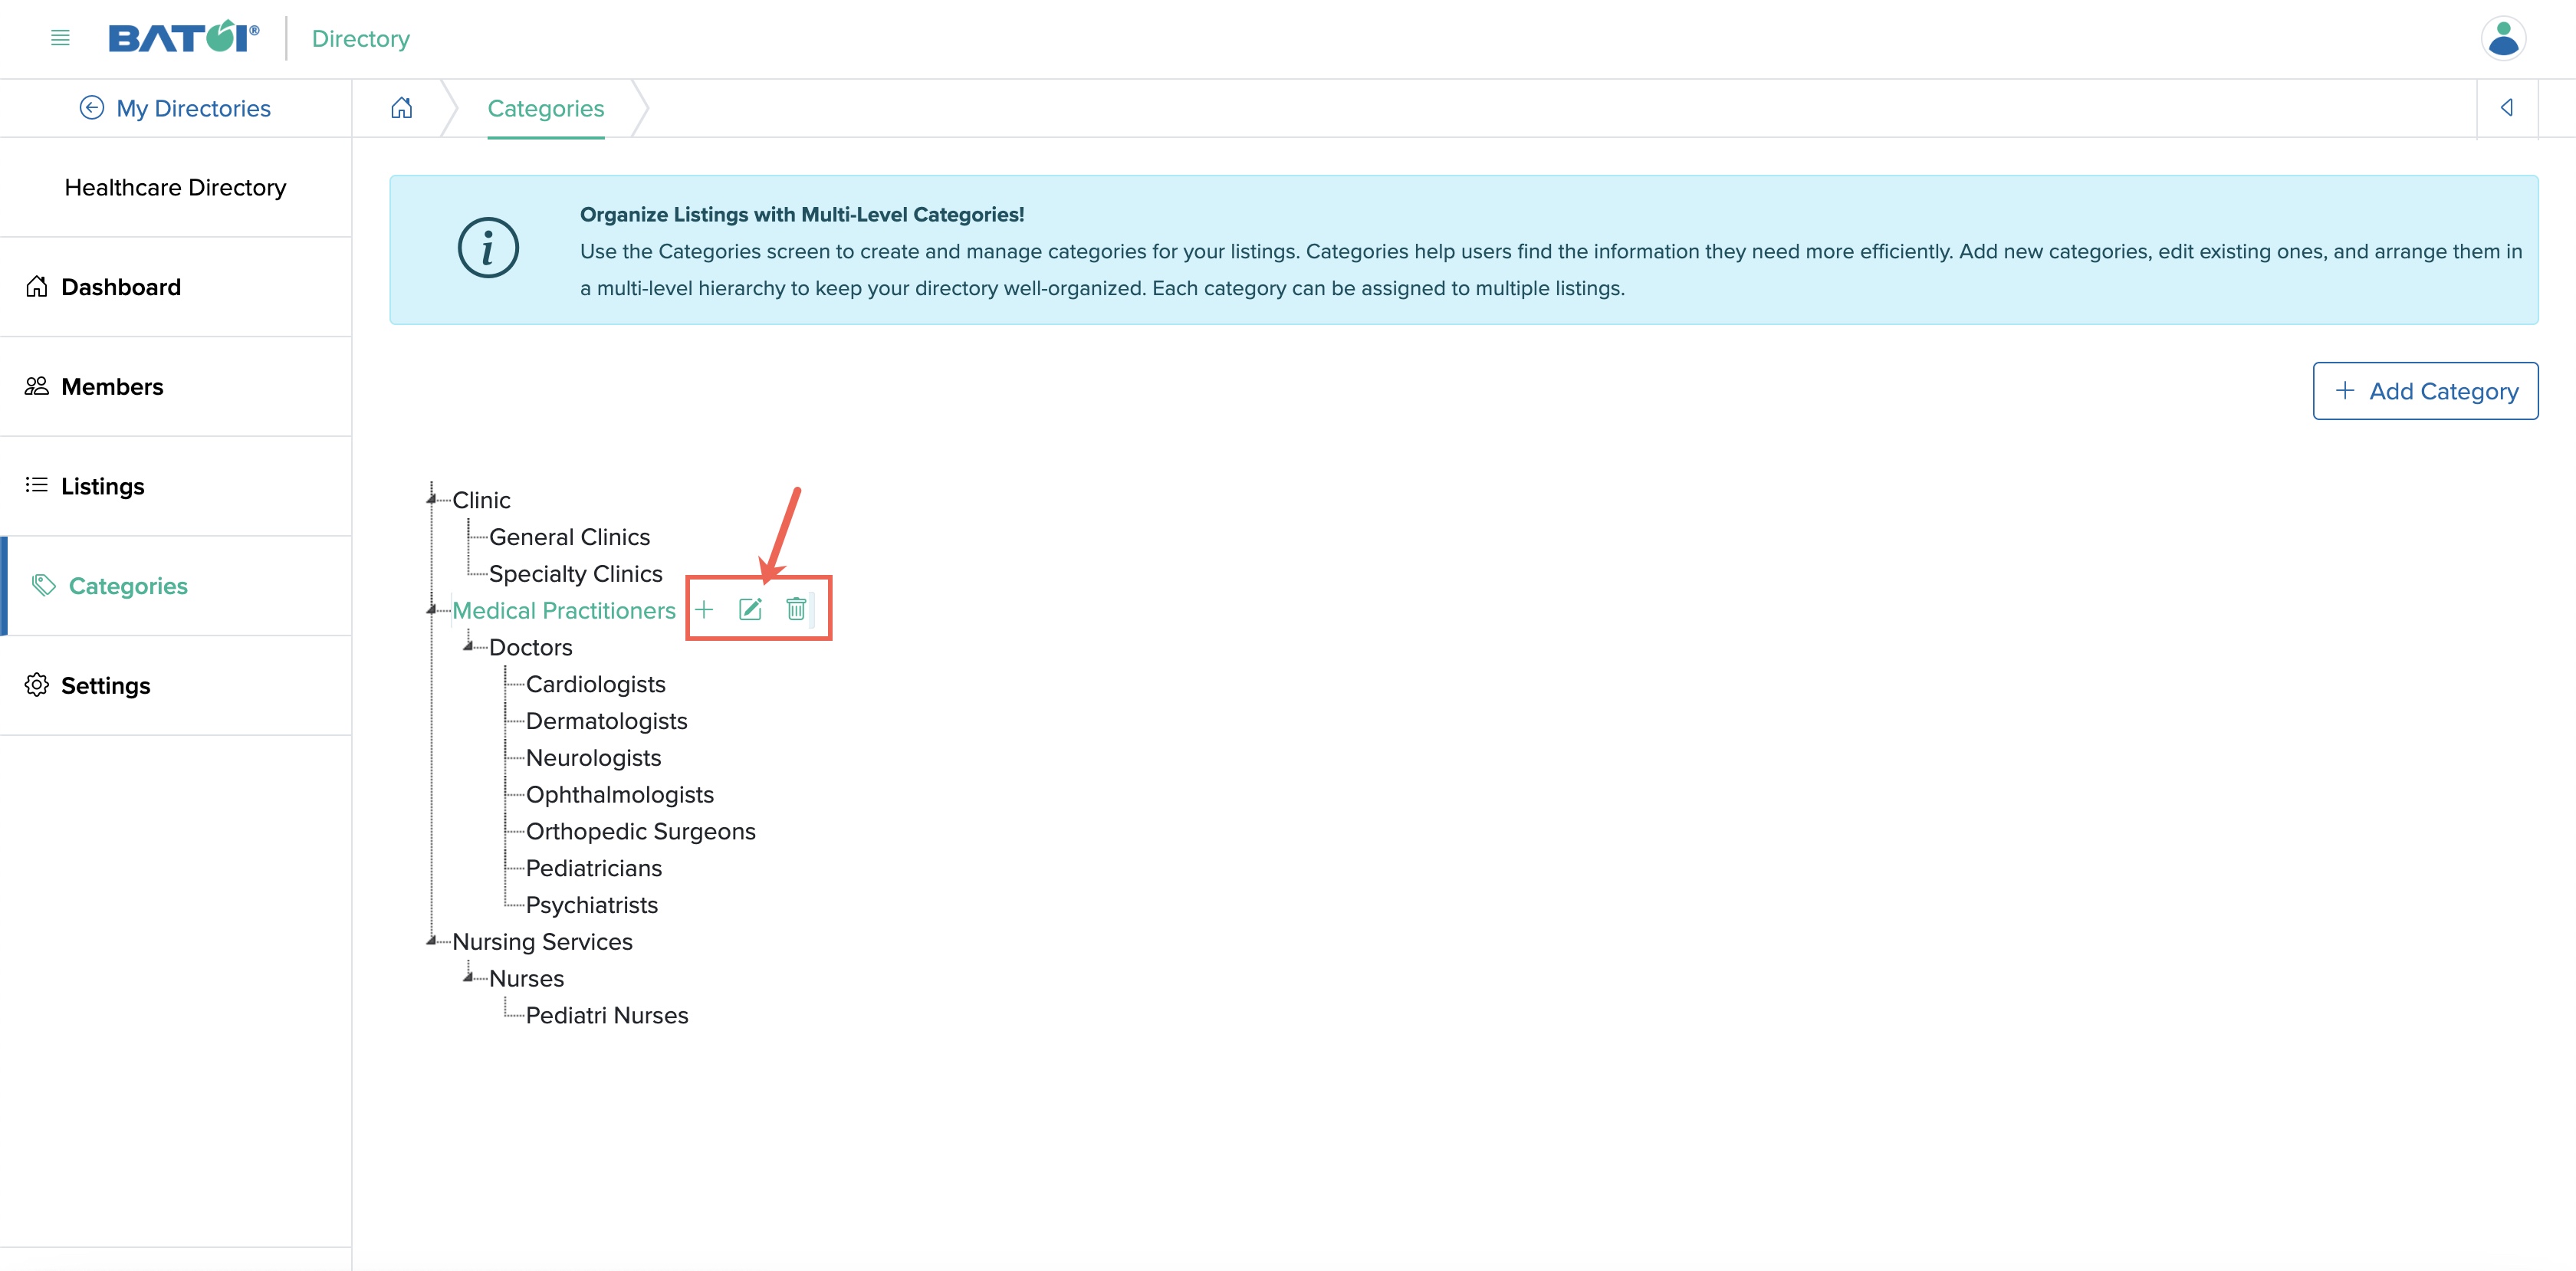
To edit a category, go to the category list page, mouse-over the specific category you want to edit, and click on the Edit icon, as shown in Figure 23 below.
Upon doing so, a pop-up screen will open where you can edit the category or subcategory name, as shown in Figure 24 below.
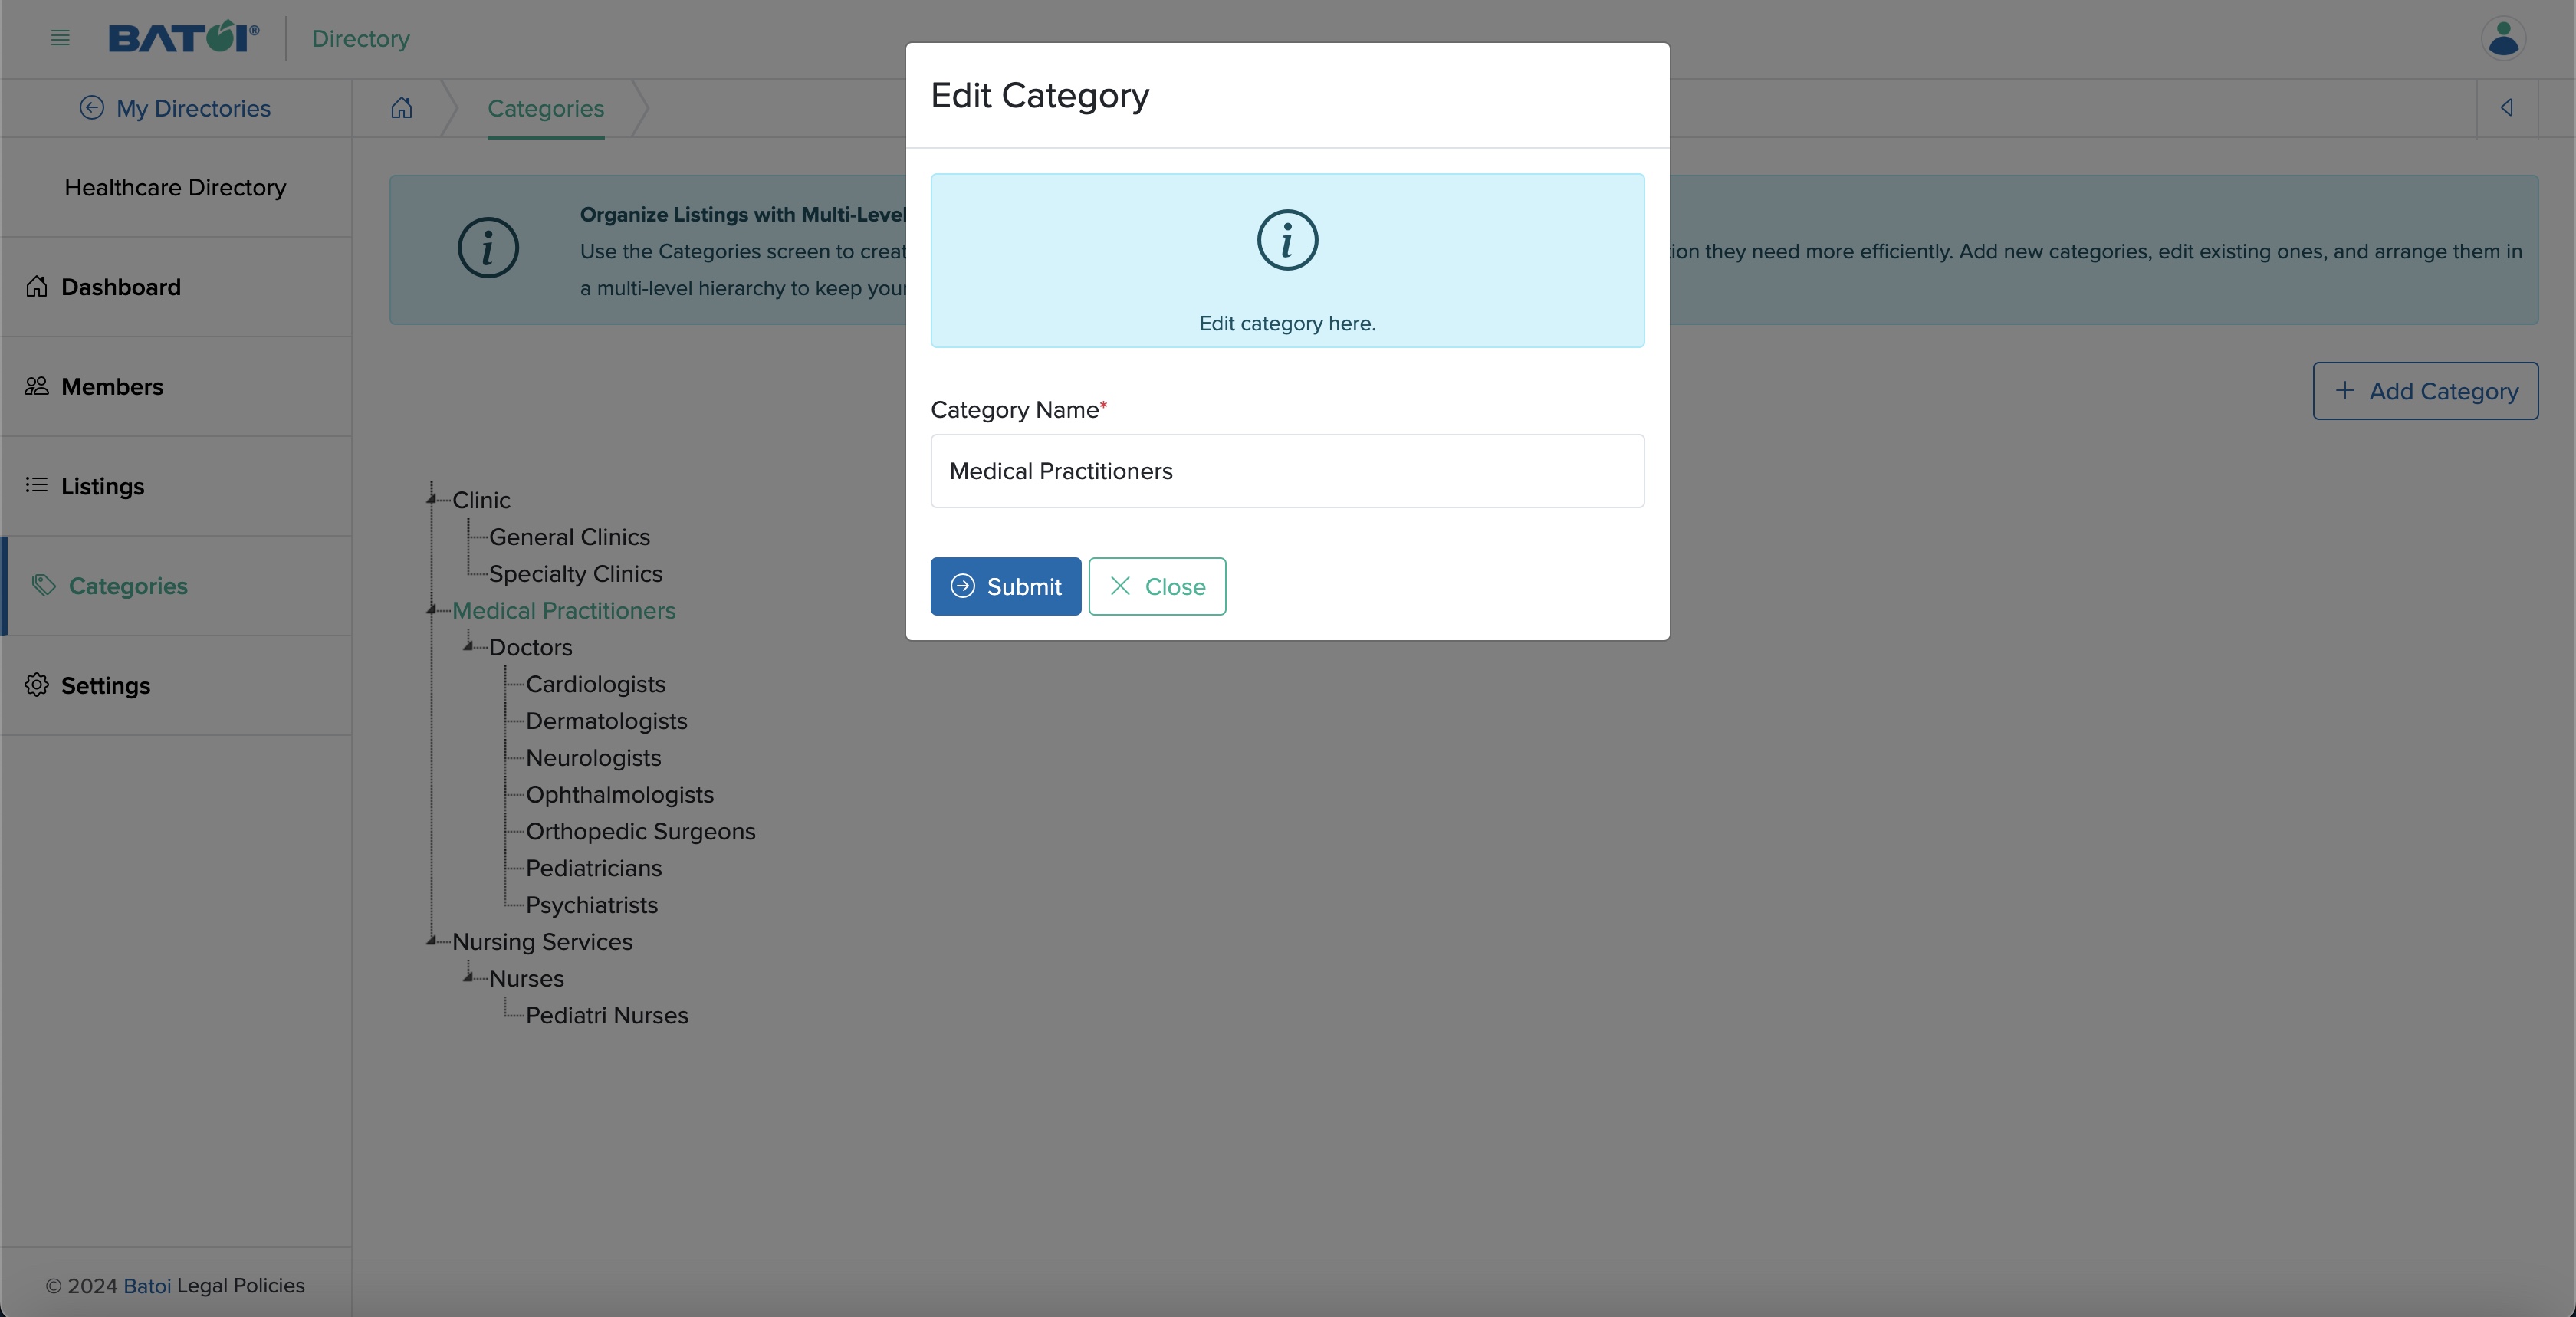
Enter the Category Name, select the Parent Category from the dropdown menu, and click the Submit button to add a subcategory, as shown in Figure 22 above.
Delete Category
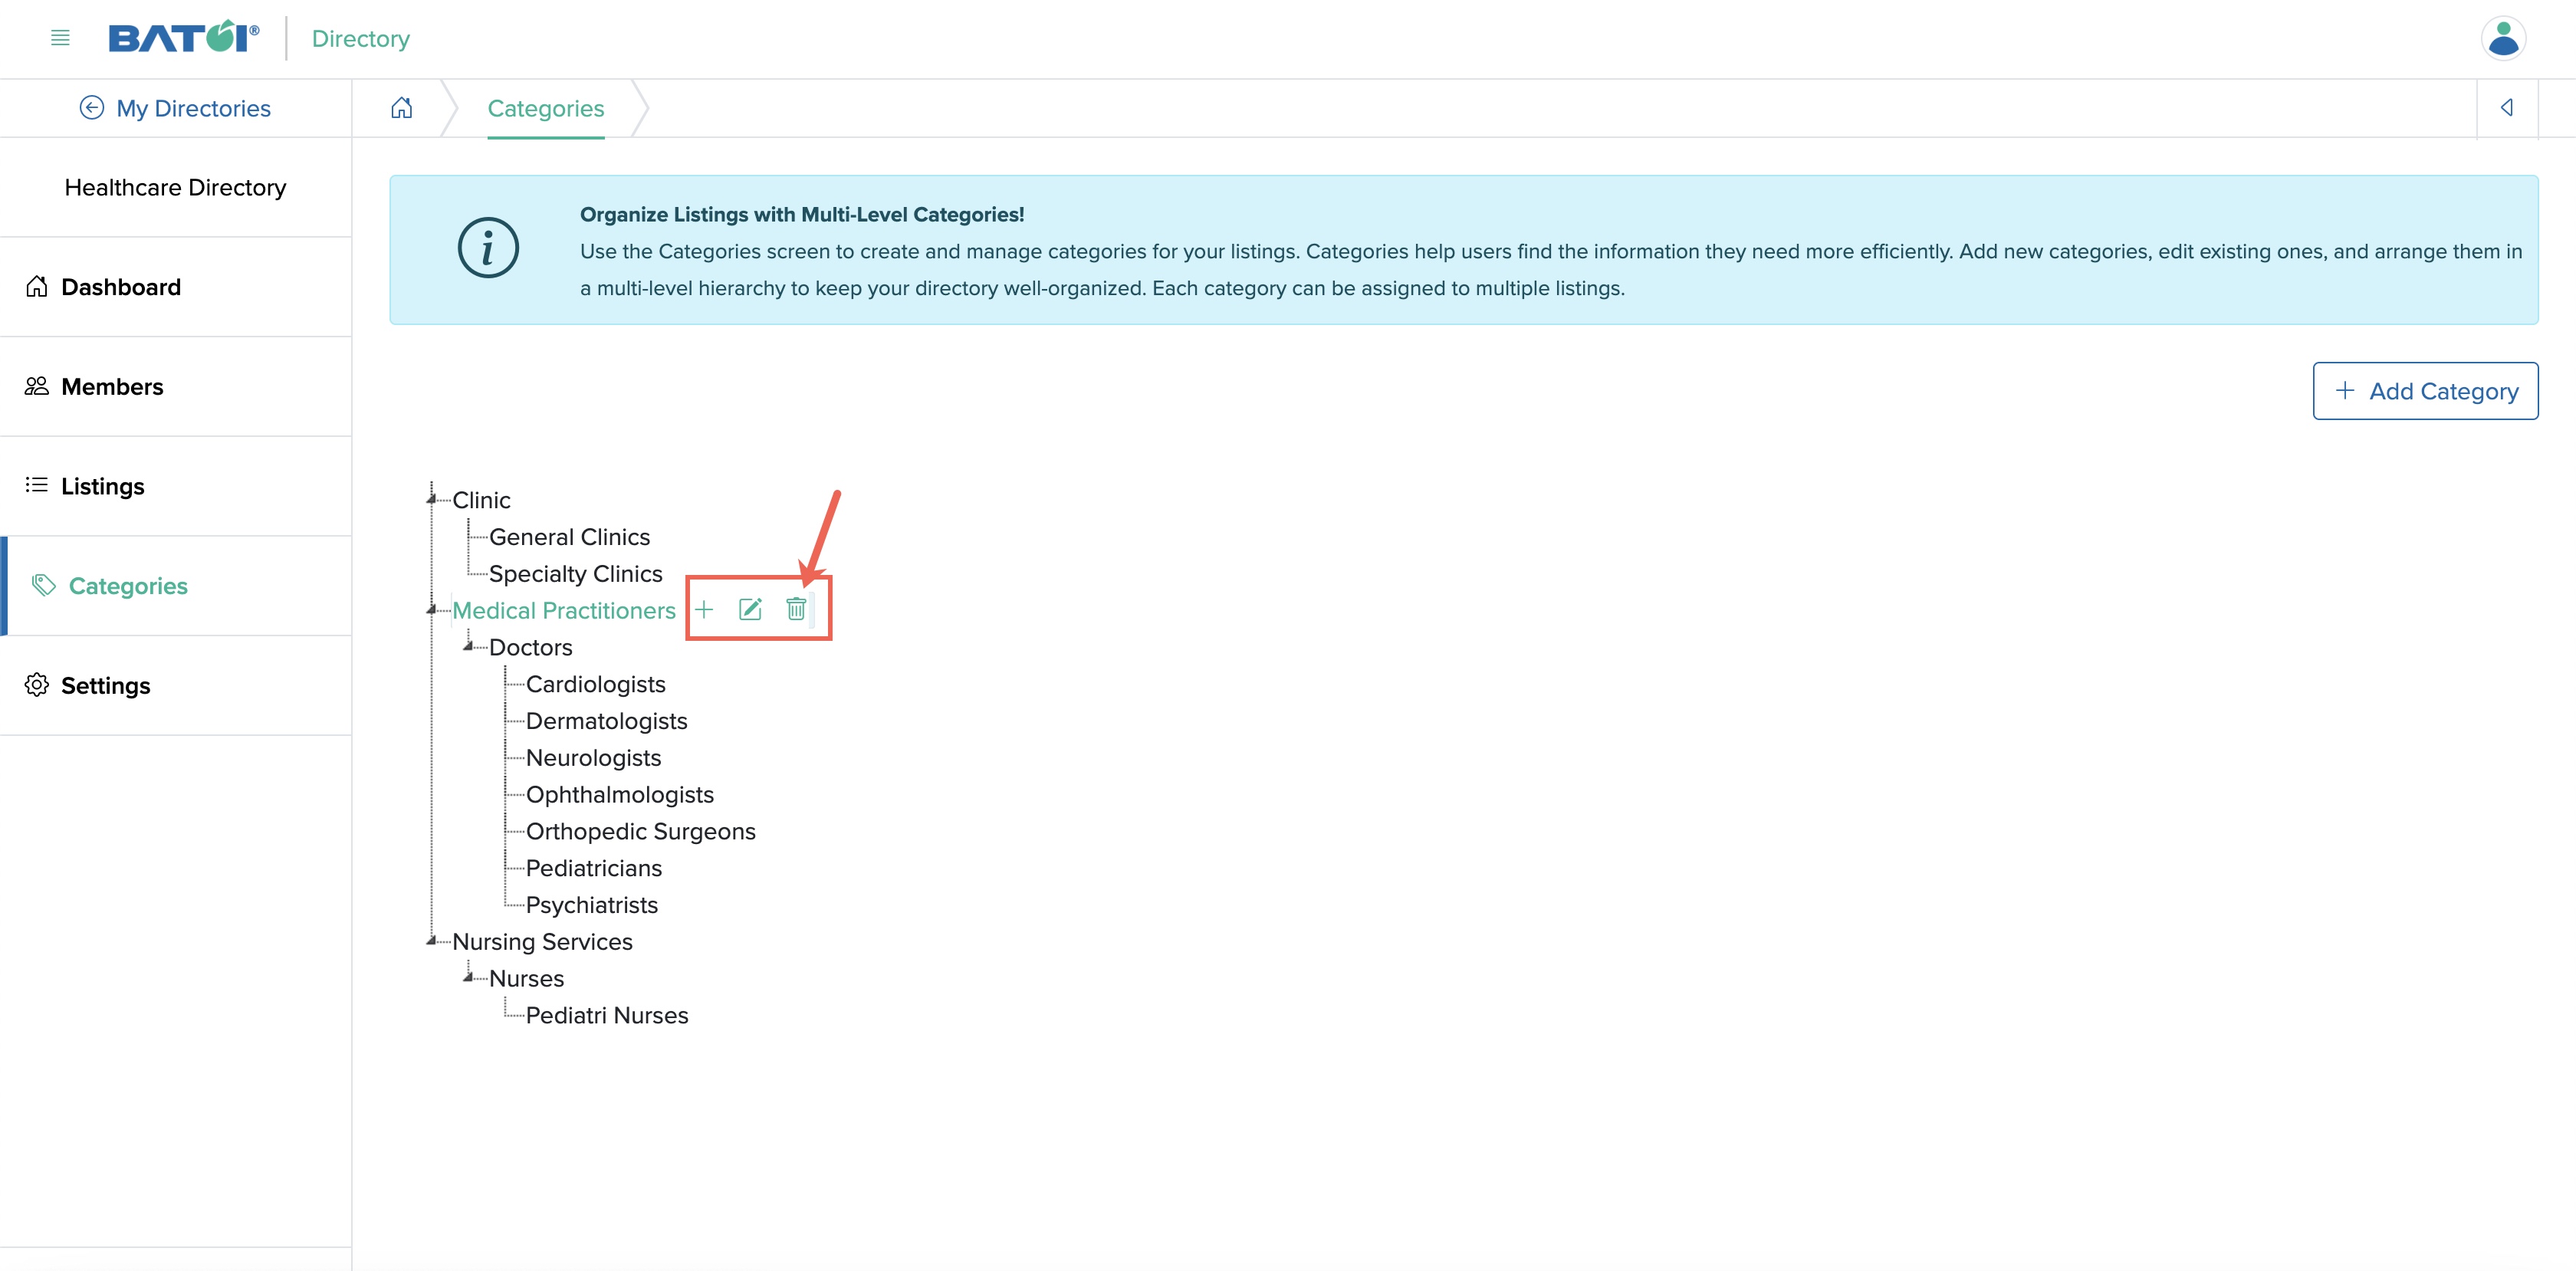
To delete a category or subcategory, go to the category list page, mouse-hover the specific category you want to delete, click on the Delete icon, and click OK from the pop-up box. The particular listing will be achieved, as shown in Figure 25 below.
Settings
Click on the Setting menu on the Admin Control Panel and you will be redirected to the setting page, as shown in Figure 26 below. Currently, only the General setting option is available.
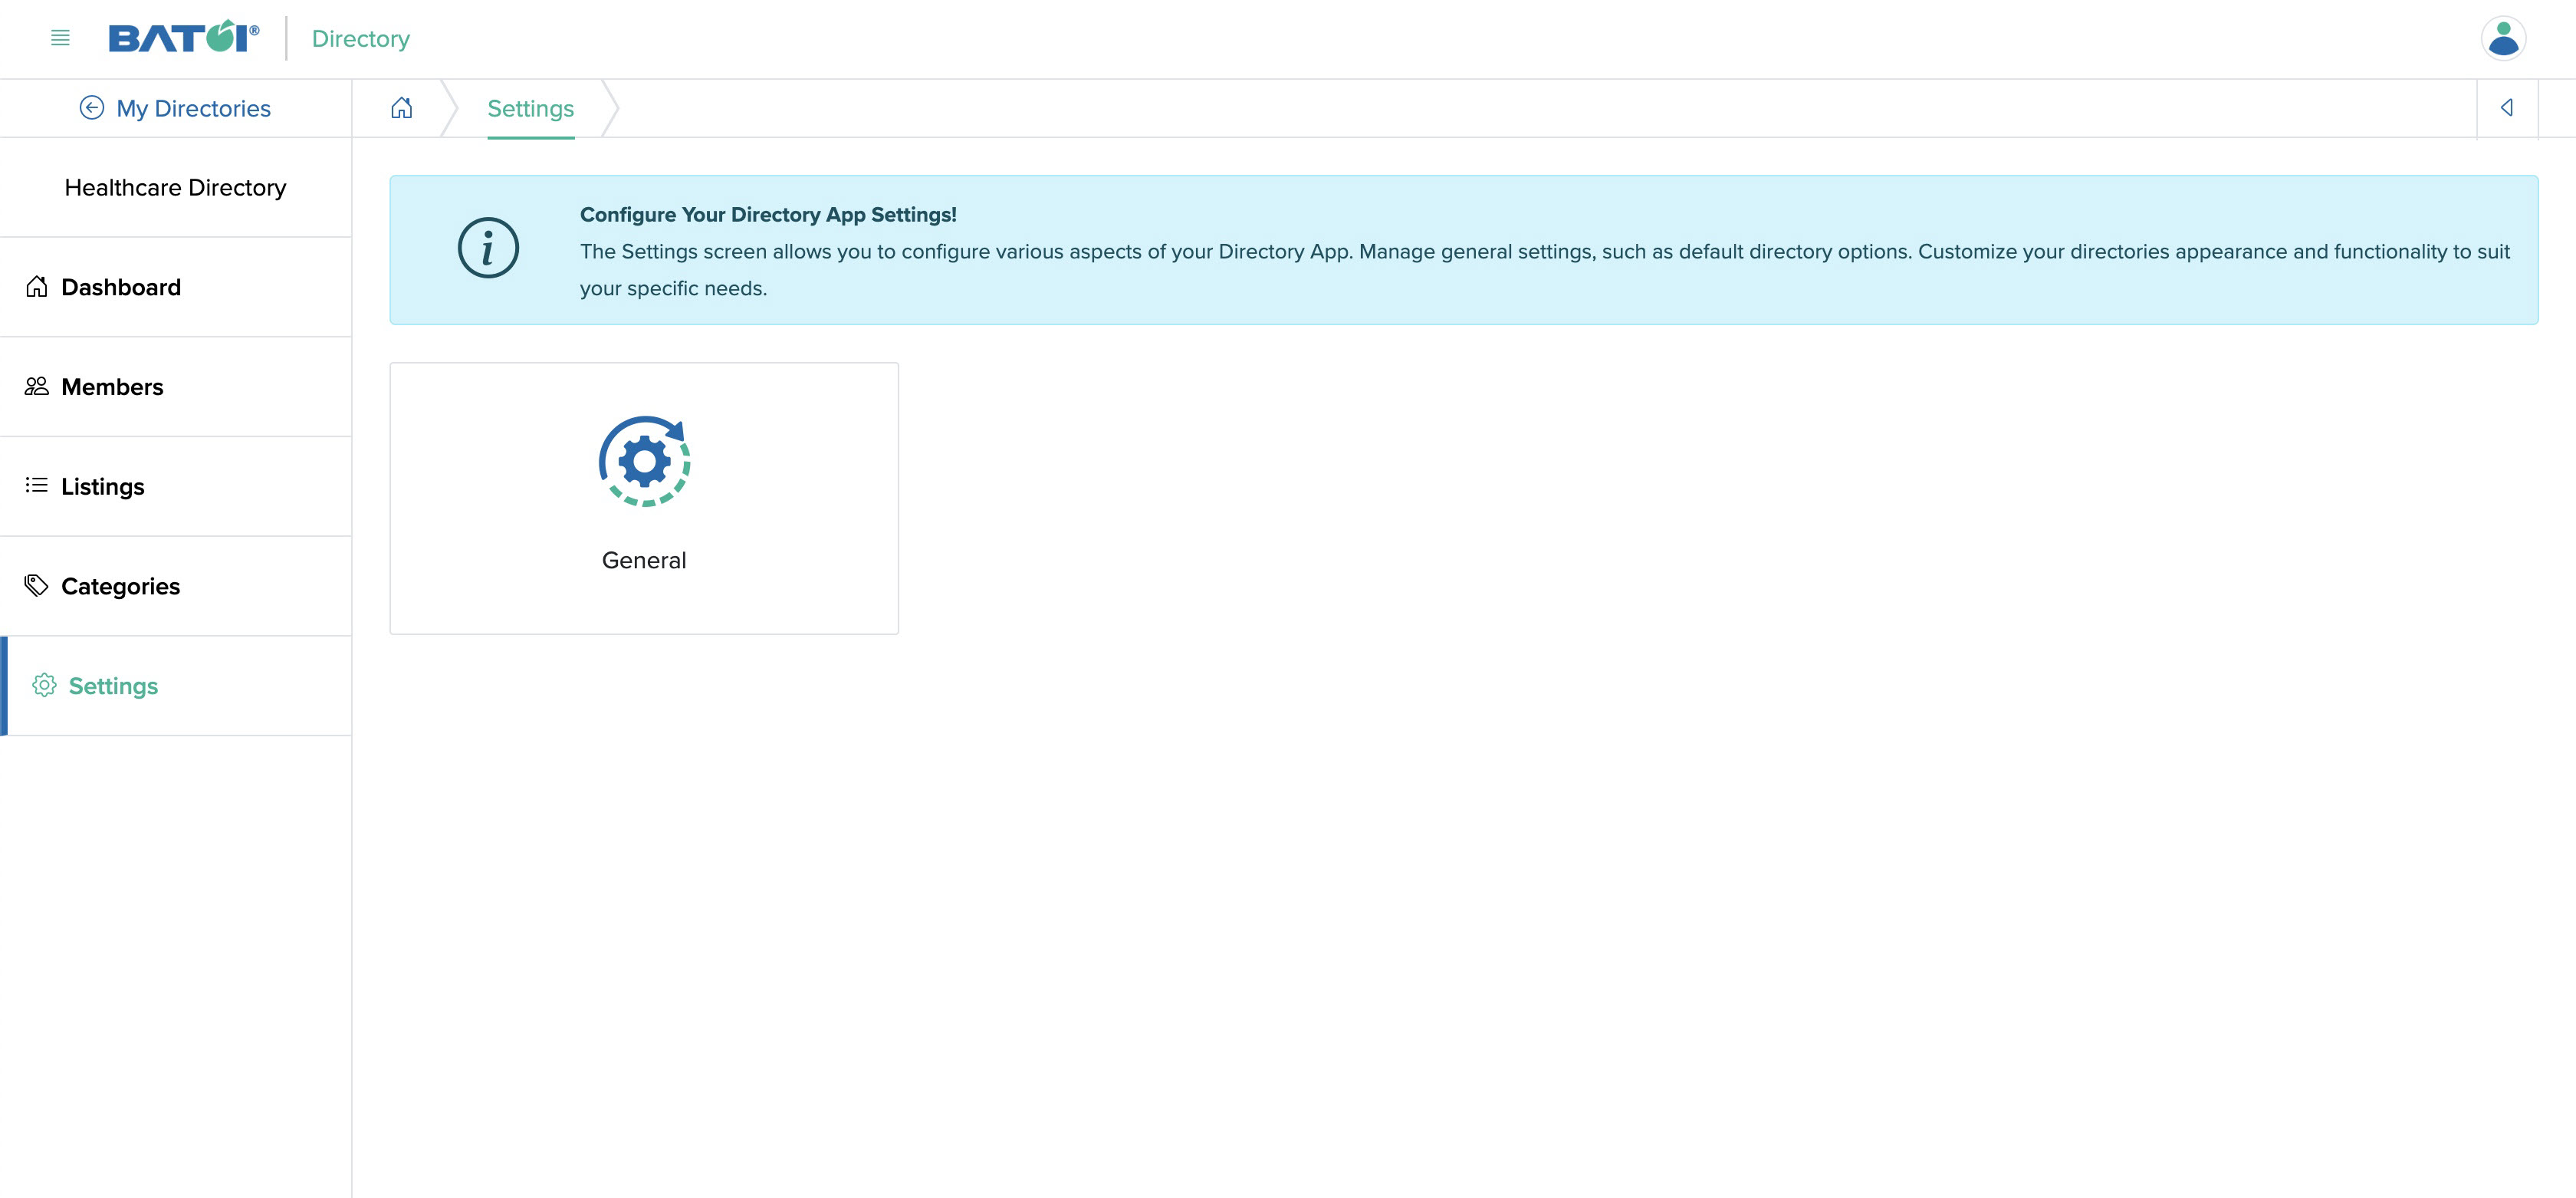
Click on the General setting card from the list page, as shown in Figure 26 above, and the edit setting page will be displayed, as shown in Figure 27 below.
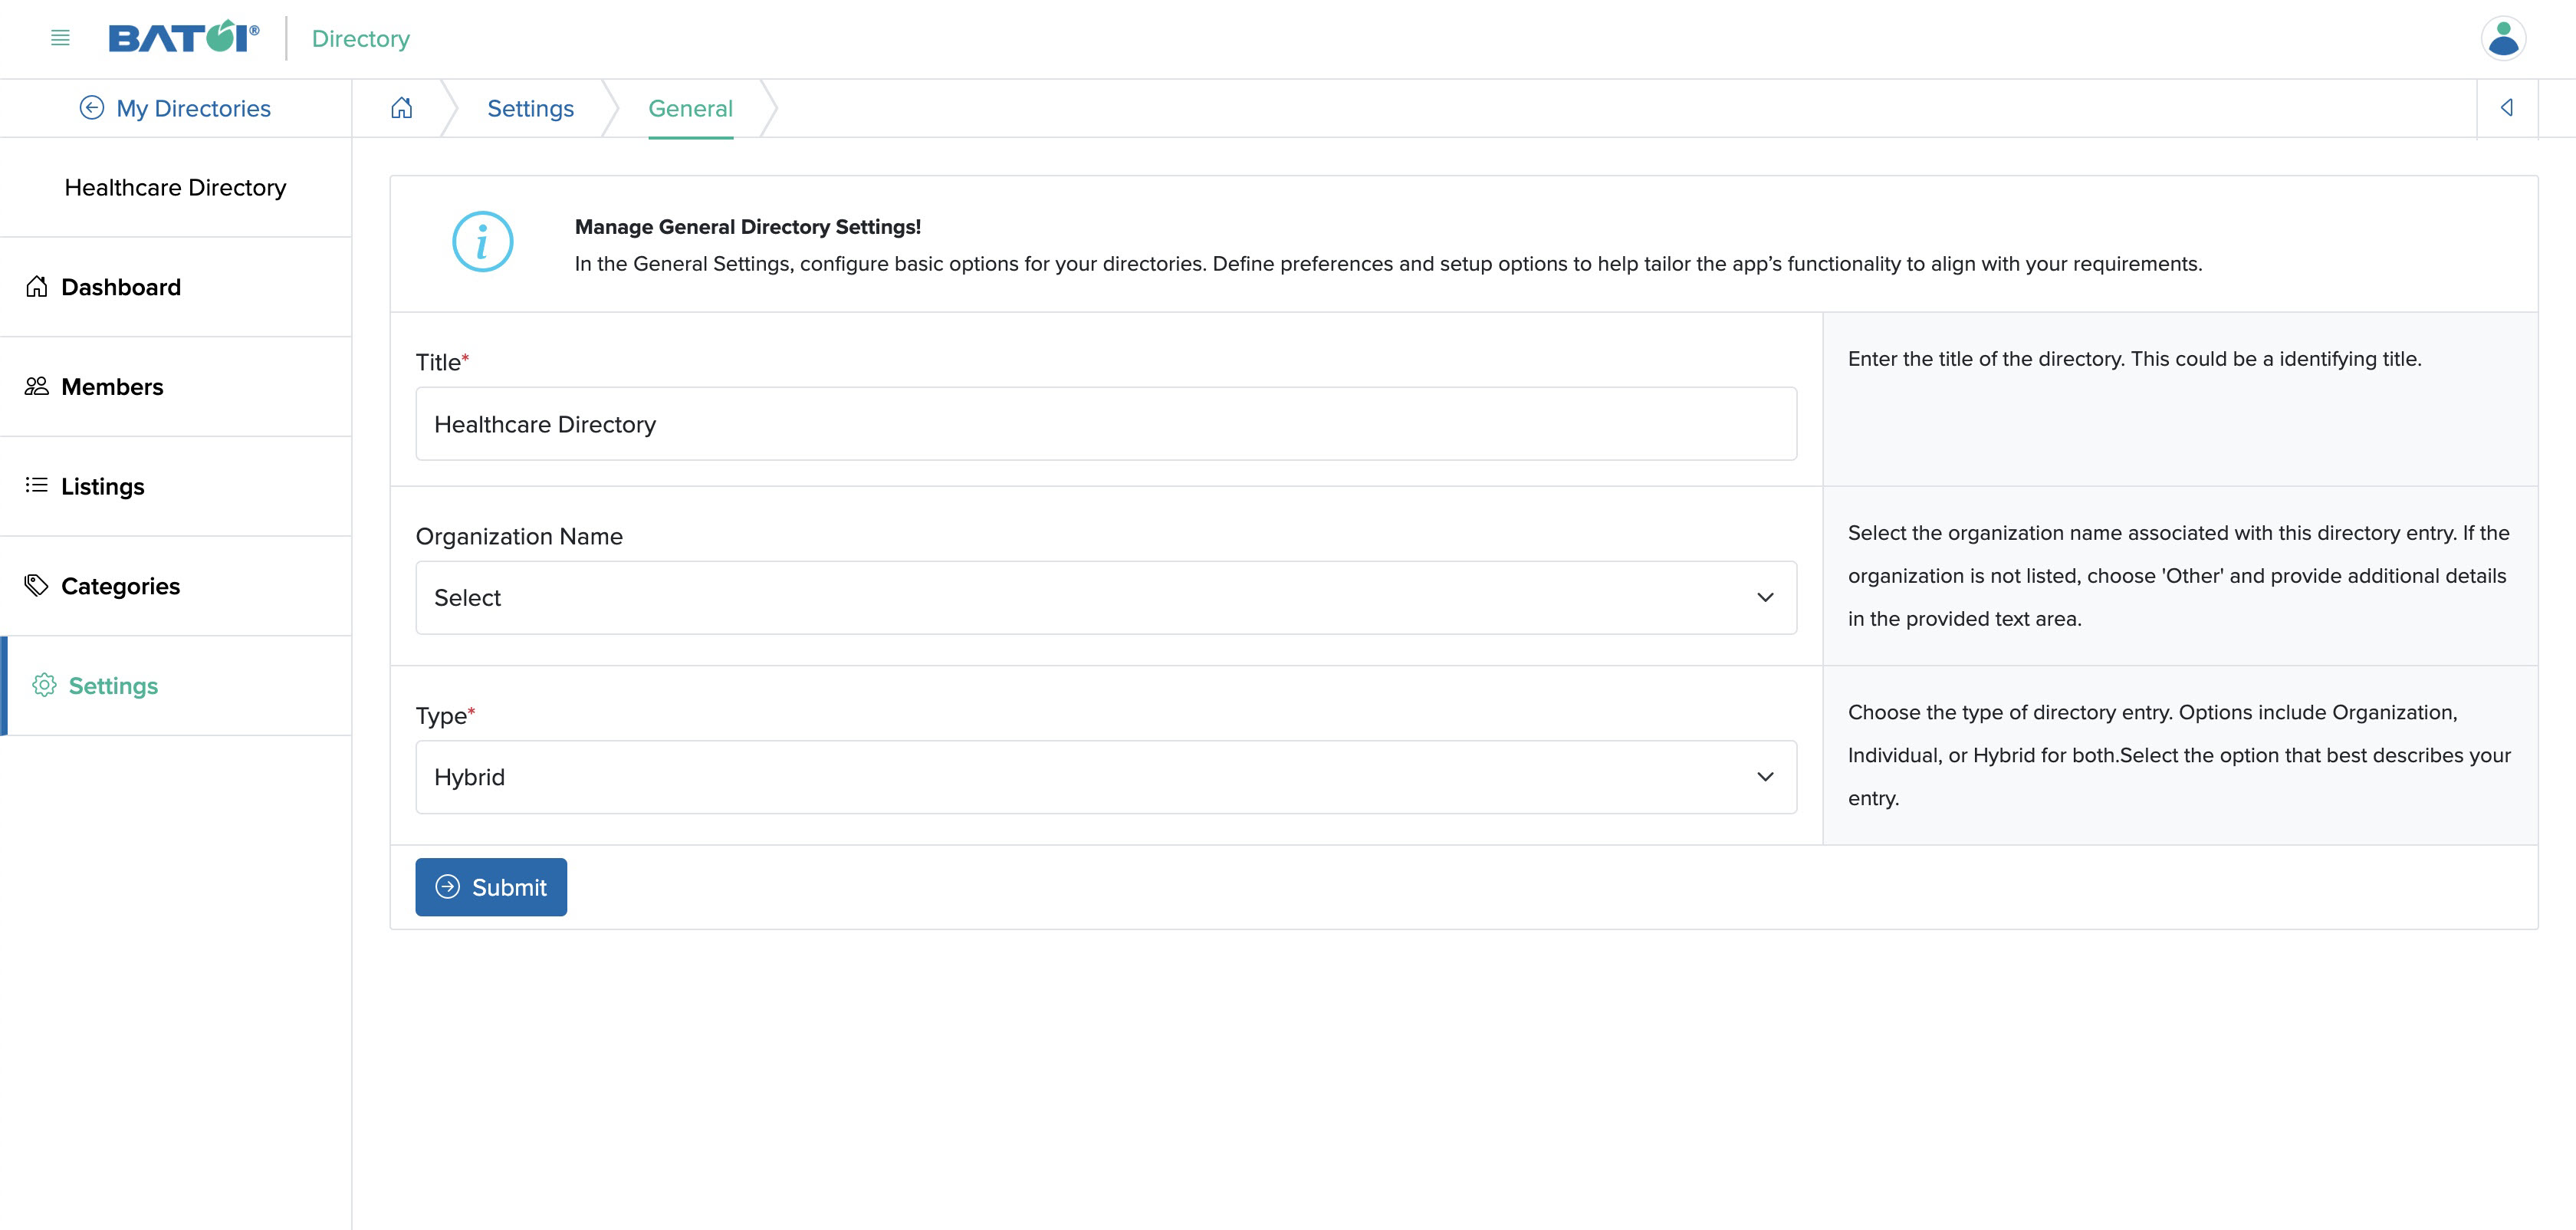
From the edit page, you can edit the directory's Title and Type, as shown in Figure 27 above. After editing the details, click the Submit button to save the changes.

 Batoi Support