Batoi Corporate Office
This article will walk you through creating an App at Google.
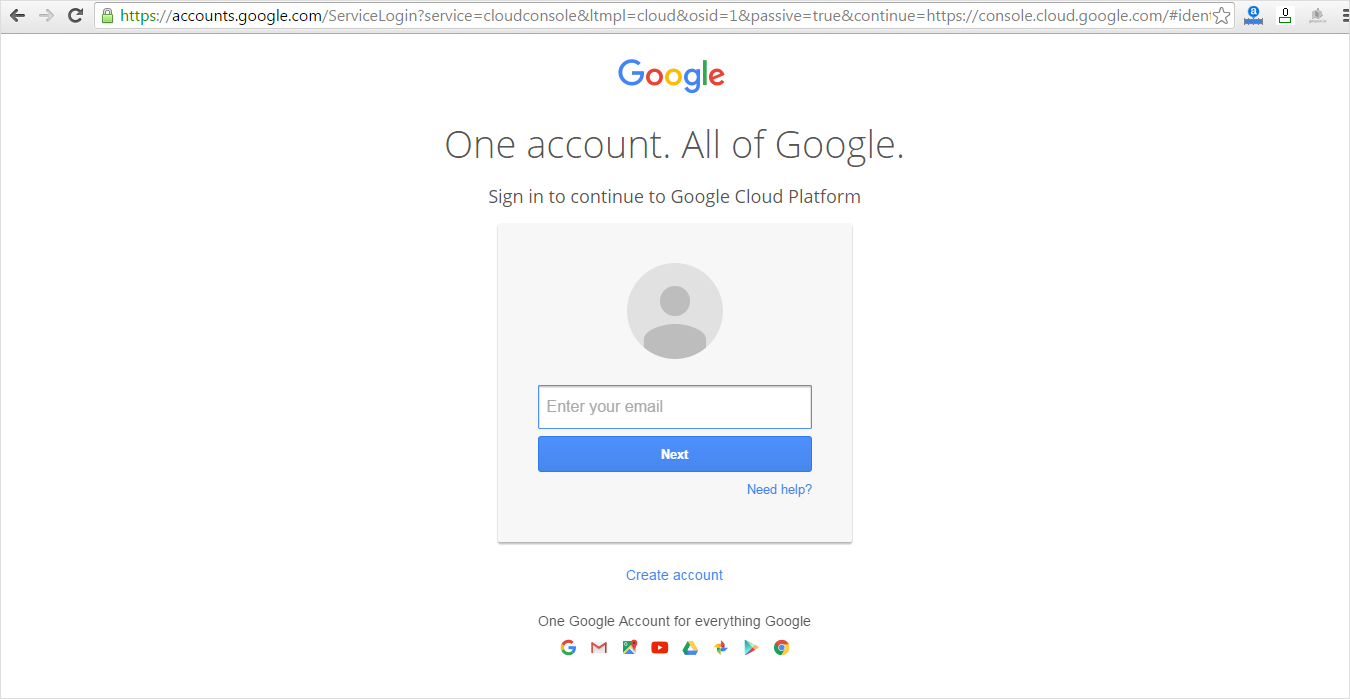
Enter the URL https://console.cloud.google.com in your web browser. Upon doing so you will immediately be taken to the secure login page as shown in Figure 1.
Enter your Email and click the Next button as shown above. Then enter the Password and click the Sign in button. After your entered credentials have been successfully authenticated, you shall land on the Home Page as shown in Figure 2.

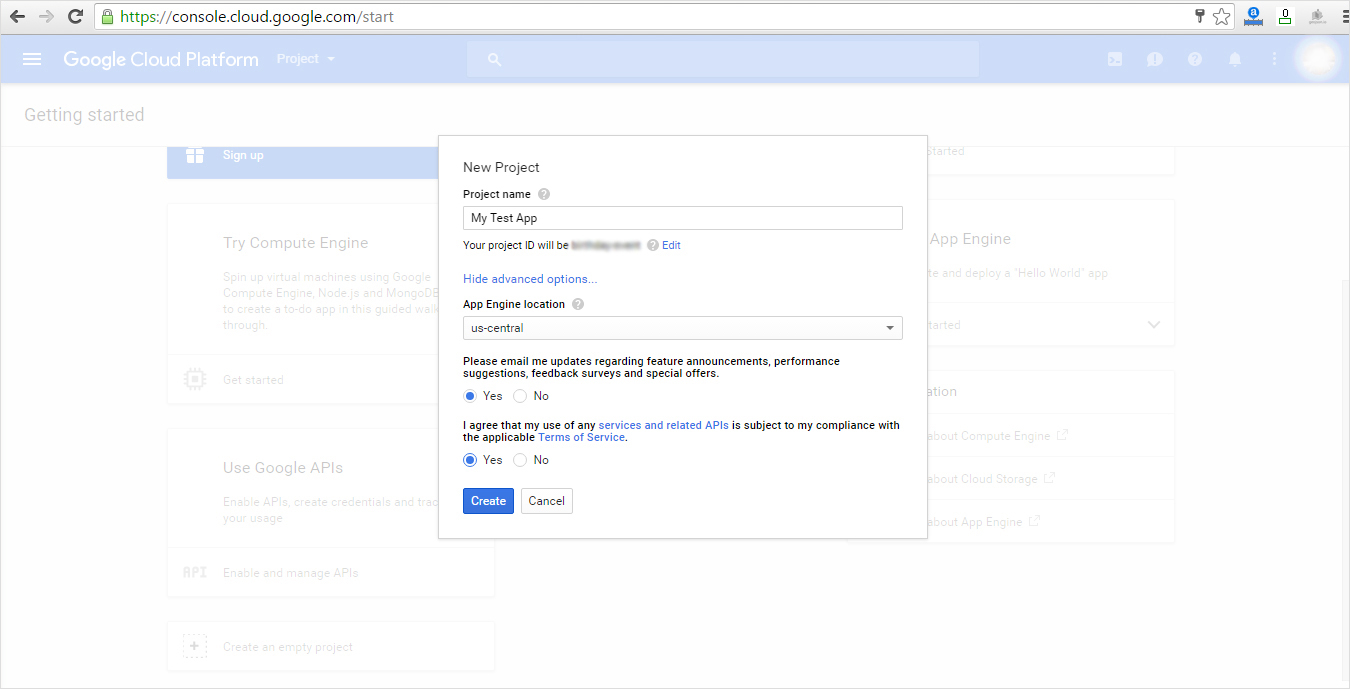
From the Project drop menu, click the sub-menu Create project. Upon doing so a pop-up will appear where you can enter the application name to create the new project as shown in Figure 3.
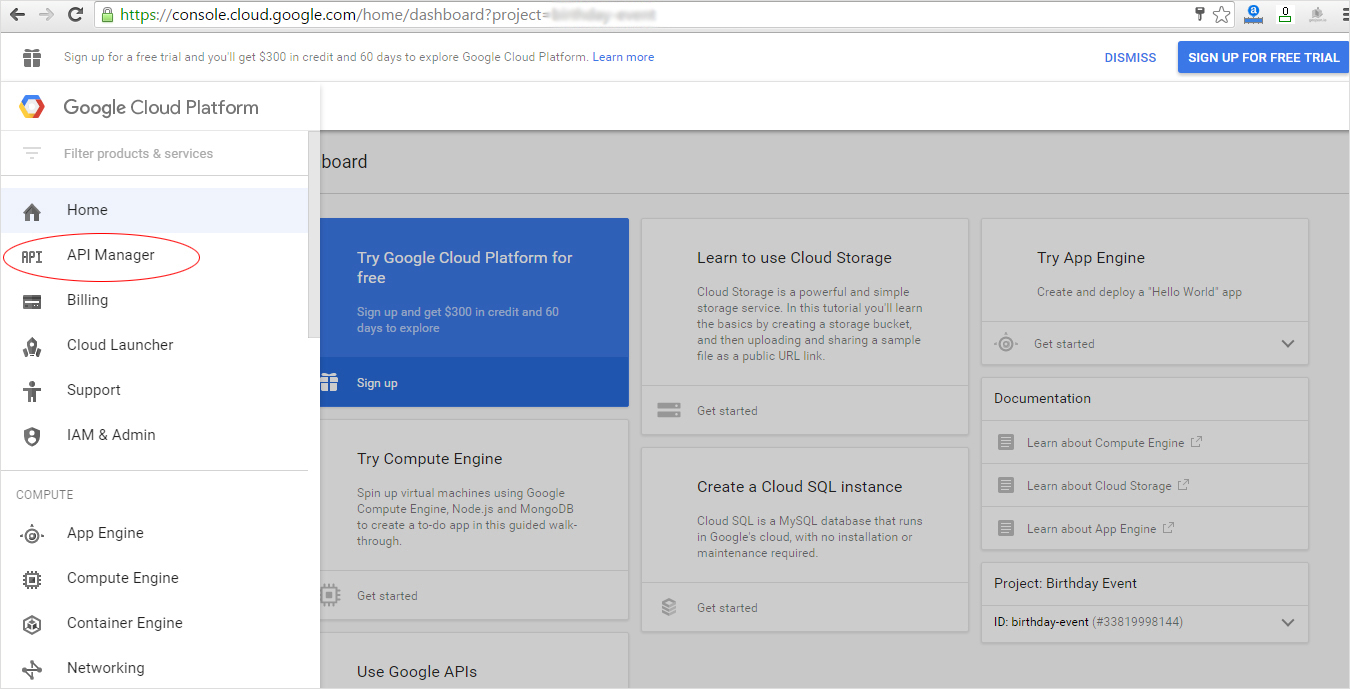
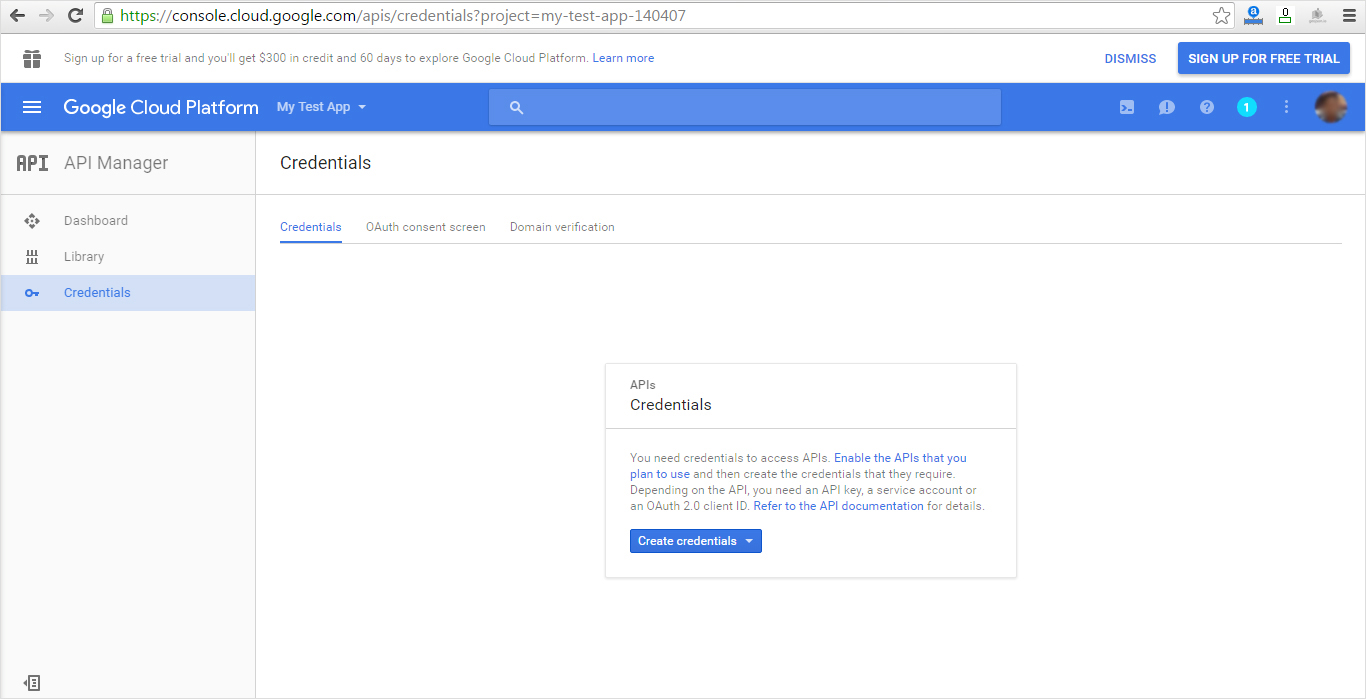
Once the new project is created, click on the API Manager menu as shown in Figure 4.
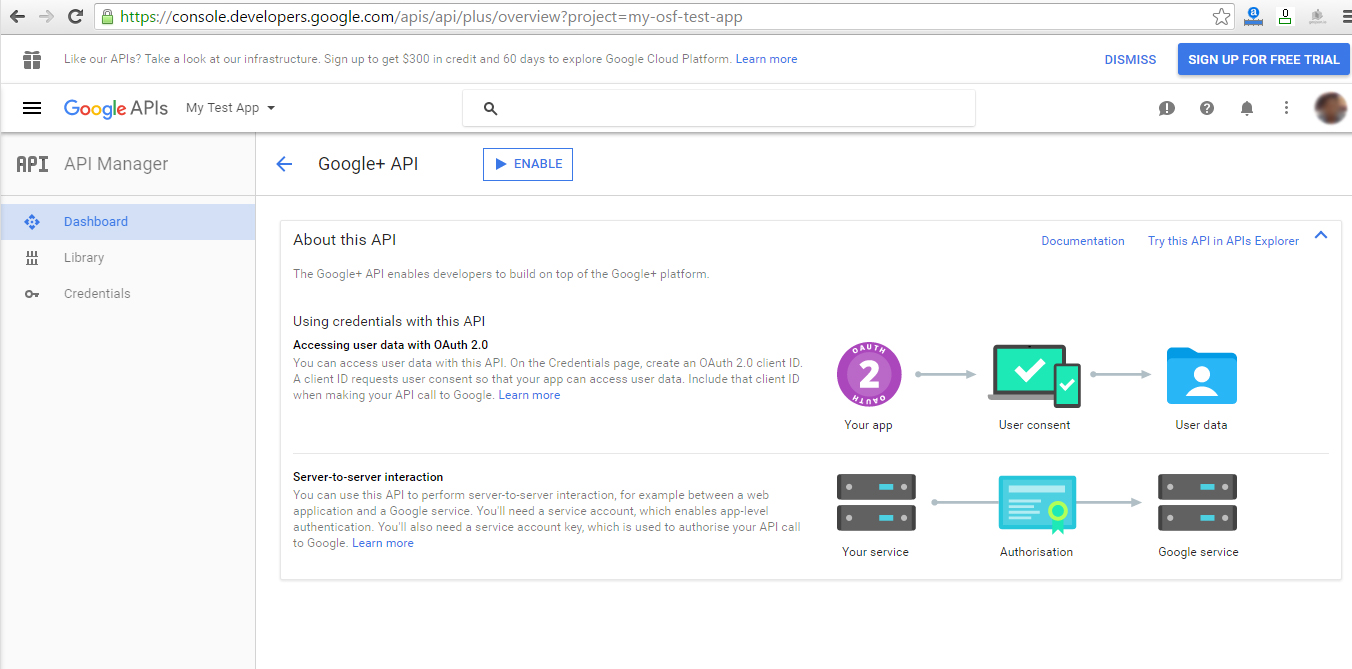
Upon doing so, the system will open the application dashboard page as shown in Figure 5.
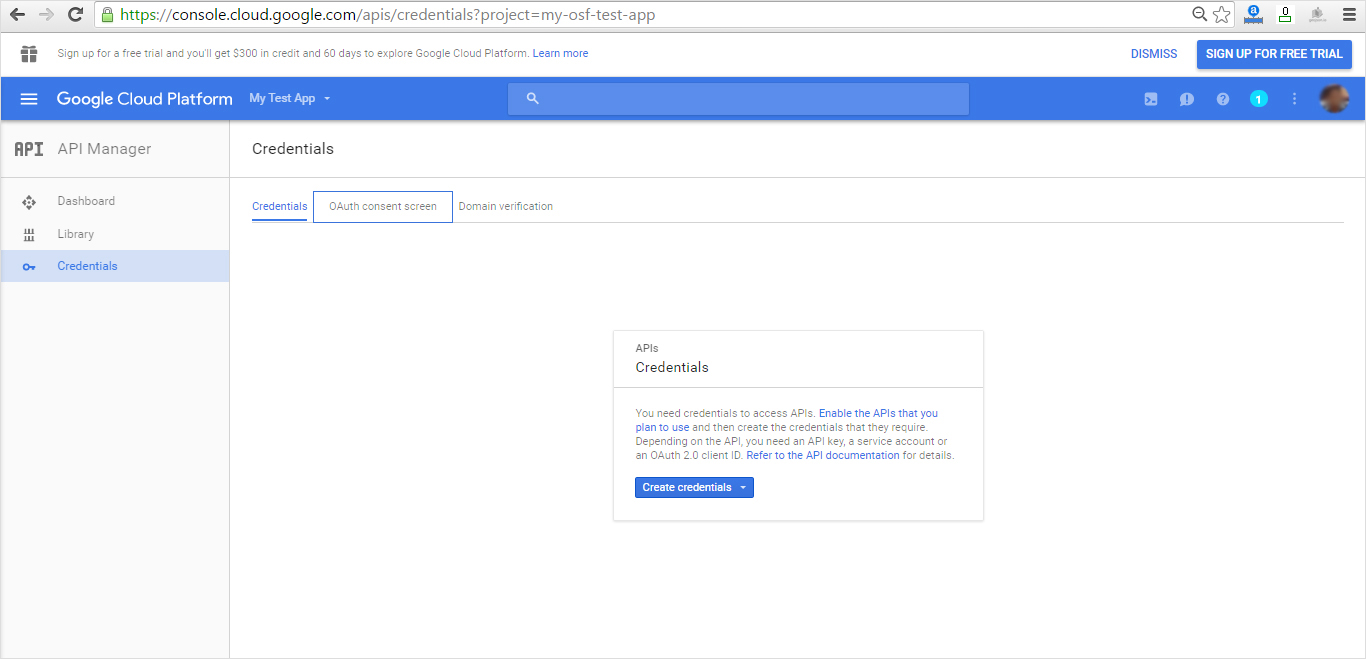
In order to create a web application, click on the OAuth consent screen as shown in Figure 6 from the credential dashboard.
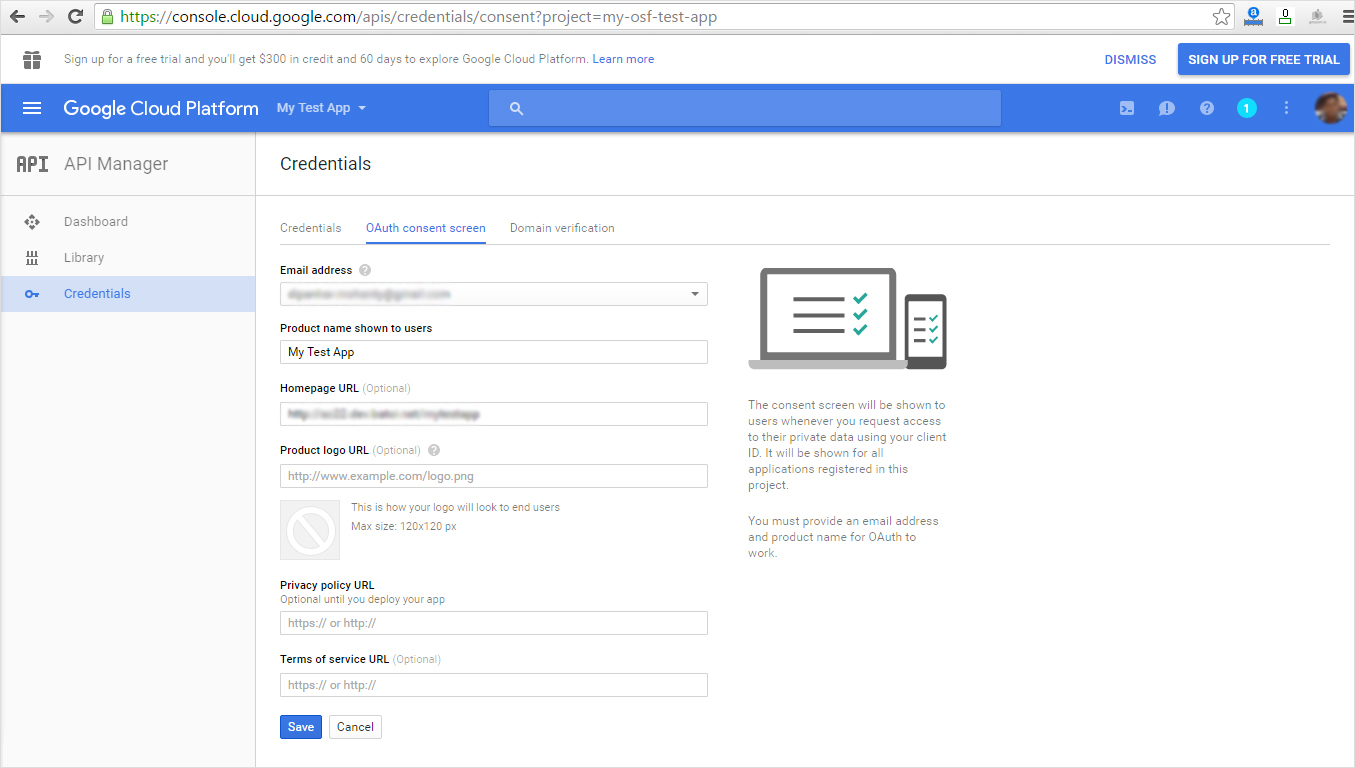
Fill the Product name shown to users text box as your application name as shown in Figure 7. You may also fill in the other optional fields in this form. Click the Save button in order to save the entered details.
On successful submission of the OAuth consent screen, the Google console will return to the Credentials page as shown below. Now click on the Create Credentials button as shown in Figure 8. Upon doing so, a popup menu will appear from where you need to click on the OAuth client ID link as shown in Figure 8.

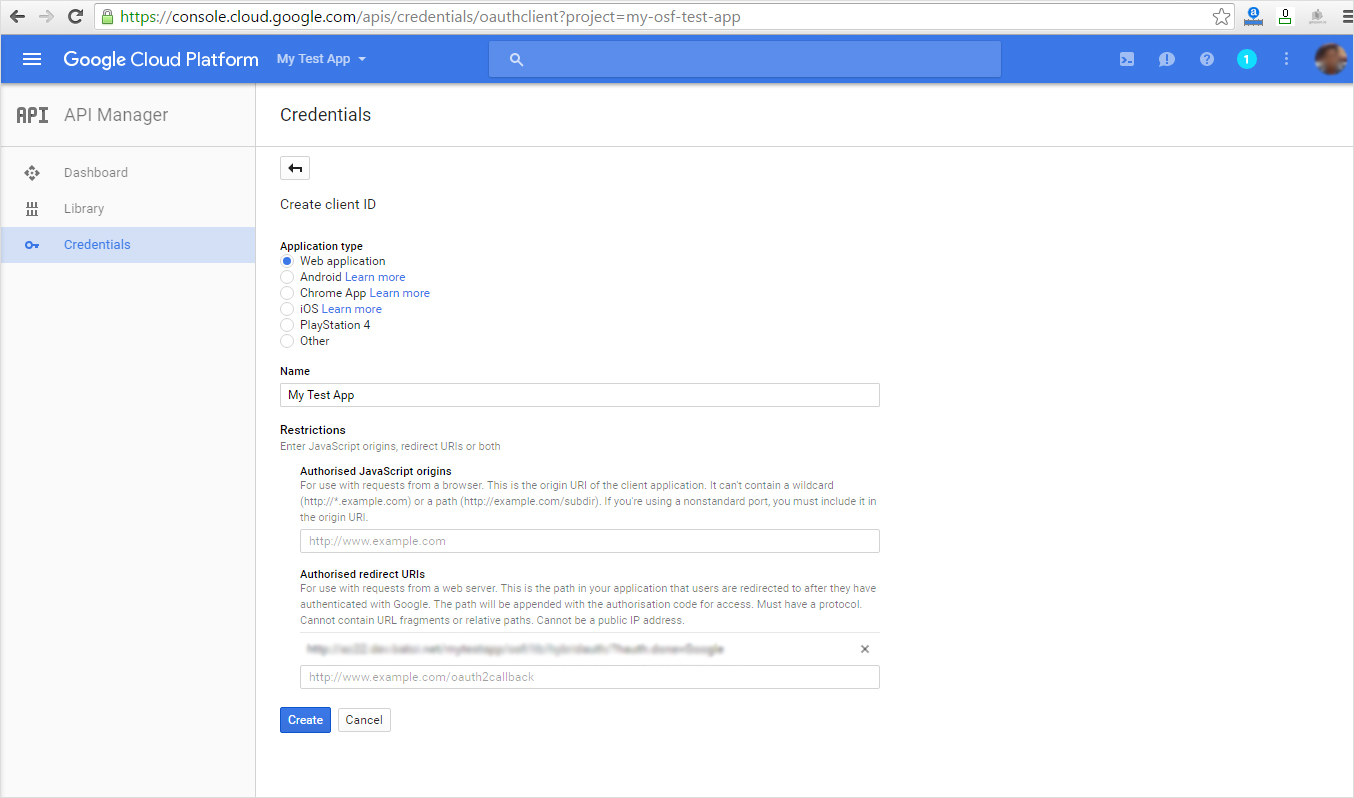
Upon doing so, the Google console will open a form where you need to fill in the required details as shown
in Figure 9. Choose the Application type as Web application. Once you choose the
application type, the detailed form will appear as shown in Figure 9. Fill in the Name as your
Application Name. Enter the Authorised redirect URIs as available in your OSF SSO Setting
Page as https://your_base_url/osf/lib/hybridauth/?hauth.done=Google. After entering the above
details click on the "Create" button and Google console will create the OAuth client ID for your
application.
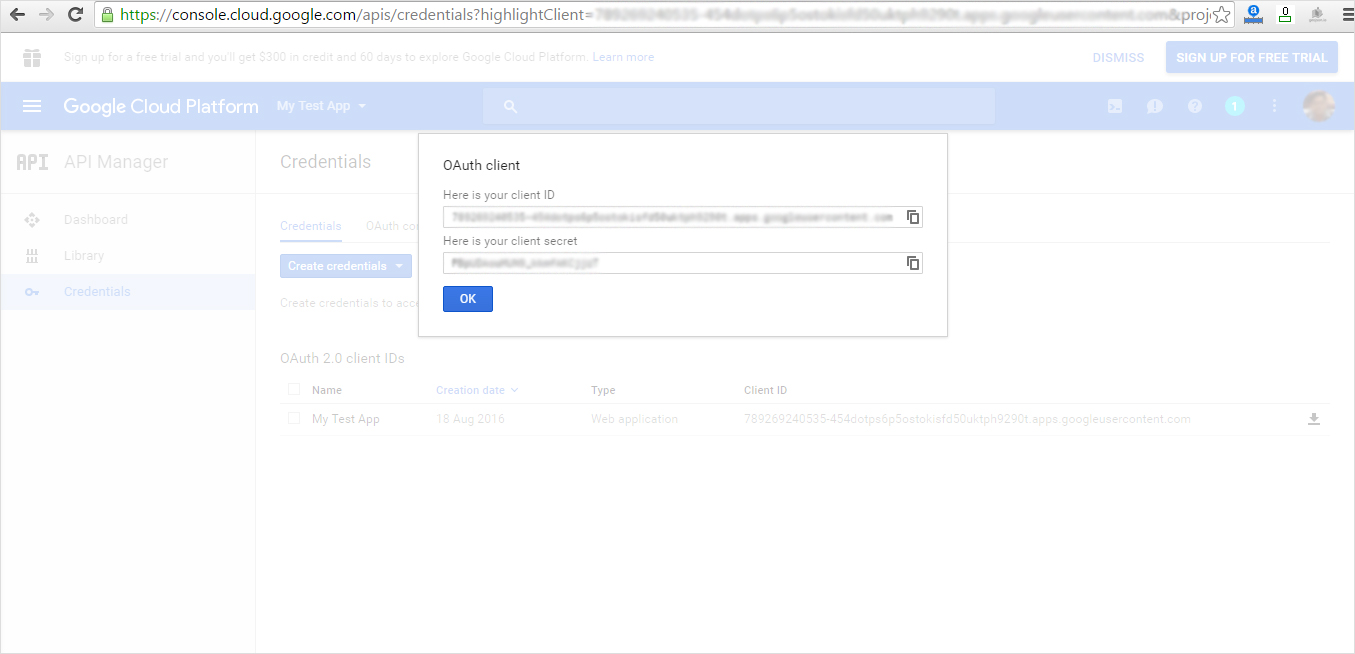
On successful submission, Google console will create client ID and client secret as shown in Figure 10. Store the key with you securely for future reference and use.
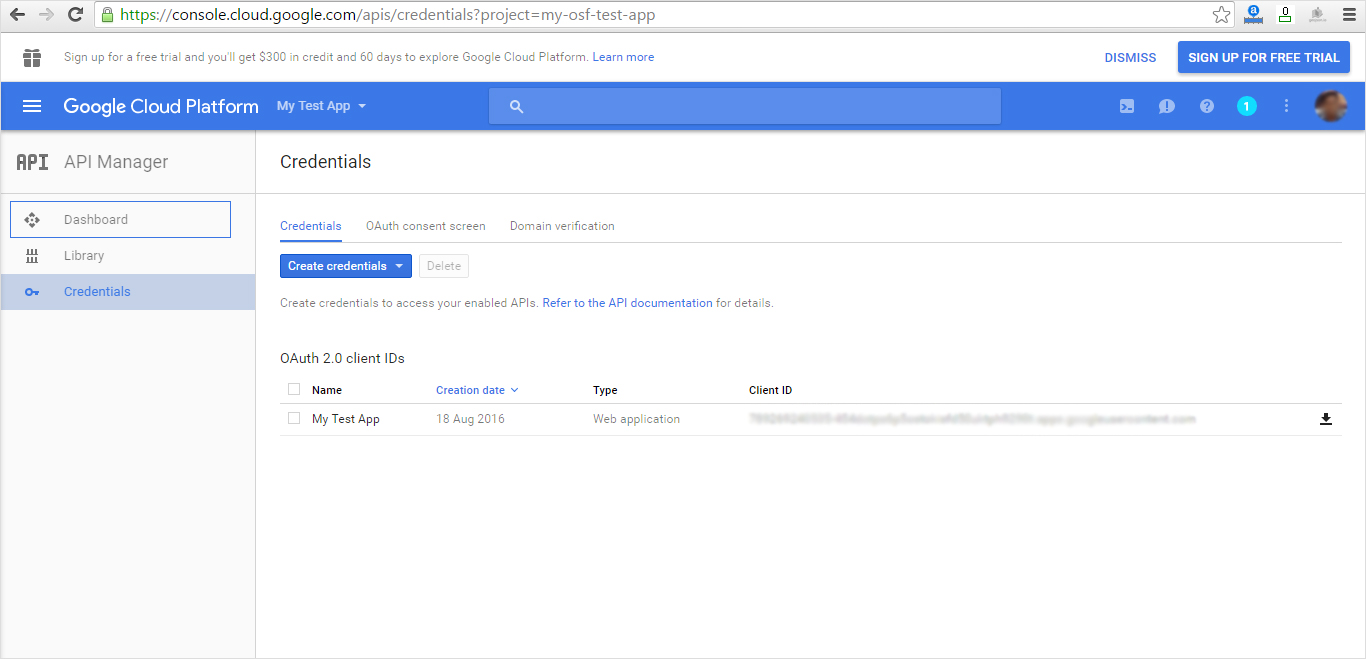
Now your API keys are created but it is not enabled. In order to enable your API keys click the menu Dashboard from the credential page as shown in Figure 11.
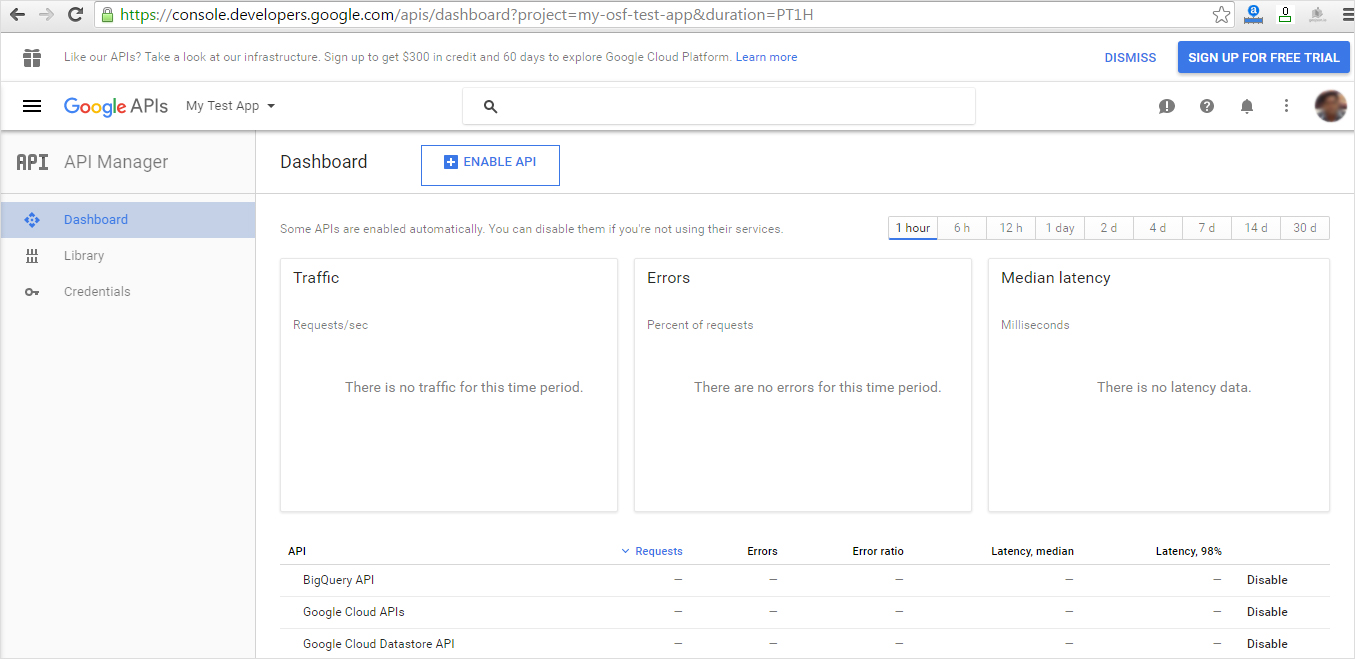
Click on the ENABLE API link on the application Dashboard as shown in Figure 12.
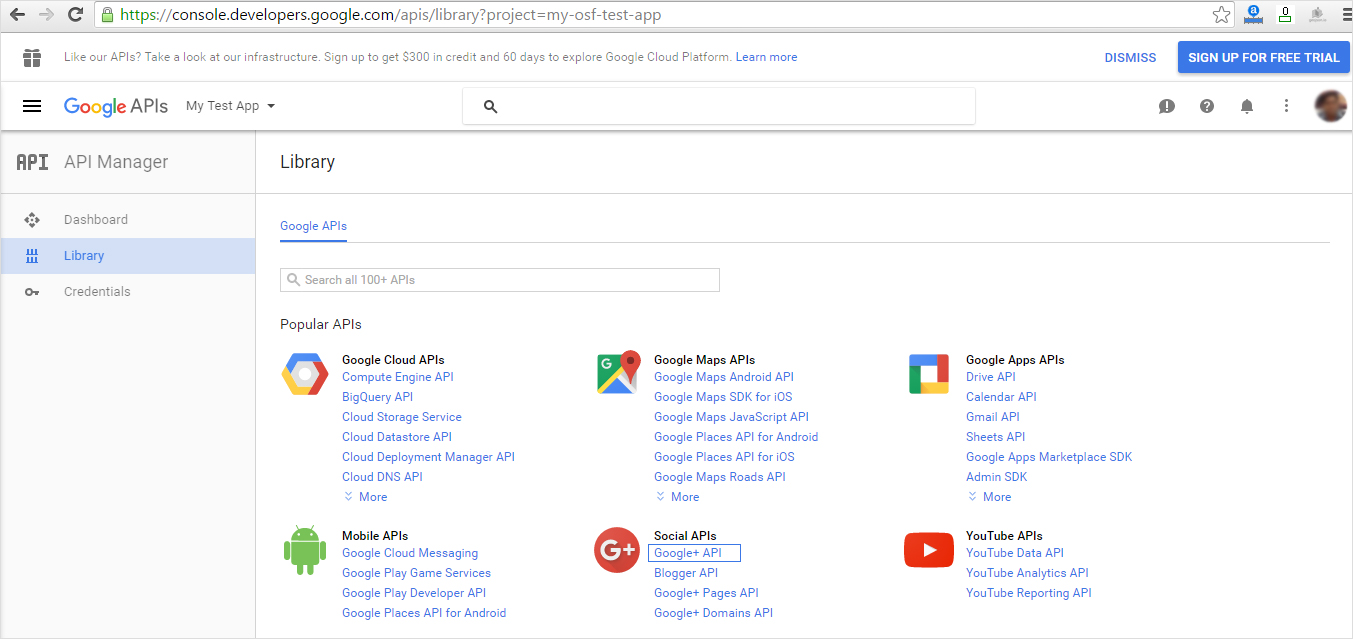
Upon doing so Google console will open the Google APIs Library page as shown in Figure 13. Here you need to choose the particular API that you want to enable for the application. For OSF SSO choose Google+ API from the Social APIs list as shown in Figure 13.
Upon doing so Google console will open the Google+ API dashboard. Click on the ENABLE link as shown in Figure 14.
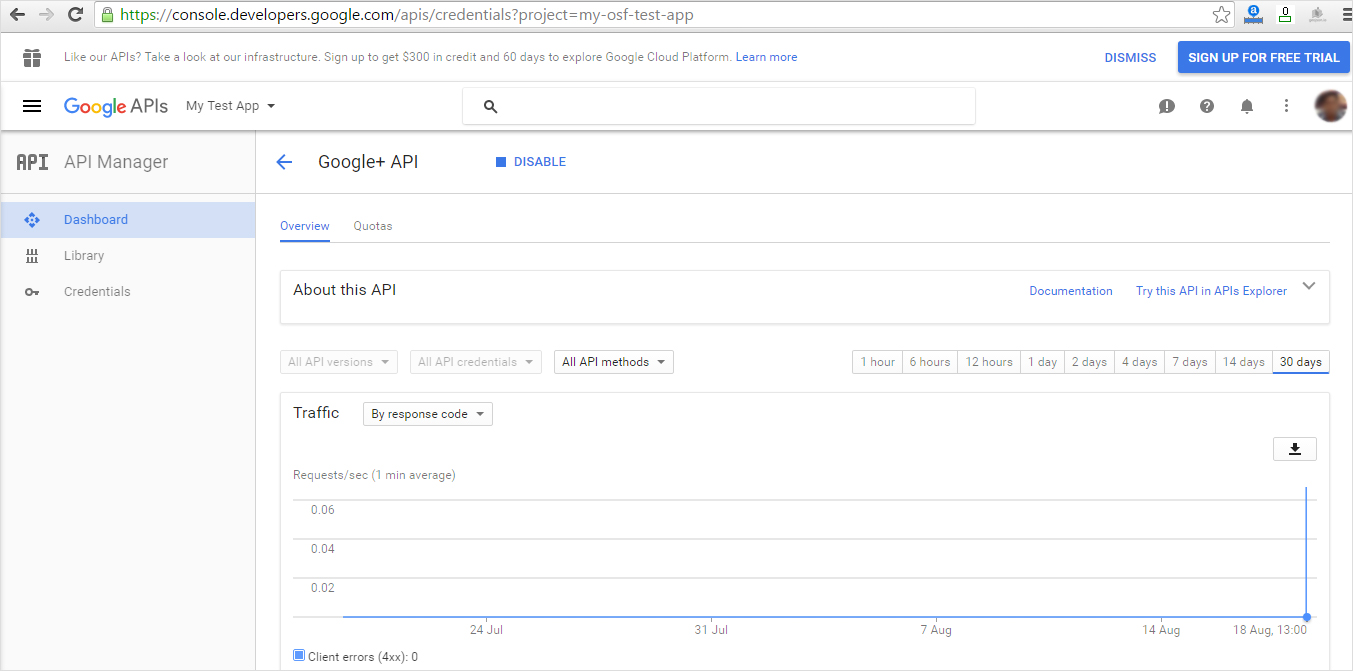
Upon doing so Google console will enable the API for your application use and will show the API dashboard as shown in Figure 15.