 Batoi Corporate Office
- Create a test account with Chargify at https://chargify.com.
- Log in to your account by using your 'Username' and 'Password'.
- Create a site by clicking the 'Create a Site button' as shown in Figure 1.
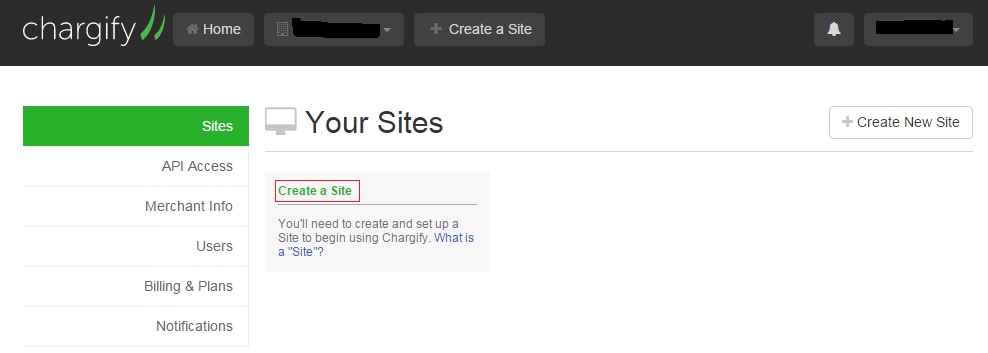
Note: Sites are containers for your products, subscriptions and customers. When a new site is created it is not shown to the customers. Your sub domain identifies the site uniquely in Chargify.
- Fill in the necessary details in the 'Create New Site' page as shown in Figure 2 and click the 'Create Site' button.
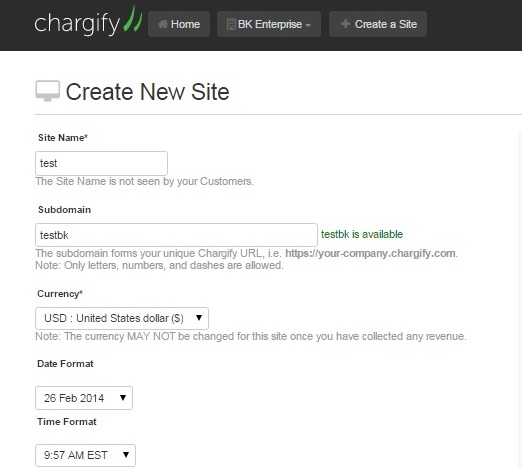
Note: Please find the detailed explanation of different fields in the page below.
- Site Name: It is not seen by your customers, hence you can use a descriptive name of yourself.
- Subdomain: The subdomain you select may be seen by your customers (i.e in the hosted payment pages). So use something that identifies your company.
- Test Mode: For sites in test mode, only development or test gateways (i.e. an Authorize.Net or the Chargify Test Gateway) are supported. Live gateways are supported only in live sites.
- Date/Time Format: Selecting date/time formats will change the way dates and times are shown throughout Chargify, including statements, invoices and Admin UI.
For ex. if you create a new site called 'test' and a subdomain
'testbk' as shown in Figure 3, the url of your sub domain will be
https://testbk.chargify.com/
- Once your new site is created, you shall be automatically redirected to the dashboard of your site. From there click on the 'Settings' menu as shown in Figure 3.
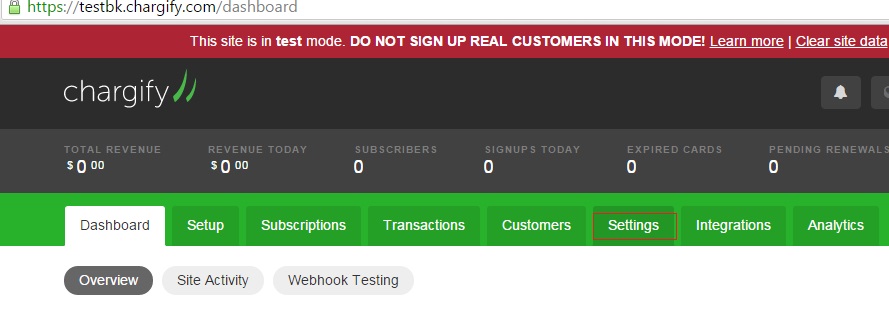
- From the 'Settings' menu select the 'Public Page Default Settings' and the following screen shall appear as shown in Figure 4.
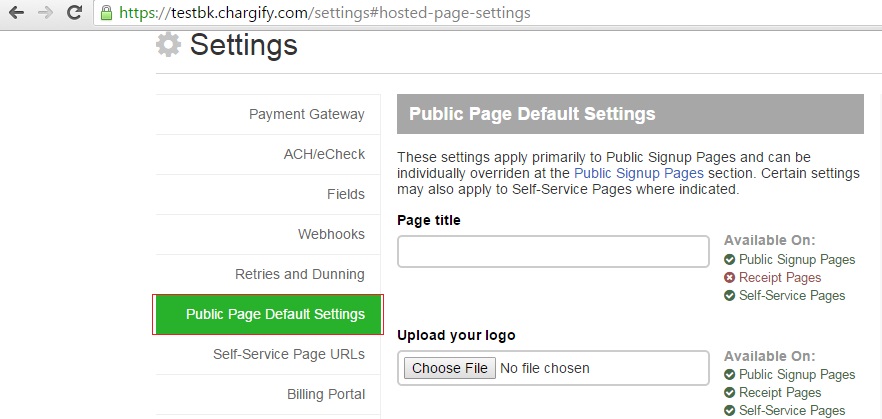
- Fill in the necessary details in the 'Public Page Default Settings' page and click the 'Save Public Page Default Settings' button.
Note: Please find the detailed explanation of different fields in the page below.
- Page Title: The title will be displayed at the top of the page and in the title of the browser window.
- Logo: The logo will be resized to a maximum width of 650px x 100px. Only JPEG, GIF, PNG file formats are accepted.
- Home Link URL: Your logo or company name will link to this URL.
- Privacy Policy URL: A link to the Privacy Policy will appear in the footer.
- Terms and Conditions: If a link to terms is a provided the customer will be required to agree to the terms before subscribing. A link to the terms will also appear in the footer.
- Custom CSS: Custom styles will be included at the top of the page within a style tag.
- Enable Security Question (CAPTCHA): If enabled, a reCAPTCHA style input form to your page will be provided.
- Accepted card types to display: Select which card logos will appear on the form.
- Enable SSL Certificate Badge: If checked, a SSL Badge will be shown on your Public Pages.
- Enable 'Powered By Chargify' Badge: If checked, a logo showing that Chargify powers your payments will be shown on your Public Pages.
- Then on the dashboard screen of your site click on the 'Setup' menu. Upon doing so you shall land on a page similar to the one as shown in Figure 5, asking you to create a 'Product Family'.

Note: A 'Product Family', is a group under which similar products are organized. Product families are typically brands or categories. There is no limit on the number of product families you can create.
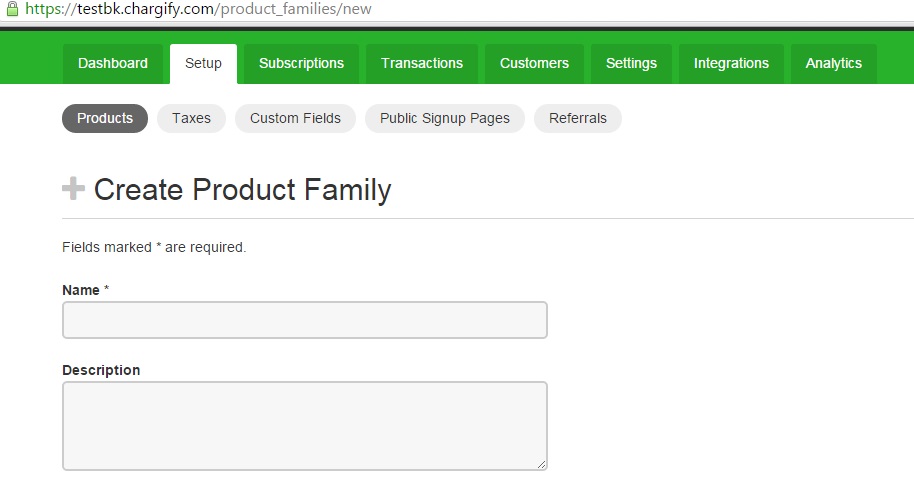
- To create a new product family click the Create a New Product Family button and you shall land on a page as shown in Figure 6.
- Enter the 'Name' and the 'Description' as shown in Figure 6. For ex. if you create a Product Family called 'test' and click the 'Create Product Family' button.
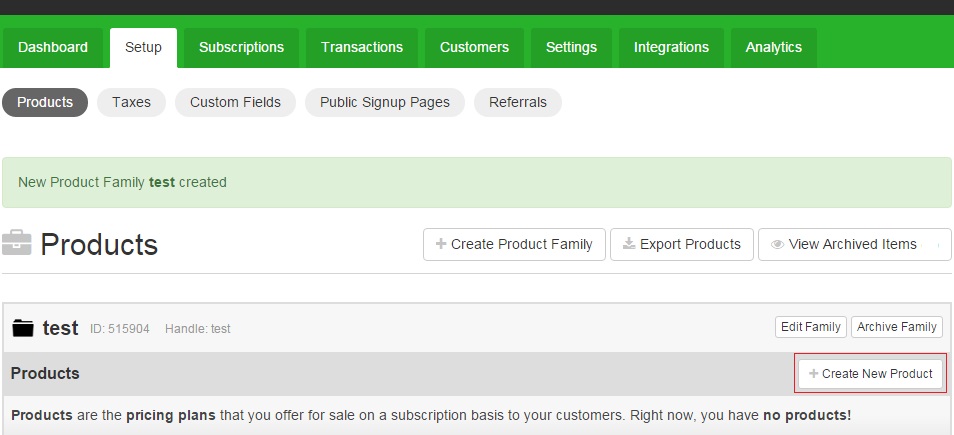
- Upon doing so you will land on a page that is similar to the one as shown in Figure 7. Now you need to create a Product by clicking the Add New product button.
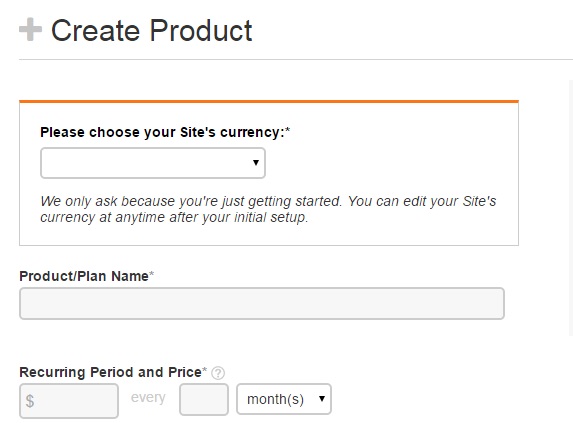
- Fill in the necessary details about the product as shown in Figure 8 and click the 'Create Product' button.
- Upon doing so you will land on a page that is similar to the one as shown in Figure 9. Next step is to set up the Billing and your return URL.
- To set-up the 'Billing & Return URL', click on the 'Edit' button besides the 'Product' created by you. This will take you to the 'Edit Product' screen and below you can find more options related to 'Product Price' and 'Billing' and to set-up the 'Return URL'. Make the changes as per your requirement and click the 'Save Changes' button to save your changes.
- Next you need to create a 'Component'.
- Metered Component: Allows you to track usage in a metered manner i.e minutes used per month.
- Quantity Based Component: Allows you to charge per unit of something.
- On/Off Component: Allows you to add components that can be toggled either on or off.
- Let's say we select and create a 'Quantity Based Component'. Fill in the necessary details as per your requirement.
- Now you get two separate ids both for the 'Products' and for 'Components'.
- Now in your application after registration of new user redirect the user to your subdomain in Chargify with the following code as shown below.
$sPath = 'https://testbk.chargify.com/subscribe/bmyfkbg54xzt/books?components[] [component_id]=136021&components[] [allocated_quantity]='.$_POST['selUserNum'].'&first_name='. $_POST['txtFirstName'].'&last_name='. $_POST['txtLastName'].'&email='.$_POST['txtEmail'].'&reference='.$iUserId;header("Location: $sPath");exit();?>- The first part of the redirection URL "https://testbk.chargify.com/subscribe/bmyfkbg54xzt/books" is obtained from the 'View this product's Public Signup Pages' in the 'Products' menu.
- The next part contains the information of the 'Component': components[][component_id]=136021&components[][allocated_quantity]='.$_POST['selUserNum']. This part contains the component id and total number of component required by user.
- Last part contains the information of user. Information include 'First Name', 'Last Name', 'Email' and a 'Unique Reference ID'.
- The application will then redirect the user to the credit card page for payment.
- In test mode enter '1' in credit card number to get successful transaction, '2' for unsuccessful transaction. If transaction is completed successfully user will be redirected to the Return URL as specified in the product menu.
Note: Products define 'how much' and 'how often' you will bill your subscribers.
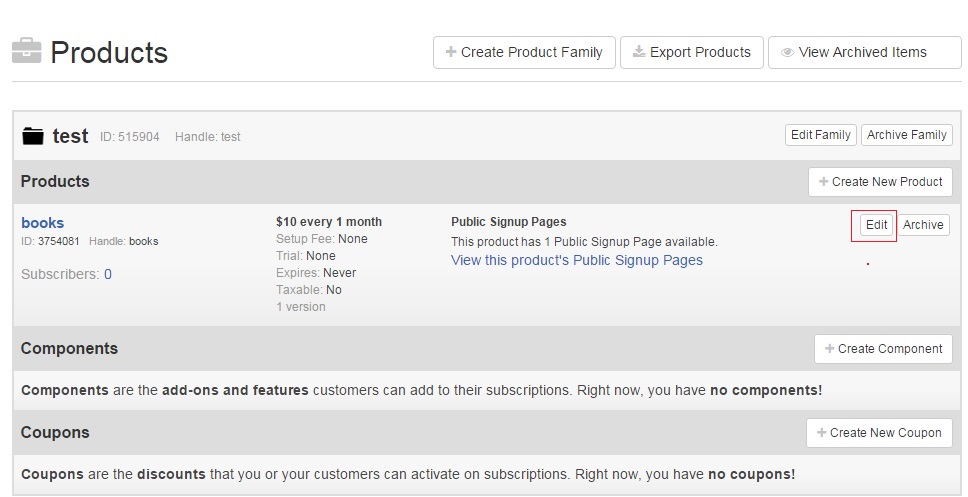
Note: Components are the add-ons and features customers can add to their subscriptions. Components can be of three types: