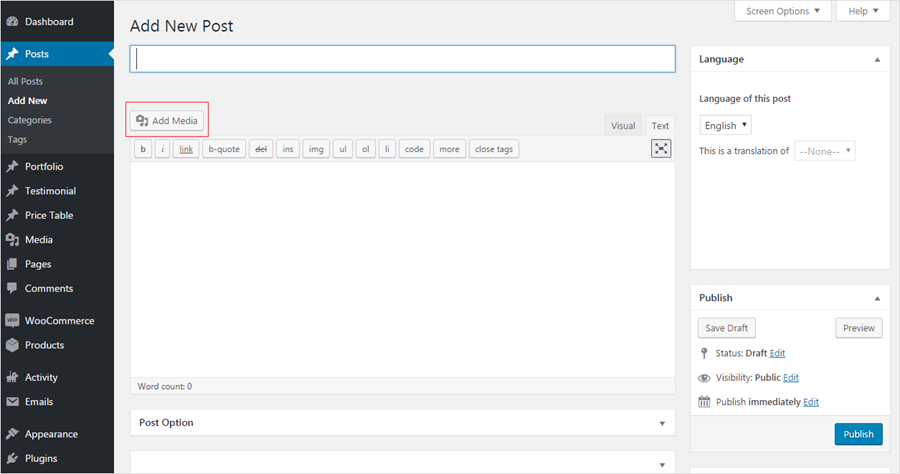
Open the post in which you want to add an image. Click on the text where you want to add the content and click on the 'Add Media' button in the top left part of the editor as shown in Figure 1.
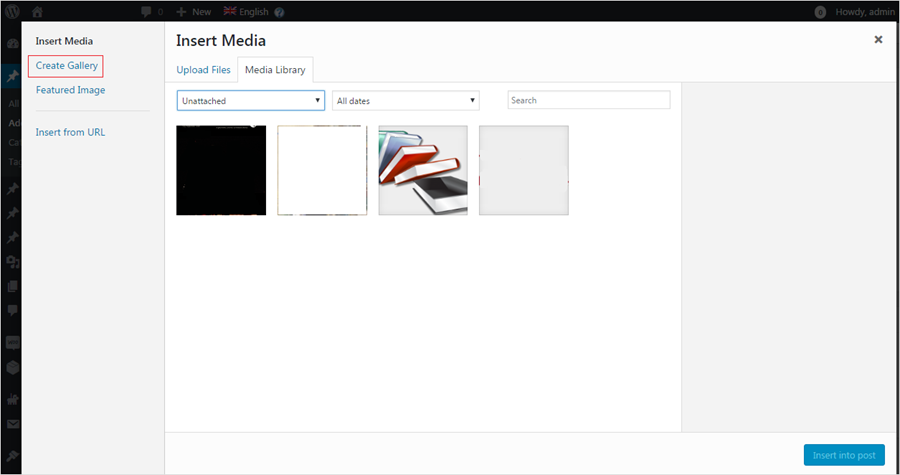
This will open the WordPress 'Insert Media' uploader. Now you need to click on the 'Create Gallery' link that you see on the left side of the screen as shown in Figure 2.
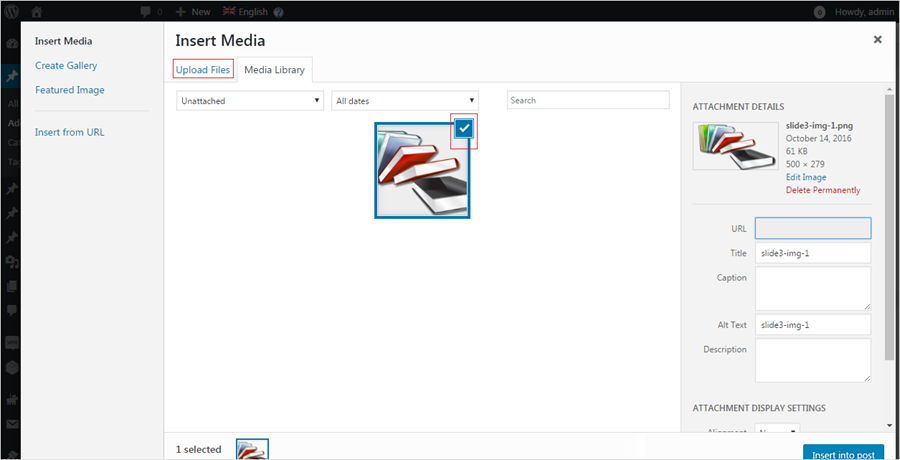
To add images to the gallery, you can either upload the images from your computer or choose existing images from the Media Library (images that you have previously uploaded to your website). Select the images you want by clicking on them. This will add a checked mark that you see on each image as shown in Figure 3.
Once you have selected all the images that you want to add to the gallery, click on the 'Create a new gallery' button in the Create Gallery screen as shown in Figure 4.
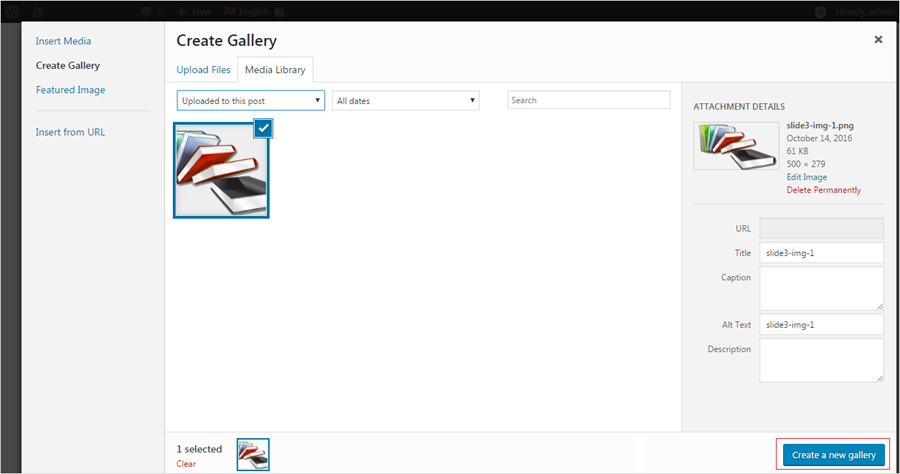
Upon doing so, you can see your selected images in the Edit Gallery view. Here you can add captions to your images, change gallery settings, and rearrange the order of images by simply dragging and dropping them in the order you want them to appear in. Once you are done with editing the gallery, click on the 'Insert gallery' button as shown in Figure 5.
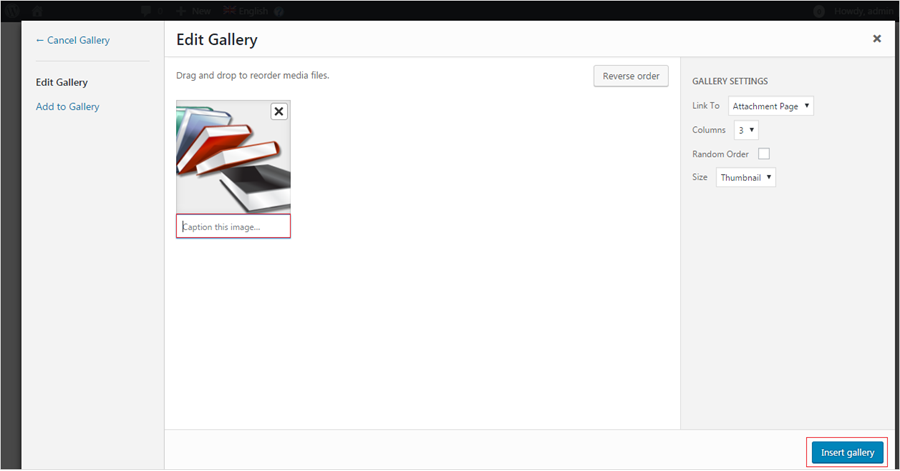
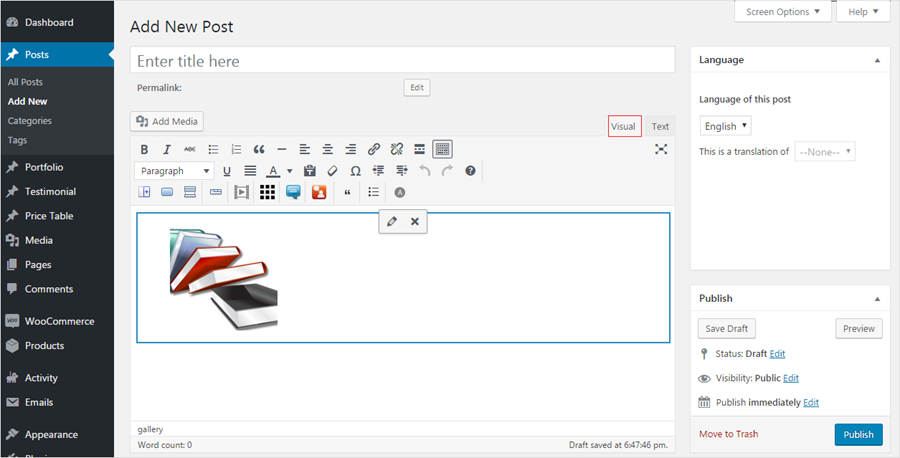
Clicking on the 'Insert gallery' button will close the media uploader and insert the gallery code inside your WordPress post. If you are using the Visual Editor then you will see a box in the post edit area indicating that there is gallery code as shown in Figure 6.
If you are using simple text editor mode to write your post, then you will see your gallery shortcode as shown in Figure 7.
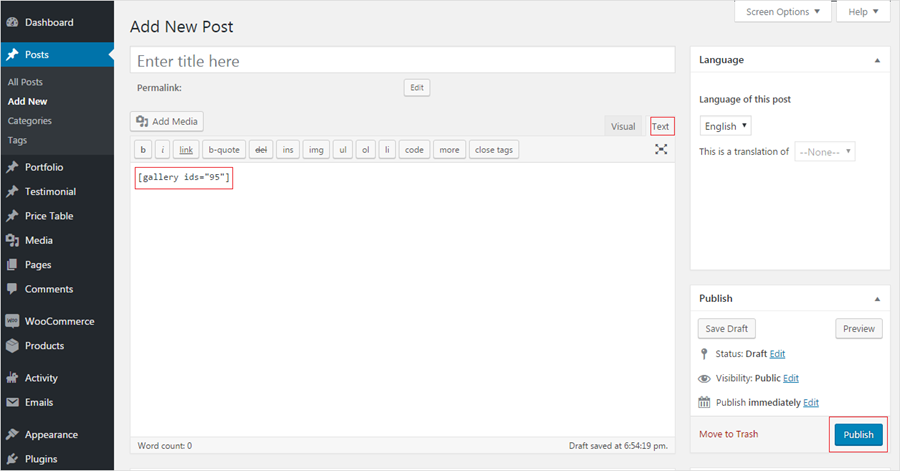
Check your gallery by clicking the Preview button. You can always click on the Add Media button to edit gallery settings. You can rearrange order, increase or decrease image columns, add or remove an image or description. You can then publish your post and your gallery will be visible to users.
You can add an image gallery to WordPress pages, using the same method.

 Batoi Corporate Office